2008 BMW 750LI Amp
[x] Cancel search: AmpPage 101 of 254

Controls
99Reference
At a glance
Driving tips
Communications
Navigation
Entertainment
Mobility
>"Brightness":
The brightness of the screen can be
adjusted, refer to page172.
The settings are stored for the remote control
currently in use.
To exit the menu:
The image will automatically disappear after
a p p r o x . 5 s e c o n d s , o r s e l e c t t h e r e t u r n a r r o w
and press the controller to exit sooner.
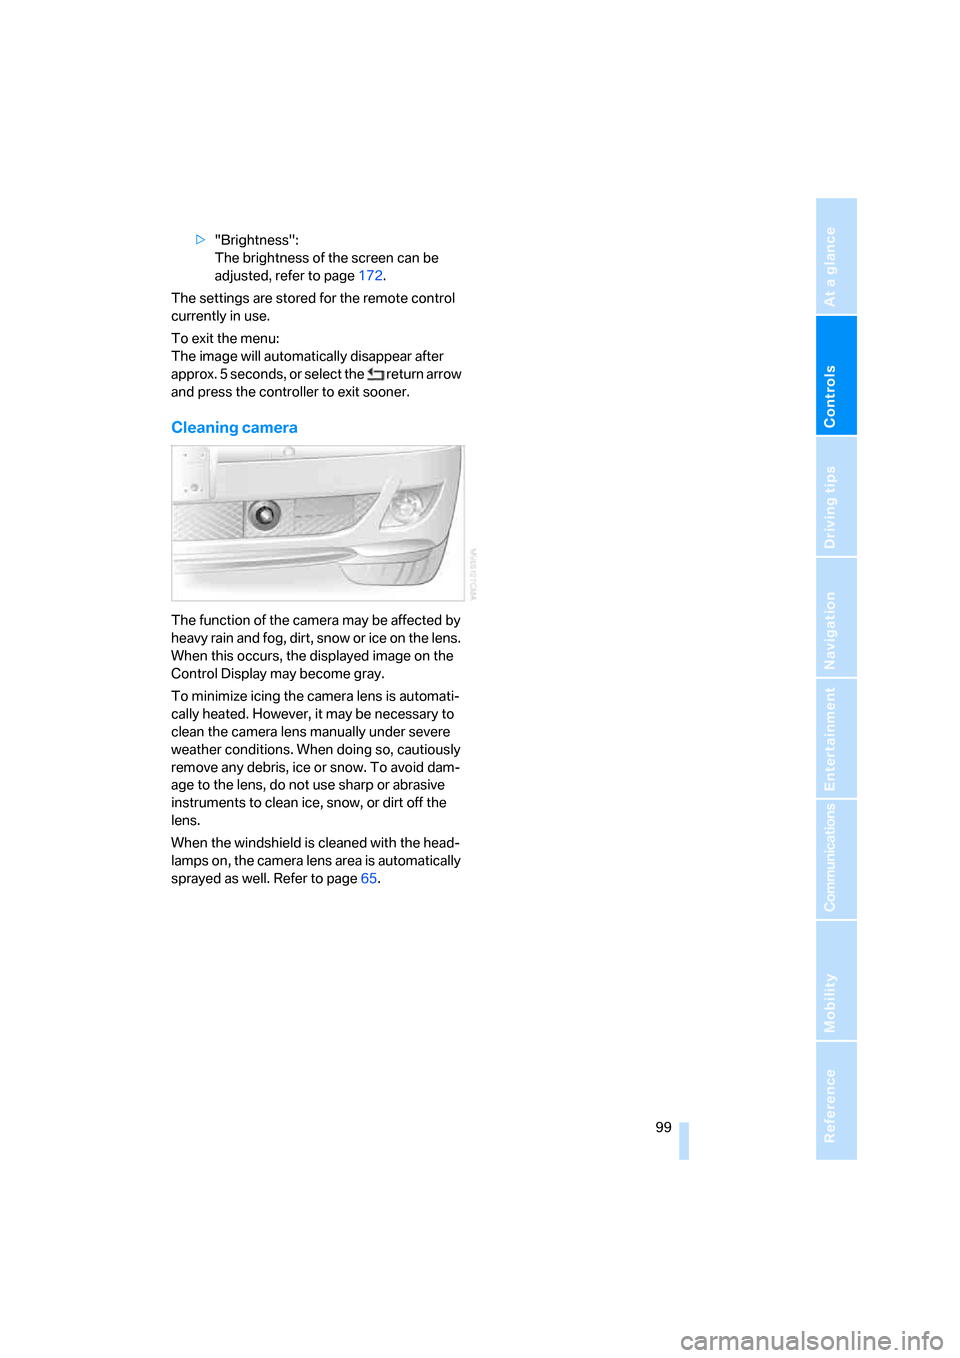
Cleaning camera
The function of the camera may be affected by
heavy rain and fog, dirt, snow or ice on the lens.
When this occurs, the displayed image on the
Control Display may become gray.
To minimize icing the camera lens is automati-
cally heated. However, it may be necessary to
clean the camera lens manually under severe
weather conditions. When doing so, cautiously
remove any debris, ice or snow. To avoid dam-
age to the lens, do not use sharp or abrasive
instruments to clean ice, snow, or dirt off the
lens.
When the windshield is cleaned with the head-
lamps on, the camera lens area is automatically
sprayed as well. Refer to page65.
Page 102 of 254

Lamps
100
Lamps
Parking lamps/low beams
0Lamps off and daytime running lamps*
1Parking lamps and daytime running lamps*
2Low beams
3Automatic headlamp control, daytime run-
ning lamps
* and Adaptive Head Light*
If you open the driver's door when the ignition is
switched off, then the exterior lighting is
switched off if the light switch is in position0, 2
or3.
Parking lamps
In switch position1, the front, rear and side
vehicle lighting is switched on. You can use the
parking lamps for parking.
The parking lamps drain the battery. Do
not leave them switched on for long peri-
ods of time; otherwise, it may no longer be pos-
sible to start the engine. It is preferable to
switch on the left-hand or right-hand roadside
parking lamps, refer to page101.<
Low beams
The low beams light up when the light switch is
in position 2 and the ignition is on.
Automatic headlamp control
In the switch position3, the system activates
the low beams and switches them on or off in
response to changes in ambient light condi-
tions, for example in a tunnel, at dawn and dusk,
and in case of precipitation. The LED next to the symbol is illuminated when the low beams are
on.
The low beams may be switched on when the
sun is low on the horizon in a clear sky.
The low beams remain switched on
regardless of the ambient light when you
switch on the front fog lamps.<
The automatic headlamp control cannot
serve as a substitute for your personal
judgment in determining when the lamps
should be switched on in response to ambient
lighting conditions. For example, the sensors
cannot detect fog or hazy weather. To avoid
safety risks, you should always switch on the
lamps manually under these conditions.<
Pathway lighting
After parking the vehicle and switching off the
headlamps, you can use the headlamp flasher
control to activate the low beams for a period of
roughly 40 seconds.
Pressing the button on the remote control,
refer to page32, also switches on the low
beams for approx. 40 seconds. In addition, the
door handle and interior lamps are switched on
for approx. 10 seconds.
Daytime running lamps*
The daytime running lamps light up in posi-
tion0, 1 or3. The light output is lower than with
the low-beam headlamps.
If the light switch remains in position1, then the
parking lamps are lit after the ignition is
switched off.
Adaptive Head Light*
The concept
Adaptive Head Light is a variable headlamp
control system that enables dynamic illumina-
tion of the road surface. Depending on the
steering angle and other parameters, the light
Page 103 of 254

Controls
101Reference
At a glance
Driving tips
Communications
Navigation
Entertainment
Mobility
from the headlamp follows the course of the
road.
Activating Adaptive Head Light
In switch position3, the Adaptive Head Light is
activated and Automatic headlamp control is
switched on.
In order not to blind oncoming traffic, the Adap-
tive Head Light is not active when driving in
reverse and only points toward the passenger
side when the vehicle is stationary.
Malfunction
The LED above the symbol for automatic head-
lamp control flashes. Adaptive Head Light is
malfunctioning or has failed. Have the system
checked as soon as possible.
High beams/
roadside parking lamps
1High beams
2Headlamp flasher
3Roadside parking lamps
Roadside parking lamps, left and right*
You also enjoy the option of lighting up just one
side of your vehicle when parking:
After parking the vehicle, press the lever in the
desired direction3, past the resistance point.
The roadside parking lamps drain the bat-
tery. Do not leave them switched on for
long periods of time; otherwise, it may no longer
be possible to start the engine.<
Front fog lamps
Briefly press the button to switch on/off.
The parking lamps or low beams must be
switched on for the fog lamps to operate. The
green indicator lamp on the Info Display lights
up whenever the fog lamps are on.
If the automatic headlamp control is acti-
vated, the low beams will come on auto-
matically when you switch on the fog lamps.<
Instrument lighting
You can adjust the lighting intensity with the
knurled wheel.
Interior lamps
The interior lamps, footwell lamps, door entry
lighting, the perimeter lighting, and the luggage
compartment lamps are controlled automati-
cally.
Page 104 of 254

Lamps
102
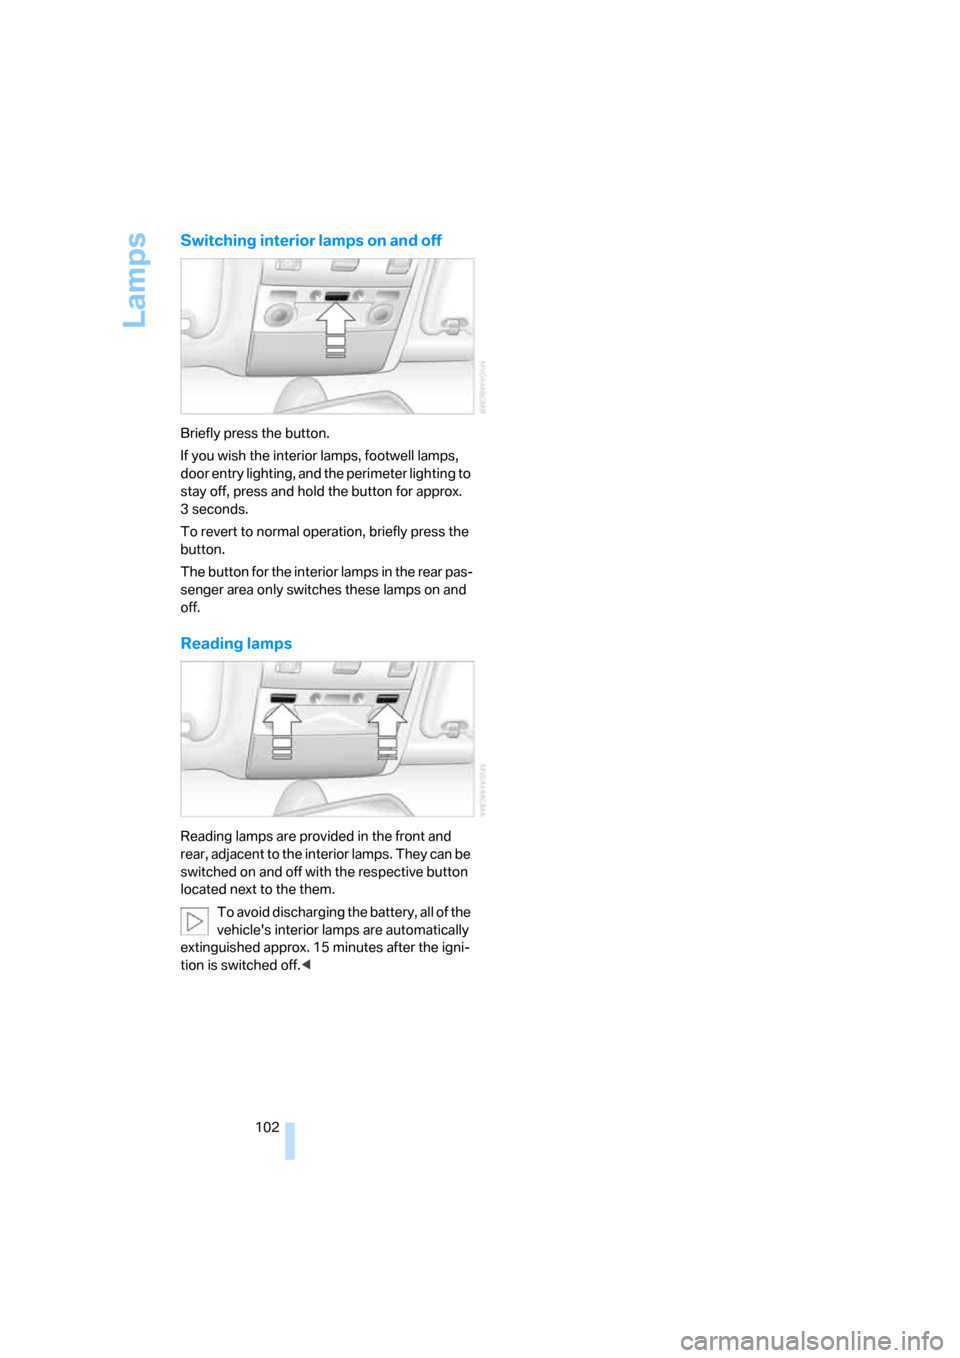
Switching interior lamps on and off
Briefly press the button.
If you wish the interior lamps, footwell lamps,
door entry lighting, and the perimeter lighting to
stay off, press and hold the button for approx.
3seconds.
To revert to normal operation, briefly press the
button.
The button for the interior lamps in the rear pas-
senger area only switches these lamps on and
off.
Reading lamps
Reading lamps are provided in the front and
rear, adjacent to the interior lamps. They can be
switched on and off with the respective button
located next to the them.
To avoid discharging the battery, all of the
vehicle's interior lamps are automatically
extinguished approx. 15 minutes after the igni-
tion is switched off.<
Page 116 of 254

Practical interior accessories
114 Depending upon your equipment package, any
of the following may be located in the storage
compartment:
>Removable CD holder
*
>Folding, removable storage compartment*,
e.g. for glasses or mobile phone
>Folding, removable waste receptacle
*
Locking storage compartment
You can use the key to lock the storage com-
partment in the armrest.
For example at a hotel, if you want to lock
the luggage compartment lid separately,
refer to page35. Then lock the armrest storage
compartment and surrender only the remote
control without the key, refer to page30. This
prevents unauthorized access to the armrest
storage compartment and the luggage com-
partment.<
Ventilating storage compartment
You can use the knurled wheel in the storage
compartment to open and close the vent.
Depending on the automatic climate con-
trol setting, the temperature in the stor-
age compartment may be higher than in the rest
of the passenger compartment. Close the vent
as required.<
The temperature in the storage compartment
depends on the setting for the upper body area,
refer to page105.
Connection for external audio device
You can connect an external audio device such
as a CD or MP3 player and play the sound over
the vehicle's speaker system, refer to page169.
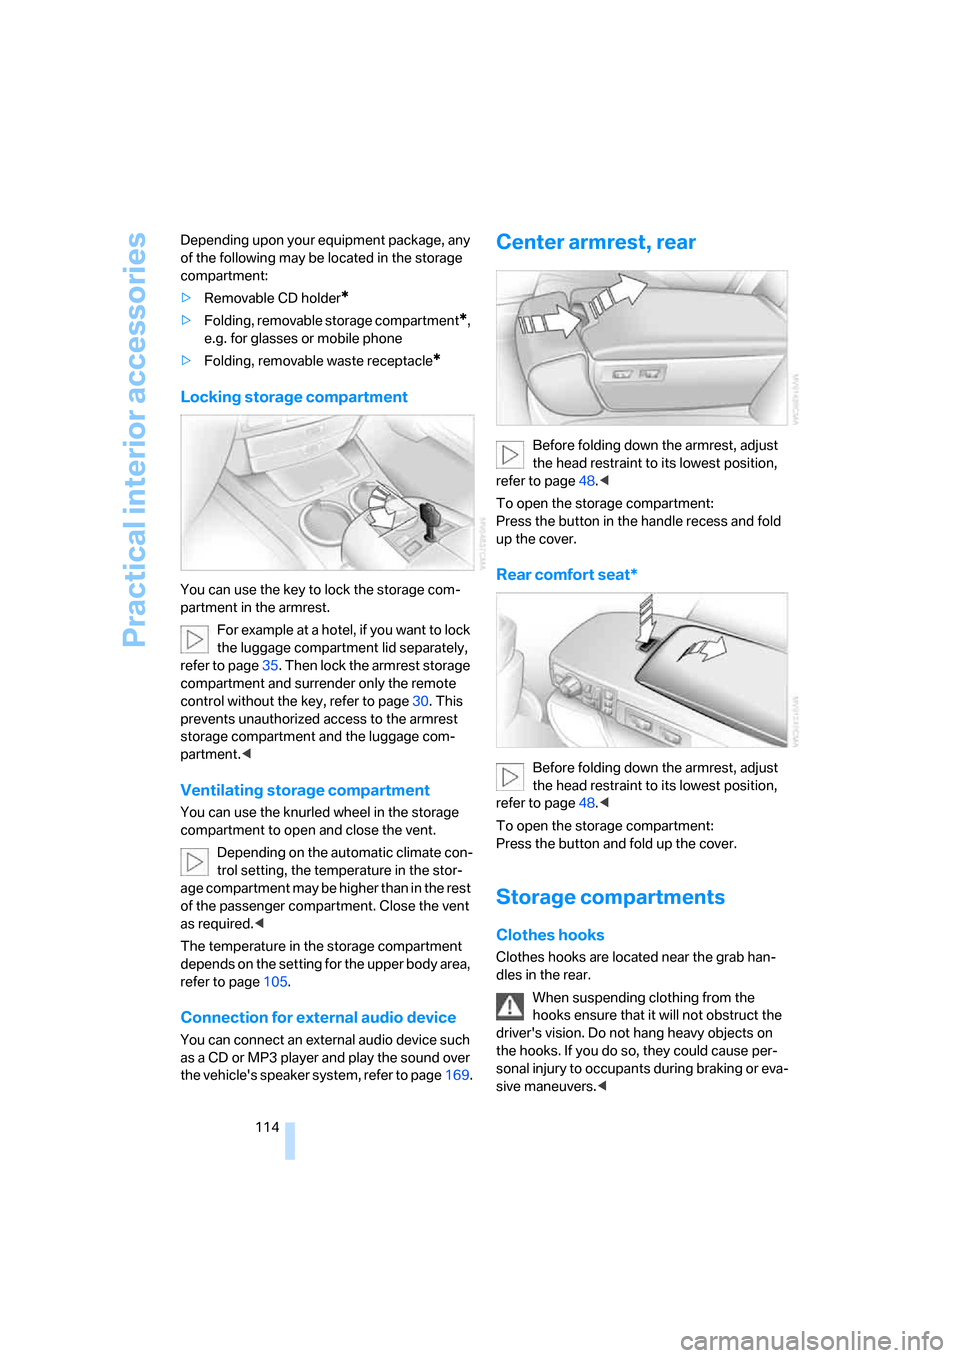
Center armrest, rear
Before folding down the armrest, adjust
the head restraint to its lowest position,
refer to page48.<
To open the storage compartment:
Press the button in the handle recess and fold
up the cover.
Rear comfort seat*
Before folding down the armrest, adjust
the head restraint to its lowest position,
refer to page48.<
To open the storage compartment:
Press the button and fold up the cover.
Storage compartments
Clothes hooks
Clothes hooks are located near the grab han-
dles in the rear.
When suspending clothing from the
hooks ensure that it will not obstruct the
driver's vision. Do not hang heavy objects on
the hooks. If you do so, they could cause per-
sonal injury to occupants during braking or eva-
sive maneuvers.<
Page 126 of 254

Things to remember when driving
124
Cargo loading
To avoid loading the tires beyond their
approved carrying capacity, never over-
load the vehicle. Overloading can lead to over-
heating of the tires and increases the rate at
which damage develops inside them. The ulti-
mate result can come in the form of a sudden
blow-out.<
Determining loading limit
1.Locate the following statement on your
vehicle's placard
*:
The combined weight of occupants
and cargo should never exceed
XXX lbs. or YYY kg; otherwise, the vehicle
may be damaged and unstable driving con-
ditions may result.<
2.Determine the combined weight of the
driver and passengers that will be riding in
your vehicle.
3.Subtract the combined weight of the driver
and passenger from XXX lbs. or YYY kg.
4.The resulting figure equals the available
amount of cargo and luggage load capacity.
For example, if the XXX amount equals
1400 lbs. and there will be five 150-lb. pas-
sengers in your vehicle, the amount of avail-
able cargo and luggage load capacity is
650 lbs.:
1400 lbs. minus 750 lbs. = 650 lbs.
5.Determine the combined weight of luggage
and cargo being loaded into the vehicle.
This weight may not safely exceed the avail-
able cargo and luggage load capacity calcu-
lated in step 4.6.If your vehicle will be towing a trailer, part of
the load from your trailer will be transferred
to your vehicle. Consult the manual for
transporting a trailer to determine how this
may reduce the available cargo and luggage
load capacity of the vehicle.
Load
The permissible load is the total of the weight of
occupants and cargo/luggage. The greater the
weight of occupants, the less cargo/luggage
can be transported.
Stowing cargo
>Place heavy cargo as far forward and as low
as possible, placing it directly behind the
bulkhead behind the rear seats.
>Cover sharp edges and corners.
>For very heavy cargo when the rear seat is
not occupied, secure each outside rear
safety belt in the opposite buckle.
Page 127 of 254

Driving tips
125Reference
At a glance
Controls
Communications
Navigation
Entertainment
Mobility
Securing cargo
>Use the luggage net* or securing straps to
secure small and lightweight luggage and
cargo.
>Heavy-duty straps
* for securing larger and
heavier objects are available at your BMW
center. Four lashing eyes for attaching
these heavy-duty straps are provided in the
luggage compartment, refer to illustration.
>Please follow the special instructions sup-
plied with the heavy-duty straps.
Always position and secure the load as
described above. If you do not, it can
endanger the passengers, for example during
braking or evasive maneuvers.
Attach heavy-duty straps only to the lashing
eyes, refer to illustration, otherwise, the heavy-
duty straps could come loose or the vehicle
could be damaged.
Never exceed either the approved gross vehicle
weight or either of the approved axle loads, refer
to page228, as excessive loads can impair the
operational safety of the vehicle and may also
put you in violation of highway safety laws.
You should never transport unsecured heavy or
hard objects in the passenger compartment, as
they could fly around and pose a safety hazard
to the vehicle's occupants during abrupt brak-
ing or evasive maneuvers .<
Roof-mounted luggage rack*
A special rack system is available as an option
for your BMW. Please comply with the precau-
tions included with the installation instructions.
Anchorage points
The anchorage points are located inside the
door openings.
Loading roof rack
Because roof racks raise the vehicle's center of
gravity when loaded, they have a major effect on
its handling and steering response.
You should therefore always remember not to
exceed the approved roof load capacity, the
approved gross vehicle weight or the axle loads
when loading the rack.
You can find this information under Weights on
page228.
The roof load must be uniformly distributed and
should not be too large in area. Always load the
heaviest pieces on the bottom. Be sure that
adequate clearance is maintained for raising the
glass sunroof, and that objects do not project
into the opening path of the luggage compart-
ment lid.
Secure roof-mounted cargo correctly and
securely to prevent it from shifting or falling off
as you drive.
Drive smoothly. Avoid sudden acceleration and
braking maneuvers. Take corners gently.
Page 131 of 254

Navigation
This section contains various examples that
illustrate how the navigation system provides
you with reliable guidance to your destination.
Navigation