2008 BMW 650I COUPE&CONVERTIBLE buttons
[x] Cancel search: buttonsPage 40 of 264
Opening and closing
38
Starting engine
You can start the engine or switch on the igni-
tion if a remote control is located in the interior
of the vehicle. It need not be inserted in the igni-
tion lock, refer to page58.
If you take the remote control with you when
leaving the vehicle with the engine running, a
warning lamp lights up. In addition, a message
appears on the Control Display. As long as no
remote control is detected, it is only possible to
restart the engine within approx. 10 seconds
after it is switched off.
Switching off engine when equipped
with sport automatic transmission
The engine can only be switched off in trans-
mission position P, refer to page59.
To switch off the engine in transmission posi-
tion N, the remote control must be inserted in
the ignition lock.
Before driving into a car wash in
vehicles equipped with automatic
transmission
1.Insert remote control into ignition lock.
2.Depress brake pedal.
3.Engage transmission position N.
4.Switch off the engine.
The vehicle can roll.
Malfunction
The comfort access function may malfunction
due to local radio waves. If this occurs, then
open or close the vehicle with the buttons on
the remote control or with a key. To start the
engine after this, insert the remote control in the
ignition lock.
When unlocking or locking/comfort closing do
not simultaneously grasp the door handle and
touch the surfaces, arrow2 or 3. Otherwise, you
may limit the function.
Replacing battery
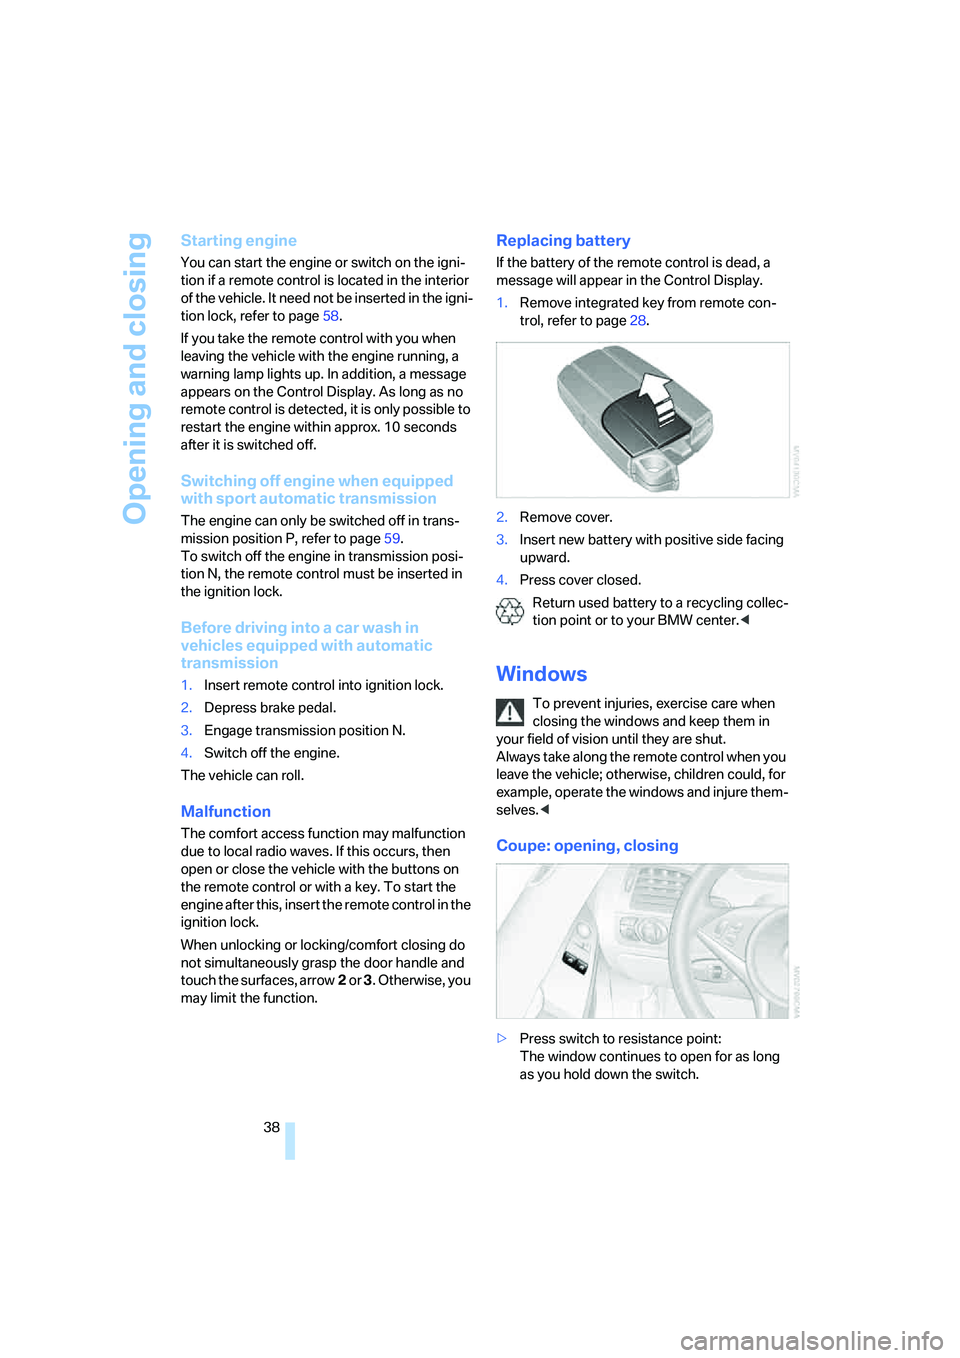
If the battery of the remote control is dead, a
message will appear in the Control Display.
1.Remove integrated key from remote con-
trol, refer to page28.
2.Remove cover.
3.Insert new battery with positive side facing
upward.
4.Press cover closed.
Return used battery to a recycling collec-
tion point or to your BMW center.<
Windows
To prevent injuries, exercise care when
closing the windows and keep them in
your field of vision until they are shut.
Always take along the remote control when you
leave the vehicle; otherwise, children could, for
example, operate the windows and injure them-
selves.<
Coupe: opening, closing
>Press switch to resistance point:
The window continues to open for as long
as you hold down the switch.
Page 45 of 264
Controls
43Reference
At a glance
Driving tips
Communications
Navigation
Entertainment
Mobility
Opening and closing
For information on top operation with comfort
access, also refer to page37.
From radio readiness, refer to page58, with the
vehicle stationary:
To avoid putting excessive strain on the
battery, only move the convertible top
when the engine is running if possible.
Before closing the convertible top, remove for-
eign objects from the windshield frame, as
these might inhibit closing of the convertible
top.<
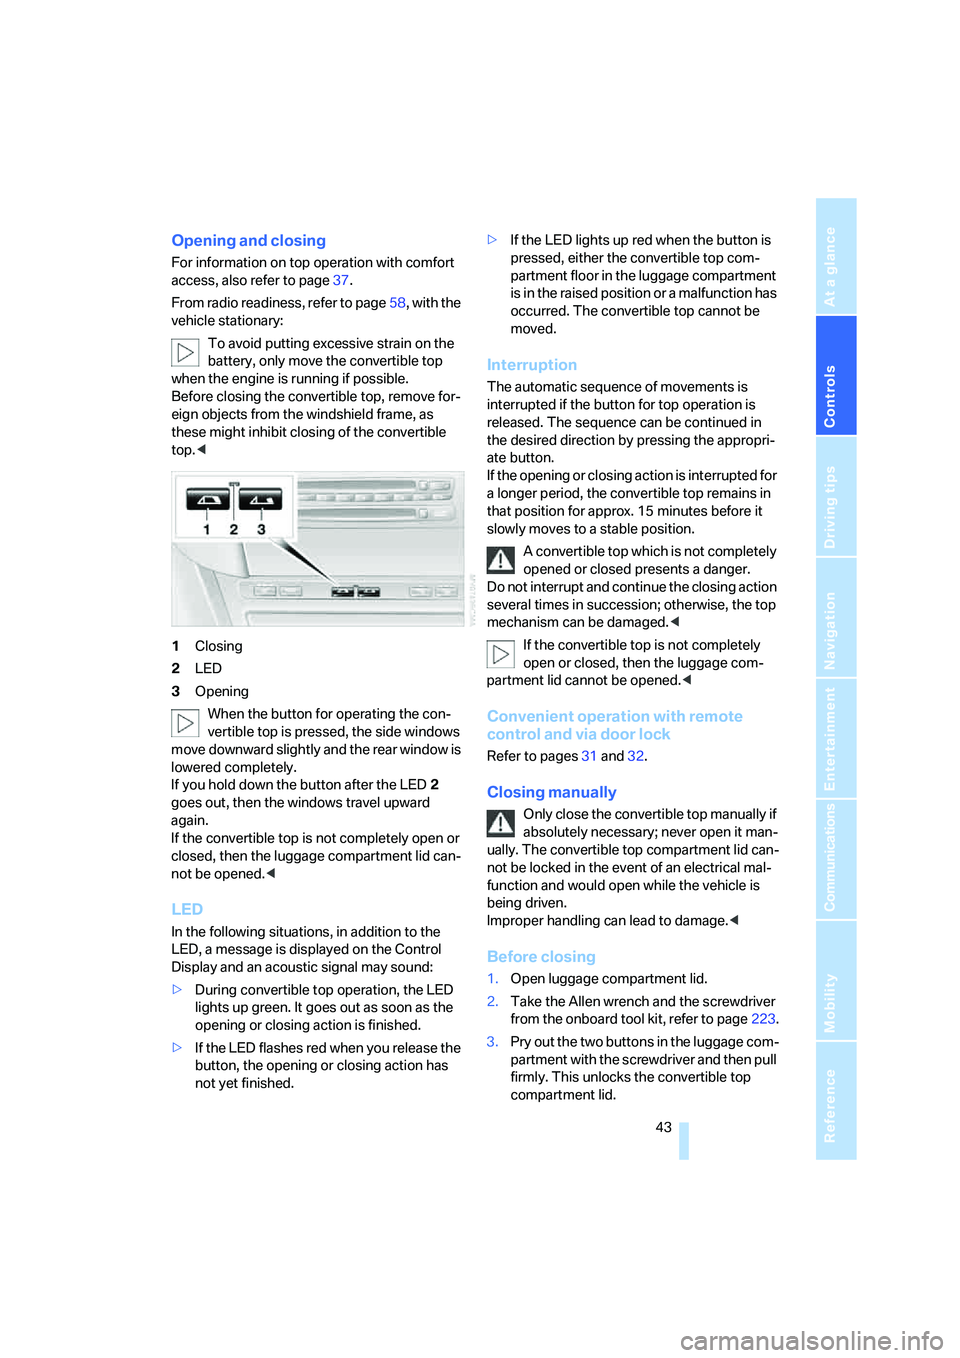
1Closing
2LED
3Opening
When the button for operating the con-
vertible top is pressed, the side windows
move downward slightly and the rear window is
lowered completely.
If you hold down the button after the LED2
goes out, then the windows travel upward
again.
If the convertible top is not completely open or
closed, then the luggage compartment lid can-
not be opened.<
LED
In the following situations, in addition to the
LED, a message is displayed on the Control
Display and an acoustic signal may sound:
>During convertible top operation, the LED
lights up green. It goes out as soon as the
opening or closing action is finished.
>If the LED flashes red when you release the
button, the opening or closing action has
not yet finished.>If the LED lights up red when the button is
pressed, either the convertible top com-
partment floor in the luggage compartment
is in the raised position or a malfunction has
occurred. The convertible top cannot be
moved.
Interruption
The automatic sequence of movements is
interrupted if the button for top operation is
released. The sequence can be continued in
the desired direction by pressing the appropri-
ate button.
If the opening or closing action is interrupted for
a longer period, the convertible top remains in
that position for approx. 15 minutes before it
slowly moves to a stable position.
A convertible top which is not completely
opened or closed presents a danger.
Do not interrupt and continue the closing action
several times in succession; otherwise, the top
mechanism can be damaged.<
If the convertible top is not completely
open or closed, then the luggage com-
partment lid cannot be opened.<
Convenient operation with remote
control and via door lock
Refer to pages31 and32.
Closing manually
Only close the convertible top manually if
absolutely necessary; never open it man-
ually. The convertible top compartment lid can-
not be locked in the event of an electrical mal-
function and would open while the vehicle is
being driven.
Improper handling can lead to damage.<
Before closing
1.Open luggage compartment lid.
2.Take the Allen wrench and the screwdriver
from the onboard tool kit, refer to page223.
3.Pry out the two buttons in the luggage com-
partment with the screwdriver and then pull
firmly. This unlocks the convertible top
compartment lid.
Page 51 of 264
Controls
49Reference
At a glance
Driving tips
Communications
Navigation
Entertainment
Mobility
Seat, mirror and steering
wheel memory
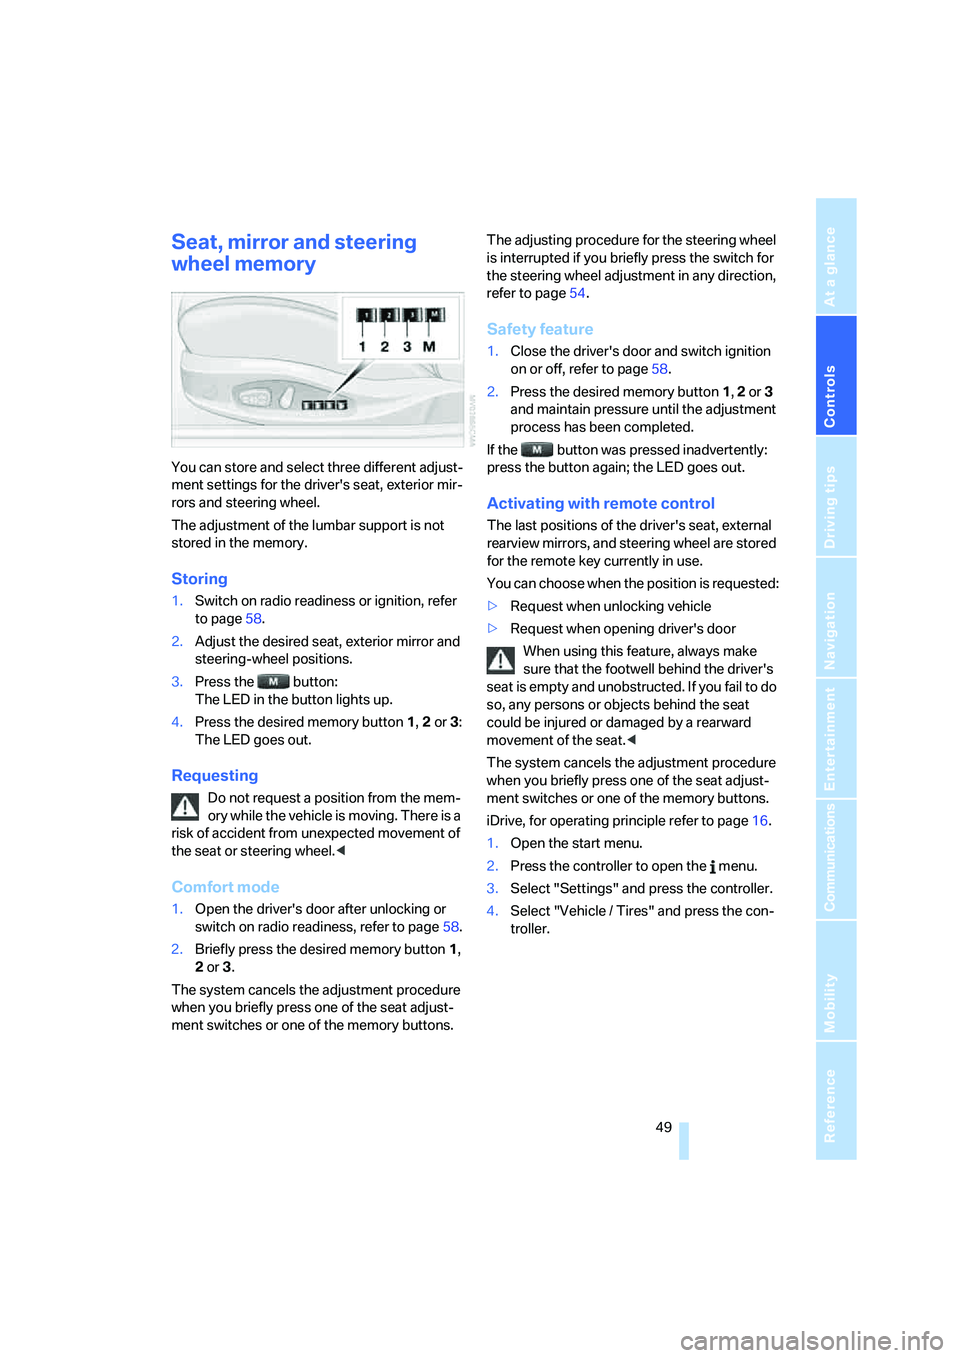
You can store and select three different adjust-
ment settings for the driver's seat, exterior mir-
rors and steering wheel.
The adjustment of the lumbar support is not
stored in the memory.
Storing
1.Switch on radio readiness or ignition, refer
to page58.
2.Adjust the desired seat, exterior mirror and
steering-wheel positions.
3.Press the button:
The LED in the button lights up.
4.Press the desired memory button 1, 2 or3:
The LED goes out.
Requesting
Do not request a position from the mem-
ory while the vehicle is moving. There is a
risk of accident from unexpected movement of
the seat or steering wheel.<
Comfort mode
1.Open the driver's door after unlocking or
switch on radio readiness, refer to page58.
2.Briefly press the desired memory button1,
2 or3.
The system cancels the adjustment procedure
when you briefly press one of the seat adjust-
ment switches or one of the memory buttons.The adjusting procedure for the steering wheel
is interrupted if you briefly press the switch for
the steering wheel adjustment in any direction,
refer to page54.
Safety feature
1.Close the driver's door and switch ignition
on or off, refer to page58.
2.Press the desired memory button 1, 2 or3
and maintain pressure until the adjustment
process has been completed.
If the button was pressed inadvertently:
press the button again; the LED goes out.
Activating with remote control
The last positions of the driver's seat, external
rearview mirrors, and steering wheel are stored
for the remote key currently in use.
You can choose when the position is requested:
>Request when unlocking vehicle
>Request when opening driver's door
When using this feature, always make
sure that the footwell behind the driver's
seat is empty and unobstructed. If you fail to do
so, any persons or objects behind the seat
could be injured or damaged by a rearward
movement of the seat.<
The system cancels the adjustment procedure
when you briefly press one of the seat adjust-
ment switches or one of the memory buttons.
iDrive, for operating principle refer to page16.
1.Open the start menu.
2.Press the controller to open the menu.
3.Select "Settings" and press the controller.
4.Select "Vehicle / Tires" and press the con-
troller.
Page 57 of 264
Controls
55Reference
At a glance
Driving tips
Communications
Navigation
Entertainment
Mobility
Programmable buttons* on steering
wheel
You can program the buttons individually.
The setting is stored for the remote control cur-
rently in use.
iDrive, for operating principle refer to page16.
1.Press the button.
This opens the start menu.
2.Press the controller to open the menu.
3.Select "Settings" and press the controller.
4.Select "Steering wheel buttons" and press
the controller.
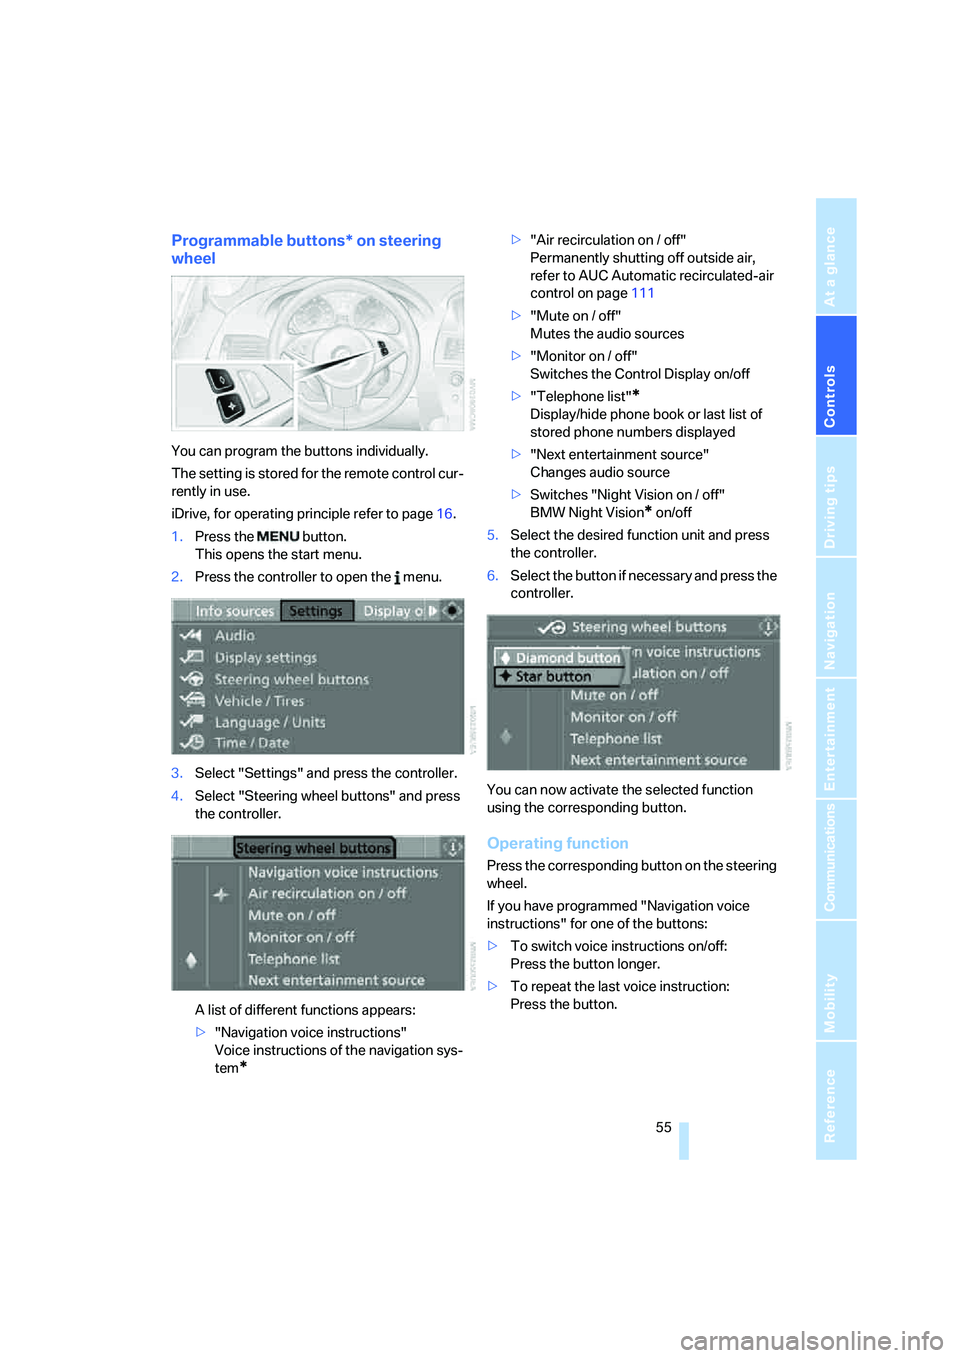
A list of different functions appears:
>"Navigation voice instructions"
Voice instructions of the navigation sys-
tem
*
>"Air recirculation on / off"
Permanently shutting off outside air,
refer to AUC Automatic recirculated-air
control on page111
>"Mute on / off"
Mutes the audio sources
>"Monitor on / off"
Switches the Control Display on/off
>"Telephone list"
*
Display/hide phone book or last list of
stored phone numbers displayed
>"Next entertainment source"
Changes audio source
>Switches "Night Vision on / off"
BMW Night Vision
* on/off
5.Select the desired function unit and press
the controller.
6.Select the button if necessary and press the
controller.
You can now activate the selected function
using the corresponding button.
Operating function
Press the corresponding button on the steering
wheel.
If you have programmed "Navigation voice
instructions" for one of the buttons:
>To switch voice instructions on/off:
Press the button longer.
>To repeat the last voice instruction:
Press the button.
Page 101 of 264
Controls
99Reference
At a glance
Driving tips
Communications
Navigation
Entertainment
Mobility
Any improvement in detection depends on
many factors such as the object size and tem-
perature compared to the surroundings, or
other nearby objects, the visual recognition
skills of the driver, weather conditions, and
other factors.
Driving hints
With the system active, periodically but briefly,
glance at the thermal image on the Control Dis-
play to notice objects that could be people or
larger animals. The glance should be similar to
glancing at the rear view mirror. Do not stare at
the image for long periods while driving, as this
will remove attention from the road. If you notice
an object of interest ahead, be prepared to slow
down or stop, blow the horn, or take other
appropriate action.
System limits
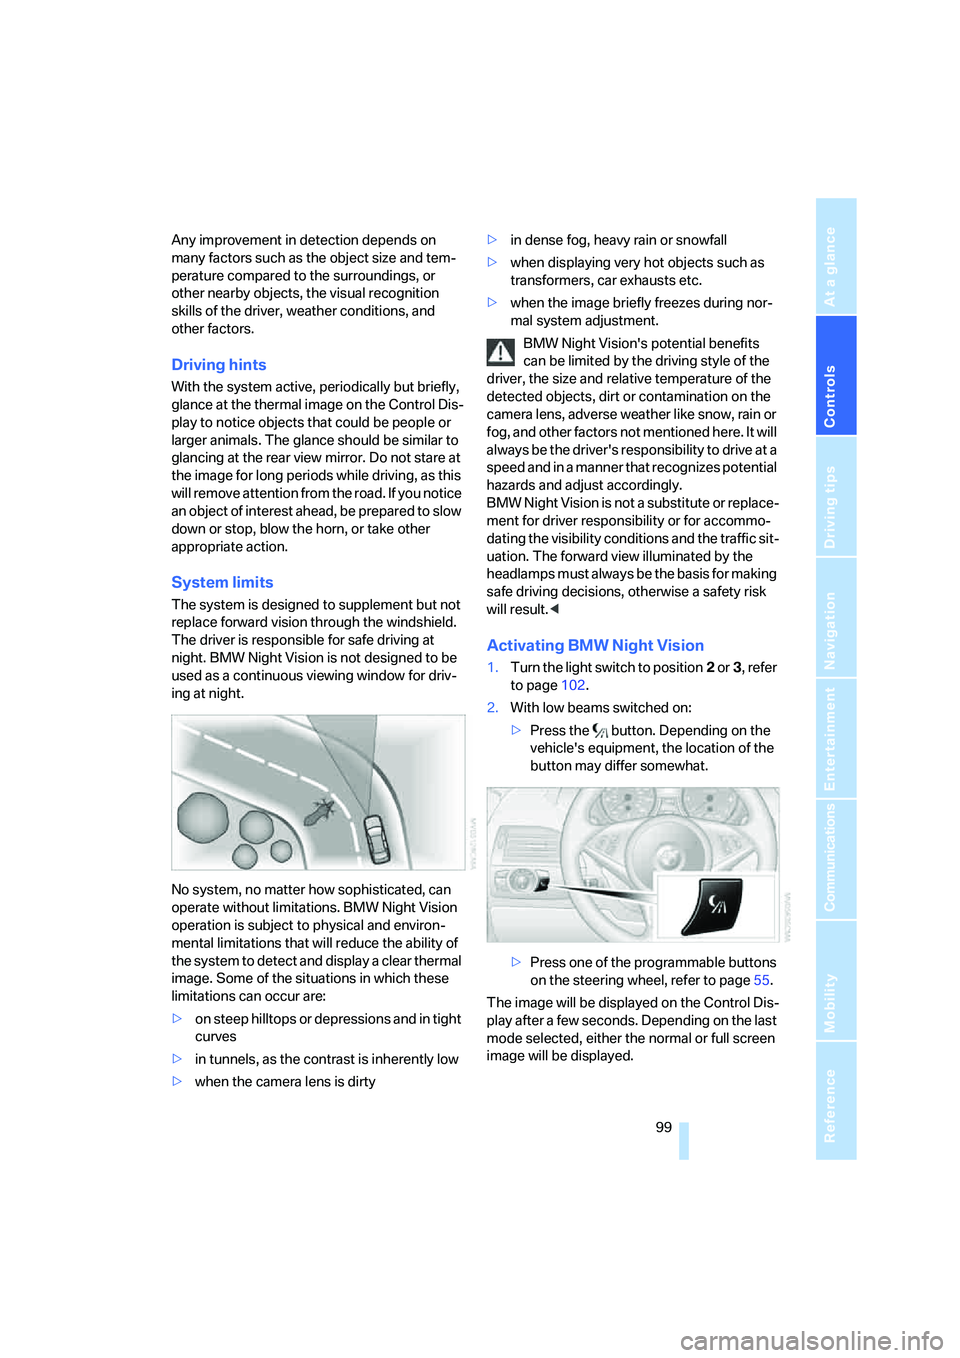
The system is designed to supplement but not
replace forward vision through the windshield.
The driver is responsible for safe driving at
night. BMW Night Vision is not designed to be
used as a continuous viewing window for driv-
ing at night.
No system, no matter how sophisticated, can
operate without limitations. BMW Night Vision
operation is subject to physical and environ-
mental limitations that will reduce the ability of
the system to detect and display a clear thermal
image. Some of the situations in which these
limitations can occur are:
>on steep hilltops or depressions and in tight
curves
>in tunnels, as the contrast is inherently low
>when the camera lens is dirty>in dense fog, heavy rain or snowfall
>when displaying very hot objects such as
transformers, car exhausts etc.
>when the image briefly freezes during nor-
mal system adjustment.
BMW Night Vision's potential benefits
can be limited by the driving style of the
driver, the size and relative temperature of the
detected objects, dirt or contamination on the
camera lens, adverse weather like snow, rain or
fog, and other factors not mentioned here. It will
always be the driver's responsibility to drive at a
speed and in a manner that recognizes potential
hazards and adjust accordingly.
BMW Night Vision is not a substitute or replace-
ment for driver responsibility or for accommo-
dating the visibility conditions and the traffic sit-
uation. The forward view illuminated by the
headlamps must always be the basis for making
safe driving decisions, otherwise a safety risk
will result.<
Activating BMW Night Vision
1.Turn the light switch to position2 or3, refer
to page102.
2.With low beams switched on:
>Press the button. Depending on the
vehicle's equipment, the location of the
button may differ somewhat.
>Press one of the programmable buttons
on the steering wheel, refer to page55.
The image will be displayed on the Control Dis-
play after a few seconds. Depending on the last
mode selected, either the normal or full screen
image will be displayed.
Page 109 of 264

Controls
107Reference
At a glance
Driving tips
Communications
Navigation
Entertainment
Mobility
Reading lamps
The reading lamps are beside the interior lamp:
You can turn them on and off using buttons2
located next to the lamps.
Page 117 of 264
Controls
115Reference
At a glance
Driving tips
Communications
Navigation
Entertainment
Mobility
Practical interior accessories
Integrated universal remote
control*
The concept
The integrated universal remote control can
replace as many as three hand-held transmit-
ters for various remote-controlled accessories,
such as garage and gate or lighting systems.
The integrated universal remote control regis-
ters and stores signals from the original hand-
held transmitters.
The signal of an original hand-held transmitter
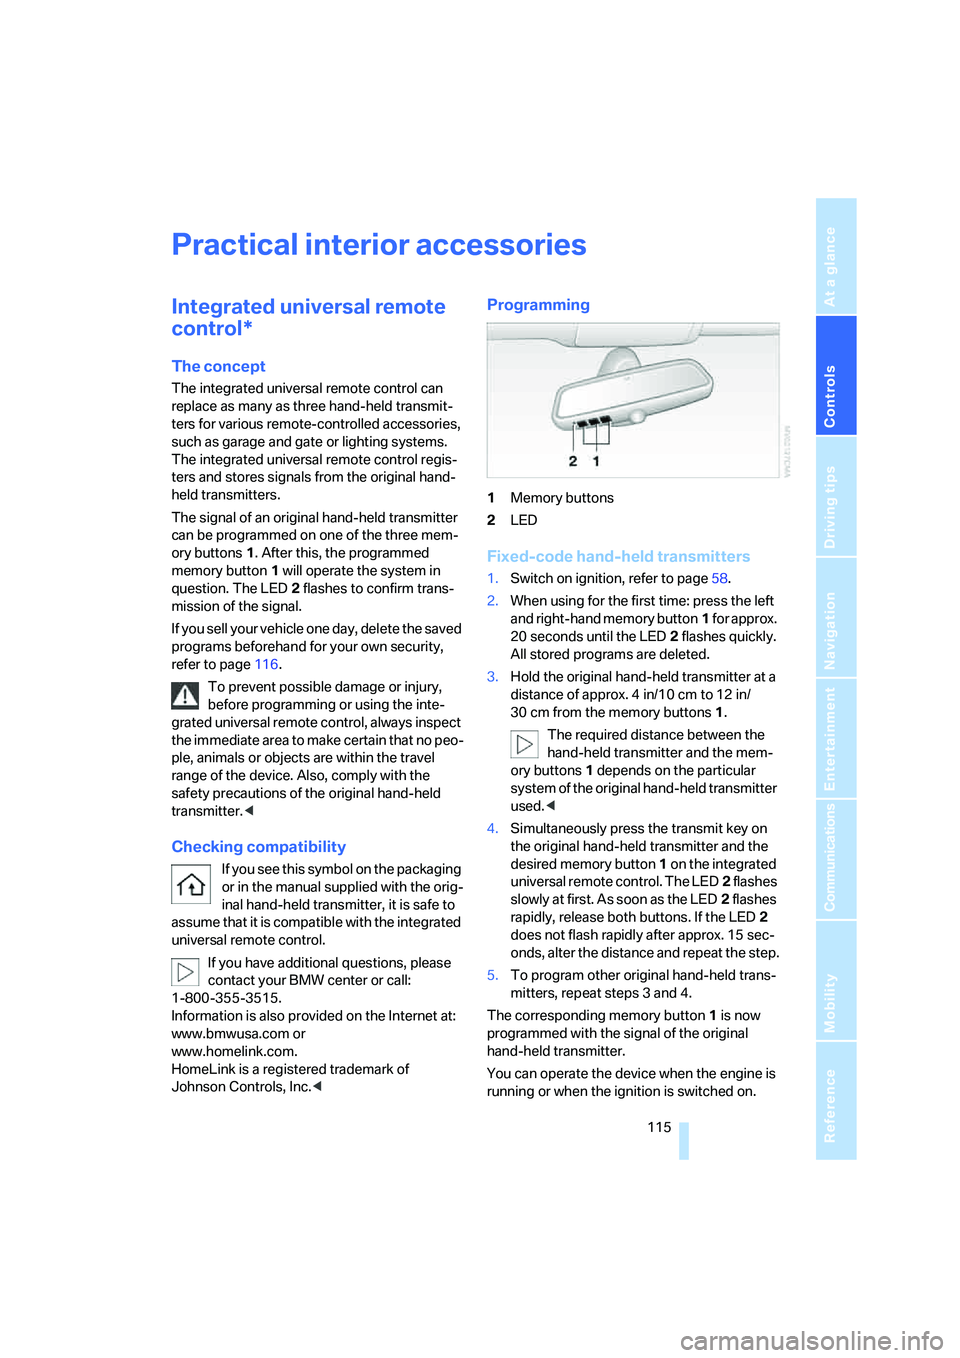
can be programmed on one of the three mem-
ory buttons1. After this, the programmed
memory button1 will operate the system in
question. The LED2 flashes to confirm trans-
mission of the signal.
If you sell your vehicle one day, delete the saved
programs beforehand for your own security,
refer to page116.
To prevent possible damage or injury,
before programming or using the inte-
grated universal remote control, always inspect
the immediate area to make certain that no peo-
ple, animals or objects are within the travel
range of the device. Also, comply with the
safety precautions of the original hand-held
transmitter.<
Checking compatibility
If you see this symbol on the packaging
or in the manual supplied with the orig-
inal hand-held transmitter, it is safe to
assume that it is compatible with the integrated
universal remote control.
If you have additional questions, please
contact your BMW center or call:
1-800-355-3515.
Information is also provided on the Internet at:
www.bmwusa.com or
www.homelink.com.
HomeLink is a registered trademark of
Johnson Controls, Inc.<
Programming
1Memory buttons
2LED
Fixed-code hand-held transmitters
1.Switch on ignition, refer to page58.
2.When using for the first time: press the left
and right-hand memory button1 for approx.
20 seconds until the LED2 flashes quickly.
All stored programs are deleted.
3.Hold the original hand-held transmitter at a
distance of approx. 4 in/10 cm to 12 in/
30 cm from the memory buttons1.
The required distance between the
hand-held transmitter and the mem-
ory buttons1 depends on the particular
system of the original hand-held transmitter
used.<
4.Simultaneously press the transmit key on
the original hand-held transmitter and the
desired memory button 1 on the integrated
universal remote control. The LED2 flashes
slowly at first. As soon as the LED2 flashes
rapidly, release both buttons. If the LED2
does not flash rapidly after approx. 15 sec-
onds, alter the distance and repeat the step.
5.To program other original hand-held trans-
mitters, repeat steps 3 and 4.
The corresponding memory button 1 is now
programmed with the signal of the original
hand-held transmitter.
You can operate the device when the engine is
running or when the ignition is switched on.
Page 118 of 264
Practical interior accessories
116 If the device fails to function even after
repeated programming, check whether
the original hand-held transmitter uses an alter-
nating-code system. To do so, either read the
instructions for the original hand-held transmit-
ter or hold down the programmed memory
button1 of the integrated universal remote
control. If the LED2 on the integrated universal
remote control flashes rapidly for a short time
and then remains lit for approx. 2 seconds, this
indicates that the original hand-held transmitter
uses an alternating-code system. In the case of
an alternating-code system, program the mem-
ory buttons1 as described at Alternating-code
hand-held transmitters.<
Alternating-code hand-held
transmitters
To program the integrated universal remote
control, consult the operating instructions for
the equipment to be set. You will find informa-
tion there on the possibilities for synchroniza-
tion.
When programming hand-held transmitters
that employ an alternating code, please observe
the following supplementary instructions:
Programming will be easier with the aid of
a second person.<
1.Park your vehicle within the range of the
remote-controlled equipment.
2.Program the integrated universal remote
control as described above in Fixed-code
hand-held transmitters.
3.Locate the button on the receiver of the
device to be set, e.g. on the drive unit.
4.Press the button on the receiver of the
equipment to be set. After step 4, you have
approx. 30 seconds for step 5.
5.Press the programmed memory button1
of the integrated universal remote control
three times.
The corresponding memory button 1 is now
programmed with the signal of the original
hand-held transmitter.
If you have any additional questions,
please contact your BMW center.<
Deleting all stored programs
Press the left and right-hand memory button1
for approx. 20 seconds until the LED2 flashes.
All stored programs are deleted.
Programs cannot be deleted individually.
Rememorizing individual programs
1.Hold the original handheld remote control
approx. 10 to 30 cm away from the memory
buttons1.
The required distance between the
hand-held transmitter and the mem-
ory buttons1 depends on the particular
system of the original hand-held transmitter
used.<
2.Press the desired memory button1 of the
integrated universal remote.
3.If the LED2 flashes slowly after approx.
20 seconds, press the command button of
the original hand-held transmitter. As soon
as the LED2 flashes rapidly, release both
buttons. If the LED2 does not flash rapidly
after approx. 15 seconds, alter the distance
and repeat the step.
Glove compartment
Opening
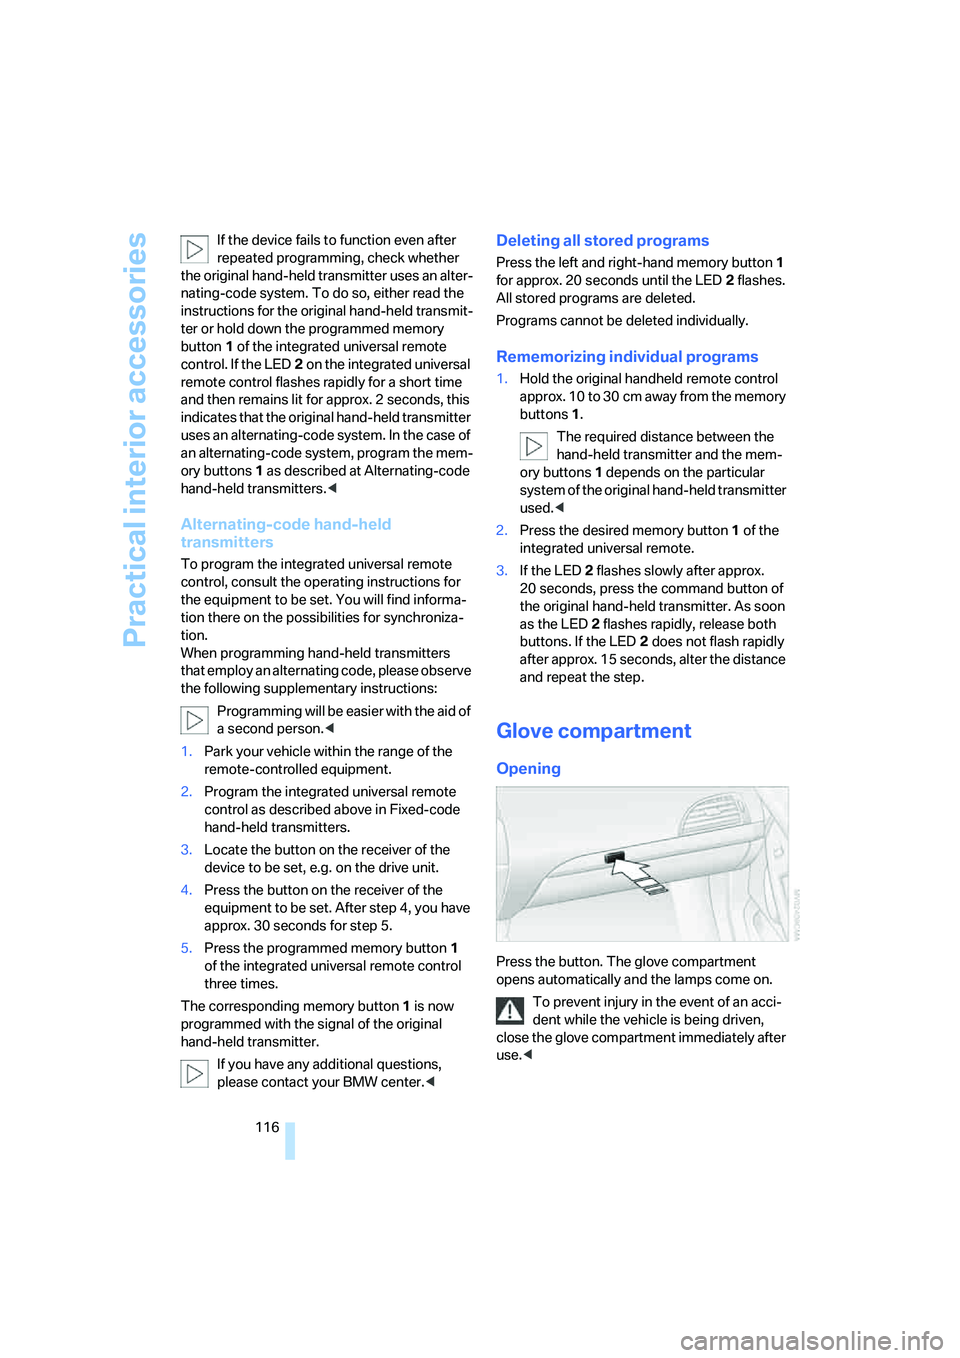
Press the button. The glove compartment
opens automatically and the lamps come on.
To prevent injury in the event of an acci-
dent while the vehicle is being driven,
close the glove compartment immediately after
use.<