2008 BMW 535I key
[x] Cancel search: keyPage 24 of 288
iDrive
22
Entertainment
In the Entertainment menu, the sound source
currently heard, e.g. a radio station, is stored,
regardless of the selection on the Control Dis-
play.
1.Select the desired function, e.g. radio sta-
tion or CD.
2.Press the ... button longer
than 2 seconds.
If the vehicle is equipped with two drives,
the current track is stored for CDs with
compressed audio files.<
Run function
Press the ... button.
When selecting a phone number, the connec-
tion is also established, or the destination guid-
ance is started when a navigation destination is
selected.
Displaying button assignment
You can display the assignment of the buttons
by touching them with your finger. Please do
not wear gloves when doing so. Touching with
an object, e.g. a pen, does not function.
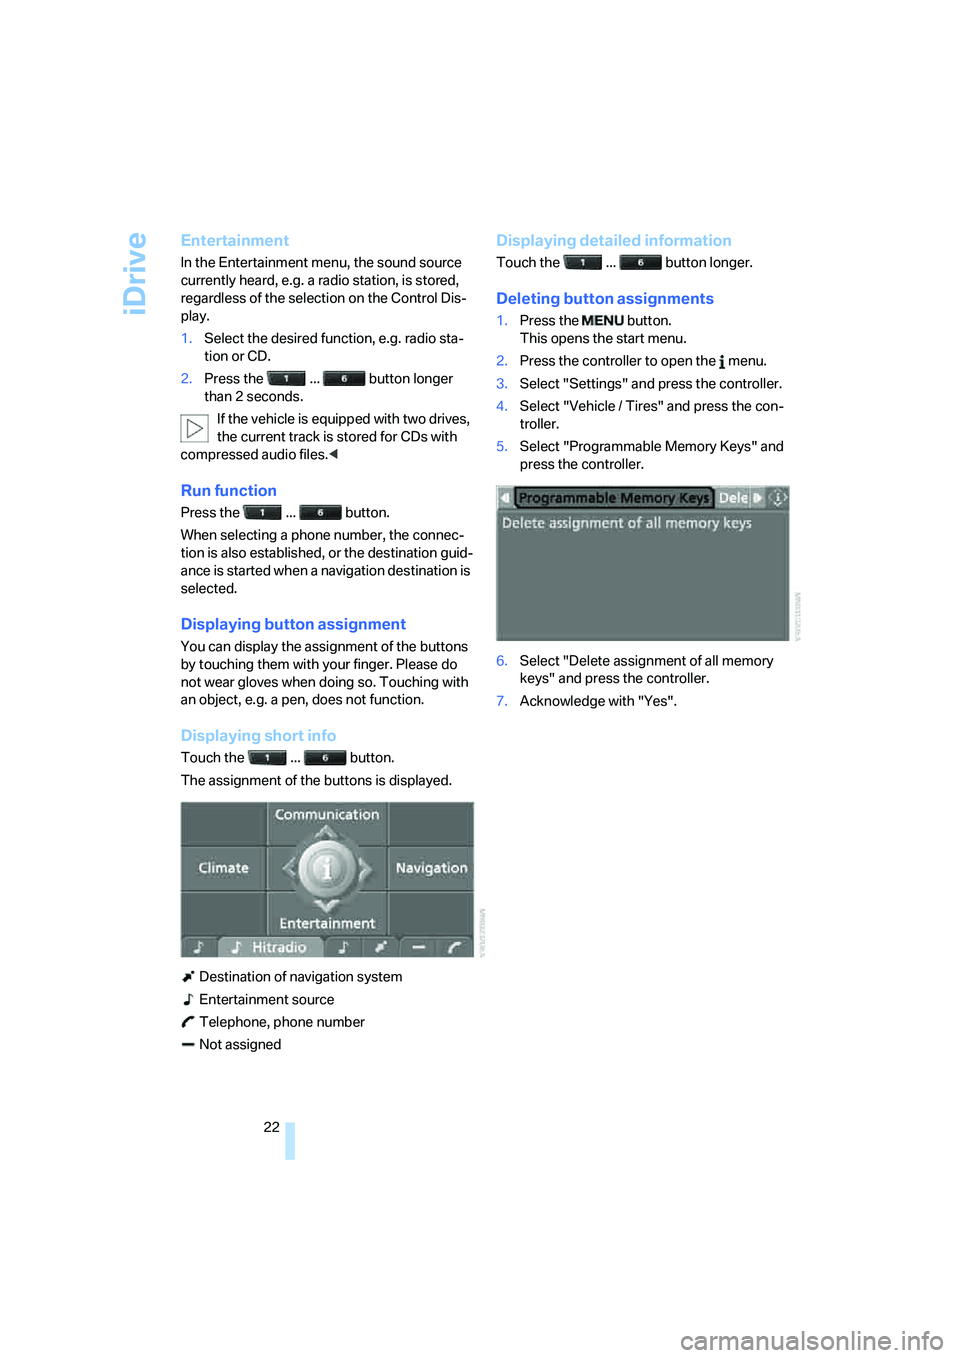
Displaying short info
Touch the ... button.
The assignment of the buttons is displayed.
Destination of navigation system
Entertainment source
Telephone, phone number
Not assigned
Displaying detailed information
Touch the ... button longer.
Deleting button assignments
1.Press the button.
This opens the start menu.
2.Press the controller to open the menu.
3.Select "Settings" and press the controller.
4.Select "Vehicle / Tires" and press the con-
troller.
5.Select "Programmable Memory Keys" and
press the controller.
6.Select "Delete assignment of all memory
keys" and press the controller.
7.Acknowledge with "Yes".
Page 30 of 288
Opening and closing
28
Opening and closing
Keys/remote control
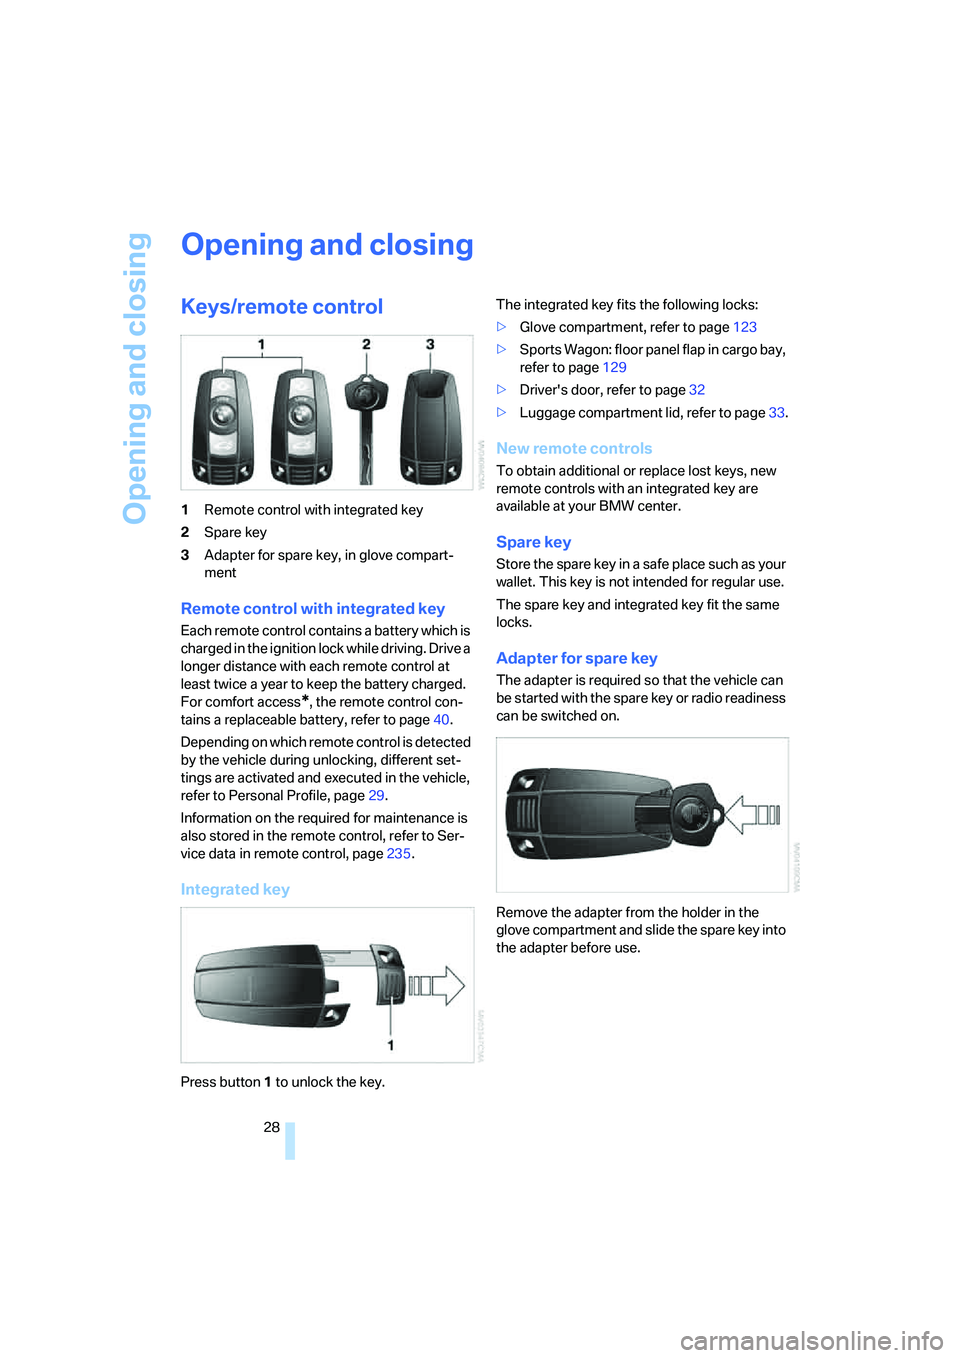
1Remote control with integrated key
2Spare key
3Adapter for spare key, in glove compart-
ment
Remote control with integrated key
Each remote control contains a battery which is
charged in the ignition lock while driving. Drive a
longer distance with each remote control at
least twice a year to keep the battery charged.
For comfort access
*, the remote control con-
tains a replaceable battery, refer to page40.
Depending on which remote control is detected
by the vehicle during unlocking, different set-
tings are activated and executed in the vehicle,
refer to Personal Profile, page29.
Information on the required for maintenance is
also stored in the remote control, refer to Ser-
vice data in remote control, page235.
Integrated key
Press button1 to unlock the key.The integrated key fits the following locks:
>Glove compartment, refer to page123
>Sports Wagon: floor panel flap in cargo bay,
refer to page129
>Driver's door, refer to page32
>Luggage compartment lid, refer to page33.
New remote controls
To obtain additional or replace lost keys, new
remote controls with an integrated key are
available at your BMW center.
Spare key
Store the spare key in a safe place such as your
wallet. This key is not intended for regular use.
The spare key and integrated key fit the same
locks.
Adapter for spare key
The adapter is required so that the vehicle can
be started with the spare key or radio readiness
can be switched on.
Remove the adapter from the holder in the
glove compartment and slide the spare key into
the adapter before use.
Page 33 of 288
Controls
31Reference
At a glance
Driving tips
Communications
Navigation
Entertainment
Mobility
Do not lock the vehicle from the outside if
persons are inside, as unlocking from the
inside is not possible without special knowl-
edge.<
Switching on interior lamps
With vehicle locked:
Press the button.
You can also use this function to locate your
vehicle in parking garages etc.
Panic mode*
You can trigger the alarm system in case of dan-
ger:
Press the button for at least 3 seconds.
Switching off alarm: press any button.
Sedan: opening luggage
compartment lid
Press the button for approx. 1 second.
The luggage compartment lid opens, regard-
less of whether it was previously locked or
unlocked.
During opening, the luggage compart-
ment lid pivots back and up. Make sure
that adequate clearance is available before
opening.
To prevent accidentally locking yourself out,
never lay the remote control in the cargo bay. A
previously locked luggage compartment lid is
also locked again after closing.<
Sports Wagon: unlocking tailgate
Press the button for approx. 1 second.
The tailgate will open slightly, regardless of
whether it was previously locked or unlocked.
During opening, the tailgate pivots back
and up. Make sure that adequate clear-
ance is available before opening.
To prevent accidentally locking yourself out,
never lay the remote control in the cargo bay. A
previously locked tailgate is also locked again
after closing.
When opening the tailgate, the roll-up cover is
raised.
sure to provide protection around all edges.
Failure to do so could result in damage to the
heating conductors of the rear window.<
Confirmation signals
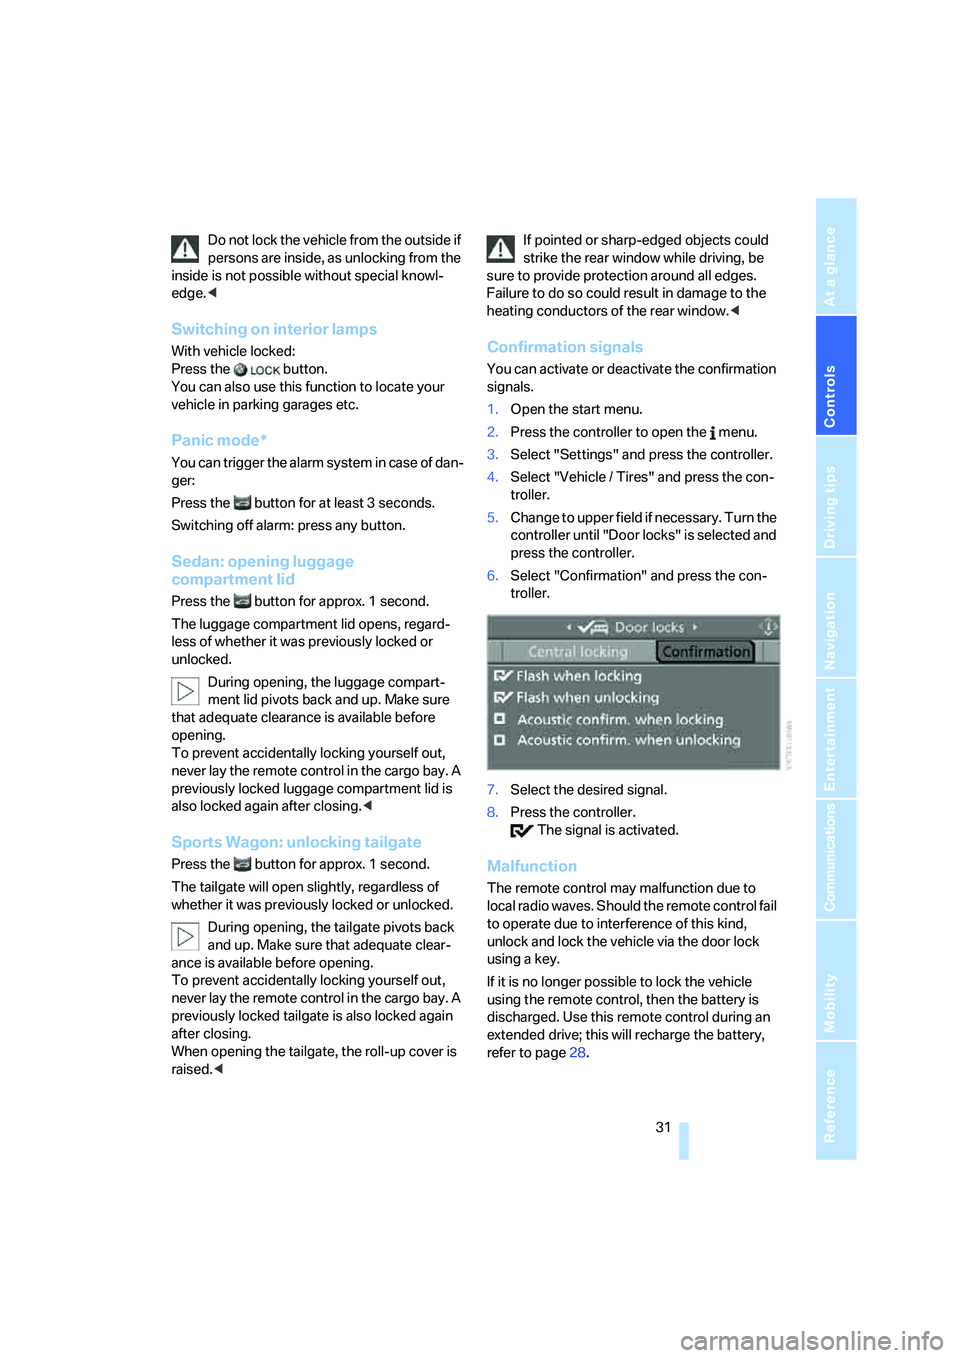
You can activate or deactivate the confirmation
signals.
1.Open the start menu.
2.Press the controller to open the menu.
3.Select "Settings" and press the controller.
4.Select "Vehicle / Tires" and press the con-
troller.
5.Change to upper field if necessary. Turn the
controller until "Door locks" is selected and
press the controller.
6.Select "Confirmation" and press the con-
troller.
7.Select the desired signal.
8.Press the controller.
The signal is activated.
Malfunction
The remote control may malfunction due to
local radio waves. Should the remote control fail
to operate due to interference of this kind,
unlock and lock the vehicle via the door lock
using a key.
If it is no longer possible to lock the vehicle
using the remote control, then the battery is
discharged. Use this remote control during an
extended drive; this will recharge the battery,
refer to page28.
Page 34 of 288
Opening and closing
32
For US owners only
The transmitter and receiver units comply with
part 15 of the FCC/Federal Communication
Commission regulations. Operation is gov-
erned by the following:
FCC ID:
LX8766S
LX8766E
LX8CAS
LX8CAS2
Compliance statement:
This device complies with part 15 of the FCC
Rules. Operation is subject to the following two
conditions:
>This device must not cause harmful inter-
ference, and
>this device must accept any interference
received, including interference that may
cause undesired operation.
Any unauthorized modifications or
changes to these devices could void the
user's authority to operate this equipment.<
Using door lock
Do not lock the vehicle from the outside if
persons are inside, as unlocking from the
inside is not possible without special knowl-
edge.<
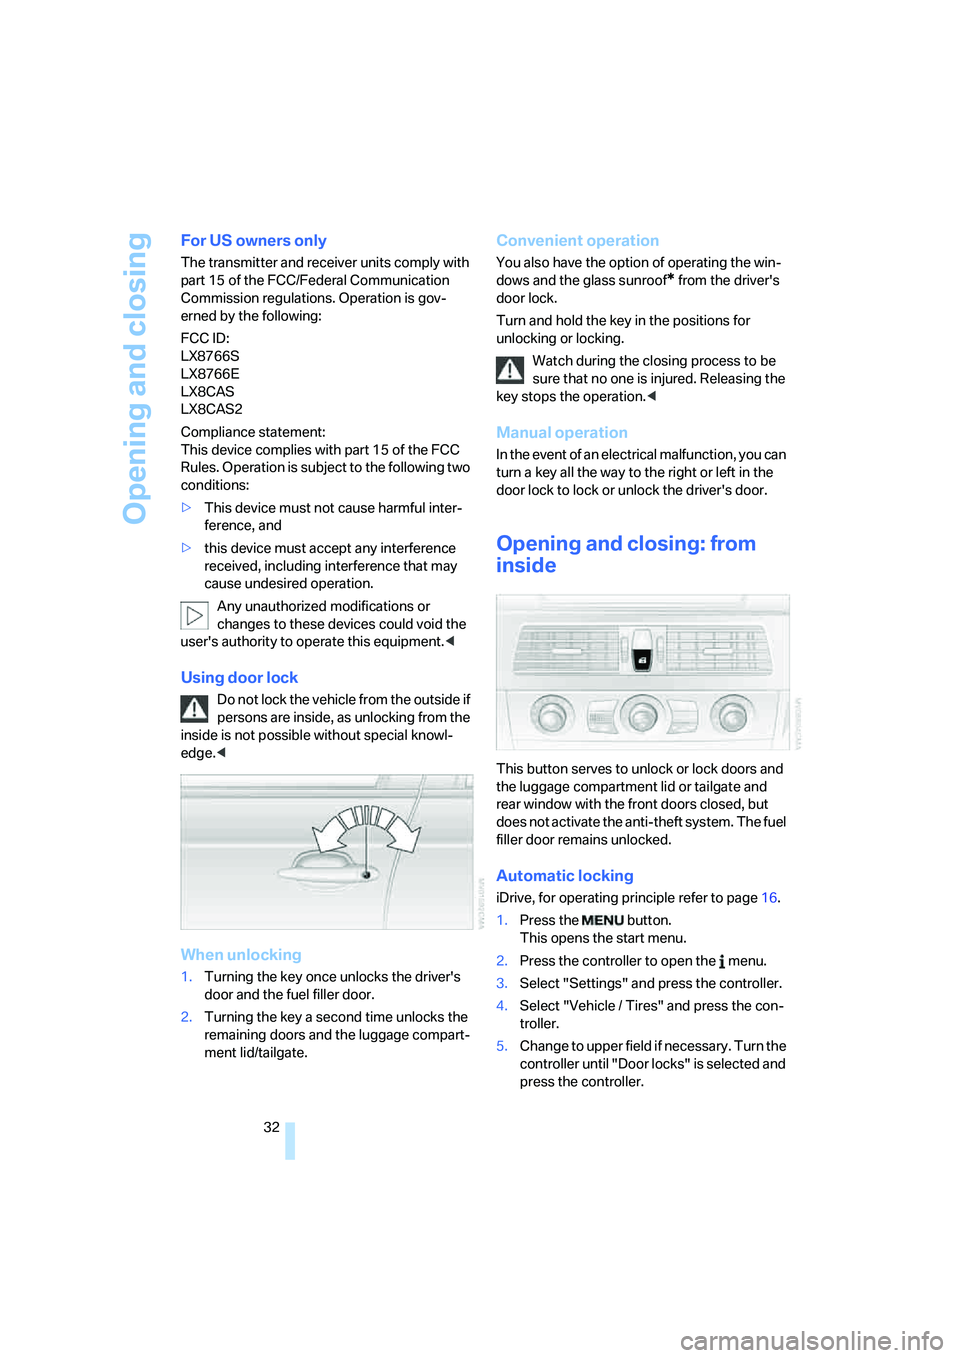
When unlocking
1.Turning the key once unlocks the driver's
door and the fuel filler door.
2.Turning the key a second time unlocks the
remaining doors and the luggage compart-
ment lid/tailgate.
Convenient operation
You also have the option of operating the win-
dows and the glass sunroof
* from the driver's
door lock.
Turn and hold the key in the positions for
unlocking or locking.
Watch during the closing process to be
sure that no one is injured. Releasing the
key stops the operation.<
Manual operation
In the event of an electrical malfunction, you can
turn a key all the way to the right or left in the
door lock to lock or unlock the driver's door.
Opening and closing: from
inside
This button serves to unlock or lock doors and
the luggage compartment lid or tailgate and
rear window with the front doors closed, but
does not activate the anti-theft system. The fuel
filler door remains unlocked.
Automatic locking
iDrive, for operating principle refer to page16.
1.Press the button.
This opens the start menu.
2.Press the controller to open the menu.
3.Select "Settings" and press the controller.
4.Select "Vehicle / Tires" and press the con-
troller.
5.Change to upper field if necessary. Turn the
controller until "Door locks" is selected and
press the controller.
Page 36 of 288
Opening and closing
34 approx. 1 second: the luggage compartment lid
opens.
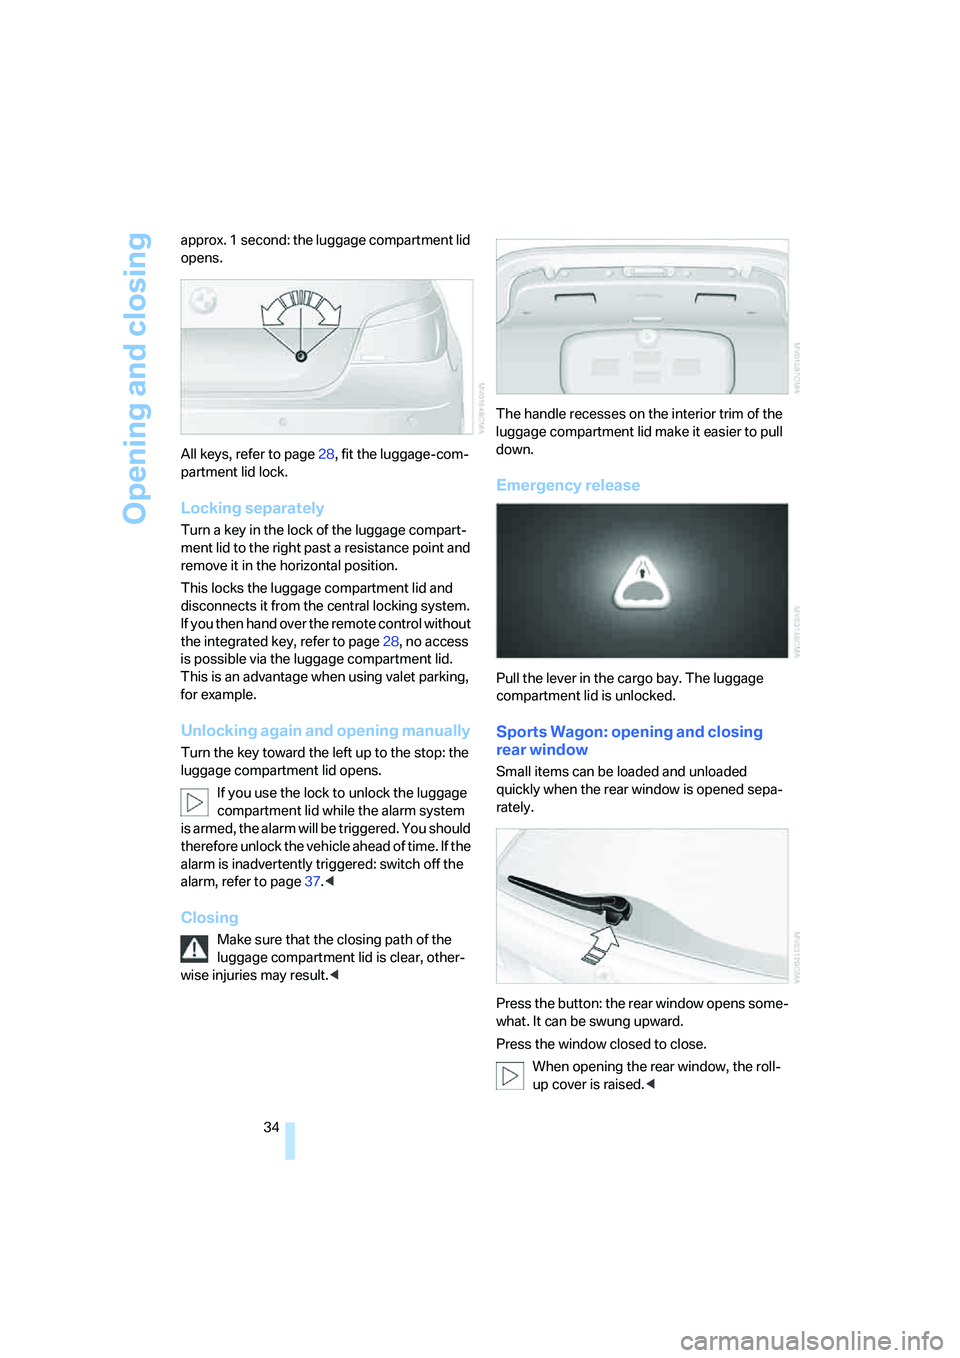
All keys, refer to page28, fit the luggage-com-
partment lid lock.
Locking separately
Turn a key in the lock of the luggage compart-
ment lid to the right past a resistance point and
remove it in the horizontal position.
This locks the luggage compartment lid and
disconnects it from the central locking system.
If you then hand over the remote control without
the integrated key, refer to page28, no access
is possible via the luggage compartment lid.
This is an advantage when using valet parking,
for example.
Unlocking again and opening manually
Turn the key toward the left up to the stop: the
luggage compartment lid opens.
If you use the lock to unlock the luggage
compartment lid while the alarm system
is armed, the alarm will be triggered. You should
therefore unlock the vehicle ahead of time. If the
alarm is inadvertently triggered: switch off the
alarm, refer to page37.<
Closing
Make sure that the closing path of the
luggage compartment lid is clear, other-
wise injuries may result.
down.
Emergency release
Pull the lever in the cargo bay. The luggage
compartment lid is unlocked.
Sports Wagon: opening and closing
rear window
Small items can be loaded and unloaded
quickly when the rear window is opened sepa-
rately.
Press the button: the rear window opens some-
what. It can be swung upward.
Press the window closed to close.
When opening the rear window, the roll-
up cover is raised.<
Page 42 of 288
Opening and closing
40
Malfunction
The comfort access function may malfunction
due to local radio waves. Then open or close the
vehicle with the buttons on the remote control
or with a key. To start the engine following this,
insert the remote control in the ignition lock.
When unlocking or locking/comfort closing do
not simultaneously grasp the door handle and
touch the surfaces, arrow2 or 3. Otherwise, you
may limit the function.
Replacing battery
If the battery of the remote control is dead, a
message will appear in the Control Display.
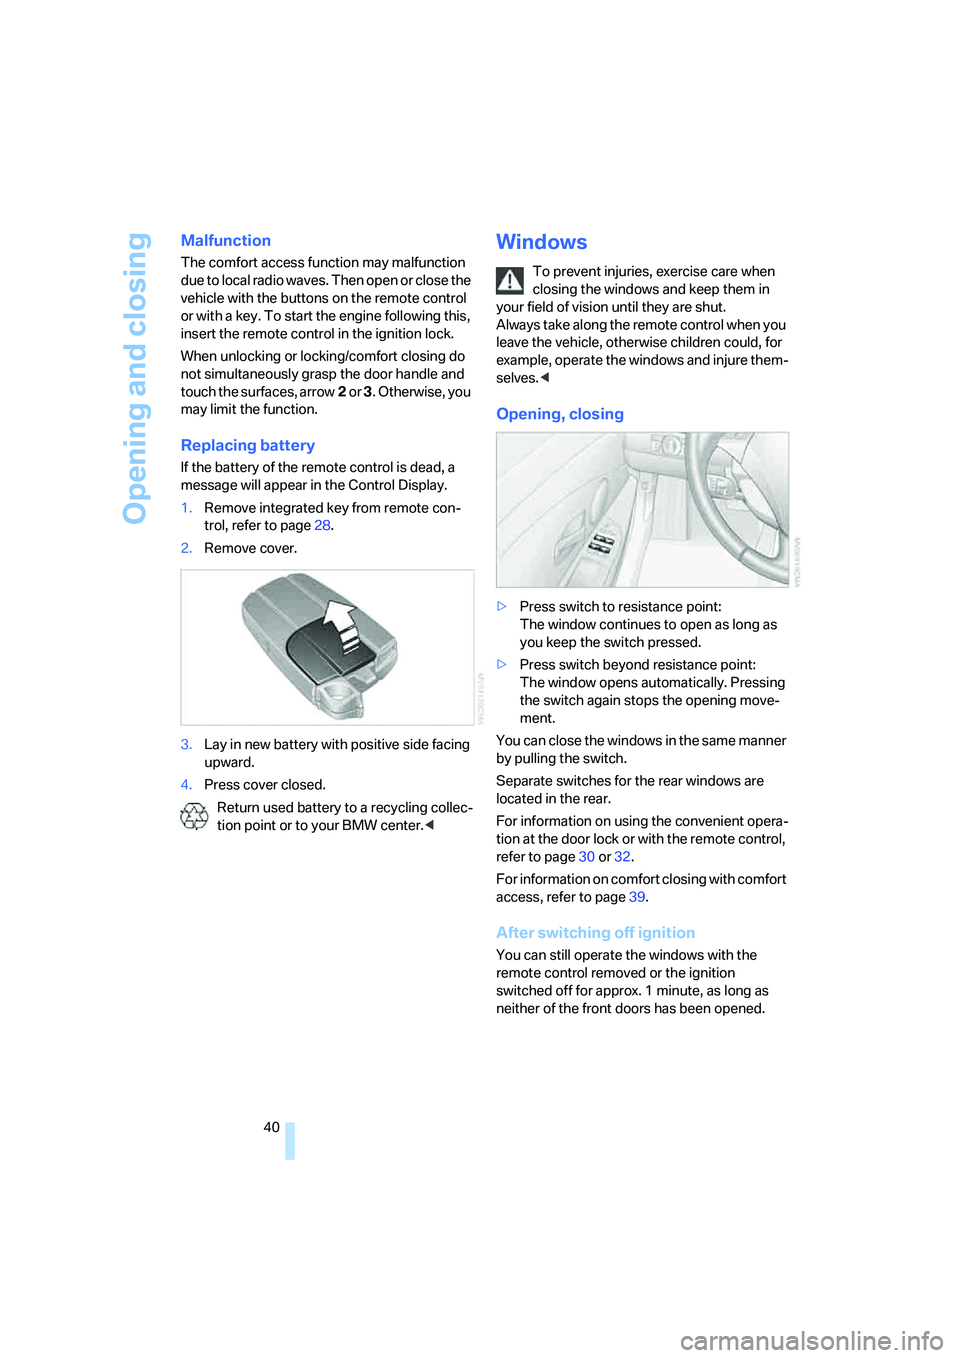
1.Remove integrated key from remote con-
trol, refer to page28.
2.Remove cover.
3.Lay in new battery with positive side facing
upward.
4.Press cover closed.
Return used battery to a recycling collec-
tion point or to your BMW center.<
Windows
To prevent injuries, exercise care when
closing the windows and keep them in
your field of vision until they are shut.
Always take along the remote control when you
leave the vehicle, otherwise children could, for
example, operate the windows and injure them-
selves.<
Opening, closing
>Press switch to resistance point:
The window continues to open as long as
you keep the switch pressed.
>Press switch beyond resistance point:
The window opens automatically. Pressing
the switch again stops the opening move-
ment.
You can close the windows in the same manner
by pulling the switch.
Separate switches for the rear windows are
located in the rear.
For information on using the convenient opera-
tion at the door lock or with the remote control,
refer to page30 or32.
For information on comfort closing with comfort
access, refer to page39.
After switching off ignition
You can still operate the windows with the
remote control removed or the ignition
switched off for approx. 1 minute, as long as
neither of the front doors has been opened.
Page 46 of 288
Opening and closing
44 very thin objects, and the sunroof would con-
tinue closing.<
Closing without pinch protection
system
In case of danger from outside, slide the switch
forward beyond the resistance point and hold.
The roof closes without the pinch protection
system.
Following interruptions in electrical
power supply
After a power loss, the sunroof may only
respond to the raise command. Then have the
system initialized. BMW recommends having
this work done by your BMW center.
Moving manually*
In the event of an electrical malfunction, you can
move the sunroof manually.
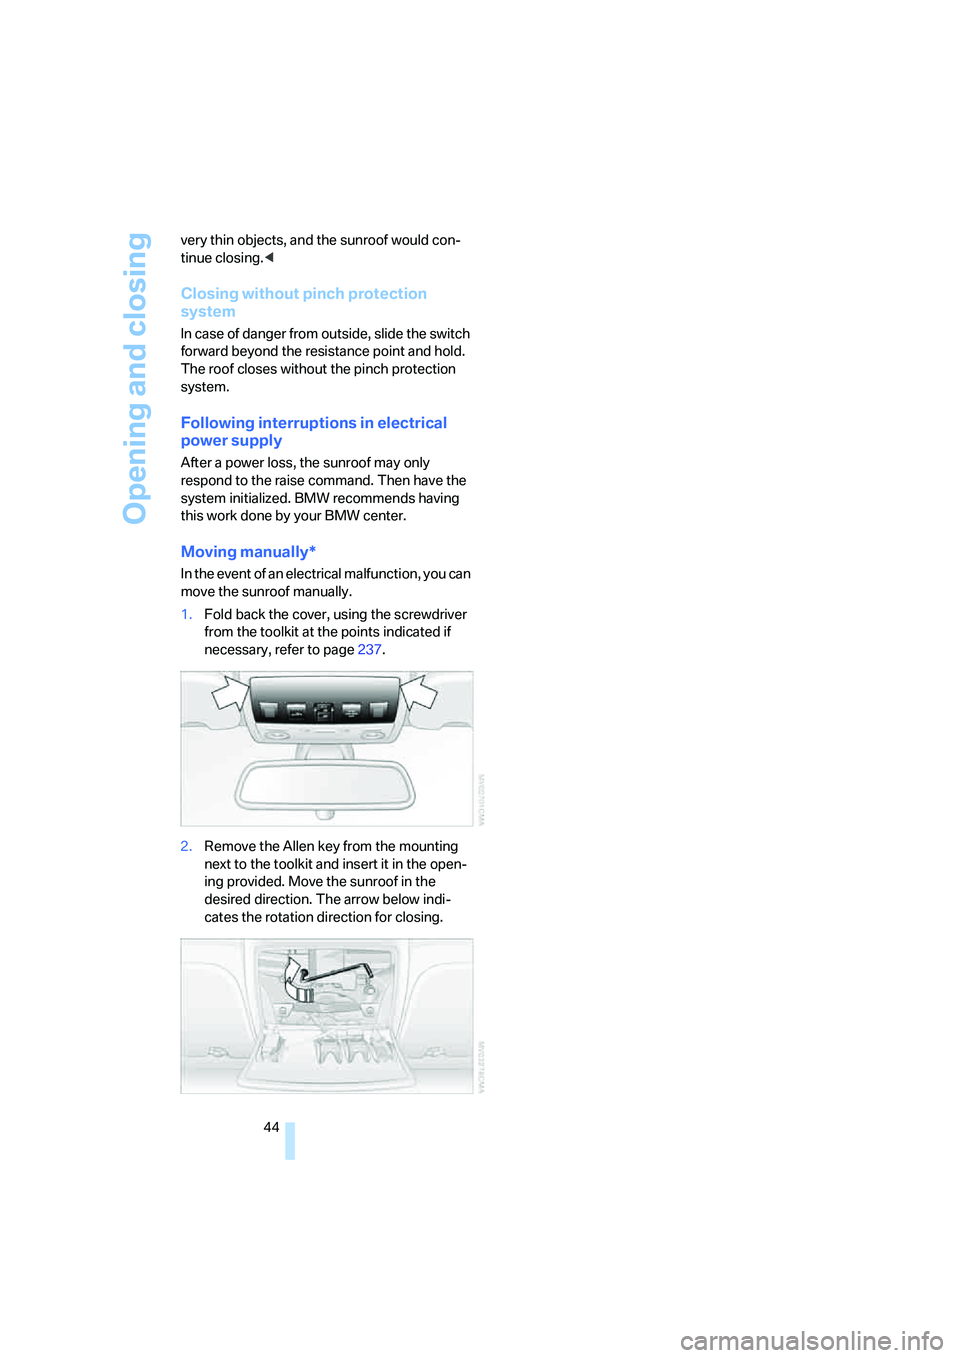
1.Fold back the cover, using the screwdriver
from the toolkit at the points indicated if
necessary, refer to page237.
2.Remove the Allen key from the mounting
next to the toolkit and insert it in the open-
ing provided. Move the sunroof in the
desired direction. The arrow below indi-
cates the rotation direction for closing.
Page 90 of 288

Everything under control
88
Brightness of Control Display
The brightness is automatically adapted to the
ambient lighting conditions. However, you can
change the basic setting.
iDrive, for operating principle refer to page16.
1.Press the button.
This opens the start menu.
2.Press the controller to open the menu.
3.Select "Settings" and press the controller.
4.Select "Display settings" and press the
controller.
5.Change to upper field if necessary. Turn the
controller until "Brightness" is selected and
press the controller.
6.If necessary, move the controller to the right
to select "Display".
7.Turn the controller until the desired setting
is selected.
The setting is stored for the remote control cur-
rently in use.
Units of measure
You can change the units of measure for con-
sumption, distances, temperature and pres-
sure.
iDrive, for operating principle refer to page16.
1.Press the button.
This opens the start menu.
2.Press the controller to open the menu.
3.Select "Settings" and press the controller.
4.Select "Language / Units" and press the
controller.5.Change to upper field if necessary. Turn the
controller until "Units" is selected and press
the controller.
6.Select the menu item to be set and press
the controller.
7.Select the desired unit of measure and
press the controller.
The settings are stored for the remote key cur-
rently in use.
Language on Control Display
iDrive, for operating principle refer to page16.
1.Press the button.
This opens the start menu.
2.Press the controller to open the menu.
3.Select "Settings" and press the controller.
4.Select "Language / Units" and press the
controller.
5.Change to upper field if necessary. Turn the
controller until "Languages" is selected and
press the controller.
6.Select "Text language" and press the con-
troller. You can change the language of the
text displays.
7.Select and activate the desired language by
pressing the controller.