2008 BMW 535I towing
[x] Cancel search: towingPage 40 of 288

Opening and closing
38
Tilt alarm sensor
The tilt of the vehicle is monitored. The alarm
system reacts, e.g. in case of an attempted
wheel theft or towing.
Interior motion sensor
In order for the interior motion sensor to func-
tion properly, the windows and glass sunroof
*
must be completely closed.
Avoiding unintentional alarms
The tilt alarm sensor and interior motion sensor
may be switched off at the same time. This pre-
vents unintentional alarms, e.g. in the following
situations:
>In two-level garages
>When transporting on car-carrying trains,
by sea or on a trailer
>When animals are to remain in the vehicle
Switching off tilt alarm sensor and
interior motion sensor
Press the button on the remote control
again as soon as the vehicle is locked.
The indicator lamp lights up briefly and then
flashes continuously. The tilt alarm sensor and
the interior motion sensor are switched off until
the next time the vehicle is unlocked and subse-
quently locked again.
Comfort access*
Comfort access allows you to access your vehi-
cle without having to hold the remote control in
your hand. It is sufficient to carry the remote
control with you, e.g. in your jacket pocket. The
vehicle automatically detects the associated
remote control in the immediate vicinity or in
the interior.
Comfort access supports the following func-
tions:
>Unlocking/locking vehicle
>Comfort closing
>Opening luggage compartment lid/tailgate
separately>Sports Wagon: opening rear window sepa-
rately
>Starting engine
Functional requirement
>The vehicle or the luggage compartment
lid/tailgate can only be locked if the vehicle
detects that the remote control you are car-
rying is outside the vehicle.
>The next unlocking and locking cycle is not
possible until after approx. 2 seconds.
>The engine can only be started if the vehicle
detects that the remote control is located in
the vehicle.
Comparison with ordinary remote
control
You can control the functions mentioned previ-
ously with the comfort access or by pressing
the buttons on the remote control. Therefore,
please familiarize yourself with the information
on opening and closing beginning on page28
beforehand.
The special features when using comfort
access are described in the following.
Should a short delay occur when opening
or closing the windows or the glass sun-
roof, the system is checking whether a remote
control is located in the vehicle. Please repeat
opening or closing if necessary.<
Unlocking
Grasp a door handle fully, refer to arrow1, but
do not touch the surfaces, arrow2 or 3 when
doing so. This corresponds to pressing the
button.
Page 67 of 288
Controls
65Reference
At a glance
Driving tips
Communications
Navigation
Entertainment
Mobility
When the selector lever is pressed forward or
back, the manual mode is activated and the
Steptronic shifts the gear. The instrument clus-
ter shows M1 through M6.
Upshifts and downshifts are only carried out at a
suitable engine and vehicle speed, e.g. a down-
shift is not carried out at excessively high
engine speeds. The selected gear is briefly dis-
played in the instrument cluster, followed by the
current gear.
To resume automatic mode, press the selector
lever to the right.
Manually unlocking and locking
transmission lock
In case of a power failure, e.g. when the battery
is drained or disconnected, or an electrical fault,
manually release the transmission lock, as oth-
erwise the rear wheels are blocked and the
vehicle cannot be towed.
Only manually release the transmission lock for
towing and firmly apply the handbrake before-
hand so that the vehicle cannot roll. Reengage
the transmission lock after parking the vehicle
at its destination.
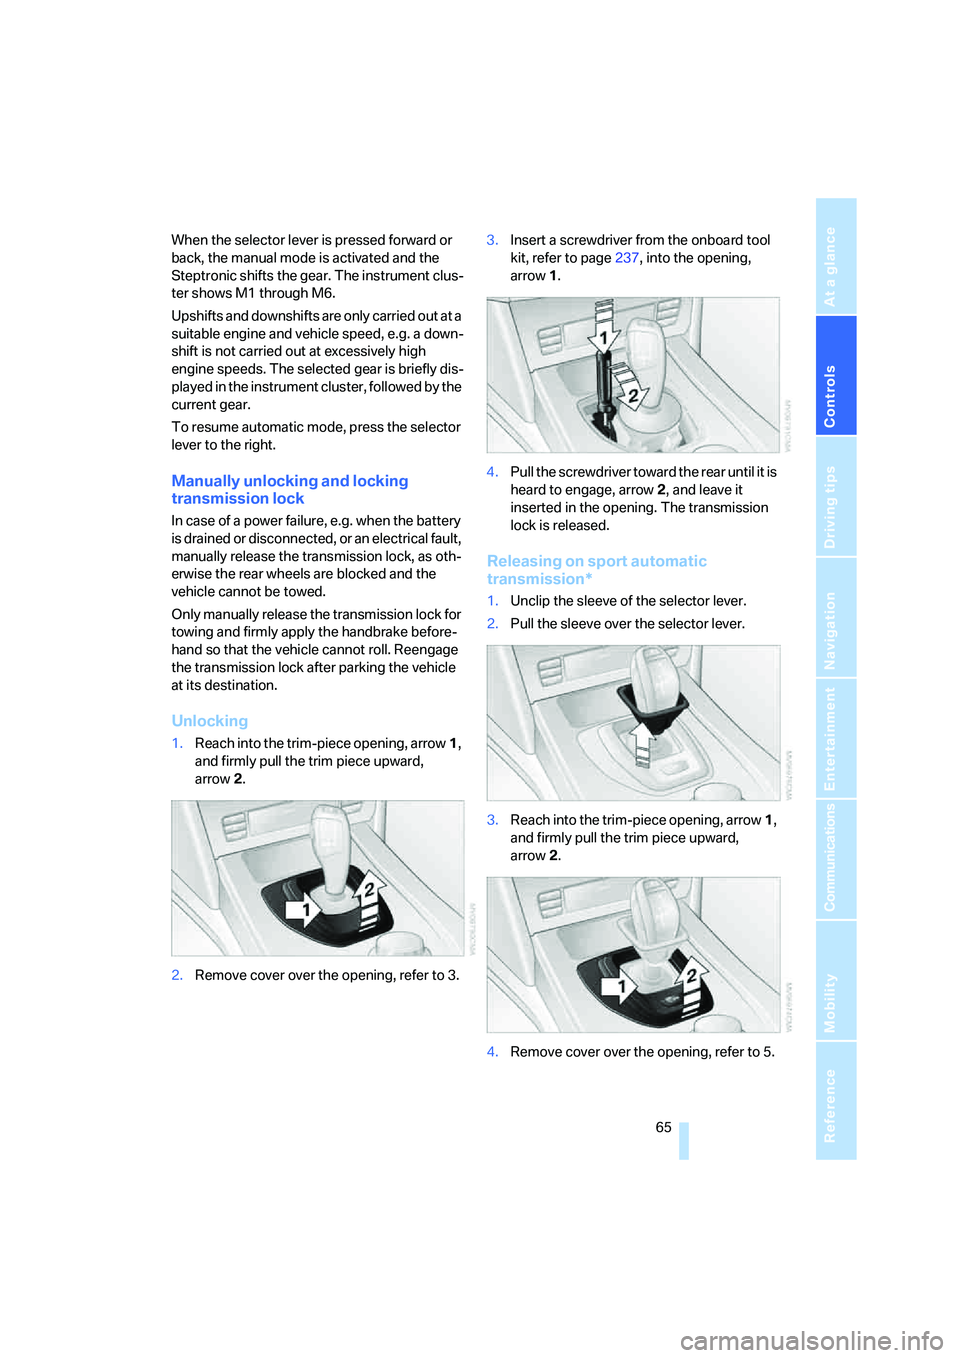
Unlocking
1.Reach into the trim-piece opening, arrow1,
and firmly pull the trim piece upward,
arrow2.
2.Remove cover over the opening, refer to 3.3.Insert a screwdriver from the onboard tool
kit, refer to page237, into the opening,
arrow1.
4.Pull the screwdriver toward the rear until it is
heard to engage, arrow2, and leave it
inserted in the opening. The transmission
lock is released.
Releasing on sport automatic
transmission*
1.Unclip the sleeve of the selector lever.
2.Pull the sleeve over the selector lever.
3.Reach into the trim-piece opening, arrow1,
and firmly pull the trim piece upward,
arrow2.
4.Remove cover over the opening, refer to 5.
Page 68 of 288
Driving
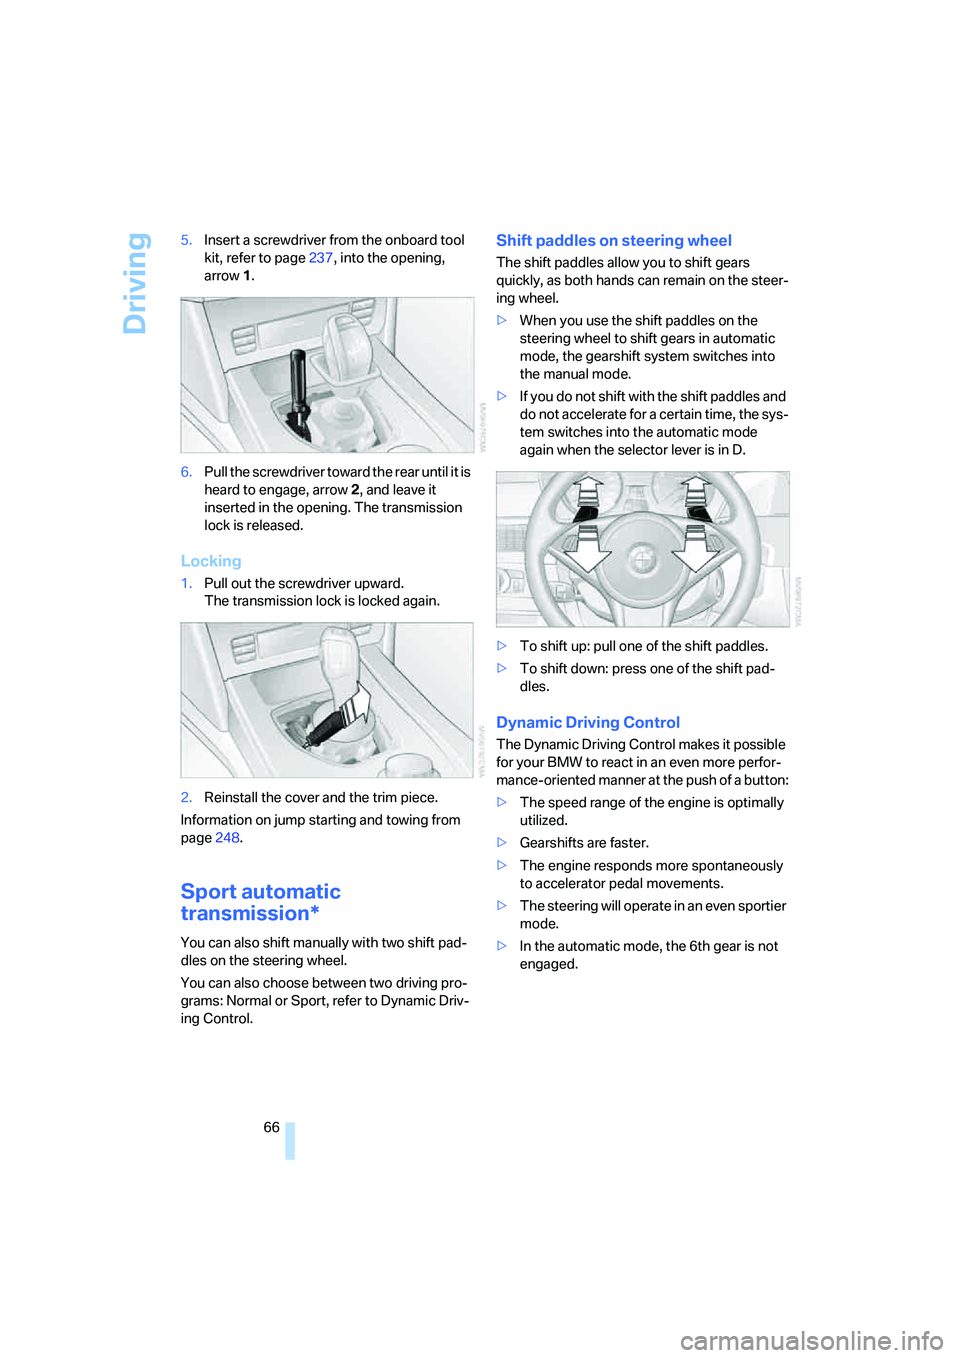
66 5.Insert a screwdriver from the onboard tool
kit, refer to page237, into the opening,
arrow1.
6.Pull the screwdriver toward the rear until it is
heard to engage, arrow2, and leave it
inserted in the opening. The transmission
lock is released.
Locking
1.Pull out the screwdriver upward.
The transmission lock is locked again.
2.Reinstall the cover and the trim piece.
Information on jump starting and towing from
page248.
Sport automatic
transmission*
You can also shift manually with two shift pad-
dles on the steering wheel.
You can also choose between two driving pro-
grams: Normal or Sport, refer to Dynamic Driv-
ing Control.
Shift paddles on steering wheel
The shift paddles allow you to shift gears
quickly, as both hands can remain on the steer-
ing wheel.
>When you use the shift paddles on the
steering wheel to shift gears in automatic
mode, the gearshift system switches into
the manual mode.
>If you do not shift with the shift paddles and
do not accelerate for a certain time, the sys-
tem switches into the automatic mode
again when the selector lever is in D.
>To shift up: pull one of the shift paddles.
>To shift down: press one of the shift pad-
dles.
Dynamic Driving Control
The Dynamic Driving Control makes it possible
for your BMW to react in an even more perfor-
mance-oriented manner at the push of a button:
>The speed range of the engine is optimally
utilized.
>Gearshifts are faster.
>The engine responds more spontaneously
to accelerator pedal movements.
>The steering will operate in an even sportier
mode.
>In the automatic mode, the 6th gear is not
engaged.
Page 139 of 288
Driving tips
137Reference
At a glance
Controls
Communications
Navigation
Entertainment
Mobility
Before driving into a car wash
Fold in the exterior mirrors, refer to page53,
otherwise they could be damaged due to the
width of the vehicle.
General information on the care and mainte-
nance of your BMW is contained in the Caring
for your vehicle brochure.
528xi, 535xi
Avoid car washes with guide rail heights
over 4 in/10 cm, otherwise there is danger
of damaging chassis components.<
Rear window wiper*
The rear window wiper can be damaged in car
washes. Take appropriate protective measures;
ask the car wash operator if necessary.
Automatic and sport automatic
transmission
Follow the instructions on page62 so that the
vehicle can roll.
Cargo loading
To avoid loading the tires beyond their
approved carrying capacity, never over-
load the vehicle. Overloading can lead to over-
heating and increases the rate at which damage
develops inside the tires. The ultimate result
can assume the form of a sudden blow-out.<
Make sure that no fluids leak in the cargo
bay; otherwise the vehicle could be dam-
aged.<
Determining loading limit
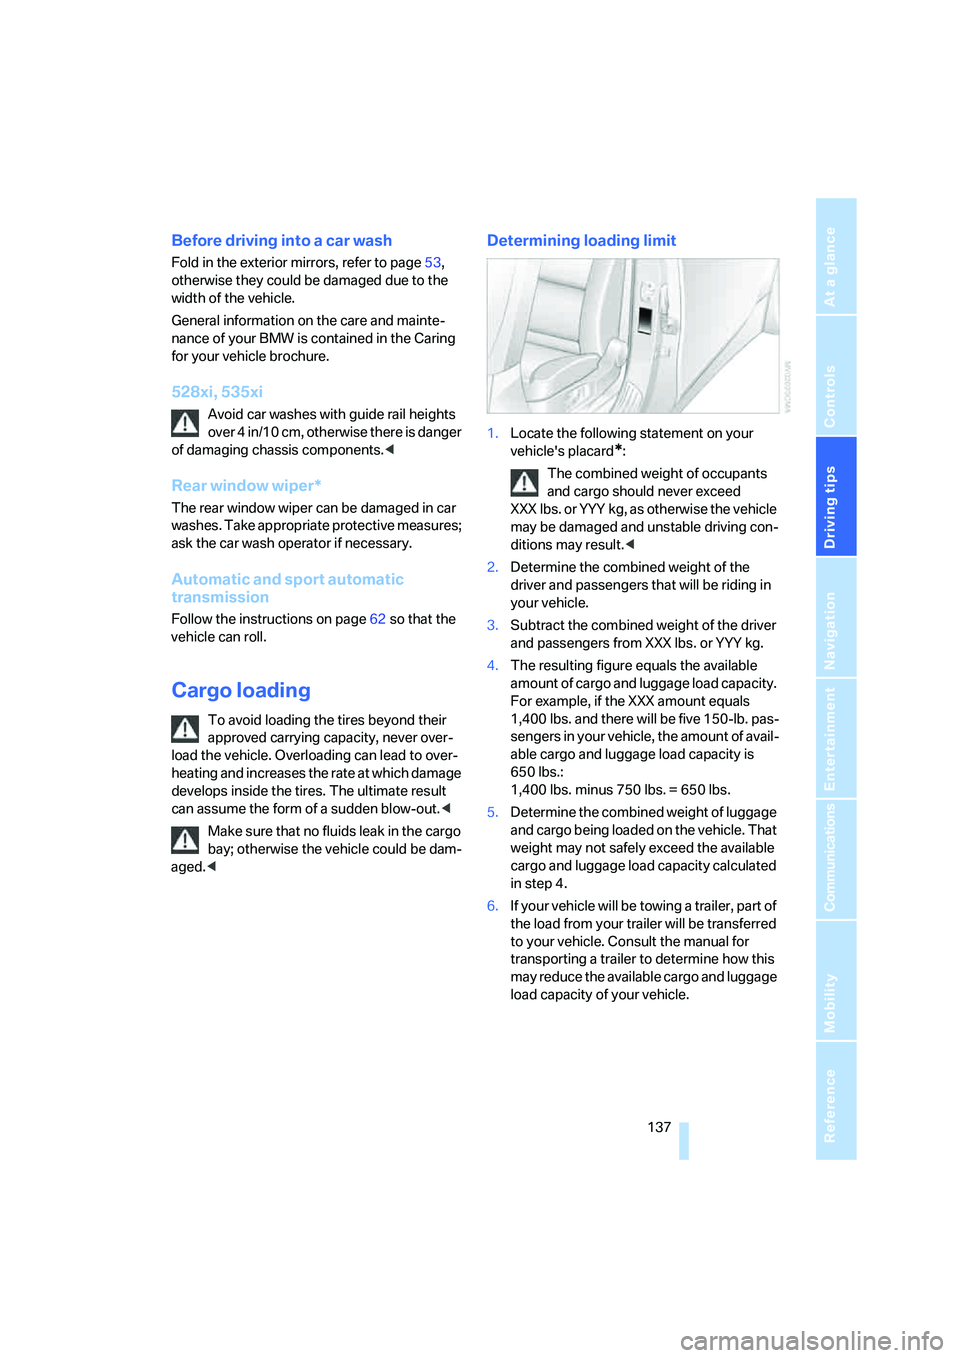
1.Locate the following statement on your
vehicle's placard
*:
The combined weight of occupants
and cargo should never exceed
XXX lbs. or YYY kg, as otherwise the vehicle
may be damaged and unstable driving con-
ditions may result.<
2.Determine the combined weight of the
driver and passengers that will be riding in
your vehicle.
3.Subtract the combined weight of the driver
and passengers from XXX lbs. or YYY kg.
4.The resulting figure equals the available
amount of cargo and luggage load capacity.
For example, if the XXX amount equals
1,400 lbs. and there will be five 150-lb. pas-
sengers in your vehicle, the amount of avail-
able cargo and luggage load capacity is
650 lbs.:
1,400 lbs. minus 750 lbs. = 650 lbs.
5.Determine the combined weight of luggage
and cargo being loaded on the vehicle. That
weight may not safely exceed the available
cargo and luggage load capacity calculated
in step 4.
6.If your vehicle will be towing a trailer, part of
the load from your trailer will be transferred
to your vehicle. Consult the manual for
transporting a trailer to determine how this
may reduce the available cargo and luggage
load capacity of your vehicle.
Page 140 of 288
Things to remember when driving
138
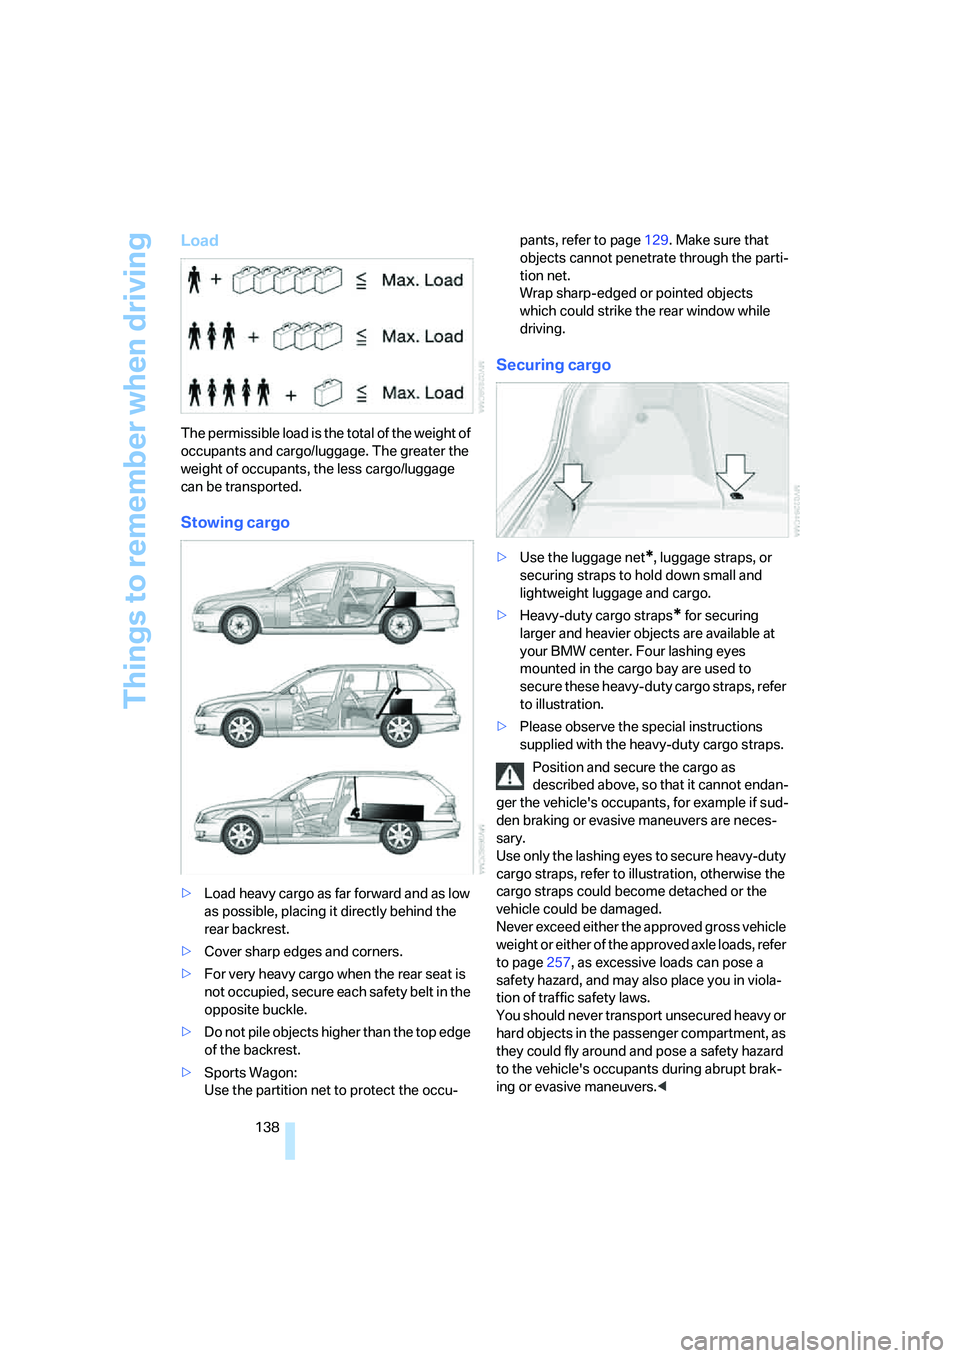
Load
The permissible load is the total of the weight of
occupants and cargo/luggage. The greater the
weight of occupants, the less cargo/luggage
can be transported.
Stowing cargo
>Load heavy cargo as far forward and as low
as possible, placing it directly behind the
rear backrest.
>Cover sharp edges and corners.
>For very heavy cargo when the rear seat is
not occupied, secure each safety belt in the
opposite buckle.
>Do not pile objects higher than the top edge
of the backrest.
>Sports Wagon:
Use the partition net to protect the occu-pants, refer to page129. Make sure that
objects cannot penetrate through the parti-
tion net.
Wrap sharp-edged or pointed objects
which could strike the rear window while
driving.
Securing cargo
>Use the luggage net*, luggage straps, or
securing straps to hold down small and
lightweight luggage and cargo.
>Heavy-duty cargo straps
* for securing
larger and heavier objects are available at
your BMW center. Four lashing eyes
mounted in the cargo bay are used to
secure these heavy-duty cargo straps, refer
to illustration.
>Please observe the special instructions
supplied with the heavy-duty cargo straps.
Position and secure the cargo as
described above, so that it cannot endan-
ger the vehicle's occupants, for example if sud-
den braking or evasive maneuvers are neces-
sary.
Use only the lashing eyes to secure heavy-duty
cargo straps, refer to illustration, otherwise the
cargo straps could become detached or the
vehicle could be damaged.
Never exceed either the approved gross vehicle
weight or either of the approved axle loads, refer
to page257, as excessive loads can pose a
safety hazard, and may also place you in viola-
tion of traffic safety laws.
You should never transport unsecured heavy or
hard objects in the passenger compartment, as
they could fly around and pose a safety hazard
to the vehicle's occupants during abrupt brak-
ing or evasive maneuvers.<
Page 246 of 288

Replacing components
244
Compact wheel*
1.Unscrew the wing nut 1.
2.Remove the washer 2 laterally.
3.Take out the tool mounts 3.
4.Remove the compact wheel.
Preparing wheel change
1.Observe the safety precautions above.
2.Prevent the vehicle from rolling:
Place the chock behind the front wheel on
the other side of the vehicle, or on inclines,
in front of this wheel. On steeply inclined
roads, always secure the vehicle against
rolling.
3.Loosen the lug bolts a half turn.
Jacking up vehicle
1.Position the vehicle jack at the jacking point
closest to the wheel so that the entire sur-
face of the jack base rests on the ground
perpendicularly beneath the jacking point.
The vehicle jack is designed for
changing wheels only. Do not attempt
to raise another vehicle model with it or to
raise any load of any kind. To do so could
cause accidents and personal injury.<
2.Guide the jack head into the rectangular
recess of the jacking point when cranking
up, refer to illustration detail.3.Jack the vehicle up until the wheel you are
changing is raised from the ground.
Mounting a wheel
1.Unscrew the lug bolts and remove the
wheel.
2.Remove accumulations of mud or dirt from
the mounting surfaces of the wheel and
hub. Also clean the lug bolts.
3.Position the new wheel or compact wheel.
Secure the wheel by screwing at least two
lug bolts into opposite bolt holes.
When you mount wheels other than Genu-
ine BMW light-alloy wheels, different lug
bolts may also be required.
4.Screw in the remaining lug bolts. Tighten all
the bolts securely in a diagonal pattern.
5.Lower the vehicle and remove the jack from
beneath the vehicle.
After mounting
1.Tighten the lug bolts in a diagonal pattern.
To ensure safety, always have the
lug bolts checked with a calibrated
torque wrench as soon as possible to
ensure that they are tightened to the speci-
fied torque. Otherwise, incorrectly tight-
ened lug bolts are a hidden safety risk. The
tightening torque is 88.5 lb ft/120 Nm.<
2.When stowing the wheel and tools in the
vehicle, execute these steps in the reverse
order.
3.Check and correct the tire inflation pressure
at the earliest opportunity.
Page 251 of 288
Mobility
249Reference
At a glance
Controls
Driving tips
Communications
Navigation
Entertainment
Preparation
1.Check whether the battery of the other
vehicle has a voltage of 12 Volts and
approximately the same capacitance in Ah.
This information can be found on the bat-
tery.
2.Switch off the engine of the assisting vehi-
cle.
3.Switch off any electrical systems and com-
ponents in both vehicles.
There must not be any contact between
the bodies of the two vehicles, otherwise
there is a danger of shorting.<
Connecting jumper cables
To avoid personal injury from sparks,
follow this sequence when connecting
jumper cables.<
In your BMW, the so-called jump-starting termi-
nal in the engine compartment serves as a pos-
itive terminal for the battery, also refer to engine
compartment overview on page231. The cover
cap is marked with a +.
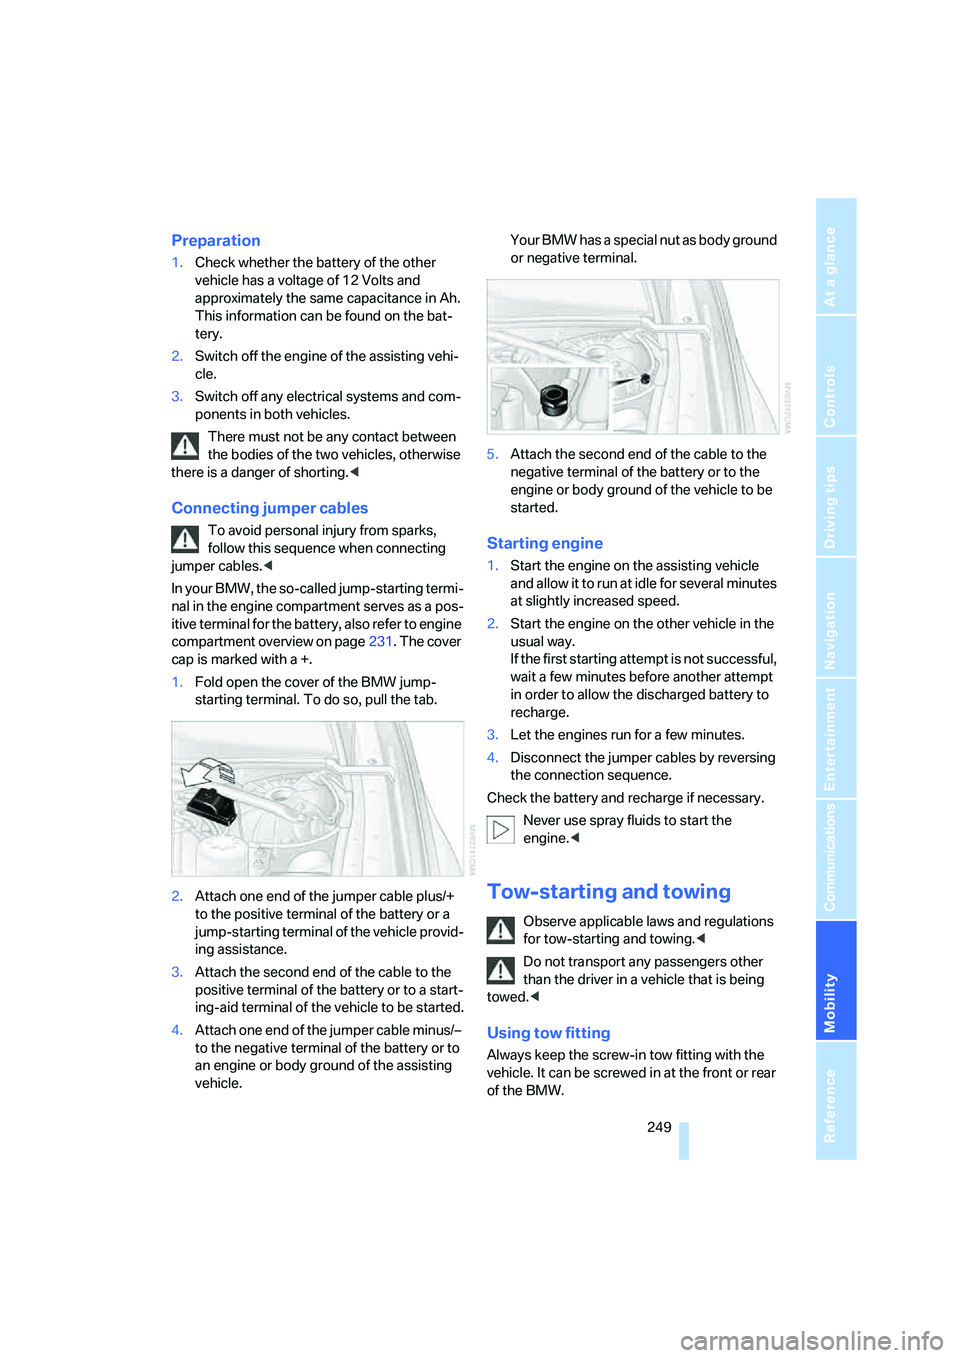
1.Fold open the cover of the BMW jump-
starting terminal. To do so, pull the tab.
2.Attach one end of the jumper cable plus/+
to the positive terminal of the battery or a
jump-starting terminal of the vehicle provid-
ing assistance.
3.Attach the second end of the cable to the
positive terminal of the battery or to a start-
ing-aid terminal of the vehicle to be started.
4.Attach one end of the jumper cable minus/–
to the negative terminal of the battery or to
an engine or body ground of the assisting
vehicle.Your BMW has a special nut as body ground
or negative terminal.
5.Attach the second end of the cable to the
negative terminal of the battery or to the
engine or body ground of the vehicle to be
started.Starting engine
1.Start the engine on the assisting vehicle
and allow it to run at idle for several minutes
at slightly increased speed.
2.Start the engine on the other vehicle in the
usual way.
If the first starting attempt is not successful,
wait a few minutes before another attempt
in order to allow the discharged battery to
recharge.
3.Let the engines run for a few minutes.
4.Disconnect the jumper cables by reversing
the connection sequence.
Check the battery and recharge if necessary.
Never use spray fluids to start the
engine.<
Tow-starting and towing
Observe applicable laws and regulations
for tow-starting and towing.<
Do not transport any passengers other
than the driver in a vehicle that is being
towed.<
Using tow fitting
Always keep the screw-in tow fitting with the
vehicle. It can be screwed in at the front or rear
of the BMW.
Page 252 of 288
Giving and receiving assistance
250 Sedan:
It is located in the toolkit in the luggage com-
partment lid, refer to page237.
Sports Wagon:
It is located in the toolkit behind the left side
panel in the cargo bay, refer to page237.
Use only the tow fitting provided with the
vehicle and screw it all the way in. Use the
tow fitting for towing only on roads. Avoid lateral
loading of the tow fitting, e.g. do not lift the vehi-
cle by the tow fitting. Otherwise damage to the
tow fitting and the vehicle can occur.<
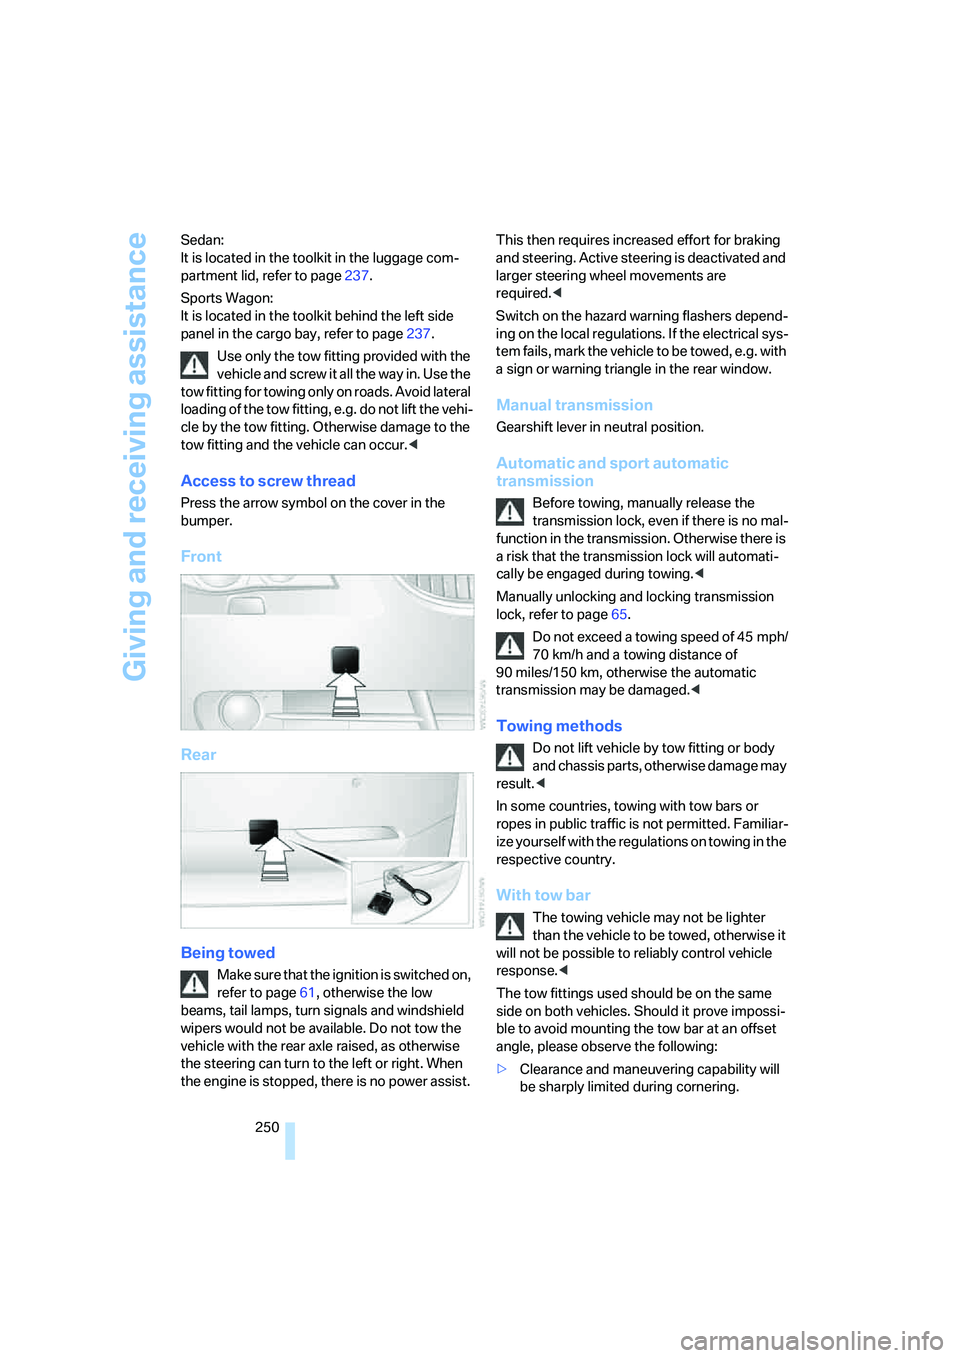
Access to screw thread
Press the arrow symbol on the cover in the
bumper.
Front
Rear
Being towed
Make sure that the ignition is switched on,
refer to page61, otherwise the low
beams, tail lamps, turn signals and windshield
wipers would not be available. Do not tow the
vehicle with the rear axle raised, as otherwise
the steering can turn to the left or right. When
the engine is stopped, there is no power assist. This then requires increased effort for braking
and steering. Active steering is deactivated and
larger steering wheel movements are
required.<
Switch on the hazard warning flashers depend-
ing on the local regulations. If the electrical sys-
tem fails, mark the vehicle to be towed, e.g. with
a sign or warning triangle in the rear window.
Manual transmission
Gearshift lever in neutral position.
Automatic and sport automatic
transmission
Before towing, manually release the
transmission lock, even if there is no mal-
function in the transmission. Otherwise there is
a risk that the transmission lock will automati-
cally be engaged during towing.<
Manually unlocking and locking transmission
lock, refer to page65.
Do not exceed a towing speed of 45 mph/
70 km/h and a towing distance of
90 miles/150 km, otherwise the automatic
transmission may be damaged.<
Towing methods
Do not lift vehicle by tow fitting or body
and chassis parts, otherwise damage may
result.<
In some countries, towing with tow bars or
ropes in public traffic is not permitted. Familiar-
ize yourself with the regulations on towing in the
respective country.
With tow bar
The towing vehicle may not be lighter
than the vehicle to be towed, otherwise it
will not be possible to reliably control vehicle
response.<
The tow fittings used should be on the same
side on both vehicles. Should it prove impossi-
ble to avoid mounting the tow bar at an offset
angle, please observe the following:
>Clearance and maneuvering capability will
be sharply limited during cornering.