2008 AUDI S5 park assist
[x] Cancel search: park assistPage 17 of 294
Downloaded from www.Manualslib.com manuals search engine Instruments and warning/indicator lamps15
Controls
Safety
Driving tips
General maintenance
Self-help
Technical data
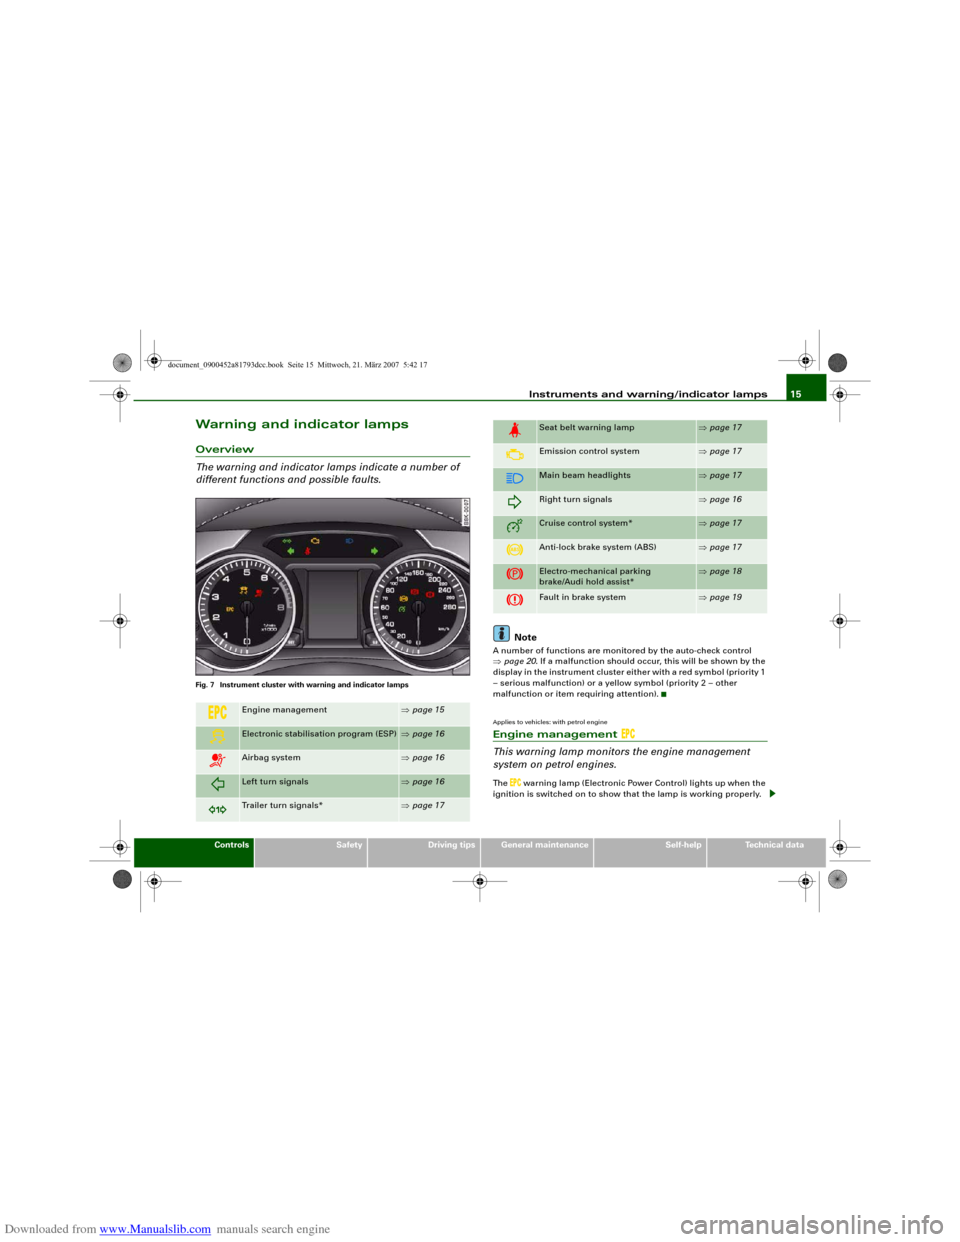
Warning and indicator lampsOverview
The warning and indicator lamps indicate a number of
different functions and possible faults.Fig. 7 Instrument cluster with warning and indicator lamps
Note
A number of functions are monitored by the auto-check control
⇒page 20. If a malfunction should occur, this will be shown by the
display in the instrument cluster either with a red symbol (priority 1
– serious malfunction) or a yellow symbol (priority 2 – other
malfunction or item requiring attention).Applies to vehicles: with petrol engineEngine management
This warning lamp monitors the engine management
system on petrol engines.The
warning lamp (Electronic Power Control) lights up when the
ignition is switched on to show that the lamp is working properly.
Engine management
⇒page 15
Electronic stabilisation program (ESP)
⇒page 16
Airbag system
⇒page 16
Left turn signals
⇒page 16
Trailer turn signals*
⇒page 17
Seat belt warning lamp
⇒page 17
Emission control system
⇒page 17
Main beam headlights
⇒page 17
Right turn signals
⇒page 16
Cruise control system*
⇒page 17
Anti-lock brake system (ABS)
⇒page 17
Electro-mechanical parking
brake/Audi hold assist*
⇒page 18
Fault in brake system
⇒page 19
document_0900452a81793dcc.book Seite 15 Mittwoch, 21. März 2007 5:42 17
Page 20 of 294
Downloaded from www.Manualslib.com manuals search engine Instruments and warning/indicator lamps 18Fault in the main brake system
If the ABS warning lamp
lights up together with the brake
warning lamp
⇒page 31, this indicates a fault in the ABS func-
tion, and possibly a malfunction in the main brake system as well
⇒.
If there is a malfunction in the brake system the symbol
will light
up in the instrument cluster. Please refer to ⇒page 31.
Fault on the electronic differential lock (EDL)
The EDL works in conjunction with the ABS. If a malfunction should
occur in the EDL, this is indicated by the ABS warning lamp .
Please take the vehicle to a qualified workshop as soon as possible.
For further information on the EDL ⇒page 189.
WARNING
•
Before opening the bonnet and checking the brake fluid level,
observe the warning information on ⇒page 221, “Working on
components in the engine compartment”.
•
If the brake warning lamp
should light up together with the
ABS warning lamp
, stop the vehicle immediately and check the
brake fluid level in the reservoir. If the fluid level has dropped
below the "MIN" mark you must not drive on - otherwise there may
be an increased accident risk. You should obtain professional
assistance.
•
If the brake fluid level is OK, the fault in the brake system may
have been caused by a failure of the ABS control function. As a
result the rear wheels can lock relatively easily when braking. This
could cause the tail of the vehicle to skid sideways. Drive carefully
to the nearest qualified workshop and have the fault rectified.
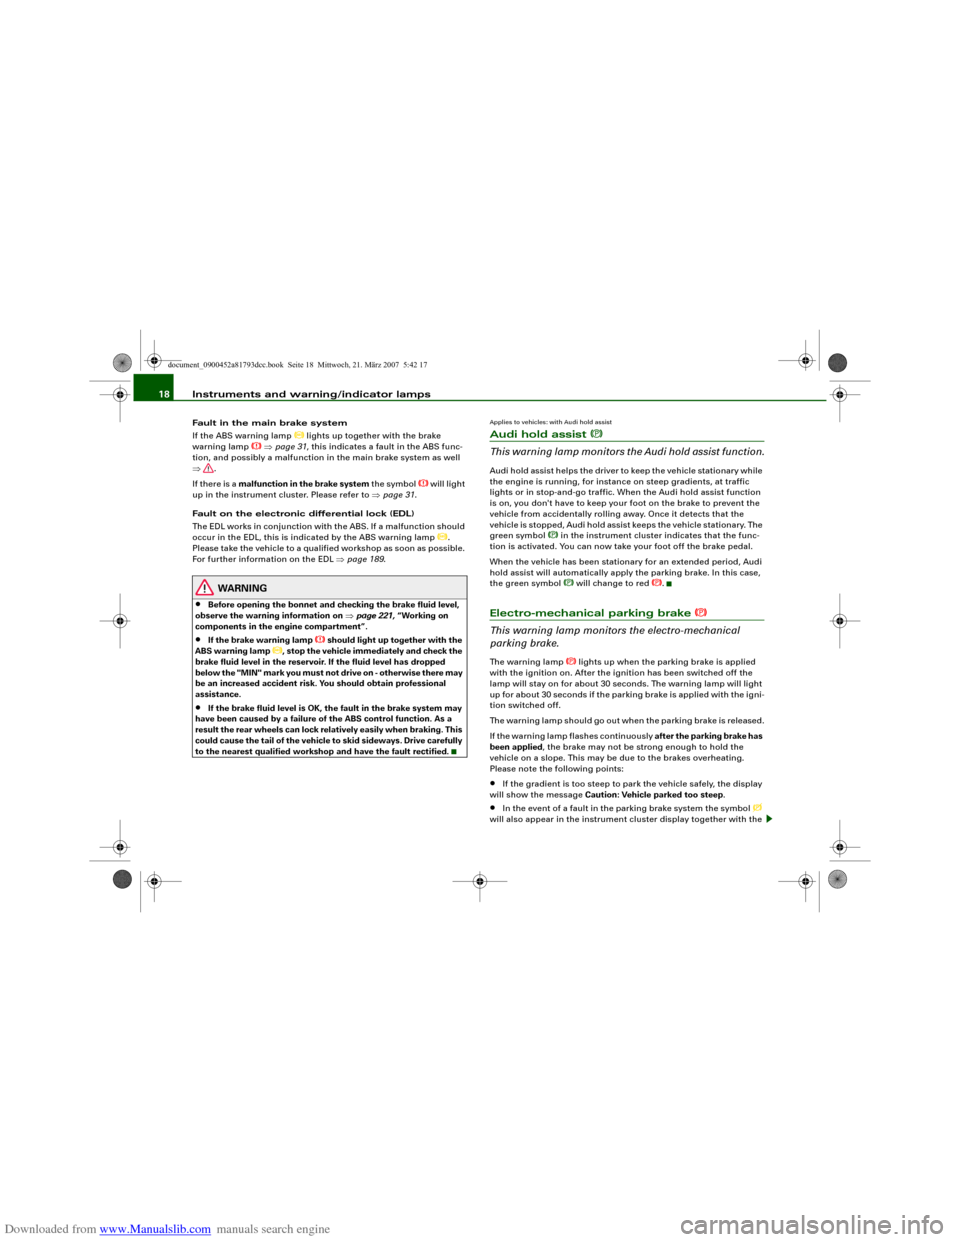
Applies to vehicles: with Audi hold assistAudi hold assist
This warning lamp monitors the Audi hold assist function.Audi hold assist helps the driver to keep the vehicle stationary while
the engine is running, for instance on steep gradients, at traffic
lights or in stop-and-go traffic. When the Audi hold assist function
is on, you don't have to keep your foot on the brake to prevent the
vehicle from accidentally rolling away. Once it detects that the
vehicle is stopped, Audi hold assist keeps the vehicle stationary. The
green symbol
in the instrument cluster indicates that the func-
tion is activated. You can now take your foot off the brake pedal.
When the vehicle has been stationary for an extended period, Audi
hold assist will automatically apply the parking brake. In this case,
the green symbol will change to red
.
Electro-mechanical parking brake
This warning lamp monitors the electro-mechanical
parking brake.The warning lamp
lights up when the parking brake is applied
with the ignition on. After the ignition has been switched off the
lamp will stay on for about 30 seconds. The warning lamp will light
up for about 30 seconds if the parking brake is applied with the igni-
tion switched off.
The warning lamp should go out when the parking brake is released.
If the warning lamp flashes continuously after the parking brake has
been applied, the brake may not be strong enough to hold the
vehicle on a slope. This may be due to the brakes overheating.
Please note the following points:
•
If the gradient is too steep to park the vehicle safely, the display
will show the message Caution: Vehicle parked too steep.
•
In the event of a fault in the parking brake system the symbol
will also appear in the instrument cluster display together with the
document_0900452a81793dcc.book Seite 18 Mittwoch, 21. März 2007 5:42 17
Page 21 of 294
Downloaded from www.Manualslib.com manuals search engine Instruments and warning/indicator lamps19
Controls
Safety
Driving tips
General maintenance
Self-help
Technical data message Parki ng b rake! You should have the fault corrected by a
qualified workshop without delay.
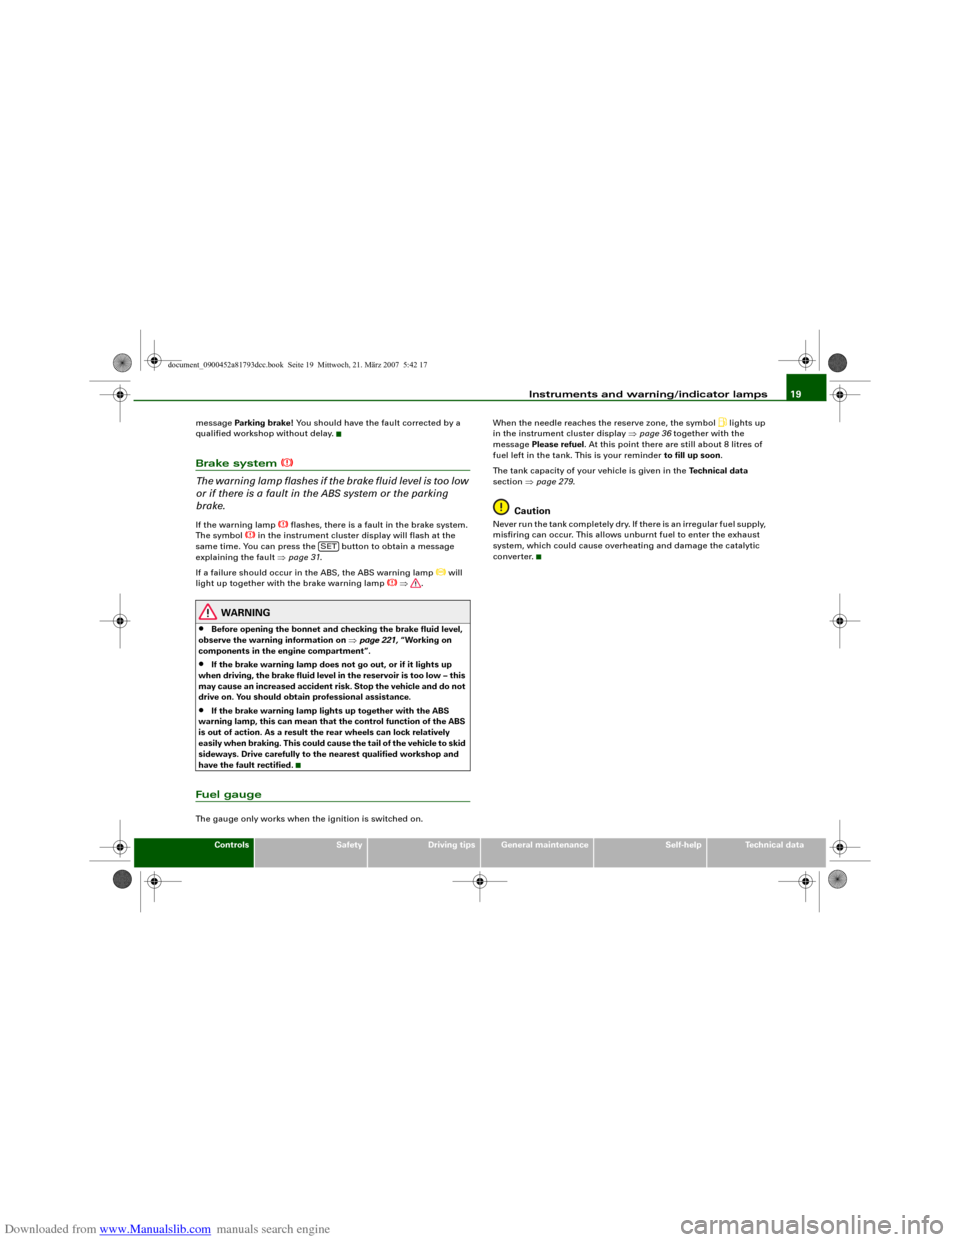
Brake system
The warning lamp flashes if the brake fluid level is too low
or if there is a fault in the ABS system or the parking
brake.If the warning lamp
flashes, there is a fault in the brake system.
The symbol
in the instrument cluster display will flash at the
same time. You can press the button to obtain a message
explaining the fault ⇒page 31.
If a failure should occur in the ABS, the ABS warning lamp
will
light up together with the brake warning lamp
⇒.
WARNING
•
Before opening the bonnet and checking the brake fluid level,
observe the warning information on ⇒page 221, “Working on
components in the engine compartment”.
•
If the brake warning lamp does not go out, or if it lights up
when driving, the brake fluid level in the reservoir is too low – this
may cause an increased accident risk. Stop the vehicle and do not
drive on. You should obtain professional assistance.
•
If the brake warning lamp lights up together with the ABS
warning lamp, this can mean that the control function of the ABS
is out of action. As a result the rear wheels can lock relatively
easily when braking. This could cause the tail of the vehicle to skid
sideways. Drive carefully to the nearest qualified workshop and
have the fault rectified.
Fuel gaugeThe gauge only works when the ignition is switched on.When the needle reaches the reserve zone, the symbol
lights up
in the instrument cluster display ⇒page 36 together with the
message Please refuel. At this point there are still about 8 litres of
fuel left in the tank. This is your reminder to fill up soon.
The tank capacity of your vehicle is given in the Technical data
section ⇒page 279.
Caution
Never run the tank completely dry. If there is an irregular fuel supply,
misfiring can occur. This allows unburnt fuel to enter the exhaust
system, which could cause overheating and damage the catalytic
converter.
SET
document_0900452a81793dcc.book Seite 19 Mittwoch, 21. März 2007 5:42 17
Page 33 of 294
Downloaded from www.Manualslib.com manuals search engine Driver information system31
Controls
Safety
Driving tips
General maintenance
Self-help
Technical data
– Switch off the engine.
– Check the function displayed. Obtain professional assist-
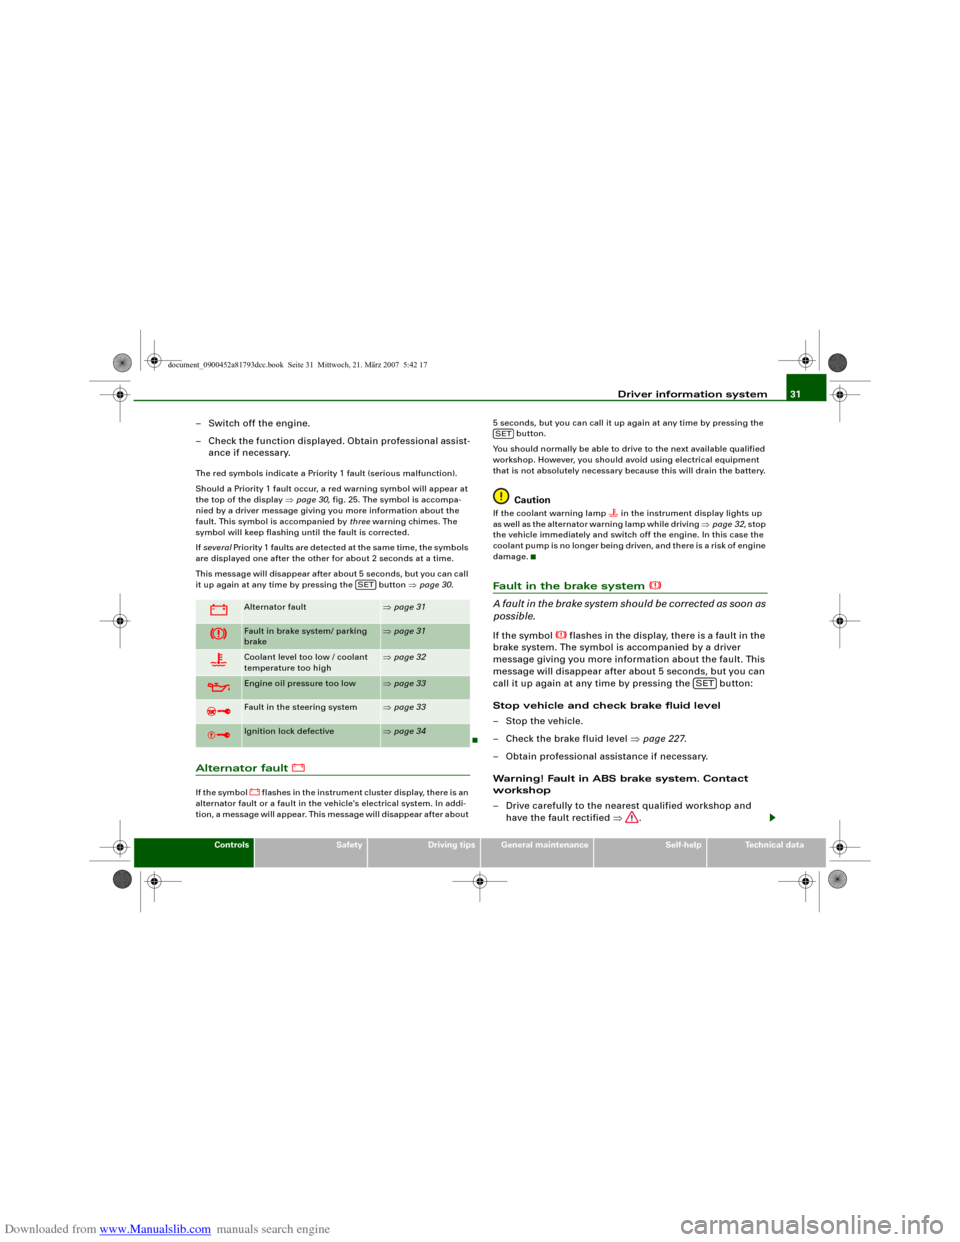
ance if necessary.The red symbols indicate a Priority 1 fault (serious malfunction).
Should a Priority 1 fault occur, a red warning symbol will appear at
the top of the display ⇒page 30, fig. 25. The symbol is accompa-
nied by a driver message giving you more information about the
fault. This symbol is accompanied by three warning chimes. The
symbol will keep flashing until the fault is corrected.
If several Priority 1 faults are detected at the same time, the symbols
are displayed one after the other for about 2 seconds at a time.
This message will disappear after about 5 seconds, but you can call
it up again at any time by pressing the button ⇒page 30.Alternator fault
If the symbol
flashes in the instrument cluster display, there is an
alternator fault or a fault in the vehicle's electrical system. In addi-
tion, a message will appear. This message will disappear after about 5 seconds, but you can call it up again at any time by pressing the
button.
You should normally be able to drive to the next available qualified
workshop. However, you should avoid using electrical equipment
that is not absolutely necessary because this will drain the battery.
Caution
If the coolant warning lamp
in the instrument display lights up
as well as the alternator warning lamp while driving ⇒page 32, stop
the vehicle immediately and switch off the engine. In this case the
coolant pump is no longer being driven, and there is a risk of engine
damage.
Fault in the brake system
A fault in the brake system should be corrected as soon as
possible.If the symbol
flashes in the display, there is a fault in the
brake system. The symbol is accompanied by a driver
message giving you more information about the fault. This
message will disappear after about 5 seconds, but you can
call it up again at any time by pressing the button:
Stop vehicle and check brake fluid level
– Stop the vehicle.
– Check the brake fluid level ⇒page 227.
– Obtain professional assistance if necessary.
Warning! Fault in ABS brake system. Contact
workshop
– Drive carefully to the nearest qualified workshop and
have the fault rectified ⇒.
Alternator fault
⇒page 31
Fault in brake system/ parking
brake
⇒page 31
Coolant level too low / coolant
temperature too high
⇒page 32
Engine oil pressure too low
⇒page 33
Fault in the steering system
⇒page 33
Ignition lock defective
⇒page 34
SET
SET
SET
document_0900452a81793dcc.book Seite 31 Mittwoch, 21. März 2007 5:42 17
Page 34 of 294
Downloaded from www.Manualslib.com manuals search engine Driver information system 32
Parking brake ! Please contact workshop
– If the symbol appears after you switch on the ignition
when the vehicle is stationary, please check whether you
can release the parking brake. If this is possible, you
should drive without delay to the nearest qualified work-
shop and have the fault rectified. If the parking brake
cannot be released you should obtain professional
assistance.
– If this symbol should appear while driving, there may be
a malfunction in the drive-away assist or the emergency
brake functions. You may not be able to apply the parking
brake. It is also possible that you cannot release the
parking brake after it has been applied. Drive the vehicle
to a qualified workshop and have the fault repaired.If the ABS fails, the ABS warning lamp
will light up together with
the brake warning symbol
⇒.
WARNING
•
Before opening the bonnet and checking the brake fluid level,
observe the warning information on ⇒page 221, “Working on
components in the engine compartment”.
•
If the brake fluid level in the reservoir is too low, this could
result in an accident. Do not drive on. You should obtain profes-
sional assistance.
•
If the brake warning lamp lights up together with the ABS
warning lamp, this can mean that the control function of the ABS
is out of action. As a result the rear wheels can lock relatively
easily when braking. This could cause the tail of the vehicle to skid
sideways. Drive carefully to the nearest qualified workshop and
have the fault rectified.
Note
The warning lamp
in the instrument cluster will start flashing as
well if there is a fault in the brake system.
Fault in the cooling system
Faults in the cooling system must be rectified immedi-
ately.If the
symbol flashes in the display, this means that
either the coolant temperature is too high or the coolant
level is too low. The symbol is accompanied by a driver
message giving you more information about the fault. This
message will disappear after about 5 seconds, but you can
call it up again at any time by pressing the button:
Switch off engine, check coolant level
–Stop the vehicle.
– Switch off the engine.
– Check the coolant level ⇒page 225.
– Add more coolant if necessary ⇒page 226.
– Wait for the symbol to go out before driving on.
– Obtain professional assistance if necessary.
If the coolant level is correct, the overheating may be caused by a
malfunction of the radiator fan.
If the alternator warning lamp lights up as well ⇒page 31, it is
possible that the drive belt has broken.
SET
document_0900452a81793dcc.book Seite 32 Mittwoch, 21. März 2007 5:42 17
Page 47 of 294
Downloaded from www.Manualslib.com manuals search engine Doors and windows45
Controls
Safety
Driving tips
General maintenance
Self-help
Technical data door is unlocked. The remote control key has to be within a range of
about 1.5 metres of the relevant door or the boot lid. It does not
matter where you carry the key, for instance whether it is in your
jacket pocket or in a briefcase.
The unlocking function may be affected if the sensor area on the
door handle is touched while the vehicle is being unlocked.
The locking function may be affected if you grasp the door handle
while the vehicle is being locked.
Once the doors have been locked, they cannot be opened again
immediately. This will enable you to check that the doors are prop-
erly closed.
The system will either unlock both the doors or one door only,
depending on the settings you have chosen on the sound system or
MMI* ⇒page 43.
WARNING
Do not leave anyone (especially children) in the car if it is locked
from the outside and the deadlock mechanism is activated: the
doors and windows cannot then be opened from the inside.
Locked doors could delay assistance in an emergency, potentially
putting lives at risk.
Note
Please note the following points if the vehicle is left parked for long
periods:•
To save electrical power, the proximity sensors are switched off
after a few days. You will then need to pull the door handle once to
unlock the vehicle, and a second time to open it.
•
To prevent the battery from becoming discharged and thus
maintain the vehicle's starting ability for as long as possible, the
power management system will gradually switch off convenience
functions that are not required. In this case you may not be able to
unlock the vehicle with this convenience function.
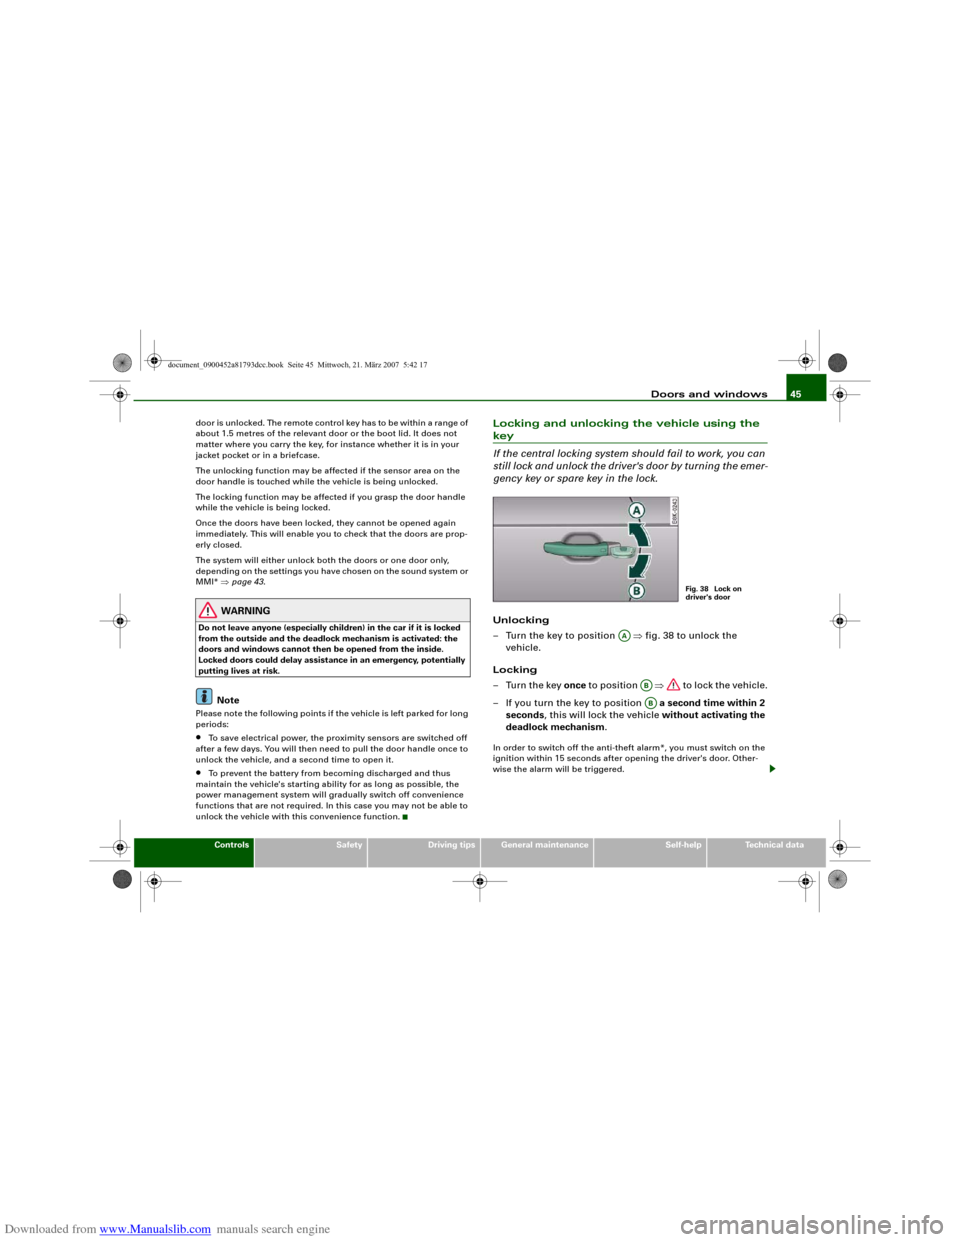
Locking and unlocking the vehicle using the key
If the central locking system should fail to work, you can
still lock and unlock the driver's door by turning the emer-
gency key or spare key in the lock.Unlocking
– Turn the key to position ⇒fig. 38 to unlock the
vehicle.
Locking
–Turn the key once to position ⇒ to lock the vehicle.
– If you turn the key to position a second time within 2
seconds, this will lock the vehicle without activating the
deadlock mechanism.In order to switch off the anti-theft alarm*, you must switch on the
ignition within 15 seconds after opening the driver's door. Other-
wise the alarm will be triggered.
Fig. 38 Lock on
driver's door
AA
ABAB
document_0900452a81793dcc.book Seite 45 Mittwoch, 21. März 2007 5:42 17
Page 68 of 294
Downloaded from www.Manualslib.com manuals search engine Lights and vision 66•
when the interior lighting is switched on
•
when reverse gear is engaged
WARNING
Electrolyte fluid can leak from a broken mirror. This fluid can cause
irritation to the skin, eyes, and respiratory organs. Wash thor-
oughly with clean water should you come into contact with this
fluid. Seek medical assistance if needed.
Caution
Electrolyte fluid leaking from a broken mirror can cause damage to
plastic surfaces. Use a sponge or similar to remove the fluid as soon
as possible.
Note
•
If you switch off the anti-dazzle function for the interior mirror,
this will also deactivate the anti-dazzle function for the exterior
mirrors.
•
The automatic anti-dazzle function will only work properly if the
sun blind* for the rear window is not in use and there are no other
objects preventing light from reaching the interior mirror.
•
Do not attach any stickers to the windscreen in front of the
sensors, as these could lead to malfunctioning of the mirror.
Exterior mirrors
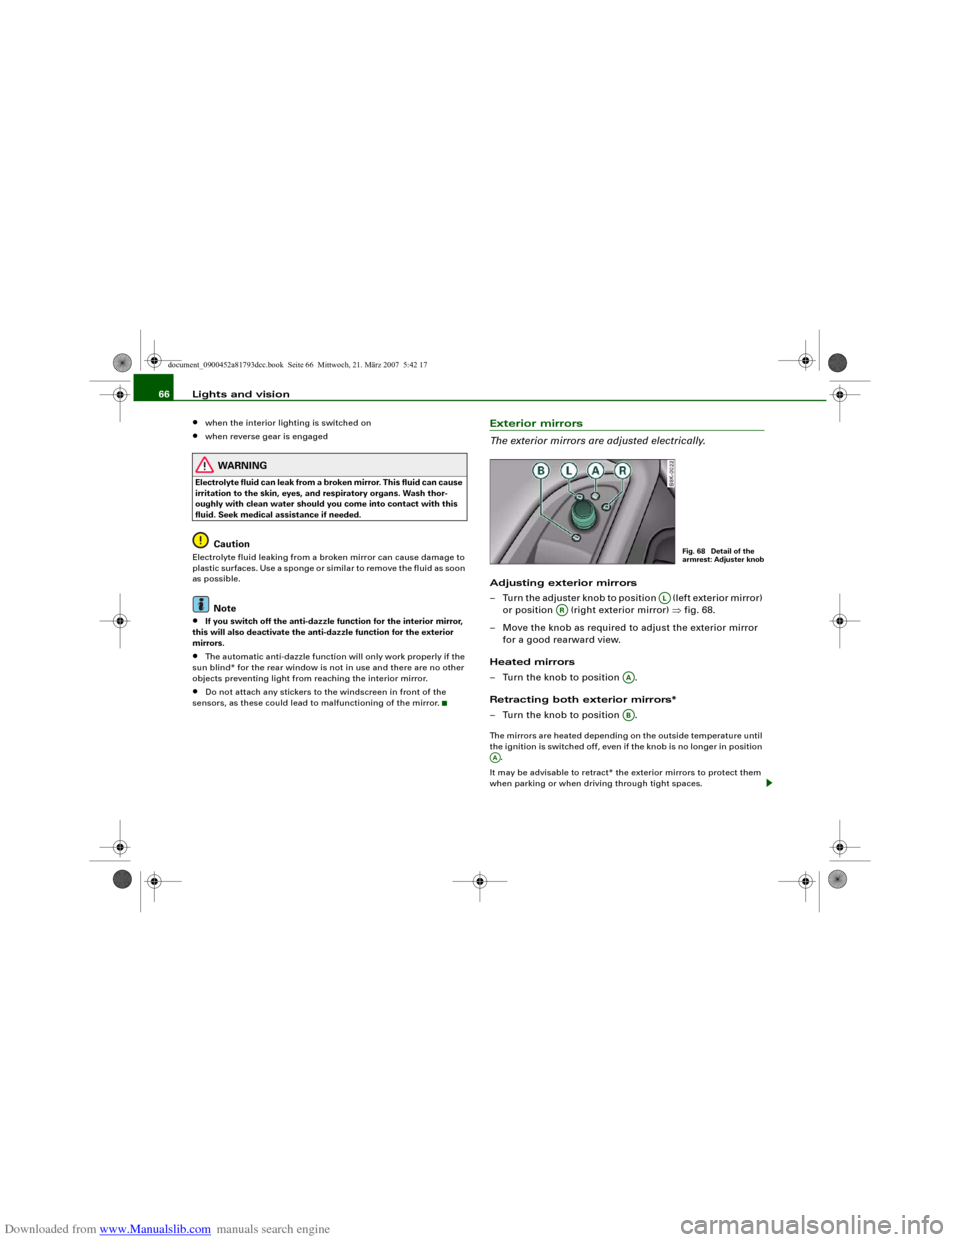
The exterior mirrors are adjusted electrically.Adjusting exterior mirrors
– Turn the adjuster knob to position (left exterior mirror)
or position (right exterior mirror) ⇒fig. 68.
– Move the knob as required to adjust the exterior mirror
for a good rearward view.
Heated mirrors
– Turn the knob to position .
Retracting both exterior mirrors*
– Turn the knob to position .The mirrors are heated depending on the outside temperature until
the ignition is switched off, even if the knob is no longer in position
.
It may be advisable to retract* the exterior mirrors to protect them
when parking or when driving through tight spaces.
Fig. 68 Detail of the
armrest: Adjuster knob
AL
AR
AAAB
AA
document_0900452a81793dcc.book Seite 66 Mittwoch, 21. März 2007 5:42 17
Page 69 of 294
Downloaded from www.Manualslib.com manuals search engine Lights and vision67
Controls
Safety
Driving tips
General maintenance
Self-help
Technical data Memory for exterior mirrors*
On vehicles with memory function for the driver's seat, the setting
of the exterior mirrors is automatically stored together with the seat
position ⇒page 72.
Tilting function for exterior mirror on passenger side*
(only if equipped with memory for exterior mirrors)
When reverse gear is engaged, the mirror surface tilts slightly
downwards, provided the mirror control is switched to the exterior
mirror on the passenger's side (knob in position ⇒page 66,
fig. 68). This provides a better view of the kerb when parking.
The mirror returns to its original position when reverse gear is
disengaged and the vehicle is driven forwards at a speed above
about 15 km/h. The mirror will also return to its original position
when the adjuster knob is turned to the position for the driver's
exterior mirror or when the ignition is switched off.
If the position of the mirror surface is changed while the mirror is
tilted, this new position is automatically stored and assigned to the
remote control key when you disengage reverse gear.
Caution
•
Convex or wide-angle* exterior mirrors give a larger field of
vision. However, they also make objects appear further away than
they actually are. For this reason, you should not rely on these
mirrors for judging the distance of vehicles behind.
•
If one of the mirror housings is knocked out of position (e.g.
when parking), the mirrors must first be fully retracted with the elec-
tric control. Do not readjust the mirror housing by hand, as this will
interfere with the mirror adjuster function.Note
If the electrical adjustment should ever fail to operate, the mirrors
can be adjusted by hand by lightly pressing the edge of the mirror
glass.
Applies to vehicles: with automatic anti-dazzle adjustment for exterior mirrorsAutomatic anti-dazzle adjustment for exterior mirrorsThe exterior mirrors darken together with the automatically
adjusting interior mirror. When the ignition is on, the mirrors will
darken automatically according to the amount of light received (for
example from the headlights of a vehicle behind).
When the interior lights are switched on, or when reverse gear is
engaged, the mirrors revert to their original (i.e. not darkened)
condition.
WARNING
Electrolyte fluid can leak from a broken mirror. This fluid can cause
irritation to the skin, eyes, and respiratory organs. Wash thor-
oughly with clean water should you come into contact with this
fluid. Seek medical assistance if needed.
Caution
Electrolyte fluid leaking from a broken mirror can cause damage to
the paintwork or plastic surfaces. Use a sponge or similar to remove
the fluid as soon as possible.
Note
•
If you switch off the anti-dazzle function for the interior mirror,
this will also deactivate the anti-dazzle function for the exterior
mirrors.
•
The automatic anti-dazzle function will only work properly if the
sun blind* for the rear window is not in use and there are no other
objects preventing light from reaching the interior mirror.
AR
AL
document_0900452a81793dcc.book Seite 67 Mittwoch, 21. März 2007 5:42 17