2008 AUDI S5 park assist
[x] Cancel search: park assistPage 122 of 294
Downloaded from www.Manualslib.com manuals search engine Driving 120
Note•
The parking brake can be applied at any time - even when the
ignition is switched off. However, the ignition must be switched on
before the parking brake can be released.
•
Any slight noise which may be heard when the parking brake is
applied or released is quite normal and no cause for concern.
•
The parking brake runs an automatic test cycle at regular inter-
vals when the vehicle is parked. This may also cause a slight noise,
which is normal.
Parking
Please note the following points to ensure there is no risk
of the car rolling away accidentally after it is parked.Parking t he c ar
– Use the foot brake to stop the vehicle.
– Pull the switch to apply the parking brake.
– Automatic gearbox: Move the selector lever to P.
– Switch off the engine ⇒.
– Manual gearbox: Engage the first gear.
When parking on slopes
– Turn the steering wheel so that the vehicle would roll into
the kerb if it did start to move accidentally.
WARNING
•
Always take the key with you when leaving the vehicle – even
if you only intend to be gone for a short time. This is especially
important if children are left in the car. They might otherwise be
able to start the engine, release the parking brake or use power-operated equipment such as the electric windows - this could lead
to injuries.
•
Do not leave anyone (especially children) in the vehicle when it
is locked. Locked doors could delay assistance in an emergency,
potentially putting lives at risk.
Driving away from a standstill
The parking brake auto release function releases the
parking brake automatically when you wish to start
moving.Applying the parking brake when stopping
– Pull the switch to apply the parking brake.
Releasing the parking brake when driving away
– Drive off in the normal way: the parking brake will be
released automatically and the vehicle will start moving.On vehicles with automatic gearbox, you can apply the parking
brake when stopping at traffic lights, etc. Then you do not have to
hold the car with the footbrake, as the parking brake will stop it
creeping forward while a gear is engaged in the automatic transmis-
sion. When you drive off in the normal way, the parking brake will be
released automatically and the vehicle will start moving.
Driving away on a slope
When driving away on a gradient, the parking brake auto release
function prevents the vehicle from rolling back unintentionally. The
braking force of the parking brake is only released when there is
enough power at the wheels to make the vehicle move in the desired
direction.
WARNING (continued)
document_0900452a81793dcc.book Seite 120 Mittwoch, 21. März 2007 5:42 17
Page 124 of 294
Downloaded from www.Manualslib.com manuals search engine Driving 122Press brake pedal to release parking brake
This message may appear when you press the switch to release the
parking brake. The parking brake can only be released, if you
depress the brake pedal and simultaneously press the switch or if
you use the parking brake auto release function ⇒page 120. Parking brake malfunction !
This message will appear together with the yellow symbol
if a
malfunction should occur in the parking brake.
Fault in parking brake auto release
This driver message will appear in the event of a malfunction of the
parking brake auto release. The automatic release of the parking
brake when moving off from a standstill is not functioning correctly.
The parking brake must be released manually by pressing the
switch. Have the fault rectified by a qualified workshop.
Audi hold assist
Audi hold assist helps the driver when the vehicle is
stationary and automatically prevents the vehicle from
rolling away when driving off.
When the Audi hold assist function is on, the vehicle is auto-
matically prevented from rolling away and you no longer
have to keep your foot on the brake pedal.
Conditions for switching on Audi hold assist
– The driver's door must be closed.
– The driver's seat belt must be buckled.
– The engine must be running.
Switching on Audi hold assist
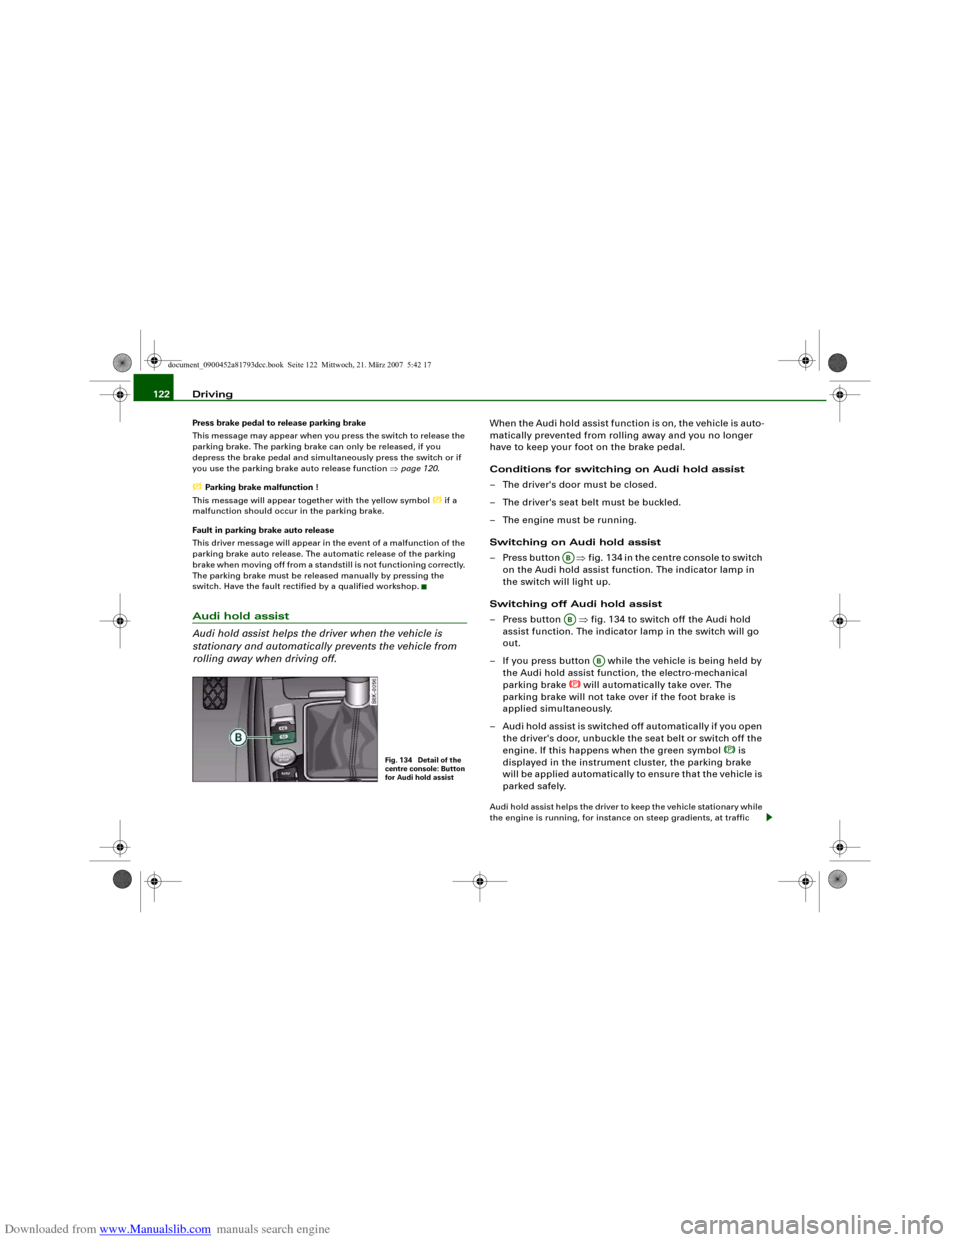
– Press button ⇒fig. 134 in the centre console to switch
on the Audi hold assist function. The indicator lamp in
the switch will light up.
Switching off Audi hold assist
– Press button ⇒fig. 134 to switch off the Audi hold
assist function. The indicator lamp in the switch will go
out.
– If you press button while the vehicle is being held by
the Audi hold assist function, the electro-mechanical
parking brake
will automatically take over. The
parking brake will not take over if the foot brake is
applied simultaneously.
– Audi hold assist is switched off automatically if you open
the driver's door, unbuckle the seat belt or switch off the
engine. If this happens when the green symbol
is
displayed in the instrument cluster, the parking brake
will be applied automatically to ensure that the vehicle is
parked safely.
Audi hold assist helps the driver to keep the vehicle stationary while
the engine is running, for instance on steep gradients, at traffic
Fig. 134 Detail of the
centre console: Button
for Audi hold assist
ABAB
AB
document_0900452a81793dcc.book Seite 122 Mittwoch, 21. März 2007 5:42 17
Page 125 of 294
Downloaded from www.Manualslib.com manuals search engine Driving123
Controls
Safety
Driving tips
General maintenance
Self-help
Technical data lights or in stop-and-go traffic. When the Audi hold assist function
is on, you don't have to keep your foot on the brake to prevent the
vehicle from accidentally rolling away. Once it detects that the
vehicle is stopped, Audi hold assist keeps the vehicle stationary. The
green symbol
in the instrument cluster indicates that the func-
tion is activated. You can now take your foot off the brake pedal.
As soon as you drive off in the normal way, the parking brake will
automatically be released and the vehicle will start moving.
If the conditions for Audi hold assist change and the function is
switched off as a result, the parking brake will be applied automati-
cally to ensure that the vehicle is parked safely. The diode in the
button will go out when the Audi hold assist function is switched
off.
WARNING
The intelligent technology in Audi hold assist cannot defy the laws
of physics. Do not let the extra convenience provided by Audi hold
assist tempt you into taking a safety risk.•
Audi hold assist cannot keep the vehicle stationary in all condi-
tions on a gradient (e.g. if the road is slippery or icy).
•
Audi hold assist must be switched on again each time the
engine is started – Risk of accident!
•
Never get out of the vehicle when the engine is running and
Audi hold assist is switched on – Risk of accident!
•
Always ensure that the vehicle is stopped properly and safely
to avoid injury to yourself and others.Caution
Switch off the Audi hold assist function before driving the vehicle
into a car wash.
Note
•
Audi hold assist can be switched on only when the driver's door
is closed, the driver's seat belt is buckled and the engine is running.
•
Audi hold assist prevents automatic vehicles from creeping
forwards when the brake pedal is released with the car in gear.
•
When the vehicle has been stationary for an extended period,
Audi hold assist will automatically apply the parking brake. In this
case, the green symbol
in the instrument cluster display will
change to red
.
Cruise control systemIntroduction
The cruise control system allows you to maintain a
constant speed.
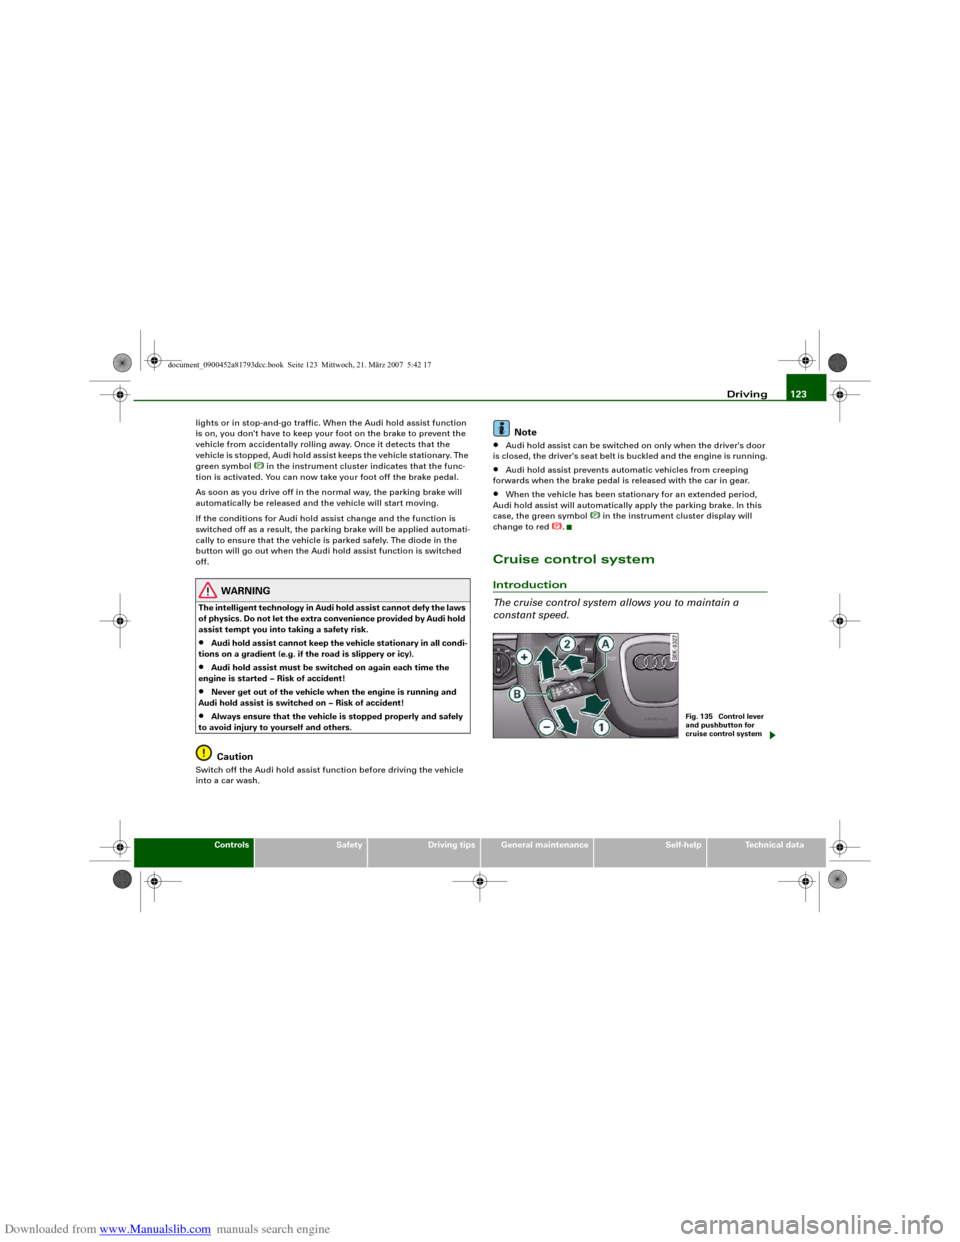
Fig. 135 Control lever
and pushbutton for
cruise control system
document_0900452a81793dcc.book Seite 123 Mittwoch, 21. März 2007 5:42 17
Page 130 of 294
Downloaded from www.Manualslib.com manuals search engine Audi parking system 128Audi parking systemParking aid systemsApplies to vehicles: with parking systemGeneral notes
Depending on the optional equipment fitted, there are
various parking aid systems to assist you when parking or
manoeuvring in tight spaces.parking system*:
The parking system comprises the rear acoustic parking aid
⇒page 128.
The rear acoustic parking system uses ultrasonic sensors to
measure the distance between the vehicle and an obstacle which
has been detected. There are four sensors which are located in the
rear bumper (two in the centre, two at the sides).
parking system plus*:
The parking system plus* comprises the rear and front acoustic
parking aid ⇒page 129 in conjunction with a graphic display.
The parking system plus* uses ultrasonic sensors to measure the
distance between the vehicle and an obstacle which has been
detected. There are a total of 8 sensors located in the front and rear
bumpers (2 in the centre and 2 on the side of each bumper).
parking system advanced*:
The parking system advanced* comprises the rear and front
acoustic parking aid in conjunction with the graphic display as well
as a reversing camera (Rear View) ⇒page 131.
The reversing camera is located in the boot lid ⇒page 131, fig. 143
and assists the driver when parking or manoeuvring in tight spaces.
The reversing camera provides an image which is shown in the MMI display. It represents the mirror image of a section of the area
behind the vehicle ⇒page 135, fig. 148.
Note
There is a slight delay in the picture display.parking systemApplies to vehicles: with parking systemRear parking aid
The parking aid gives an acoustic warning if it detects any
obstacles behind the vehicle.– Engage reverse gear. You will hear a short beep to
confirm that the rear parking aid has been activated. The
rear parking aid remains active for as long as the reverse
gear is engaged.The measuring range of the sensors in the rear bumper starts at
approximately:
Reversing
When the vehicle is reversing, the system starts to beep when it
registers an obstacle within its detection range (see above). The
warnings will beep increasingly rapidly as the vehicle approaches
the obstacle.Rear
Side
0.60 m
Centre
1.60 m
document_0900452a81793dcc.book Seite 128 Mittwoch, 21. März 2007 5:42 17
Page 133 of 294

Downloaded from www.Manualslib.com manuals search engine Audi parking system131
Controls
Safety
Driving tips
General maintenance
Self-help
Technical data reached the danger (collision) zone. The driver should then not
move backwards/forwards any further ⇒.
The graphic display in the MMI screen ⇒page 140 can be switched
off. The acoustic proximity warning will, however, remain activated.
The graphic display will be deactivated as soon as you press a func-
tion selector button on the MMI control console. The graphic
display will appear again the next time you park the vehicle. The
graphic display in the MMI screen can also be switched on again
manually using the switch
⇒page 129, fig. 141. For more infor-
mation on the MMI control console please refer to the MMI Oper-
ating Manual.
WARNING
•
The sensors have blind spots in which obstacles are not regis-
tered. It is particularly important to ensure that there are no small
children or animals near the vehicle, as the sensors may not
always be able to detect them.
•
The parking aid cannot replace the full concentration of the
driver. The driver is always responsible for safety during parking
and other manoeuvres. Always keep a close watch on the area
around the vehicle.
•
Please note that low obstacles detected by the system may no
longer be registered by the sensors as the car moves closer, so the
system will not give any further warning. Certain kinds of obsta-
cles (such as wire fences, chains, thin painted posts or trailer draw
bars, etc.) may not always be detected by the system (accident
risk).Note
•
There is a slight delay in the picture display.
•
You can change the settings for the graphic display in the MMI
⇒page 140.
•
To ensure that the acoustic parking aid works properly, the
sensors must be kept clean and free of snow and ice. Please observe
the additional notes on ⇒page 143.
•
Please refer to the notes on towing ⇒page 138.
parking system advancedApplies to vehicles: with parking system advancedParking aid (front and rear), with display and reversing camera
The parking aid gives an acoustic and visual warning if it
detects any obstacles in front of or behind the vehicle. The
reversing camera provides further assistance when
parking.
Fig. 1 43 Bo o t lid : Lo c a-
tion of reversing
camera
document_0900452a81793dcc.book Seite 131 Mittwoch, 21. März 2007 5:42 17
Page 135 of 294
Downloaded from www.Manualslib.com manuals search engine Audi parking system133
Controls
Safety
Driving tips
General maintenance
Self-help
Technical data displayed on the MMI screen. The warnings will then return to the
normal volume if the vehicle approaches the detected obstacle
again.
Graphic display
The segments in the MMI display indicate the distance between the
vehicle and an obstacle. The number of segments shown depends
on the obstacle in front of or behind the vehicle. The closer the
vehicle gets to the obstacle the closer the segments move towards
the vehicle in the graphic ⇒page 132, fig. 144. At the latest when
the penultimate segment is highlighted the vehicle has reached the
danger (collision) zone. The driver should then not move back-
wards/forwards any further ⇒.
The graphic display in the MMI screen ⇒page 140 can be switched
off. The acoustic proximity warning will, however, remain activated.
The graphic display will be deactivated as soon as you press a func-
tion selector button on the MMI control console. The graphic
display in the MMI screen can also be switched on again manually
using the switch
. For more information on the MMI control
console please refer to the MMI Operating Manual.
Reversing camera (Rear View)
The mirrored image of the picture supplied by the reversing camera
⇒page 136, fig. 149 is shown in the MMI display. The picture
supplied by the reversing camera also includes orientation lines
and area markings which are projected onto the image to assist you
when parking ⇒page 134. The red line in the picture ⇒page 134,
fig. 145/⇒page 134, fig. 146 shows the collision zone. From here at
the latest, the driver should not reverse any further ⇒.
If your vehicle is near an obstacle, the proximity graphic will also
appear in the reversing camera image. This superimposed graphic
helps the driver to localise the critical area of the vehicle.
If the MMI screen is showing the graphic display you can switch to
the image of the reversing camera by pressing the control button
for the function Rear View ⇒page 132, fig. 144.If the MMI screen is showing the image of the reversing camera you
can switch to the graphic display by pressing the control button for
the function Graphic ⇒page 136, fig. 149.
The image of the reversing camera in the MMI screen ⇒page 140
can be switched off. The acoustic proximity warning will, however,
remain activated.
The image of the reversing camera will be deactivated as soon as
you press a function selector button on the MMI control console.
The image of the reversing camera will be shown again the next
time you park the vehicle. The image of the reversing camera can
also be switched on again manually using the switch
. For more
information on the MMI control console please refer to the MMI
Operating Manual.
WARNING
•
The sensors have blind spots in which obstacles are not regis-
tered. It is particularly important to ensure that there are no small
children or animals near the vehicle, as the sensors may not
always be able to detect them.
•
The parking aid cannot replace the full concentration of the
driver. The driver is always responsible for safety during parking
and other manoeuvres. Always keep a close watch on the area
around the vehicle.
•
Please note that low obstacles detected by the system may no
longer be registered by the sensors as the car moves closer, so the
system will not give any further warning. Certain kinds of obsta-
cles (such as wire fences, chains, thin painted posts or trailer draw
bars, etc.) may not always be detected by the system (accident
risk).Note
•
There is a slight delay in the picture display.
•
You can change the settings for the graphic display and the
reversing camera in the MMI ⇒page 140.
document_0900452a81793dcc.book Seite 133 Mittwoch, 21. März 2007 5:42 17
Page 136 of 294
Downloaded from www.Manualslib.com manuals search engine Audi parking system 134•
To ensure that the acoustic parking aid works properly, the
sensors and the lens of the reversing camera must be kept clean
and free of snow and ice. Please observe the additional notes from
⇒page 143 onwards.
•
Please refer to the notes on towing ⇒page 138.
Applies to vehicles: with parking system advancedReversing camera (Rear View)
The reversing camera image in the MMI display shows the
area behind the vehicle.
Parking mode
There are two different parking modes available when you park your
vehicle with the help of the reversing camera. These are referred to
as “Parking mode 1” ⇒page 136 and “Pa r k i n g m od e 2” ⇒page 137.
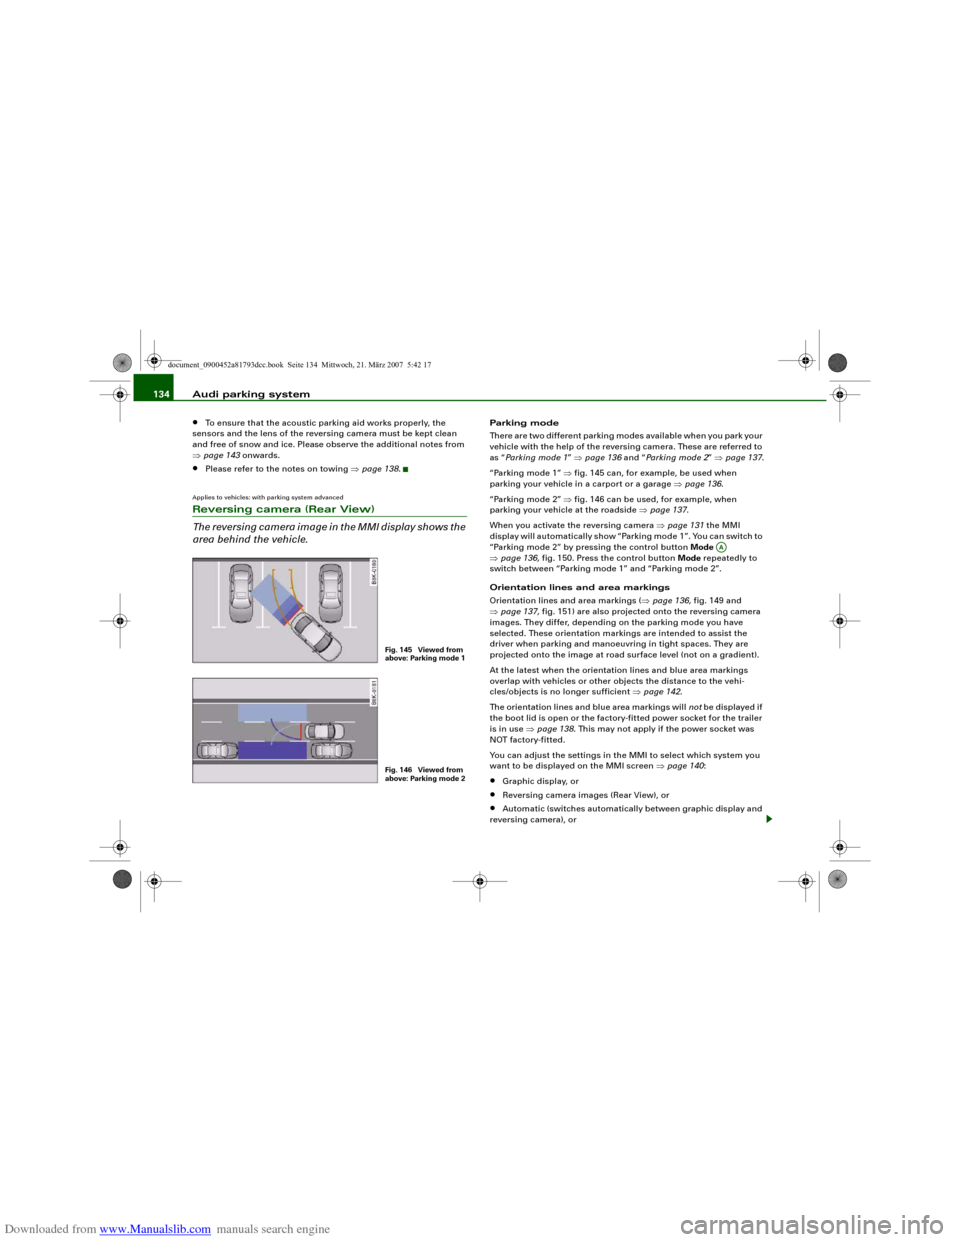
“Parking mode 1” ⇒fig. 145 can, for example, be used when
parking your vehicle in a carport or a garage ⇒page 136.
“Parking mode 2” ⇒fig. 146 can be used, for example, when
parking your vehicle at the roadside ⇒page 137.
When you activate the reversing camera ⇒page 131 the MMI
display will automatically show “Parking mode 1”. You can switch to
“Parking mode 2” by pressing the control button Mode
⇒page 136, fig. 150. Press the control button Mode repeatedly to
switch between “Parking mode 1” and “Parking mode 2”.
Orientation lines and area markings
Orientation lines and area markings (⇒page 136, fig. 149 and
⇒page 137, fig. 151) are also projected onto the reversing camera
images. They differ, depending on the parking mode you have
selected. These orientation markings are intended to assist the
driver when parking and manoeuvring in tight spaces. They are
projected onto the image at road surface level (not on a gradient).
At the latest when the orientation lines and blue area markings
overlap with vehicles or other objects the distance to the vehi-
cles/objects is no longer sufficient ⇒page 142.
The orientation lines and blue area markings will not be displayed if
the boot lid is open or the factory-fitted power socket for the trailer
is in use ⇒page 138. This may not apply if the power socket was
NOT factory-fitted.
You can adjust the settings in the MMI to select which system you
want to be displayed on the MMI screen ⇒page 140:•
Graphic display, or
•
Reversing camera images (Rear View), or
•
Automatic (switches automatically between graphic display and
reversing camera), or
Fig. 145 Viewed from
above: Parking mode 1Fig. 146 Viewed from
above: Parking mode 2
AA
document_0900452a81793dcc.book Seite 134 Mittwoch, 21. März 2007 5:42 17
Page 138 of 294
Downloaded from www.Manualslib.com manuals search engine Audi parking system 136
WARNING
Please note that objects which are not touching the ground may
appear to be further away than they actually are (e.g. the bumper
of a parked vehicle, a towing bracket or the rear end of a truck). In
this case you should not use the orientation lines for judging the
distance (accident risk).Applies to vehicles: with parking system advancedParking mode 1
“Parking mode 1” can, for example, be used to assist you
when parking in a garage or carport.
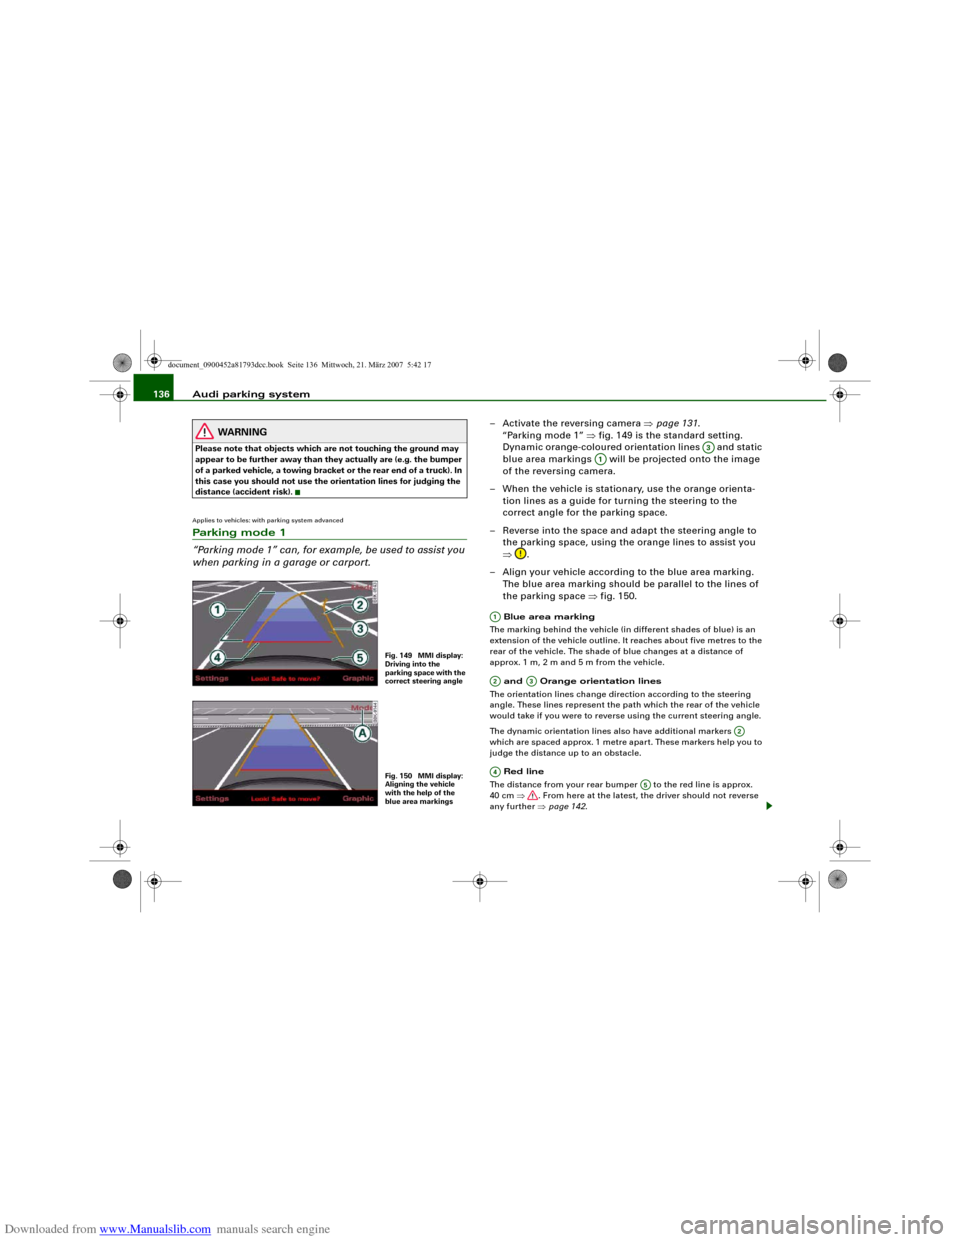
– Activate the reversing camera ⇒page 131.
“Parking mode 1” ⇒fig. 149 is the standard setting.
Dynamic orange-coloured orientation lines and static
blue area markings will be projected onto the image
of the reversing camera.
– When the vehicle is stationary, use the orange orienta-
tion lines as a guide for turning the steering to the
correct angle for the parking space.
– Reverse into the space and adapt the steering angle to
the parking space, using the orange lines to assist you
⇒.
– Align your vehicle according to the blue area marking.
The blue area marking should be parallel to the lines of
the parking space ⇒fig. 150. Blue area marking
The marking behind the vehicle (in different shades of blue) is an
extension of the vehicle outline. It reaches about five metres to the
rear of the vehicle. The shade of blue changes at a distance of
approx. 1m, 2m and 5m from the vehicle.
and Orange orientation lines
The orientation lines change direction according to the steering
angle. These lines represent the path which the rear of the vehicle
would take if you were to reverse using the current steering angle.
The dynamic orientation lines also have additional markers
which are spaced approx. 1 metre apart. These markers help you to
judge the distance up to an obstacle.
Red line
The distance from your rear bumper to the red line is approx.
40 cm ⇒. From here at the latest, the driver should not reverse
any further ⇒page 142.
Fig. 149 MMI display:
Driving into the
parking space with the
correct steering angleFig. 150 MMI display:
Aligning the vehicle
with the help of the
blue area markings
A3
A1
A1A2
A3
A2
A4
A5
document_0900452a81793dcc.book Seite 136 Mittwoch, 21. März 2007 5:42 17