2008 AUDI S5 cruise control
[x] Cancel search: cruise controlPage 4 of 294
Downloaded from www.Manualslib.com manuals search engine Contents 2ContentsNotes on this Owner's
Manual
. . . . . . . . . . . . . . . . . . . . . .
Controls
. . . . . . . . . . . . . . . . . . . . .
Controls and displays
. . . . . . . . . .
Overview . . . . . . . . . . . . . . . . . . . . . .
Instruments and
warning/indicator lamps
. . . . . . .
Instruments . . . . . . . . . . . . . . . . . . . .
Warning and indicator lamps . . . . .
Driver information system
. . . . . .
Introduction . . . . . . . . . . . . . . . . . . . .
On-board computer . . . . . . . . . . . . .
Speed warning function . . . . . . . . .
Auto-check control . . . . . . . . . . . . . .
Doors and windows
. . . . . . . . . . . .
Remote control keys . . . . . . . . . . . .
Central locking system . . . . . . . . . .
Boot lid . . . . . . . . . . . . . . . . . . . . . . . .
Electric windows . . . . . . . . . . . . . . .
Tilting panorama roof . . . . . . . . . . .
Lights and vision
. . . . . . . . . . . . . . .
Lights . . . . . . . . . . . . . . . . . . . . . . . . .
Interior lights . . . . . . . . . . . . . . . . . . .
Clear vision . . . . . . . . . . . . . . . . . . . .
Windscreen wipers . . . . . . . . . . . . . .Rear-view mirrors . . . . . . . . . . . . . .
Digital compass . . . . . . . . . . . . . . . .
Seats and storage
. . . . . . . . . . . . .
Electric adjustment of front seats
Easy-entry function . . . . . . . . . . . . .
Seat memory . . . . . . . . . . . . . . . . . .
Head restraints . . . . . . . . . . . . . . . .
Front armrest . . . . . . . . . . . . . . . . . .
Luggage compartment . . . . . . . . .
Roof carrier . . . . . . . . . . . . . . . . . . . .
Cup holders . . . . . . . . . . . . . . . . . . .
Ashtrays . . . . . . . . . . . . . . . . . . . . . .
Cigarette lighter and electrical
sockets . . . . . . . . . . . . . . . . . . . . . . .
On-board 230 Volt Euro socket . . .
Storage compartments . . . . . . . . .
Heating and cooling
. . . . . . . . . . .
Deluxe automatic air conditioner .
Deluxe automatic air conditioner -
basic settings . . . . . . . . . . . . . . . . . .
Deluxe automatic air conditioner
plus . . . . . . . . . . . . . . . . . . . . . . . . . .
Deluxe automatic air conditioner
plus - basic settings . . . . . . . . . . . .
Auxiliary heating and auxiliary
ventilation . . . . . . . . . . . . . . . . . . . . .
Seat heating . . . . . . . . . . . . . . . . . . .
Driving
. . . . . . . . . . . . . . . . . . . . . . . . .
Steering . . . . . . . . . . . . . . . . . . . . . . .
Ignition lock . . . . . . . . . . . . . . . . . . .
Starting and stopping the engine
with the advanced key . . . . . . . . . .
Electro-mechanical parking brake
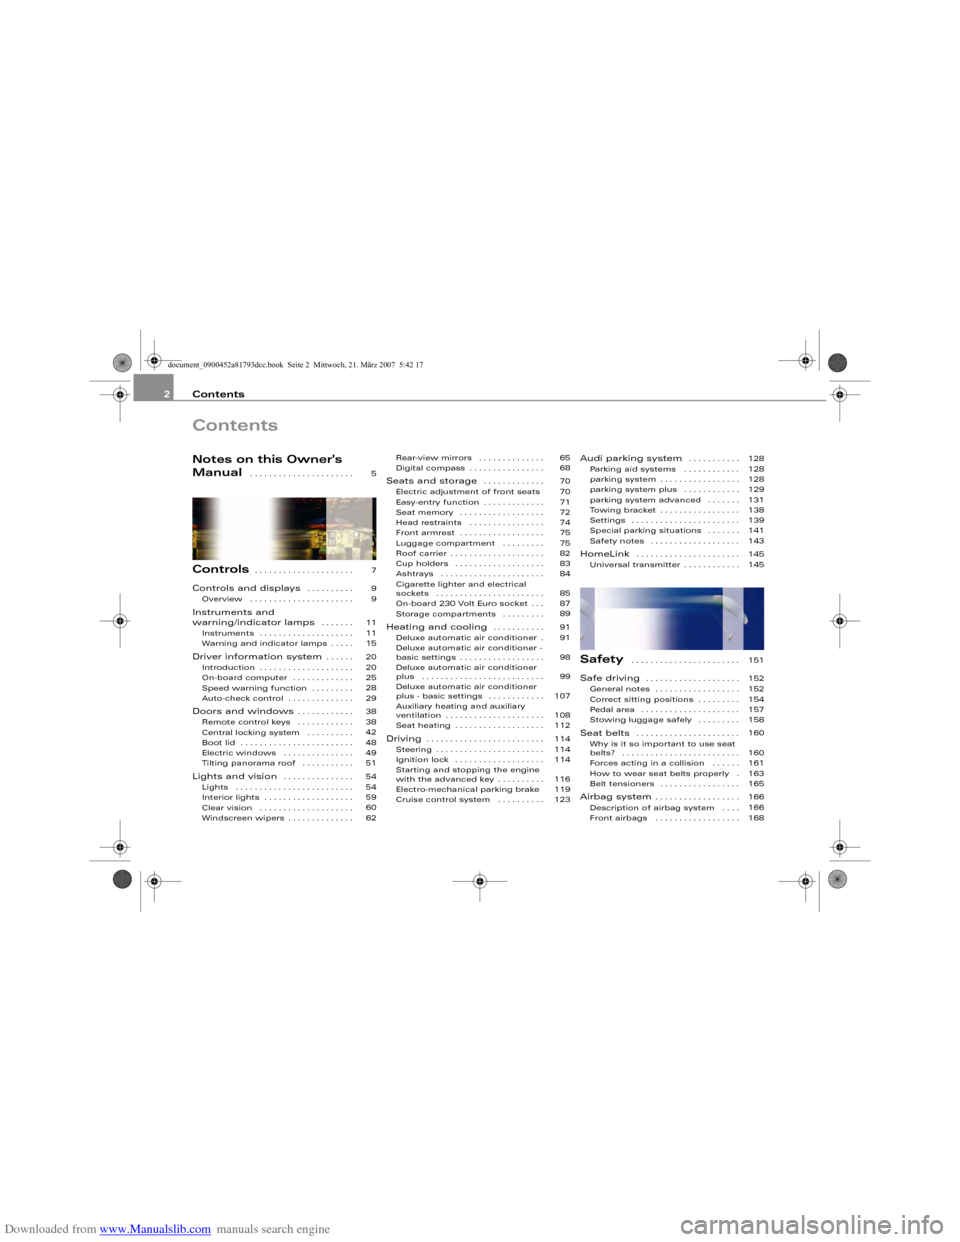
Cruise control system . . . . . . . . . .
Audi parking system
. . . . . . . . . . .
Parking aid systems . . . . . . . . . . . .
parking system . . . . . . . . . . . . . . . . .
parking system plus . . . . . . . . . . . .
parking system advanced . . . . . . .
Towing bracket . . . . . . . . . . . . . . . . .
Settings . . . . . . . . . . . . . . . . . . . . . . .
Special parking situations . . . . . . .
Safety notes . . . . . . . . . . . . . . . . . . .
HomeLink
. . . . . . . . . . . . . . . . . . . . . .
Universal transmitter . . . . . . . . . . . .
Safety
. . . . . . . . . . . . . . . . . . . . . . .
Safe driving
. . . . . . . . . . . . . . . . . . . .
General notes . . . . . . . . . . . . . . . . . .
Correct sitting positions . . . . . . . . .
Pedal area . . . . . . . . . . . . . . . . . . . . .
Stowing luggage safely . . . . . . . . .
Seat belts
. . . . . . . . . . . . . . . . . . . . . .
Why is it so important to use seat
belts? . . . . . . . . . . . . . . . . . . . . . . . . .
Forces acting in a collision . . . . . .
How to wear seat belts properly .
Belt tensioners . . . . . . . . . . . . . . . . .
Airbag system
. . . . . . . . . . . . . . . . . .
Description of airbag system . . . .
Front airbags . . . . . . . . . . . . . . . . . . 5
7
9
9
11
11
15
20
20
25
28
29
38
38
42
48
49
51
54
54
59
60
6265
68
70
70
71
72
74
75
75
82
83
84
85
87
89
91
91
98
99
107
108
112
114
114
114
116
119
123128
128
128
129
131
138
139
141
143
145
145
151
152
152
154
157
158
160
160
161
163
165
166
166
168
document_0900452a81793dcc.book Seite 2 Mittwoch, 21. März 2007 5:42 17
Page 11 of 294
Downloaded from www.Manualslib.com manuals search engine Controls and displays9
Controls
Safety
Driving tips
General maintenance
Self-help
Technical data
Controls and displaysOverview
Door handle
Central locking switch . . . . . . . . . . . . . . . . . . . . . . . . . . .
Electric adjuster for exterior mirrors . . . . . . . . . . . . . . .
Seat memory . . . . . . . . . . . . . . . . . . . . . . . . . . . . . . . . . .
Light switch . . . . . . . . . . . . . . . . . . . . . . . . . . . . . . . . . . .
Instrument lighting
Lever for turn signals and main beam headlights . . . .
Steering wheel with:
−Horn
−Driver's airbag . . . . . . . . . . . . . . . . . . . . . . . . . . . . . . .
−Controls for audio, TV*, telephone and speech
dialogue system*
SET button . . . . . . . . . . . . . . . . . . . . . . . . . . . . . . . . . . . .
Instrument cluster . . . . . . . . . . . . . . . . . . . . . . . . . . . . . .
Reset button for trip recorder . . . . . . . . . . . . . . . . . . . .
Control lever for:
−Windscreen wipers and washer . . . . . . . . . . . . . . . . .
−On-board computer . . . . . . . . . . . . . . . . . . . . . . . . . . .
Ignition lock . . . . . . . . . . . . . . . . . . . . . . . . . . . . . . . . . . .
Air outlets with thumbwheel
−For deluxe automatic air conditioner . . . . . . . . . . . .
−For deluxe automatic air conditioner plus . . . . . . . .
Depending on equipment fitted:
−Radio
−CD changer
Depending on equipment fitted:
−Radio display
−MMI display
1)
Hazard warning lights . . . . . . . . . . . . . . . . . . . . . . . . . . .
Glove box . . . . . . . . . . . . . . . . . . . . . . . . . . . . . . . . . . . . .
Front passenger's airbag . . . . . . . . . . . . . . . . . . . . . . . . .
Switches for the following (as applicable):
−Audi parking system . . . . . . . . . . . . . . . . . . . . . . . . . .
−Electronic Stabilisation Program (ESP OFF) . . . . . . .
−Electric sun blind . . . . . . . . . . . . . . . . . . . . . . . . . . . . .
Air conditioner, depending on equipment fitted:
−Deluxe automatic air conditioner . . . . . . . . . . . . . . . .
−Deluxe automatic air conditioner plus . . . . . . . . . . .
Ashtray with cigarette lighter . . . . . . . . . . . . . . . . . . . . .
Gear lever
Depending on equipment fitted:
−MMI control console or
−Switch for Audi parking system . . . . . . . . . . . . . . . . .
−Switch for Electronic Stabilisation Program (ESP) . .
−Switch for electric sun blind . . . . . . . . . . . . . . . . . . . .
Start/stop button . . . . . . . . . . . . . . . . . . . . . . . . . . . . . . .
Electro-mechanical parking brake . . . . . . . . . . . . . . . . .
Adjustable steering column (hidden behind steering
wheel) . . . . . . . . . . . . . . . . . . . . . . . . . . . . . . . . . . . . . . . .
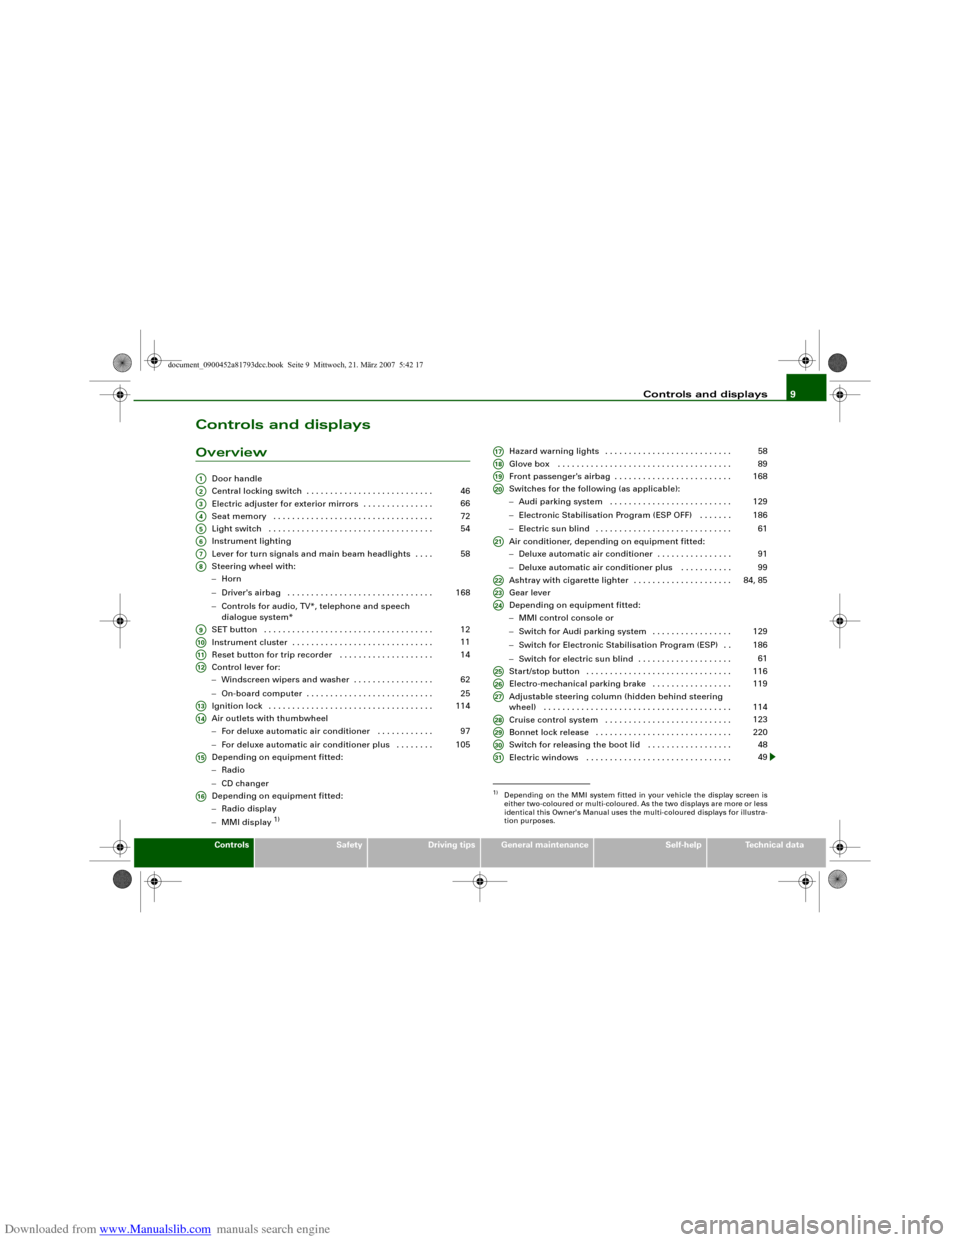
Cruise control system . . . . . . . . . . . . . . . . . . . . . . . . . . .
Bonnet lock release . . . . . . . . . . . . . . . . . . . . . . . . . . . . .
Switch for releasing the boot lid . . . . . . . . . . . . . . . . . .
Electric windows . . . . . . . . . . . . . . . . . . . . . . . . . . . . . . .
A1A2
46
A3
66
A4
72
A5
54
A6A7
58
A8
168
A9
12
A10
11
A11
14
A12
62
25
A13
114
A14
97
105
A15A16
1)Depending on the MMI system fitted in your vehicle the display screen is
either two-coloured or multi-coloured. As the two displays are more or less
identical this Owner's Manual uses the multi-coloured displays for illustra-
tion purposes.A17
58
A18
89
A19
168
A20
129
186
61
A21
91
99
A22
84, 85
A23A24
129
186
61
A25
116
A26
119
A27
114
A28
123
A29
220
A30
48
A31
49
document_0900452a81793dcc.book Seite 9 Mittwoch, 21. März 2007 5:42 17
Page 17 of 294
Downloaded from www.Manualslib.com manuals search engine Instruments and warning/indicator lamps15
Controls
Safety
Driving tips
General maintenance
Self-help
Technical data
Warning and indicator lampsOverview
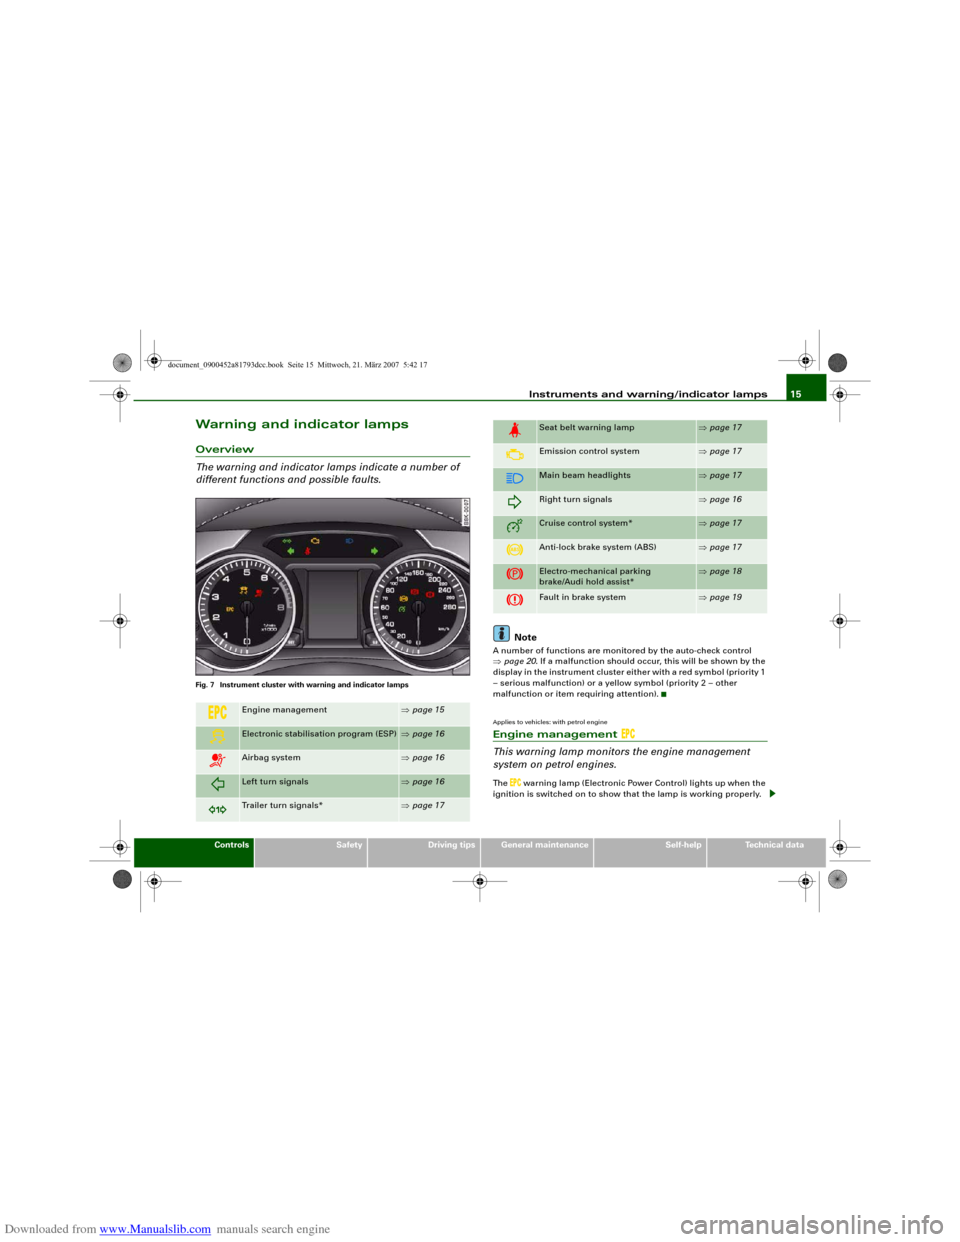
The warning and indicator lamps indicate a number of
different functions and possible faults.Fig. 7 Instrument cluster with warning and indicator lamps
Note
A number of functions are monitored by the auto-check control
⇒page 20. If a malfunction should occur, this will be shown by the
display in the instrument cluster either with a red symbol (priority 1
– serious malfunction) or a yellow symbol (priority 2 – other
malfunction or item requiring attention).Applies to vehicles: with petrol engineEngine management
This warning lamp monitors the engine management
system on petrol engines.The
warning lamp (Electronic Power Control) lights up when the
ignition is switched on to show that the lamp is working properly.
Engine management
⇒page 15
Electronic stabilisation program (ESP)
⇒page 16
Airbag system
⇒page 16
Left turn signals
⇒page 16
Trailer turn signals*
⇒page 17
Seat belt warning lamp
⇒page 17
Emission control system
⇒page 17
Main beam headlights
⇒page 17
Right turn signals
⇒page 16
Cruise control system*
⇒page 17
Anti-lock brake system (ABS)
⇒page 17
Electro-mechanical parking
brake/Audi hold assist*
⇒page 18
Fault in brake system
⇒page 19
document_0900452a81793dcc.book Seite 15 Mittwoch, 21. März 2007 5:42 17
Page 19 of 294
Downloaded from www.Manualslib.com manuals search engine Instruments and warning/indicator lamps17
Controls
Safety
Driving tips
General maintenance
Self-help
Technical data
Applies to vehicles: with towing bracketTrailer turn signals
The indicator lamp flashes when the turn signals are
operated while towing a caravan or trailer.The indicator lamp
flashes when the turn signals are operated,
provided a caravan or trailer is correctly attached and connected to
the vehicle.
The indicator lamp will not flash if one of the turn signals on the
trailer fails.
Seat belt warning lamp
The warning lamp acts as a reminder to fasten the seat
belts.After switching on the ignition, the warning lamp
will remain lit
until the driver and front passenger (if applicable) have fastened
their seat belts. When the vehicle has gathered speed you will also
hear a warning chime.
For further information on the seat belts ⇒page 160.
Emission control system
If the warning lamp lights up continuously you should take your
vehicle to a qualified workshop as soon as possible in order to have
the fault rectified.
If the warning lamp flashes drive on at reduced speed and seek
professional help in order to avoid damage to the catalytic
converter.
For further information on the catalytic converter ⇒page 195.
Main beam headlights
The indicator lamp
lights up when the main beams are on or
when the headlight flasher is operated.
For further information on the main beam headlights ⇒page 58.
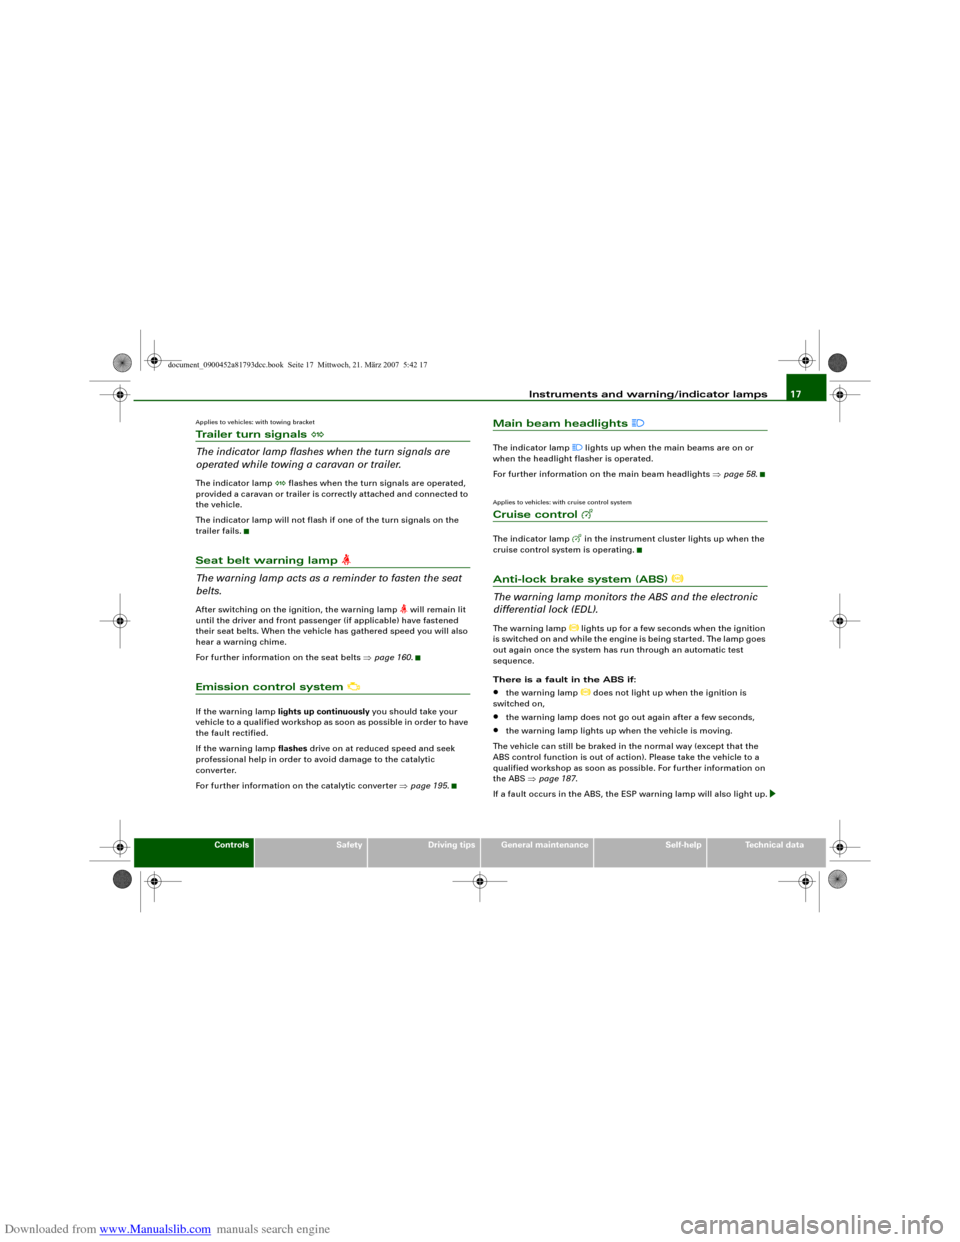
Applies to vehicles: with cruise control systemCruise control
The indicator lamp
in the instrument cluster lights up when the
cruise control system is operating.
Anti-lock brake system (ABS)
The warning lamp monitors the ABS and the electronic
differential lock (EDL).The warning lamp
lights up for a few seconds when the ignition
is switched on and while the engine is being started. The lamp goes
out again once the system has run through an automatic test
sequence.
There is a fault in the ABS if:
•
the warning lamp
does not light up when the ignition is
switched on,
•
the warning lamp does not go out again after a few seconds,
•
the warning lamp lights up when the vehicle is moving.
The vehicle can still be braked in the normal way (except that the
ABS control function is out of action). Please take the vehicle to a
qualified workshop as soon as possible. For further information on
the ABS ⇒page 187.
If a fault occurs in the ABS, the ESP warning lamp will also light up.
document_0900452a81793dcc.book Seite 17 Mittwoch, 21. März 2007 5:42 17
Page 125 of 294
Downloaded from www.Manualslib.com manuals search engine Driving123
Controls
Safety
Driving tips
General maintenance
Self-help
Technical data lights or in stop-and-go traffic. When the Audi hold assist function
is on, you don't have to keep your foot on the brake to prevent the
vehicle from accidentally rolling away. Once it detects that the
vehicle is stopped, Audi hold assist keeps the vehicle stationary. The
green symbol
in the instrument cluster indicates that the func-
tion is activated. You can now take your foot off the brake pedal.
As soon as you drive off in the normal way, the parking brake will
automatically be released and the vehicle will start moving.
If the conditions for Audi hold assist change and the function is
switched off as a result, the parking brake will be applied automati-
cally to ensure that the vehicle is parked safely. The diode in the
button will go out when the Audi hold assist function is switched
off.
WARNING
The intelligent technology in Audi hold assist cannot defy the laws
of physics. Do not let the extra convenience provided by Audi hold
assist tempt you into taking a safety risk.•
Audi hold assist cannot keep the vehicle stationary in all condi-
tions on a gradient (e.g. if the road is slippery or icy).
•
Audi hold assist must be switched on again each time the
engine is started – Risk of accident!
•
Never get out of the vehicle when the engine is running and
Audi hold assist is switched on – Risk of accident!
•
Always ensure that the vehicle is stopped properly and safely
to avoid injury to yourself and others.Caution
Switch off the Audi hold assist function before driving the vehicle
into a car wash.
Note
•
Audi hold assist can be switched on only when the driver's door
is closed, the driver's seat belt is buckled and the engine is running.
•
Audi hold assist prevents automatic vehicles from creeping
forwards when the brake pedal is released with the car in gear.
•
When the vehicle has been stationary for an extended period,
Audi hold assist will automatically apply the parking brake. In this
case, the green symbol
in the instrument cluster display will
change to red
.
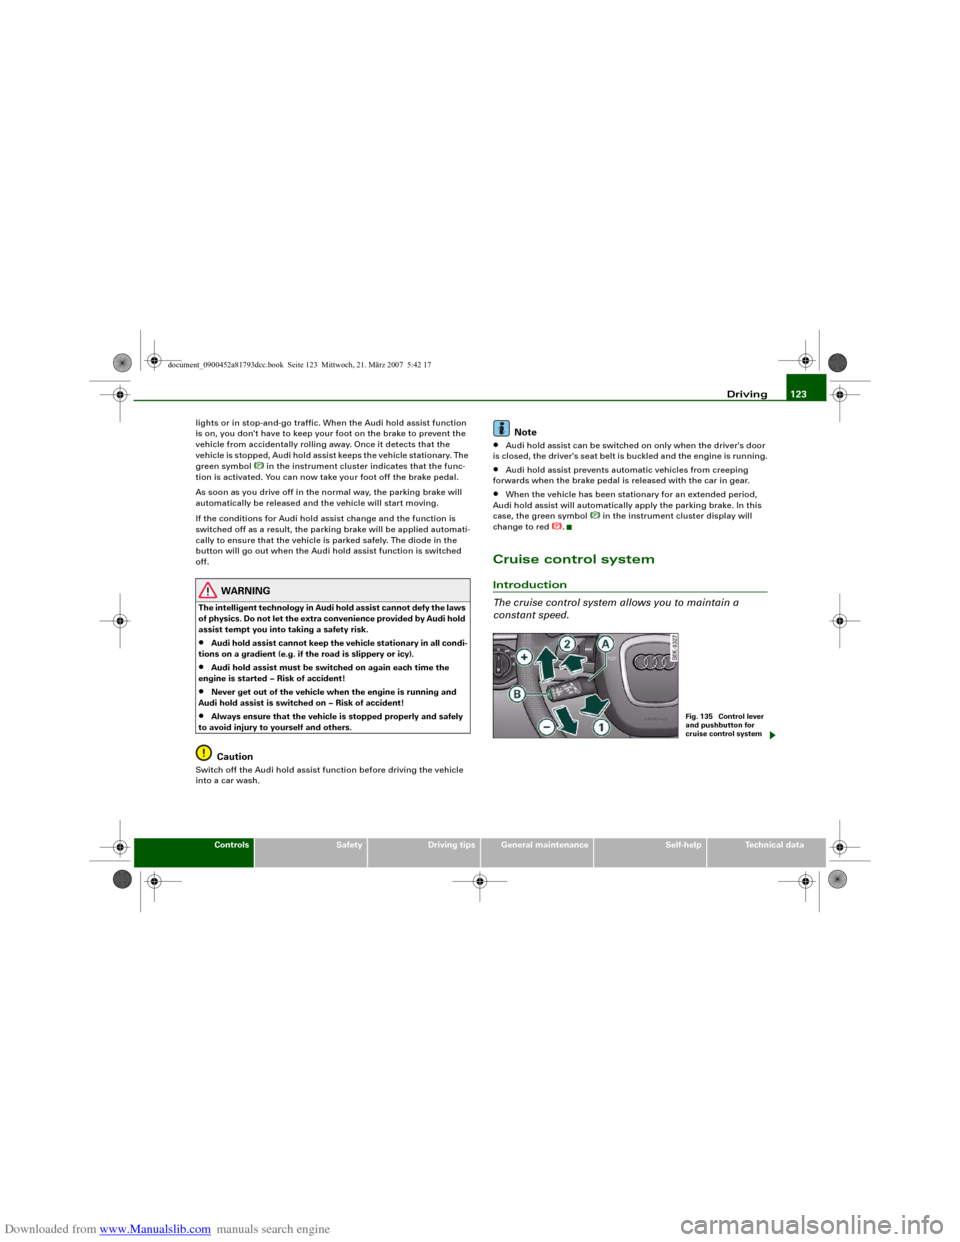
Cruise control systemIntroduction
The cruise control system allows you to maintain a
constant speed.
Fig. 135 Control lever
and pushbutton for
cruise control system
document_0900452a81793dcc.book Seite 123 Mittwoch, 21. März 2007 5:42 17
Page 126 of 294
Downloaded from www.Manualslib.com manuals search engine Driving 124The cruise control system allows you to drive at a constant speed of
30 km/h or higher.
A constant speed is maintained by adjusting the engine power or
braking the vehicle accordingly (while in cruise mode).
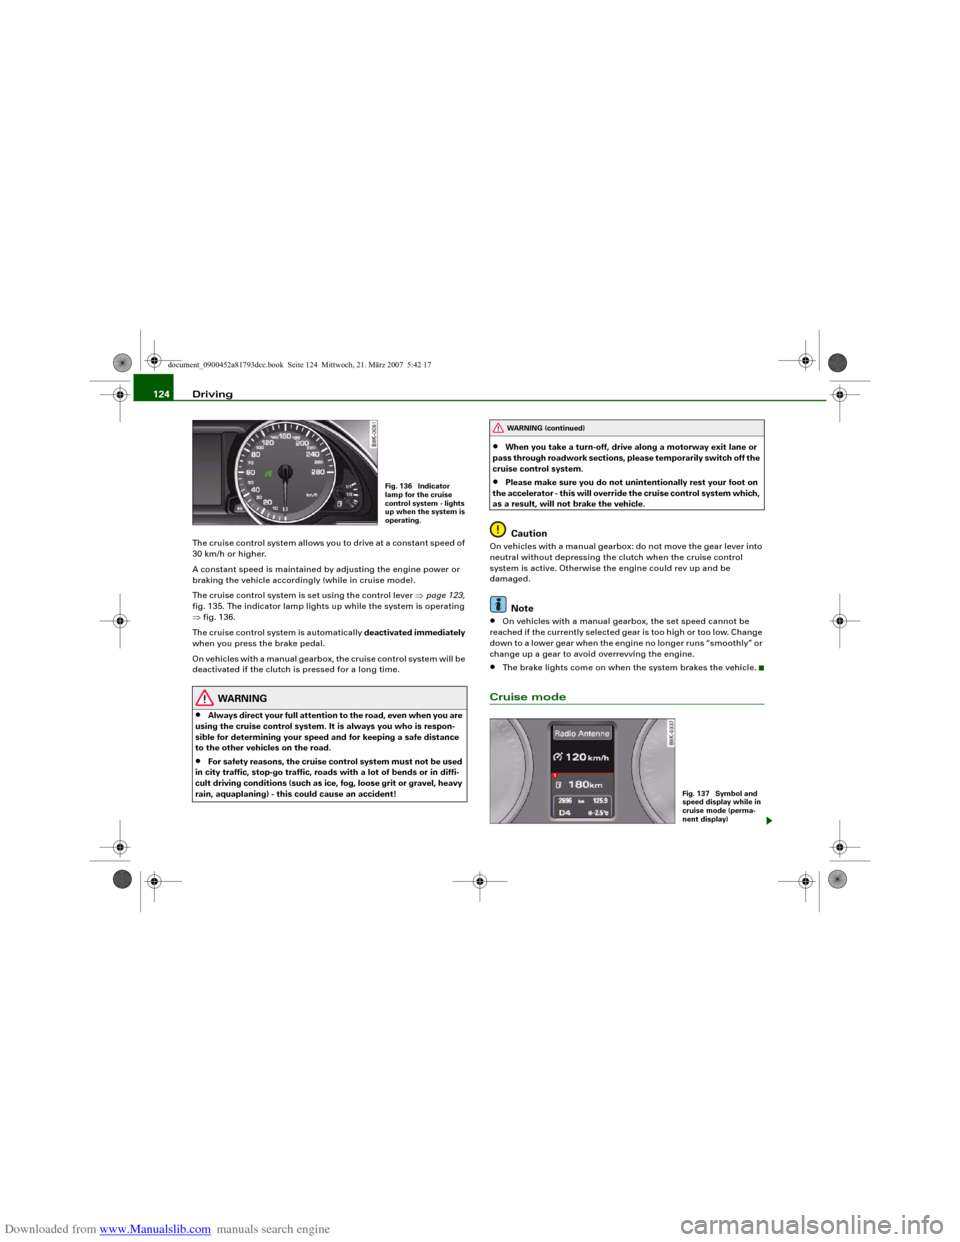
The cruise control system is set using the control lever ⇒page 123,
fig. 135. The indicator lamp lights up while the system is operating
⇒fig. 136.
The cruise control system is automatically deactivated immediately
when you press the brake pedal.
On vehicles with a manual gearbox, the cruise control system will be
deactivated if the clutch is pressed for a long time.
WARNING
•
Always direct your full attention to the road, even when you are
using the cruise control system. It is always you who is respon-
sible for determining your speed and for keeping a safe distance
to the other vehicles on the road.
•
For safety reasons, the cruise control system must not be used
in city traffic, stop-go traffic, roads with a lot of bends or in diffi-
cult driving conditions (such as ice, fog, loose grit or gravel, heavy
rain, aquaplaning) - this could cause an accident!
•
When you take a turn-off, drive along a motorway exit lane or
pass through roadwork sections, please temporarily switch off the
cruise control system.
•
Please make sure you do not unintentionally rest your foot on
the accelerator - this will override the cruise control system which,
as a result, will not brake the vehicle.Caution
On vehicles with a manual gearbox: do not move the gear lever into
neutral without depressing the clutch when the cruise control
system is active. Otherwise the engine could rev up and be
damaged.
Note
•
On vehicles with a manual gearbox, the set speed cannot be
reached if the currently selected gear is too high or too low. Change
down to a lower gear when the engine no longer runs “smoothly” or
change up a gear to avoid overrevving the engine.
•
The brake lights come on when the system brakes the vehicle.
Cruise mode
Fig. 136 Indicator
lamp for the cruise
control system - lights
up when the system is
operating.
WARNING (continued)
Fig. 137 Symbol and
speed display while in
cruise mode (perma-
nent display)
document_0900452a81793dcc.book Seite 124 Mittwoch, 21. März 2007 5:42 17
Page 127 of 294
Downloaded from www.Manualslib.com manuals search engine Driving125
Controls
Safety
Driving tips
General maintenance
Self-help
Technical data
– Pull the lever to position ⇒page 123, fig. 135 to
switch on the system.
– Drive at the speed you wish to set the system to (must be
higher than 30 km/h).
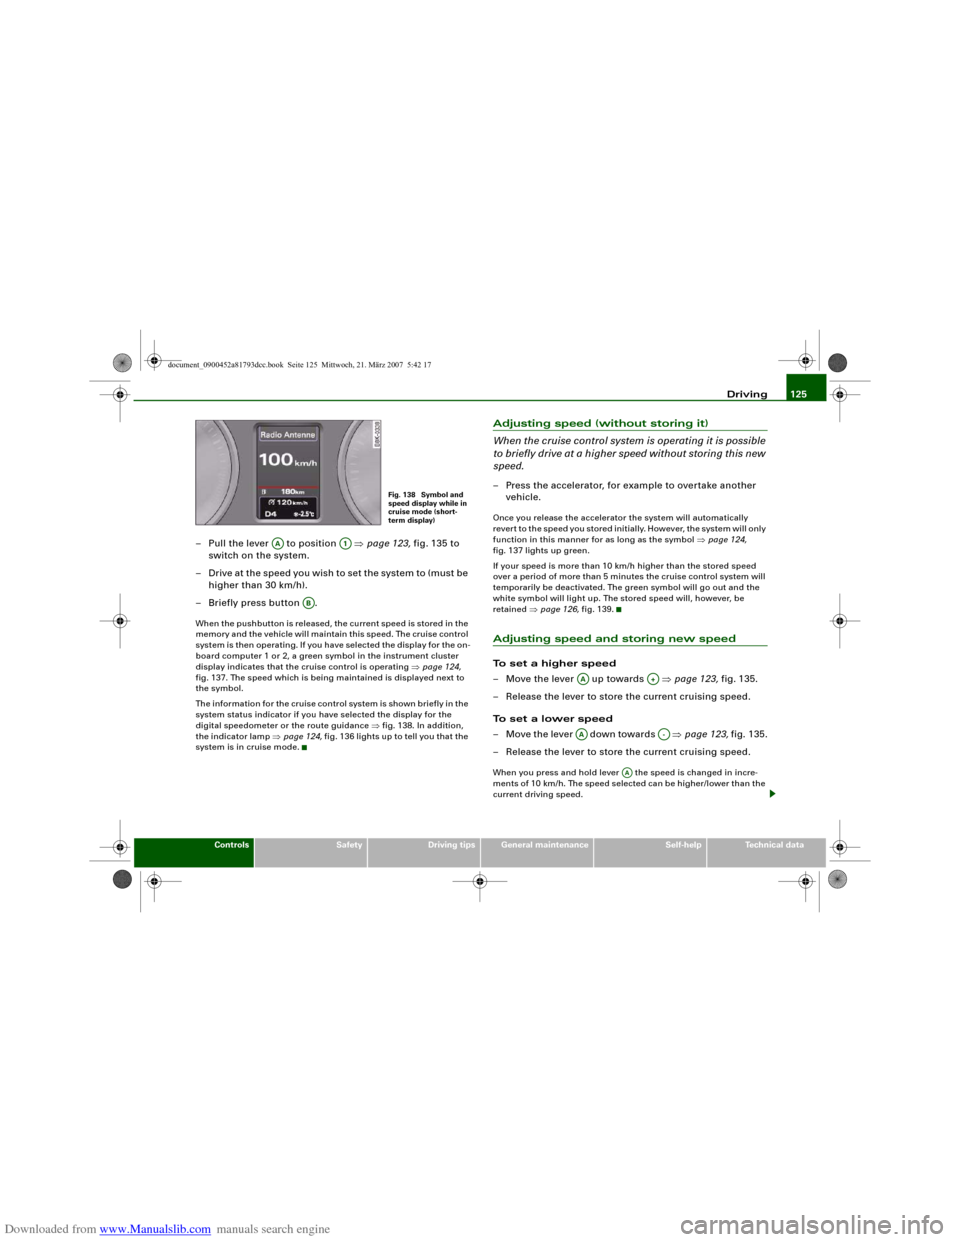
– Briefly press button .When the pushbutton is released, the current speed is stored in the
memory and the vehicle will maintain this speed. The cruise control
system is then operating. If you have selected the display for the on-
board computer 1 or 2, a green symbol in the instrument cluster
display indicates that the cruise control is operating ⇒page 124,
fig. 137. The speed which is being maintained is displayed next to
the symbol.
The information for the cruise control system is shown briefly in the
system status indicator if you have selected the display for the
digital speedometer or the route guidance ⇒fig. 138. In addition,
the indicator lamp ⇒page 124, fig. 136 lights up to tell you that the
system is in cruise mode.
Adjusting speed (without storing it)
When the cruise control system is operating it is possible
to briefly drive at a higher speed without storing this new
speed.– Press the accelerator, for example to overtake another
vehicle.Once you release the accelerator the system will automatically
revert to the speed you stored initially. However, the system will only
function in this manner for as long as the symbol ⇒page 124,
fig. 137 lights up green.
If your speed is more than 10 km/h higher than the stored speed
over a period of more than 5 minutes the cruise control system will
temporarily be deactivated. The green symbol will go out and the
white symbol will light up. The stored speed will, however, be
retained ⇒page 126, fig. 139.Adjusting speed and storing new speedTo set a higher speed
– Move the lever up towards ⇒page 123, fig. 135.
– Release the lever to store the current cruising speed.
To set a lower speed
– Move the lever down towards ⇒page 123, fig. 135.
– Release the lever to store the current cruising speed.When you press and hold lever the speed is changed in incre-
ments of 10 km/h. The speed selected can be higher/lower than the
current driving speed.
Fig. 138 Symbol and
speed display while in
cruise mode (short-
term display)
AA
A1
AB
AA
A+
AA
A-
AA
document_0900452a81793dcc.book Seite 125 Mittwoch, 21. März 2007 5:42 17
Page 128 of 294
Downloaded from www.Manualslib.com manuals search engine Driving 126Pressing lever briefly
You can increase the set speed in steps of 1 km/h by briefly pressing
the lever up towards ⇒page 123, fig. 135.
You can decrease the set speed in steps of about 1 km/h by briefly
pressing the lever down towards ⇒page 123, fig. 135.Switching off cruise control temporarily– Press the brake pedal, or
– Push lever in direction (click stop not engaged)
⇒page 123, fig. 135, or– Drive more than 10 km/h faster than the stored speed
over a period of more than 5 minutes ⇒page 125.
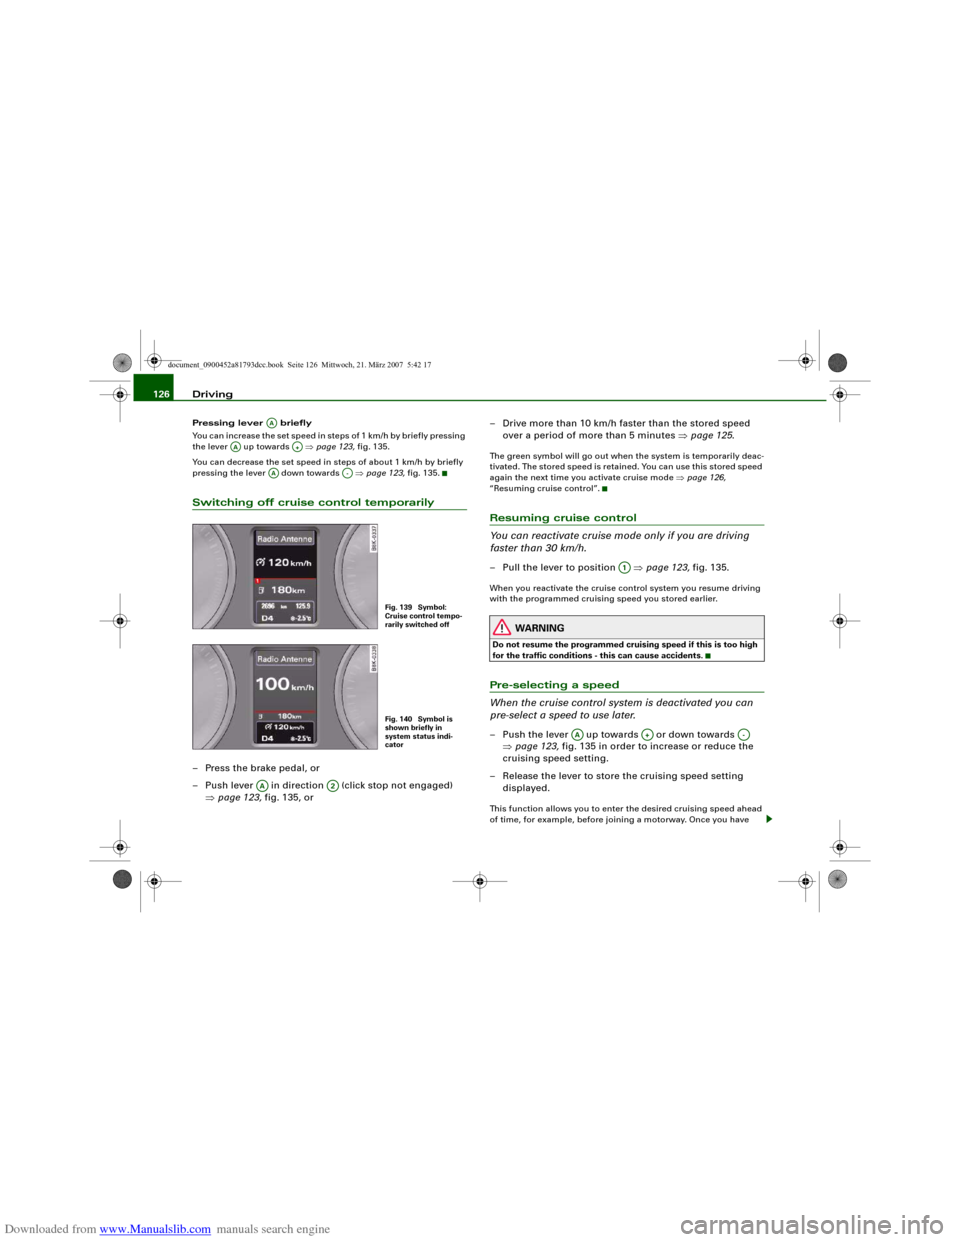
The green symbol will go out when the system is temporarily deac-
tivated. The stored speed is retained. You can use this stored speed
again the next time you activate cruise mode ⇒page 126,
“Resuming cruise control”.Resuming cruise control
You can reactivate cruise mode only if you are driving
faster than 30 km/h.– Pull the lever to position ⇒page 123, fig. 135.When you reactivate the cruise control system you resume driving
with the programmed cruising speed you stored earlier.
WARNING
Do not resume the programmed cruising speed if this is too high
for the traffic conditions - this can cause accidents.Pre-selecting a speed
When the cruise control system is deactivated you can
pre-select a speed to use later.– Push the lever up towards or down towards
⇒page 123, fig. 135 in order to increase or reduce the
cruising speed setting.
– Release the lever to store the cruising speed setting
displayed.This function allows you to enter the desired cruising speed ahead
of time, for example, before joining a motorway. Once you have
AA
AA
A+
AA
A-
Fig. 139 Symbol:
Cruise control tempo-
rarily switched offFig. 140 Symbol is
shown briefly in
system status indi-
cator
AA
A2
A1
AA
A+
A-
document_0900452a81793dcc.book Seite 126 Mittwoch, 21. März 2007 5:42 17