2008 AUDI S5 light
[x] Cancel search: lightPage 43 of 294
Downloaded from www.Manualslib.com manuals search engine Doors and windows41
Controls
Safety
Driving tips
General maintenance
Self-help
Technical data
Emergency release for ignition key
In the event of a malfunction in the vehicle's electrical
system, it may no longer be possible to remove the igni-
tion key.If you are not able to remove the ignition key because the
vehicle battery has discharged (for example), remove the
key as follows:
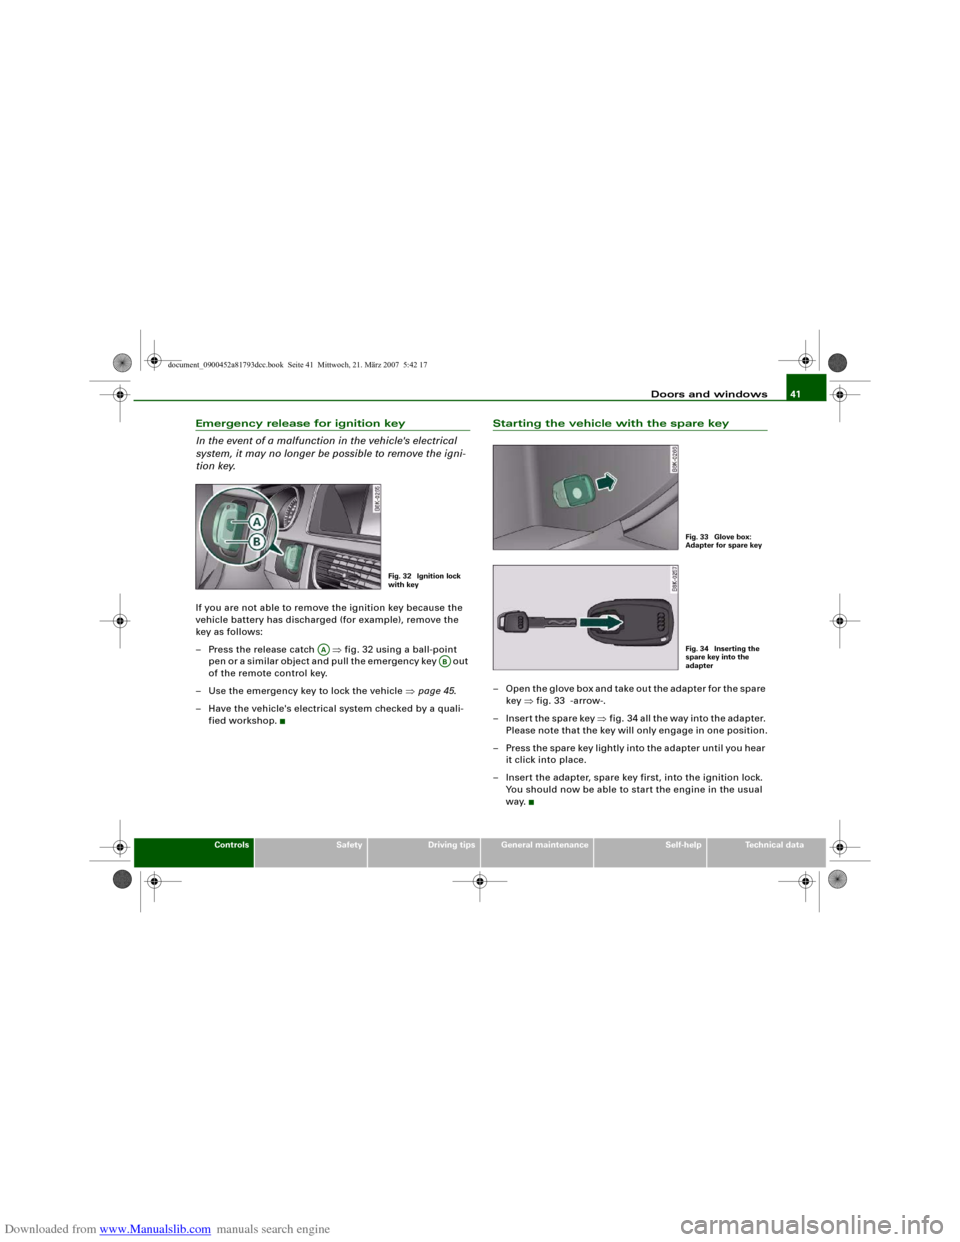
– Press the release catch ⇒fig. 32 using a ball-point
pen or a similar object and pull the emergency key out
of the remote control key.
– Use the emergency key to lock the vehicle ⇒page 45.
– Have the vehicle's electrical system checked by a quali-
fied workshop.
Starting the vehicle with the spare key– Open the glove box and take out the adapter for the spare
key ⇒fig. 33 -arrow-.
– Insert the spare key ⇒fig. 34 all the way into the adapter.
Please note that the key will only engage in one position.
– Press the spare key lightly into the adapter until you hear
it click into place.
– Insert the adapter, spare key first, into the ignition lock.
You should now be able to start the engine in the usual
way.
Fig. 32 Ignition lock
with key
AA
AB
Fig. 33 Glove box:
Adapter for spare keyFig. 34 Inserting the
spare key into the
adapter
document_0900452a81793dcc.book Seite 41 Mittwoch, 21. März 2007 5:42 17
Page 45 of 294
Downloaded from www.Manualslib.com manuals search engine Doors and windows43
Controls
Safety
Driving tips
General maintenance
Self-help
Technical data
WARNING
Do not leave anyone (especially children) in the car if it is locked
from the outside and the deadlock mechanism is activated: the
doors and windows cannot then be opened from the inside.
Locked doors could delay assistance in an emergency, potentially
putting lives at risk.
Note
•
Never leave any valuable items in the vehicle unattended. Even a
locked vehicle is not a safe.
•
If the diode on the driver's window sill lights up for about 30
seconds when the vehicle is locked, the central locking system or
anti-theft alarm* is not working properly. Please have the malfunc-
tion repaired by an Audi dealer or qualified workshop.
•
The interior monitor of the anti-theft alarm* system will only
function as intended if the windows and the tilting panorama roof*
are closed.
Setting the central locking system
You can use the sound system or MMI* to select which
doors are unlocked by the central locking system.
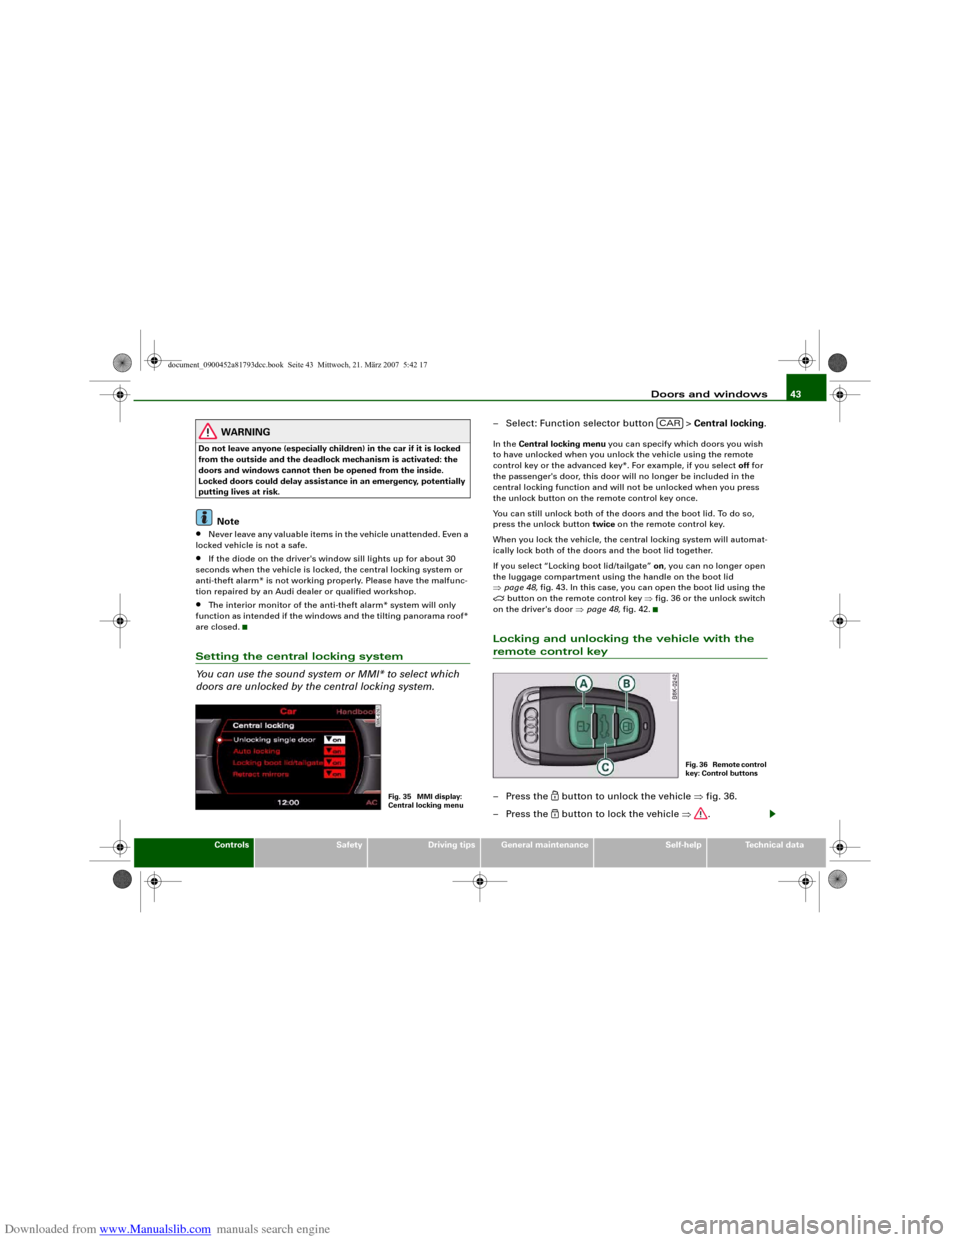
– Select: Function selector button > Central locking.In the Central locking menu you can specify which doors you wish
to have unlocked when you unlock the vehicle using the remote
control key or the advanced key*. For example, if you select off for
the passenger's door, this door will no longer be included in the
central locking function and will not be unlocked when you press
the unlock button on the remote control key once.
You can still unlock both of the doors and the boot lid. To do so,
press the unlock button twice on the remote control key.
When you lock the vehicle, the central locking system will automat-
ically lock both of the doors and the boot lid together.
If you select “Locking boot lid/tailgate” on, you can no longer open
the luggage compartment using the handle on the boot lid
⇒page 48, fig. 43. In this case, you can open the boot lid using the
button on the remote control key ⇒fig. 36 or the unlock switch
on the driver's door ⇒page 48, fig. 42.
Locking and unlocking the vehicle with the remote control key– Press the
button to unlock the vehicle ⇒fig. 36.
– Press the button to lock the vehicle ⇒.
Fig. 35 MMI display:
Central locking menu
CAR
F i g . 3 6 R e m o t e c o n t r o l
key: Control buttons
document_0900452a81793dcc.book Seite 43 Mittwoch, 21. März 2007 5:42 17
Page 48 of 294
Downloaded from www.Manualslib.com manuals search engine Doors and windows 46
WARNING
Do not leave anyone (especially children) in the car if it is locked
from the outside and the deadlock mechanism is activated: the
doors and windows cannot then be opened from the inside.
Locked doors could delay assistance in an emergency, potentially
putting lives at risk.
Note
•
The central locking switch and the release button for the boot lid
will function after the ignition is switched on.
•
If the vehicle is locked with the key when the central locking
system is operational, it is only possible to unlock all the doors and
the boot lid centrally with the key within the next 45 seconds. After
this period, the key will only unlock the driver's door.
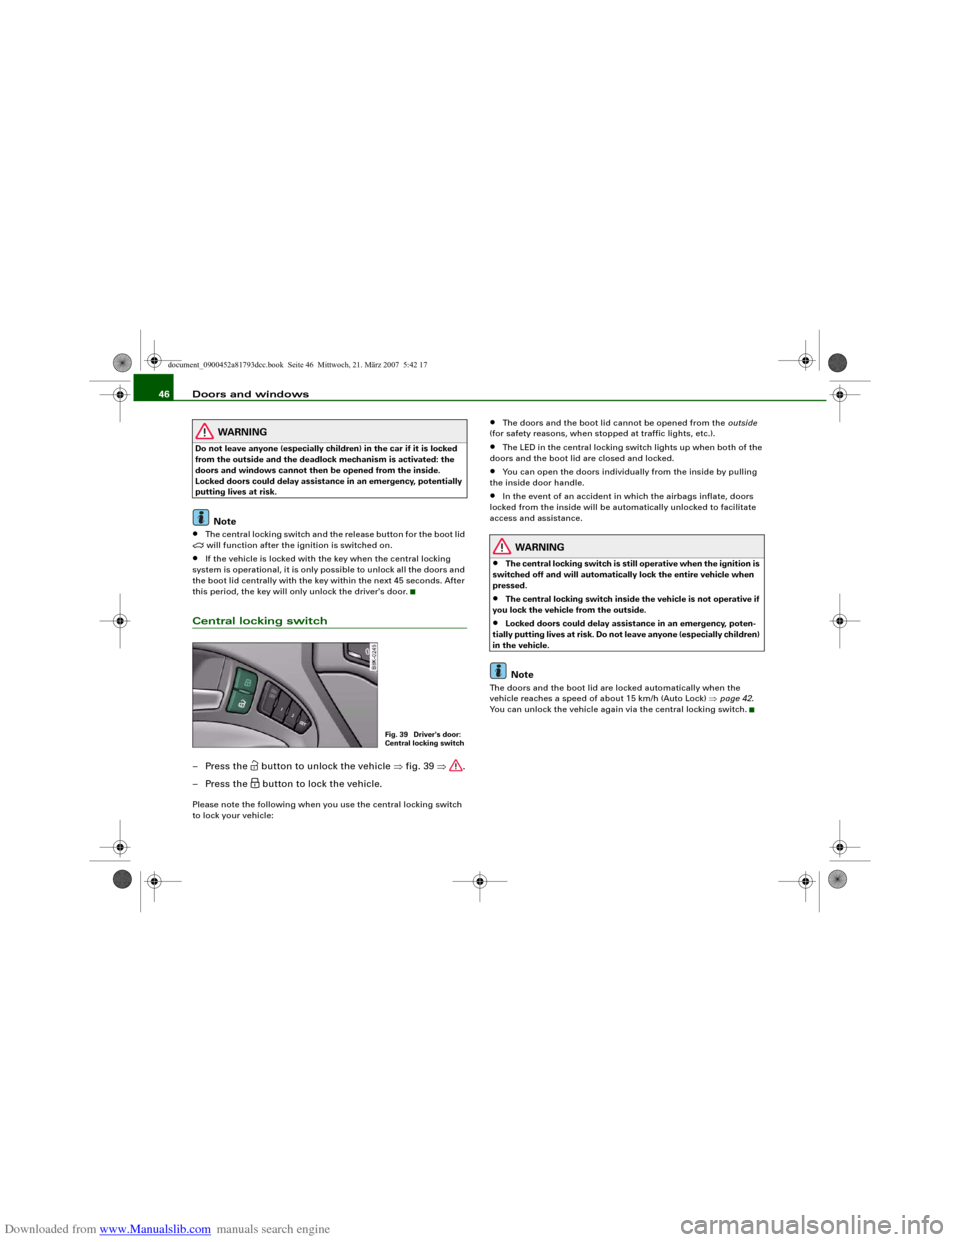
Central locking switch– Press the
button to unlock the vehicle ⇒fig. 39 ⇒.
– Press the button to lock the vehicle.
Please note the following when you use the central locking switch
to lock your vehicle:
•
The doors and the boot lid cannot be opened from the outside
(for safety reasons, when stopped at traffic lights, etc.).
•
The LED in the central locking switch lights up when both of the
doors and the boot lid are closed and locked.
•
You can open the doors individually from the inside by pulling
the inside door handle.
•
In the event of an accident in which the airbags inflate, doors
locked from the inside will be automatically unlocked to facilitate
access and assistance.
WARNING
•
The central locking switch is still operative when the ignition is
switched off and will automatically lock the entire vehicle when
pressed.
•
The central locking switch inside the vehicle is not operative if
you lock the vehicle from the outside.
•
Locked doors could delay assistance in an emergency, poten-
tially putting lives at risk. Do not leave anyone (especially children)
in the vehicle.Note
The doors and the boot lid are locked automatically when the
vehicle reaches a speed of about 15 km/h (Auto Lock) ⇒page 42.
You can unlock the vehicle again via the central locking switch.
Fig. 39 Driver's door:
Central locking switch
document_0900452a81793dcc.book Seite 46 Mittwoch, 21. März 2007 5:42 17
Page 49 of 294
Downloaded from www.Manualslib.com manuals search engine Doors and windows47
Controls
Safety
Driving tips
General maintenance
Self-help
Technical data
Applies to vehicles: with anti-theft alarm systemDeactivating the interior monitor and tow-away protectionWhen the vehicle is locked, the alarm will be triggered if
movements are detected in the interior (e.g. by animals) or
if the vehicle's inclination is changed (e.g. during transport).
You can prevent the alarm from being triggered accidentally
by switching off the interior monitor and/or tow-away
protection.
Deactivating interior monitor
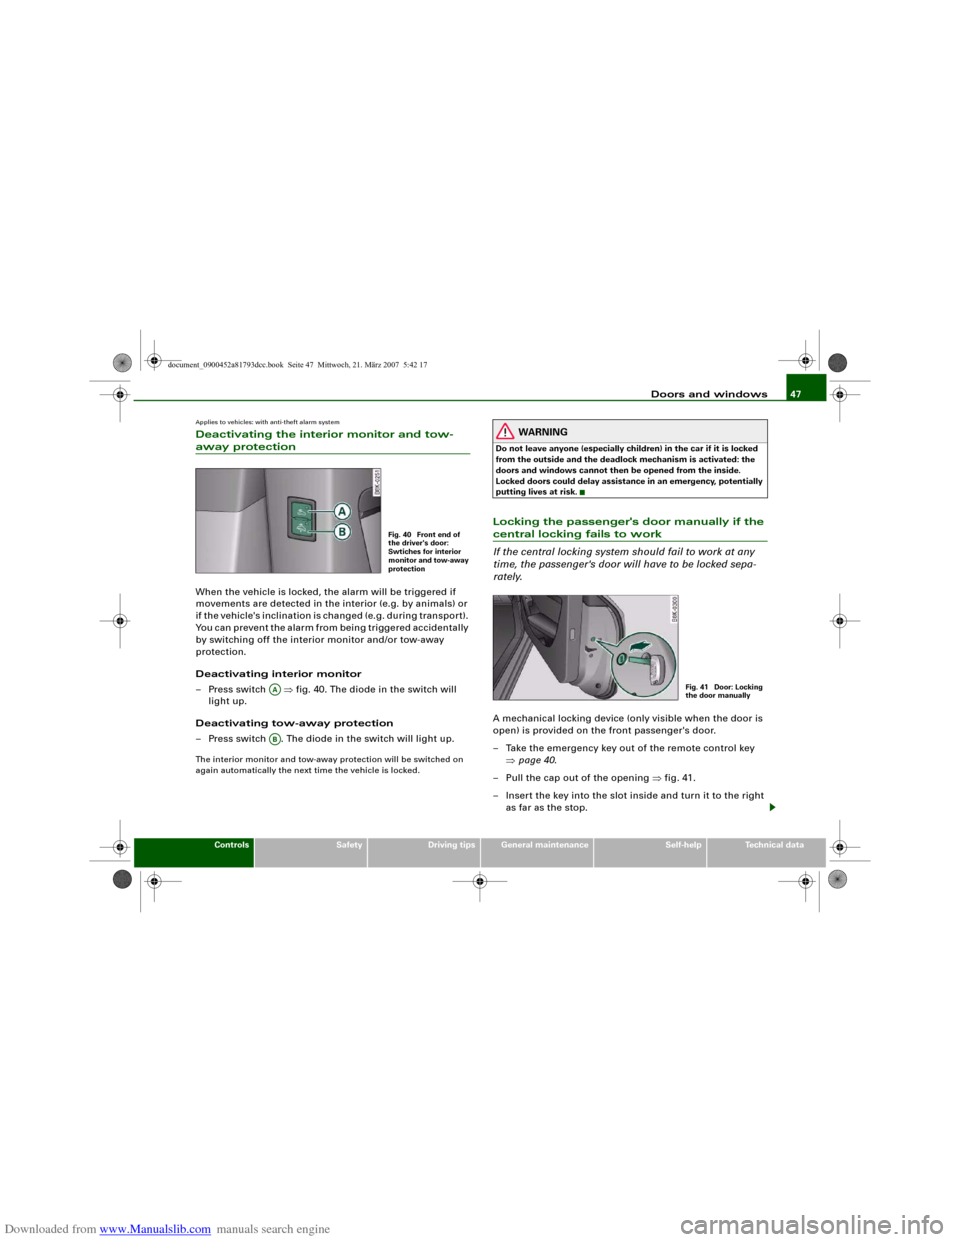
– Press switch ⇒fig. 40. The diode in the switch will
light up.
Deactivating tow-away protection
– Press switch . The diode in the switch will light up.The interior monitor and tow-away protection will be switched on
again automatically the next time the vehicle is locked.
WARNING
Do not leave anyone (especially children) in the car if it is locked
from the outside and the deadlock mechanism is activated: the
doors and windows cannot then be opened from the inside.
Locked doors could delay assistance in an emergency, potentially
putting lives at risk.Locking the passenger's door manually if the central locking fails to work
If the central locking system should fail to work at any
time, the passenger's door will have to be locked sepa-
rately.A mechanical locking device (only visible when the door is
open) is provided on the front passenger's door.
– Take the emergency key out of the remote control key
⇒page 40.
– Pull the cap out of the opening ⇒fig. 41.
– Insert the key into the slot inside and turn it to the right
as far as the stop.
Fig. 40 Front end of
the driver's door:
Swtiches for interior
monitor and tow-away
protection
AAAB
Fig. 41 Door: Locking
the door manually
document_0900452a81793dcc.book Seite 47 Mittwoch, 21. März 2007 5:42 17
Page 50 of 294
Downloaded from www.Manualslib.com manuals search engine Doors and windows 48Once the door has been closed it can no longer be opened from the
outside. The door can be opened from the inside by pulling the door
handle.Boot lidOpening and closing the boot lidOpening boot lid
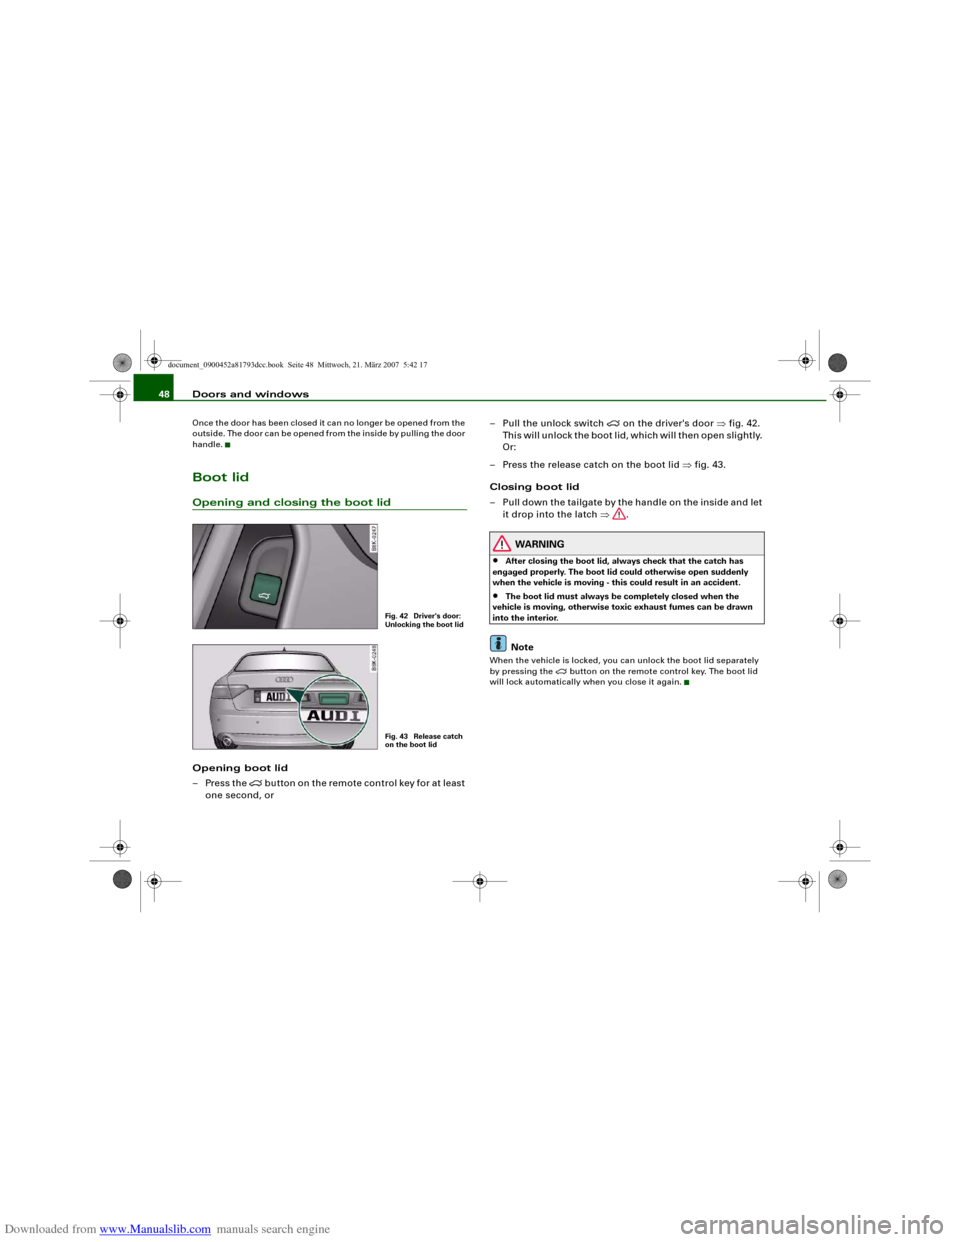
– Press the
button on the remote control key for at least
one second, or– Pull the unlock switch
on the driver's door ⇒fig. 42.
This will unlock the boot lid, which will then open slightly.
Or:
– Press the release catch on the boot lid ⇒fig. 43.
Closing boot lid
– Pull down the tailgate by the handle on the inside and let
it drop into the latch ⇒.
WARNING
•
After closing the boot lid, always check that the catch has
engaged properly. The boot lid could otherwise open suddenly
when the vehicle is moving - this could result in an accident.
•
The boot lid must always be completely closed when the
vehicle is moving, otherwise toxic exhaust fumes can be drawn
into the interior.Note
When the vehicle is locked, you can unlock the boot lid separately
by pressing the
button on the remote control key. The boot lid
will lock automatically when you close it again.
Fig. 42 Driver's door:
Unlocking the boot lidFig. 43 Release catch
on the boot lid
document_0900452a81793dcc.book Seite 48 Mittwoch, 21. März 2007 5:42 17
Page 53 of 294
Downloaded from www.Manualslib.com manuals search engine Doors and windows51
Controls
Safety
Driving tips
General maintenance
Self-help
Technical data
Settings for convenience open function
The driver can use the sound system or MMI* to select
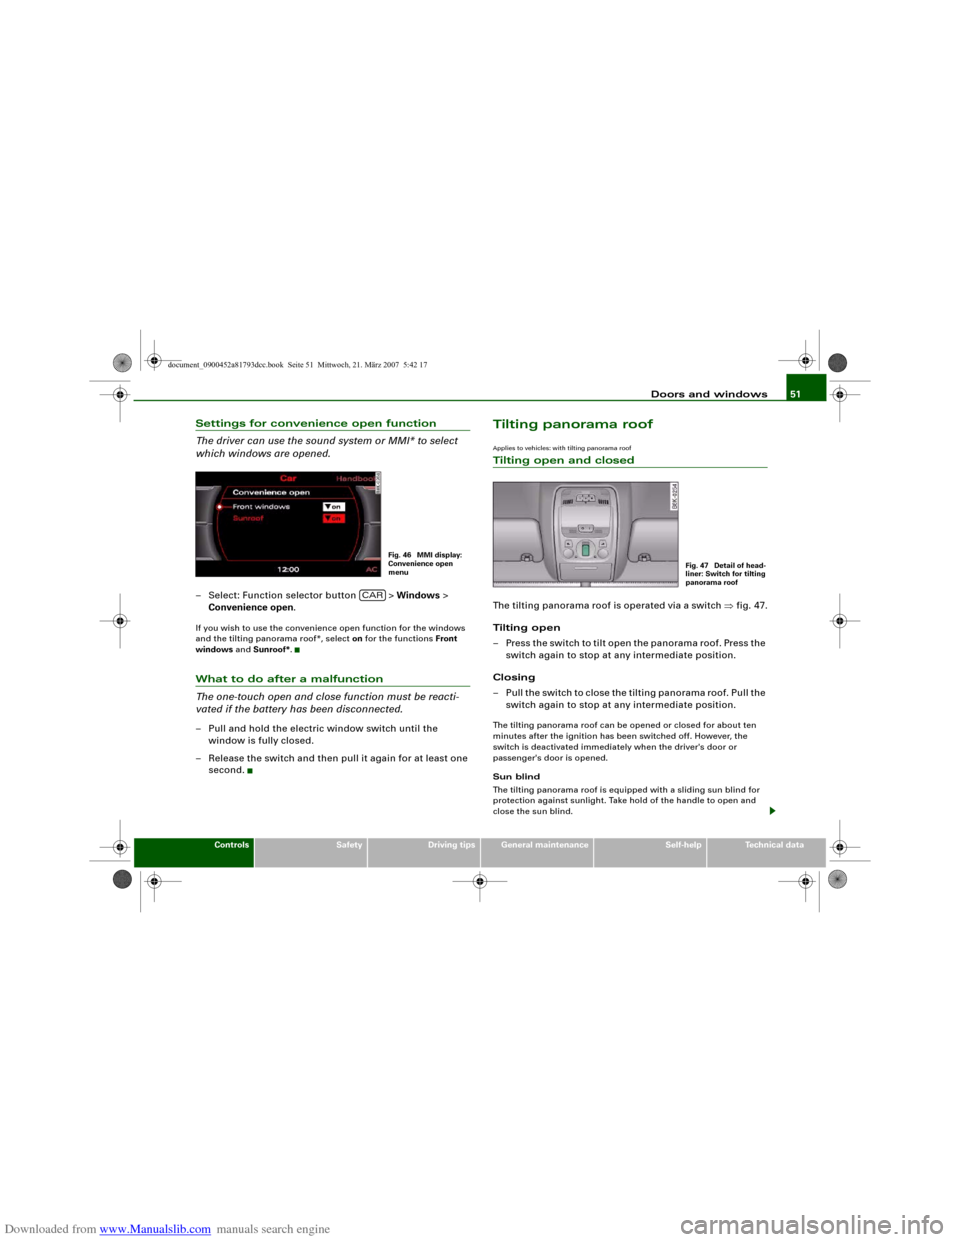
which windows are opened.– Select: Function selector button > Windows >
Convenience open.If you wish to use the convenience open function for the windows
and the tilting panorama roof*, select on for the functions Front
windows and Sunroof*.What to do after a malfunction
The one-touch open and close function must be reacti-
vated if the battery has been disconnected.– Pull and hold the electric window switch until the
window is fully closed.
– Release the switch and then pull it again for at least one
second.
Tilting panorama roofApplies to vehicles: with tilting panorama roofTilting open and closedThe tilting panorama roof is operated via a switch ⇒fig. 47.
Tilting open
– Press the switch to tilt open the panorama roof. Press the
switch again to stop at any intermediate position.
Closing
– Pull the switch to close the tilting panorama roof. Pull the
switch again to stop at any intermediate position.The tilting panorama roof can be opened or closed for about ten
minutes after the ignition has been switched off. However, the
switch is deactivated immediately when the driver's door or
passenger's door is opened.
Sun blind
The tilting panorama roof is equipped with a sliding sun blind for
protection against sunlight. Take hold of the handle to open and
close the sun blind.
Fig. 46 MMI display:
Convenience open
menu
CAR
Fig. 47 Detail of head-
liner: Switch for tilting
panorama roof
document_0900452a81793dcc.book Seite 51 Mittwoch, 21. März 2007 5:42 17
Page 54 of 294
Downloaded from www.Manualslib.com manuals search engine Doors and windows 52
WARNING
Take care when closing the tilting panorama roof. Careless or
uncontrolled use can cause injuries. For this reason, always take
out the ignition key when leaving the vehicle.
Caution
You should always close the tilting panorama roof when leaving the
car. Sudden rain could seriously damage the upholstery and elec-
tronic equipment inside the vehicle.
Note
It is advisable to close the sun blind when the vehicle is left standing
in the sun.Applies to vehicles: with tilting panorama roofClosing the tilting panorama roof by overriding the safety cut-outThe tilting panorama roof mechanism is equipped with a
safety cut-out. If the force required to close the roof is too
high, the panorama roof will tilt up to the fully open posi-
tion. It can now be closed by overriding the safety cut-out.
– Immediately after the tilting panorama roof opens auto-
matically, pull and hold the switch ⇒page 51, fig. 47
until the panorama roof is closed ⇒.The safety cut-out tilts the panorama roof to the fully open position.
When this happens, it is possible to close the panorama roof within
approximately 5 seconds by overriding the safety cut-out.
WARNING
Take care when closing the tilting panorama roof. Careless or
uncontrolled use can cause injuries. For this reason, always take
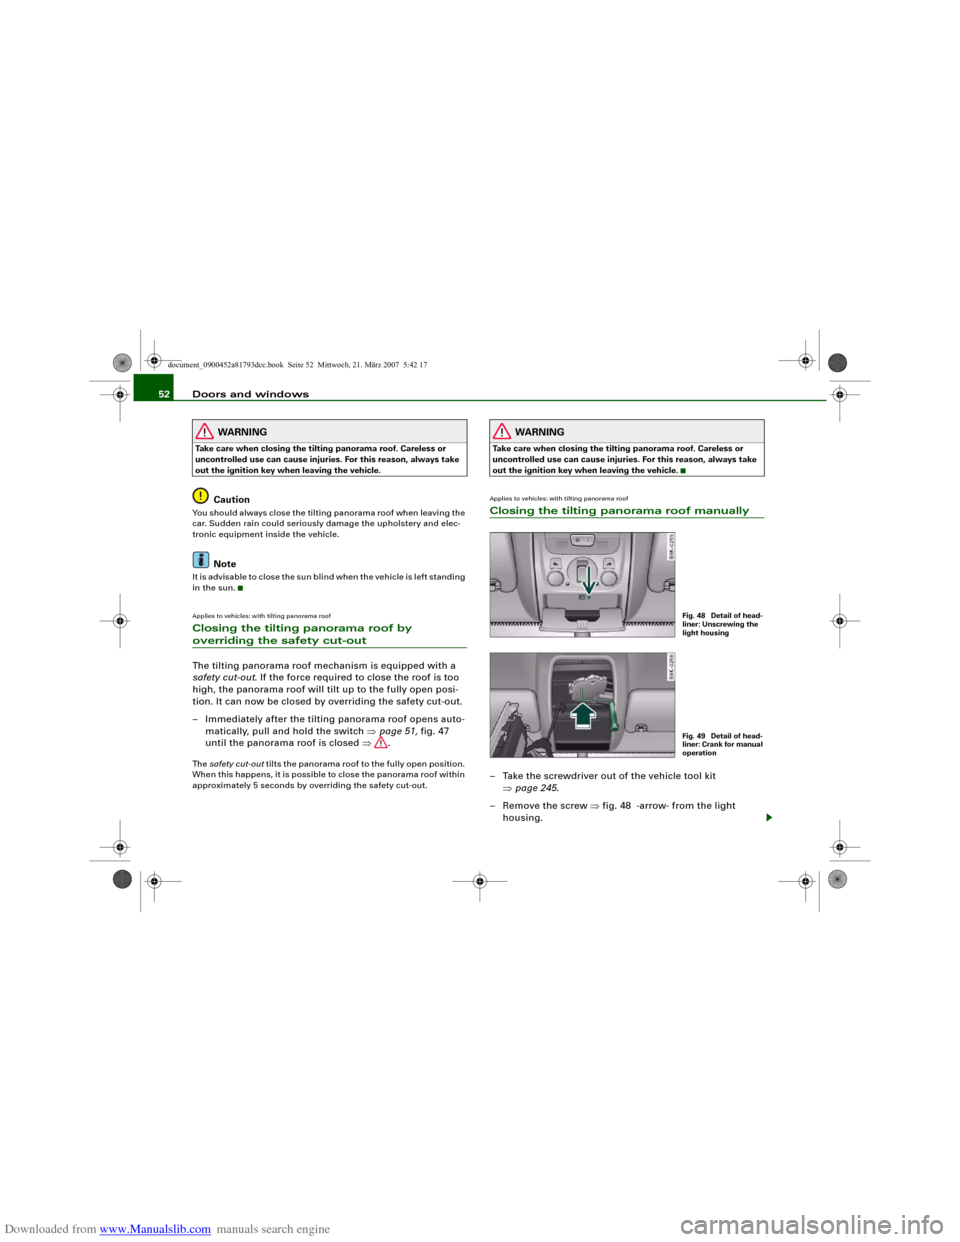
out the ignition key when leaving the vehicle.Applies to vehicles: with tilting panorama roofClosing the tilting panorama roof manually– Take the screwdriver out of the vehicle tool kit
⇒page 245.
– Remove the screw ⇒fig. 48 -arrow- from the light
housing.
Fig. 48 Detail of head-
liner: Unscrewing the
light housingFig. 49 Detail of head-
liner: Crank for manual
operation
document_0900452a81793dcc.book Seite 52 Mittwoch, 21. März 2007 5:42 17
Page 55 of 294
Downloaded from www.Manualslib.com manuals search engine Doors and windows53
Controls
Safety
Driving tips
General maintenance
Self-help
Technical data
– Carefully pull out the light housing.
– Remove the fuse box cover ⇒page 261 ⇒page 261,
fig. 241 on the driver's side.
– Take the crank handle from its mounting.
– Insert the crank handle all the way into the hexagonal
socket ⇒page 52, fig. 49.
– Hold the crank in position and turn it to close the sun
roof.
– Re-install the complete light housing.
– Have the fault rectified.
NoteTo make it easier to turn the crank, you can make use of the screw-
driver handle. Detach the handle from the screwdriver and then fit
the handle onto the crank.
document_0900452a81793dcc.book Seite 53 Mittwoch, 21. März 2007 5:42 17