2008 AUDI S5 ESP
[x] Cancel search: ESPPage 126 of 294
Downloaded from www.Manualslib.com manuals search engine Driving 124The cruise control system allows you to drive at a constant speed of
30 km/h or higher.
A constant speed is maintained by adjusting the engine power or
braking the vehicle accordingly (while in cruise mode).
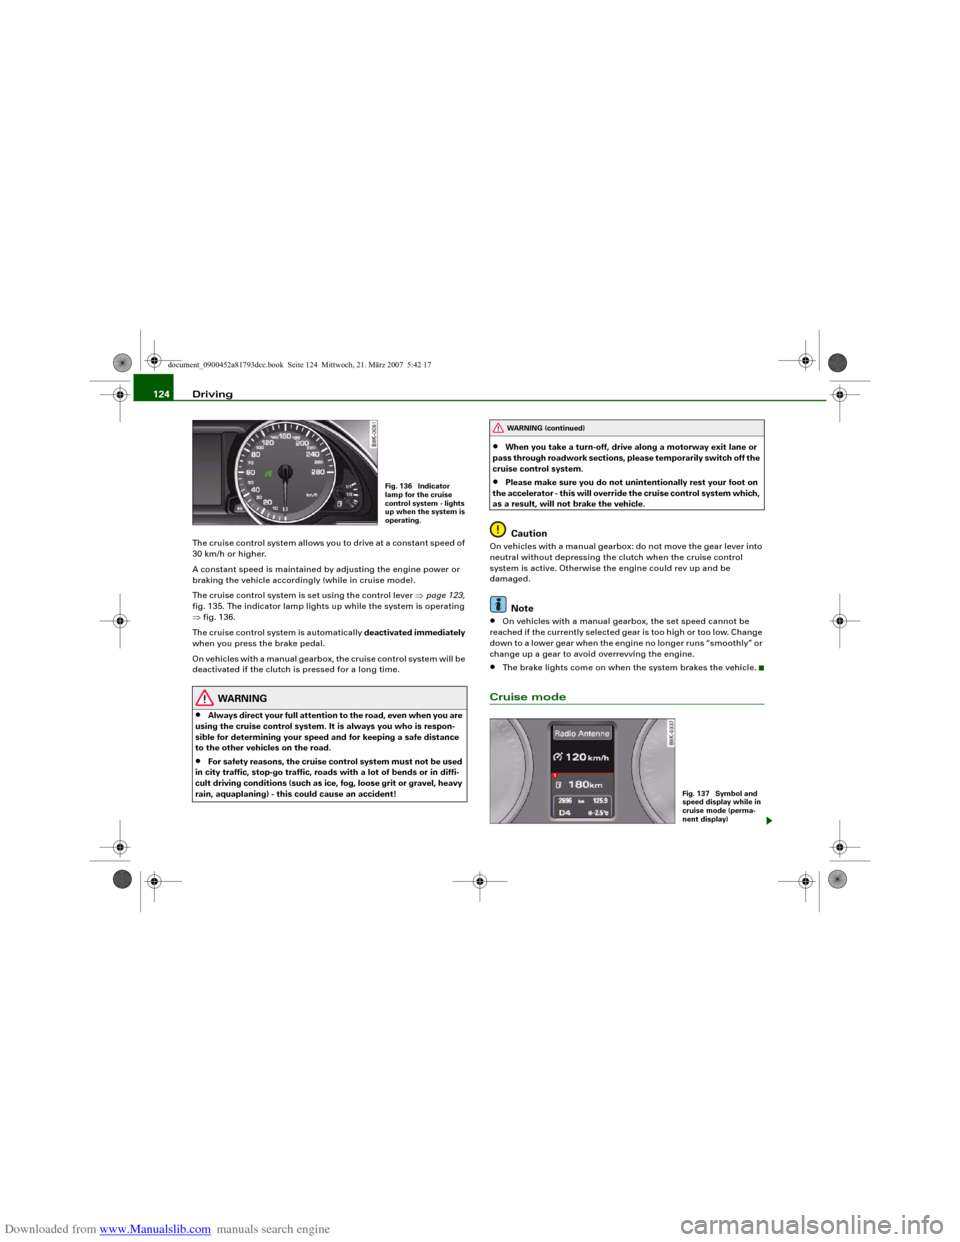
The cruise control system is set using the control lever ⇒page 123,
fig. 135. The indicator lamp lights up while the system is operating
⇒fig. 136.
The cruise control system is automatically deactivated immediately
when you press the brake pedal.
On vehicles with a manual gearbox, the cruise control system will be
deactivated if the clutch is pressed for a long time.
WARNING
•
Always direct your full attention to the road, even when you are
using the cruise control system. It is always you who is respon-
sible for determining your speed and for keeping a safe distance
to the other vehicles on the road.
•
For safety reasons, the cruise control system must not be used
in city traffic, stop-go traffic, roads with a lot of bends or in diffi-
cult driving conditions (such as ice, fog, loose grit or gravel, heavy
rain, aquaplaning) - this could cause an accident!
•
When you take a turn-off, drive along a motorway exit lane or
pass through roadwork sections, please temporarily switch off the
cruise control system.
•
Please make sure you do not unintentionally rest your foot on
the accelerator - this will override the cruise control system which,
as a result, will not brake the vehicle.Caution
On vehicles with a manual gearbox: do not move the gear lever into
neutral without depressing the clutch when the cruise control
system is active. Otherwise the engine could rev up and be
damaged.
Note
•
On vehicles with a manual gearbox, the set speed cannot be
reached if the currently selected gear is too high or too low. Change
down to a lower gear when the engine no longer runs “smoothly” or
change up a gear to avoid overrevving the engine.
•
The brake lights come on when the system brakes the vehicle.
Cruise mode
Fig. 136 Indicator
lamp for the cruise
control system - lights
up when the system is
operating.
WARNING (continued)
Fig. 137 Symbol and
speed display while in
cruise mode (perma-
nent display)
document_0900452a81793dcc.book Seite 124 Mittwoch, 21. März 2007 5:42 17
Page 131 of 294
Downloaded from www.Manualslib.com manuals search engine Audi parking system129
Controls
Safety
Driving tips
General maintenance
Self-help
Technical data When the vehicle is less than approx. 0.30 m away from the obstacle
the warning tone will sound continuously. From here at the latest,
the driver should then not reverse any further.
The volume of the warning beeps will be gradually reduced after
about 4 seconds if the vehicle remains at a constant distance from
a detected obstacle (it will not be reduced if the obstacle is closer
than 0.30 m). The warnings will then return to the normal volume if
the vehicle approaches the detected obstacle again.
Warning beeps
The warning beeps are produced by sound boxes. The volume and
pitch of the beeps can be adjusted in the MMI ⇒page 139.
WARNING
•
The sensors have blind spots in which obstacles are not regis-
tered. It is particularly important to ensure that there are no small
children or animals near the vehicle, as the sensors may not
always be able to detect them.
•
The parking aid cannot replace the full concentration of the
driver. The driver is always responsible for safety during parking
and other manoeuvres. Always keep a close watch on the area
around the vehicle.
•
Please note that low obstacles detected by the system may no
longer be registered by the sensors as the car moves closer, so the
system will not give any further warning. Certain kinds of obsta-
cles (such as wire fences, chains, thin painted posts or trailer draw
bars, etc.) may not always be detected by the system (accident
risk).Note
•
To ensure that the acoustic parking aid works properly, the
sensors must be kept clean and free of snow and ice. Please observe
the additional notes on ⇒page 143.
•
Please refer to the notes on towing ⇒page 138.
parking system plusApplies to vehicles: with parking system plusParking aid (front and rear), with display
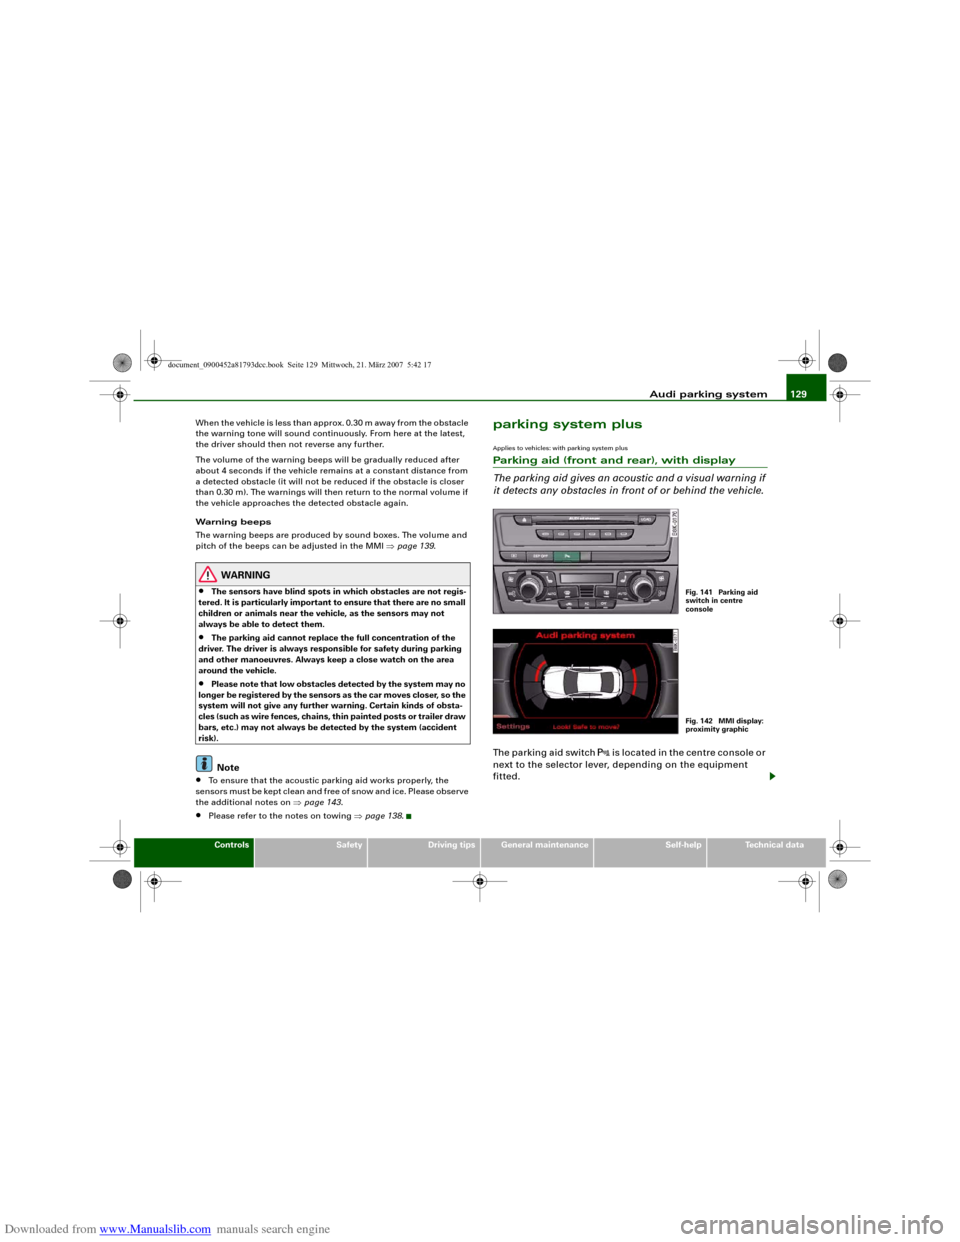
The parking aid gives an acoustic and a visual warning if
it detects any obstacles in front of or behind the vehicle.The parking aid switch
is located in the centre console or
next to the selector lever, depending on the equipment
fitted.
Fig. 141 Parking aid
switch in centre
consoleFig. 142 MMI display:
proximity graphic
document_0900452a81793dcc.book Seite 129 Mittwoch, 21. März 2007 5:42 17
Page 133 of 294

Downloaded from www.Manualslib.com manuals search engine Audi parking system131
Controls
Safety
Driving tips
General maintenance
Self-help
Technical data reached the danger (collision) zone. The driver should then not
move backwards/forwards any further ⇒.
The graphic display in the MMI screen ⇒page 140 can be switched
off. The acoustic proximity warning will, however, remain activated.
The graphic display will be deactivated as soon as you press a func-
tion selector button on the MMI control console. The graphic
display will appear again the next time you park the vehicle. The
graphic display in the MMI screen can also be switched on again
manually using the switch
⇒page 129, fig. 141. For more infor-
mation on the MMI control console please refer to the MMI Oper-
ating Manual.
WARNING
•
The sensors have blind spots in which obstacles are not regis-
tered. It is particularly important to ensure that there are no small
children or animals near the vehicle, as the sensors may not
always be able to detect them.
•
The parking aid cannot replace the full concentration of the
driver. The driver is always responsible for safety during parking
and other manoeuvres. Always keep a close watch on the area
around the vehicle.
•
Please note that low obstacles detected by the system may no
longer be registered by the sensors as the car moves closer, so the
system will not give any further warning. Certain kinds of obsta-
cles (such as wire fences, chains, thin painted posts or trailer draw
bars, etc.) may not always be detected by the system (accident
risk).Note
•
There is a slight delay in the picture display.
•
You can change the settings for the graphic display in the MMI
⇒page 140.
•
To ensure that the acoustic parking aid works properly, the
sensors must be kept clean and free of snow and ice. Please observe
the additional notes on ⇒page 143.
•
Please refer to the notes on towing ⇒page 138.
parking system advancedApplies to vehicles: with parking system advancedParking aid (front and rear), with display and reversing camera
The parking aid gives an acoustic and visual warning if it
detects any obstacles in front of or behind the vehicle. The
reversing camera provides further assistance when
parking.
Fig. 1 43 Bo o t lid : Lo c a-
tion of reversing
camera
document_0900452a81793dcc.book Seite 131 Mittwoch, 21. März 2007 5:42 17
Page 135 of 294
Downloaded from www.Manualslib.com manuals search engine Audi parking system133
Controls
Safety
Driving tips
General maintenance
Self-help
Technical data displayed on the MMI screen. The warnings will then return to the
normal volume if the vehicle approaches the detected obstacle
again.
Graphic display
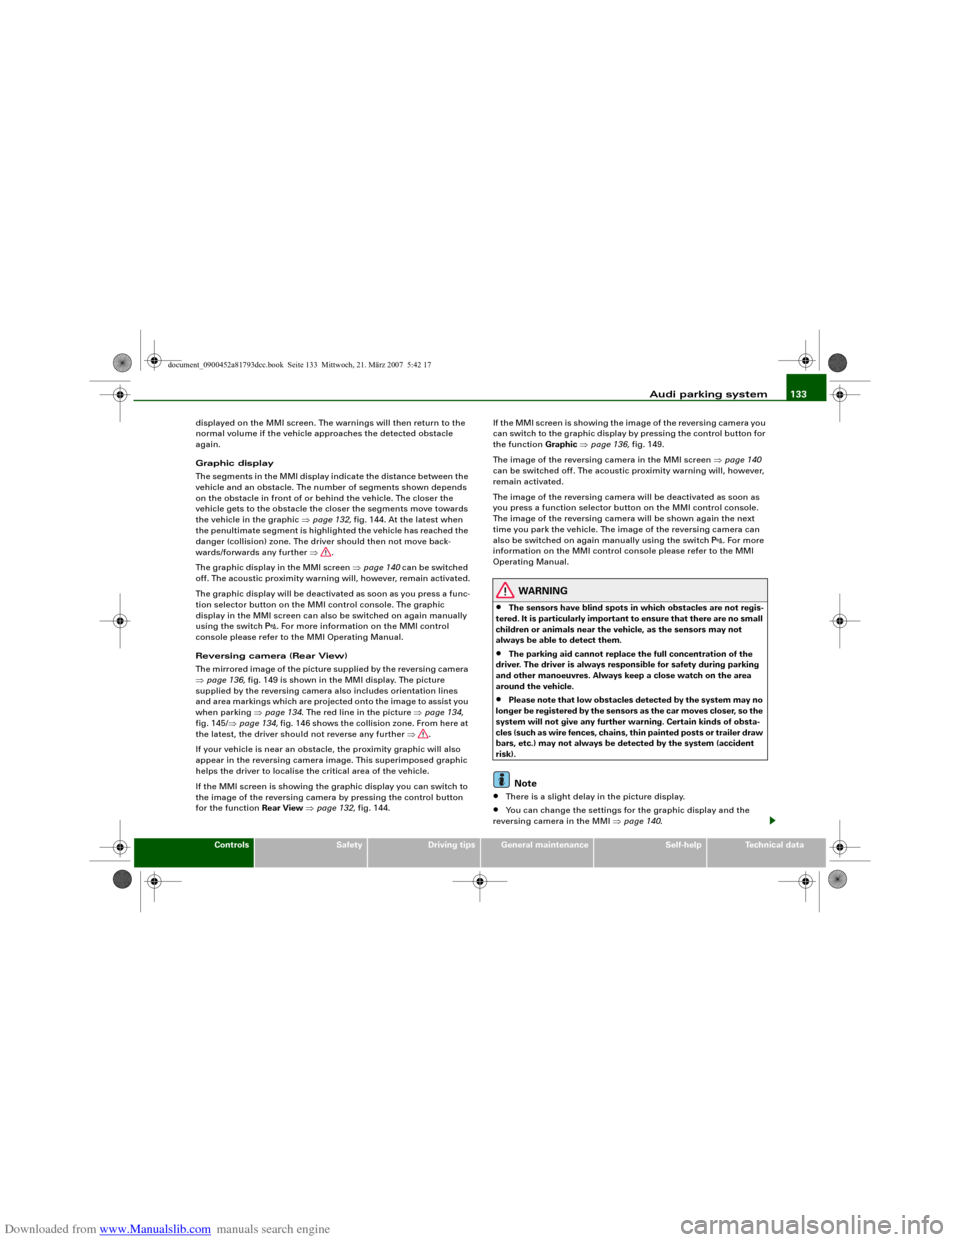
The segments in the MMI display indicate the distance between the
vehicle and an obstacle. The number of segments shown depends
on the obstacle in front of or behind the vehicle. The closer the
vehicle gets to the obstacle the closer the segments move towards
the vehicle in the graphic ⇒page 132, fig. 144. At the latest when
the penultimate segment is highlighted the vehicle has reached the
danger (collision) zone. The driver should then not move back-
wards/forwards any further ⇒.
The graphic display in the MMI screen ⇒page 140 can be switched
off. The acoustic proximity warning will, however, remain activated.
The graphic display will be deactivated as soon as you press a func-
tion selector button on the MMI control console. The graphic
display in the MMI screen can also be switched on again manually
using the switch
. For more information on the MMI control
console please refer to the MMI Operating Manual.
Reversing camera (Rear View)
The mirrored image of the picture supplied by the reversing camera
⇒page 136, fig. 149 is shown in the MMI display. The picture
supplied by the reversing camera also includes orientation lines
and area markings which are projected onto the image to assist you
when parking ⇒page 134. The red line in the picture ⇒page 134,
fig. 145/⇒page 134, fig. 146 shows the collision zone. From here at
the latest, the driver should not reverse any further ⇒.
If your vehicle is near an obstacle, the proximity graphic will also
appear in the reversing camera image. This superimposed graphic
helps the driver to localise the critical area of the vehicle.
If the MMI screen is showing the graphic display you can switch to
the image of the reversing camera by pressing the control button
for the function Rear View ⇒page 132, fig. 144.If the MMI screen is showing the image of the reversing camera you
can switch to the graphic display by pressing the control button for
the function Graphic ⇒page 136, fig. 149.
The image of the reversing camera in the MMI screen ⇒page 140
can be switched off. The acoustic proximity warning will, however,
remain activated.
The image of the reversing camera will be deactivated as soon as
you press a function selector button on the MMI control console.
The image of the reversing camera will be shown again the next
time you park the vehicle. The image of the reversing camera can
also be switched on again manually using the switch
. For more
information on the MMI control console please refer to the MMI
Operating Manual.
WARNING
•
The sensors have blind spots in which obstacles are not regis-
tered. It is particularly important to ensure that there are no small
children or animals near the vehicle, as the sensors may not
always be able to detect them.
•
The parking aid cannot replace the full concentration of the
driver. The driver is always responsible for safety during parking
and other manoeuvres. Always keep a close watch on the area
around the vehicle.
•
Please note that low obstacles detected by the system may no
longer be registered by the sensors as the car moves closer, so the
system will not give any further warning. Certain kinds of obsta-
cles (such as wire fences, chains, thin painted posts or trailer draw
bars, etc.) may not always be detected by the system (accident
risk).Note
•
There is a slight delay in the picture display.
•
You can change the settings for the graphic display and the
reversing camera in the MMI ⇒page 140.
document_0900452a81793dcc.book Seite 133 Mittwoch, 21. März 2007 5:42 17
Page 137 of 294
Downloaded from www.Manualslib.com manuals search engine Audi parking system135
Controls
Safety
Driving tips
General maintenance
Self-help
Technical data
•
Off (no display).
The reversing camera can be switched on and off in the MMI
⇒page 140. The acoustic proximity warning will, however, remain
activated.
WARNING
•
The reversing camera has blind spots in which obstacles are
not registered. It is particularly important to ensure that there are
no small children or animals near the vehicle, as the reversing
camera may not always be able to detect them (accident risk).
•
The parking aid cannot replace the full concentration of the
driver. The driver is always responsible for safety during parking
and other manoeuvres. Always keep a close watch on the area
around the vehicle.
•
Please note that low obstacles detected by the system may no
longer be registered by the sensors as the car moves closer, so the
system will not give any further warning. Certain kinds of obsta-
cles (such as wire fences, chains, thin painted posts or trailer draw
bars, etc.) may not always be detected by the system (accident
risk).Note
•
There is a slight delay in the picture display.
•
To ensure that the reversing camera works properly, the lens of
the camera ⇒page 131, fig. 143 must be kept clean and free of
snow and ice. Please observe the additional notes on ⇒page 143.
•
If the boot lid is open the angle covered by the camera will
change. For this reason, the image of the reversing camera will then
be shown without orientation lines and blue area markings.
•
Please refer to the notes on towing ⇒page 138.
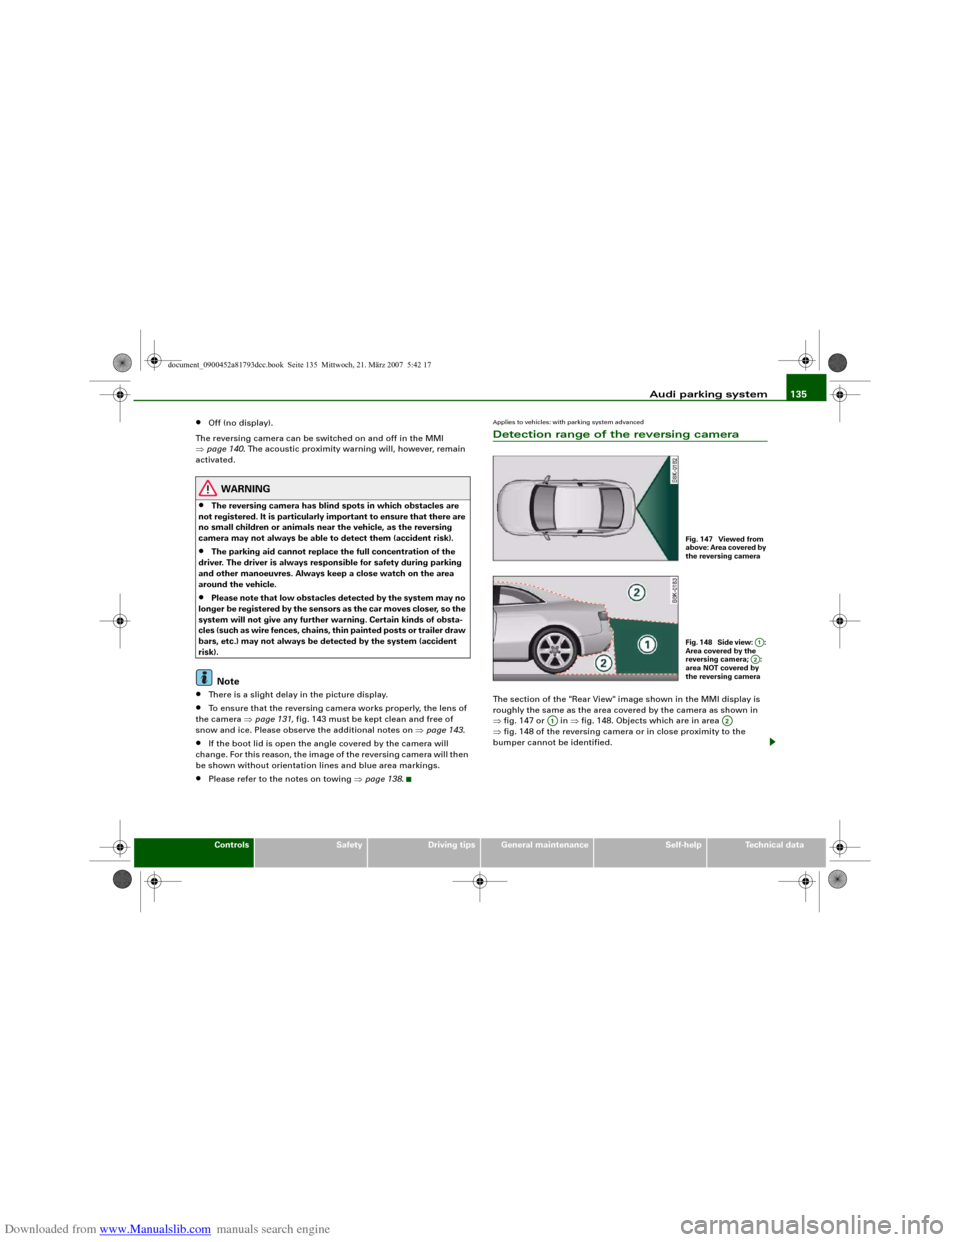
Applies to vehicles: with parking system advancedDetection range of the reversing cameraThe section of the "Rear View" image shown in the MMI display is
roughly the same as the area covered by the camera as shown in
⇒fig. 147 or in ⇒fig. 148. Objects which are in area
⇒fig. 148 of the reversing camera or in close proximity to the
bumper cannot be identified.
Fig. 147 Viewed from
above: Area covered by
the reversing cameraFig. 148 Side view: :
Area covered by the
reversing camera; :
area NOT covered by
the reversing camera
A1A2
A1
A2
document_0900452a81793dcc.book Seite 135 Mittwoch, 21. März 2007 5:42 17
Page 144 of 294
Downloaded from www.Manualslib.com manuals search engine Audi parking system 142•
The parking aid cannot replace the full concentration of the
driver. The driver is always responsible for safety during parking
and other manoeuvres. Always keep a close watch on the area
around the vehicle.
•
When parking or manoeuvring do not rely solely on the MMI
display. Some objects (e.g. narrow posts or bars) may - due to the
resolution of the display screen - not be displayed in a satisfactory
manner or may not be displayed at all.
Applies to vehicles: with parking system advancedNote on distances
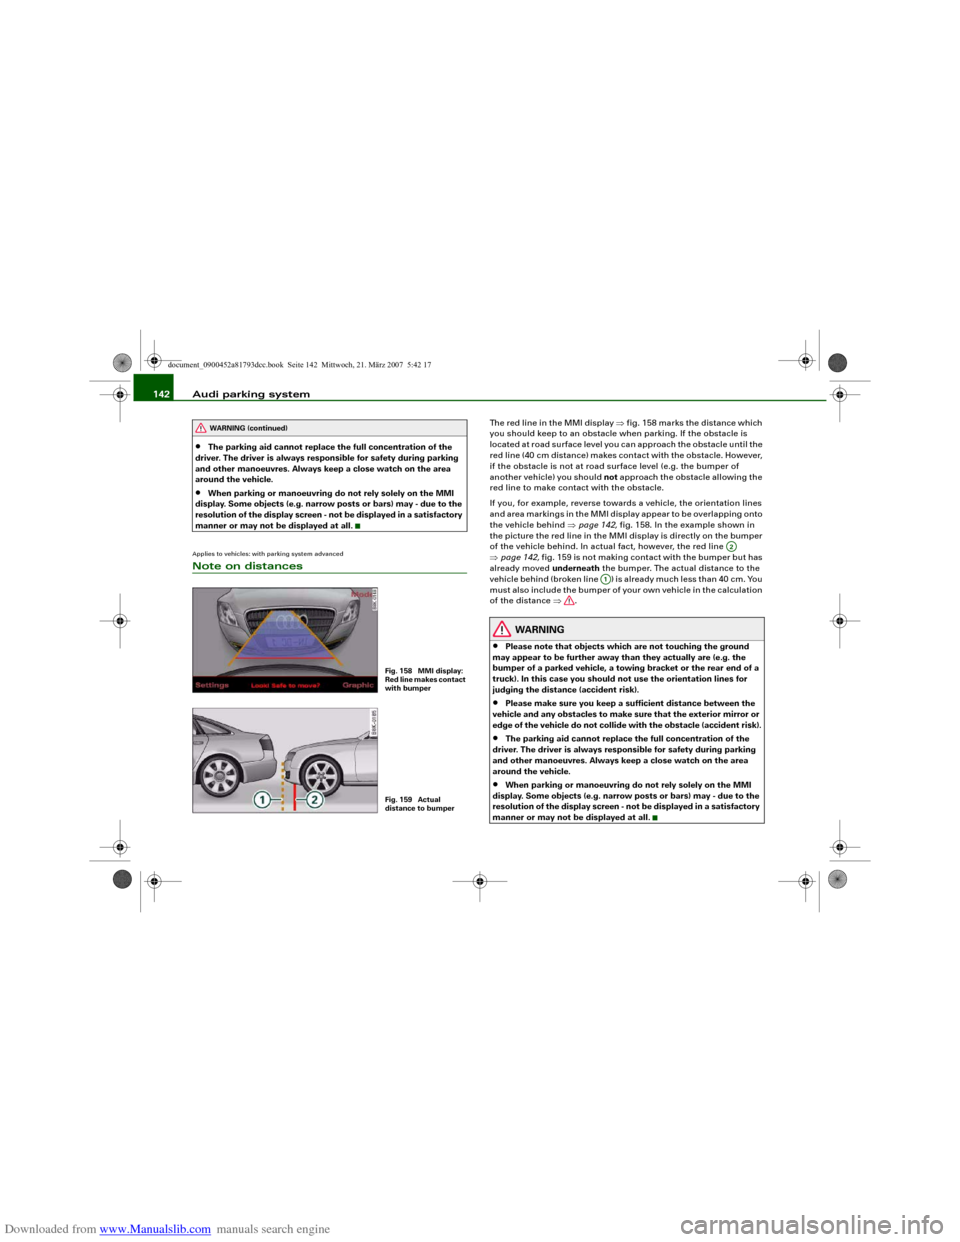
The red line in the MMI display ⇒fig. 158 marks the distance which
you should keep to an obstacle when parking. If the obstacle is
located at road surface level you can approach the obstacle until the
red line (40 cm distance) makes contact with the obstacle. However,
if the obstacle is not at road surface level (e.g. the bumper of
another vehicle) you should not approach the obstacle allowing the
red line to make contact with the obstacle.
If you, for example, reverse towards a vehicle, the orientation lines
and area markings in the MMI display appear to be overlapping onto
the vehicle behind ⇒page 142, fig. 158. In the example shown in
the picture the red line in the MMI display is directly on the bumper
of the vehicle behind. In actual fact, however, the red line
⇒page 142, fig. 159 is not making contact with the bumper but has
already moved underneath the bumper. The actual distance to the
vehicle behind (broken line ) is already much less than 40 cm. You
must also include the bumper of your own vehicle in the calculation
of the distance ⇒.
WARNING
•
Please note that objects which are not touching the ground
may appear to be further away than they actually are (e.g. the
bumper of a parked vehicle, a towing bracket or the rear end of a
truck). In this case you should not use the orientation lines for
judging the distance (accident risk).
•
Please make sure you keep a sufficient distance between the
vehicle and any obstacles to make sure that the exterior mirror or
edge of the vehicle do not collide with the obstacle (accident risk).
•
The parking aid cannot replace the full concentration of the
driver. The driver is always responsible for safety during parking
and other manoeuvres. Always keep a close watch on the area
around the vehicle.
•
When parking or manoeuvring do not rely solely on the MMI
display. Some objects (e.g. narrow posts or bars) may - due to the
resolution of the display screen - not be displayed in a satisfactory
manner or may not be displayed at all.
WARNING (continued)
Fig. 158 MMI display:
Red line makes contact
with bumperFig. 159 Actual
distance to bumper
A2
A1
document_0900452a81793dcc.book Seite 142 Mittwoch, 21. März 2007 5:42 17
Page 145 of 294
Downloaded from www.Manualslib.com manuals search engine Audi parking system143
Controls
Safety
Driving tips
General maintenance
Self-help
Technical data
Safety notesApplies to vehicles: with parking systemFault warning for the acoustic parking aidparking system:
If you hear a long beep when you engage reverse gear, the rear
parking aid is not functioning correctly.
parking system plus*/parking system advanced*:
If you hear a long beep for a few seconds when you engage reverse
gear and the diode in the switch
* starts flashing, there is a fault
in the rear and front parking system with graphic display.
You will be notified of a system fault
•
when you manually activate the parking system via the switch
* ⇒page 129•
the first time you engage reverse gear after switching on the
ignition, or
•
immediately, if the fault is identified while you are using the
parking system.Note
If the system alerts you to a fault please have the fault rectified by
an Audi workshop or other qualified workshop.Applies to vehicles: with parking system advancedNotes on reversing cameraWe recommend that you practise parking with the reversing camera
in a quiet location (car park or similar) in order to become familiar
with the system, including the orientation lines and all the other
features. Ideally, the weather and light conditions should be good.Vehicles or other objects shown in the MMI display appear to be
further away or closer, if:
•
you are reversing from a horizontal surface up a gradient or
down a hill,
•
you are reversing towards protruding objects,
•
the vehicle has been loaded with a greater load on the rear.
The accuracy of the orientation lines and the blue area markings
decreases if:
•
the reversing camera does not provide a reliable image, e.g. if
visibility is poor or the lens is dirty,
•
the sun is so dazzling that you cannot see the image on the
display screen.
How to clean the lens of the reversing camera:
•
Moisten the lens using a commercially available, alcohol-based
glass cleaning agent and clean the lens with a dry cloth.
•
Remove snow using a small brush.
•
If possible, use de-icing spray to remove any ice ⇒.
WARNING
•
Even when using the reversing camera, the driver must still
keep a close watch on the area behind the vehicle and use the
mirrors.
•
For technical reasons, the reversing camera cannot show the
complete area behind the vehicle ⇒page 135, fig. 148. It is partic-
ularly important to ensure that there are no small children or
animals near the vehicle, as the reversing camera may not always
be able to detect them (accident risk).
•
The parking aid cannot replace the full concentration of the
driver. The driver is always responsible for safety during parking
and other manoeuvres. Always keep a close watch on the area
around the vehicle.
document_0900452a81793dcc.book Seite 143 Mittwoch, 21. März 2007 5:42 17
Page 147 of 294
Downloaded from www.Manualslib.com manuals search engine HomeLink145
Controls
Safety
Driving tips
General maintenance
Self-help
Technical data
HomeLinkUniversal transmitterApplies to vehicles: with HomeLinkDescription
The HomeLink universal transmitter can be programmed
to replace the hand-held controls of devices already in
use.HomeLink allows you to conveniently activate garage doors, estate
gates, security systems, home or office lighting and other electric
devices by means of control buttons inside your car.
HomeLink can replace up to three hand-held transmitters operating
existing devices on your property with a single universal trans-
mitter. This will be possible for most transmitters which control the
drive units for a garage door or external gates, etc. You can
programme the individual hand-held transmitters for your remote
control at or near the centre of the radiator grille. This is where the
control unit is located.
To be able to control systems with HomeLink, you need to perform
initial programming on the HomeLink transmitter first. If systems
fail to respond after the initial programming, check whether these
systems work with a "rolling code" (variable security code)
⇒page 146.
WARNING
When you are programming the HomeLink universal transmitter,
make sure that no persons or objects are close to the devices
receiving the transmitter signals. If a gate or door is inadvertently
set into motion during programming, persons might be injured or
other damage caused by moving parts.
Note
•
For additional information on HomeLink
® and/or products
compatible with HomeLink
®, please call the toll-free HomeLink
®
hotline (0) 08000466 35465 or alternatively +49 (0) 6838 907 277, or
visit the HomeLink
® website at: www.homelink.com
•
HomeLink
® is a registered trademark of Johnson Controls.
Applies to vehicles: with HomeLinkProgramming the universal transmitter
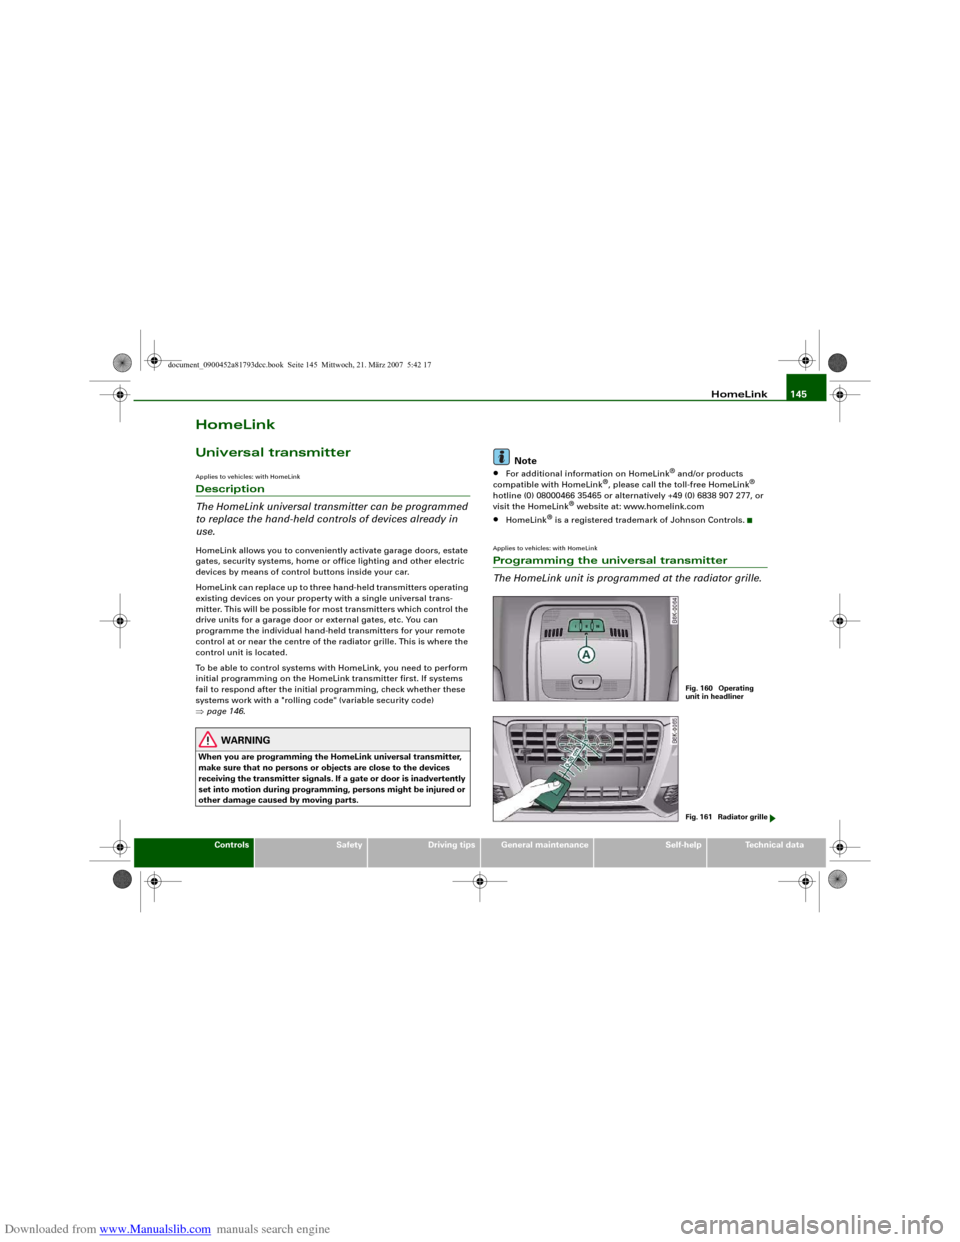
The HomeLink unit is programmed at the radiator grille.
Fig. 160 Operating
unit in headlinerFig. 161 Radiator grille
document_0900452a81793dcc.book Seite 145 Mittwoch, 21. März 2007 5:42 17