2008 AUDI S5 tyre pressure
[x] Cancel search: tyre pressurePage 238 of 294
Downloaded from www.Manualslib.com manuals search engine Wheels and tyres 236replacement parts, trained personnel and facilities for disposing of
the old tyres.
WARNING
•
It is very important to ensure that the tyres you have chosen
have adequate clearance. When selecting replacement tyres, do
not rely entirely on the nominal tyre size marked on the tyre; with
some makes of tyre the effective tyre size can differ significantly
from the nominal dimensions, even though the tyres have the
same size designation. Inadequate tyre clearance can result in
damage to the tyres or the vehicle, causing a serious safety risk. It
may also invalidate the vehicle's type approval for use on public
roads.
•
Please ask your Audi dealer or qualified workshop whether run
flat tyres can be used on your vehicle. Unauthorised use of these
tyres can invalidate the vehicle's type approval for use on public
roads. Furthermore, this could cause damage to your vehicle and
possibly also result in an accident.
•
Avoid running the car on tyres that are more than 6 years old.
If you have no alternative, you should drive slowly and with extra
care at all times.For the sake of the environment
Old tyres must be disposed of according to the laws in the country
concerned.
Note
•
Never mount used tyres if you are not sure of their previous
history.
•
For technical reasons it is not normally possible to use wheel
rims from other vehicles. In some cases this also applies to rims
from other vehicles of the same model.
Wheel bolts
The wheel bolts are designed to suit the rims on your car.The wheel bolts are matched to the rims. When installing different
wheels (for instance wheels with winter tyres) it is important to use
the correct wheel bolts with the right length and correctly shaped
bolt heads. This is essential for the secure fit of the wheels and for
the proper function of the brake system.
Audi dealers have full information on the technical requirements
when installing or changing tyres, rims or wheel trims.
The wheel bolts should be clean and turn easily.
A special adapter is required to turn the anti-theft wheel bolts*
⇒page 254.Winter tyres
Winter tyres will significantly improve the car's handling
in winter road conditions.–Use only radial ply winter tyres.
– Winter tyres must be fitted on all four wheels.
– Only use winter tyres of the correct type approved for
your vehicle.
– Please note that the maximum permissible speed for
winter tyres may be lower than for summer tyres.
– Also note that winter tyres are no longer effective when
the tread is worn down.
– After fitting the wheels you must always check the tyre
pressures. The correct tyre pressures are listed on the
sticker on the end face of the driver's door.
document_0900452a81793dcc.book Seite 236 Mittwoch, 21. März 2007 5:42 17
Page 249 of 294
Downloaded from www.Manualslib.com manuals search engine Self-help247
Controls
Safety
Driving tips
General maintenance
Self-help
Technical data How to use the compact temporary spare wheel
Should you ever have a punctured tyre, the compact temporary
spare wheel is only intended for temporary use until you can reach
a workshop. The standard-size road wheel should be refitted as
soon as possible.
Please note the following restrictions when using the compact
temporary spare wheel. The compact temporary spare wheel is
designed specifically for this model. For this reason, do not use a
temporary spare from a different type of vehicle.
Snow chains
For technical reasons, snow chains must not be used on the
compact temporary spare wheel.
If you should have a puncture on one of the front wheels when using
snow chains, fit the compact temporary spare in place of one of the
rear wheels. You can then attach the snow chains to the wheel taken
from the rear and use this wheel to replace the punctured front
wheel.
WARNING
•
The tyre pressures must be checked and corrected as soon as
possible. The tyre pressure of the compact temporary spare wheel
must be 4.2 bar – an incorrectly inflated tyre can cause an acci-
dent.
•
Do not drive faster than 80 km/h - higher speeds can cause an
accident.
•
Avoid heavy acceleration, hard braking and fast cornering – risk
of accident.
•
Never use two or more compact spare tyres at the same time –
risk of accident.
•
No other type of tyre (normal summer or winter tyres) may be
fitted on the compact temporary spare wheel.
Ty r e r e p a i r sGeneral information and safety notes
Repaired tyres are only suitable for temporary use.Your vehicle is equipped with a tyre repair kit: the Tyre Mobility
System (TMS).
In the event of a puncture you will find the TMS, which consists of a
sealing compound and a compressor, located under the floor panel
in the luggage compartment.
The TMS will reliably seal tyres damaged by foreign bodies,
provided that the cuts or punctures are no larger than approx. 4 mm
in diameter.
It is not necessary to remove the foreign body from the tyre.
The sealing compound must not be used:•
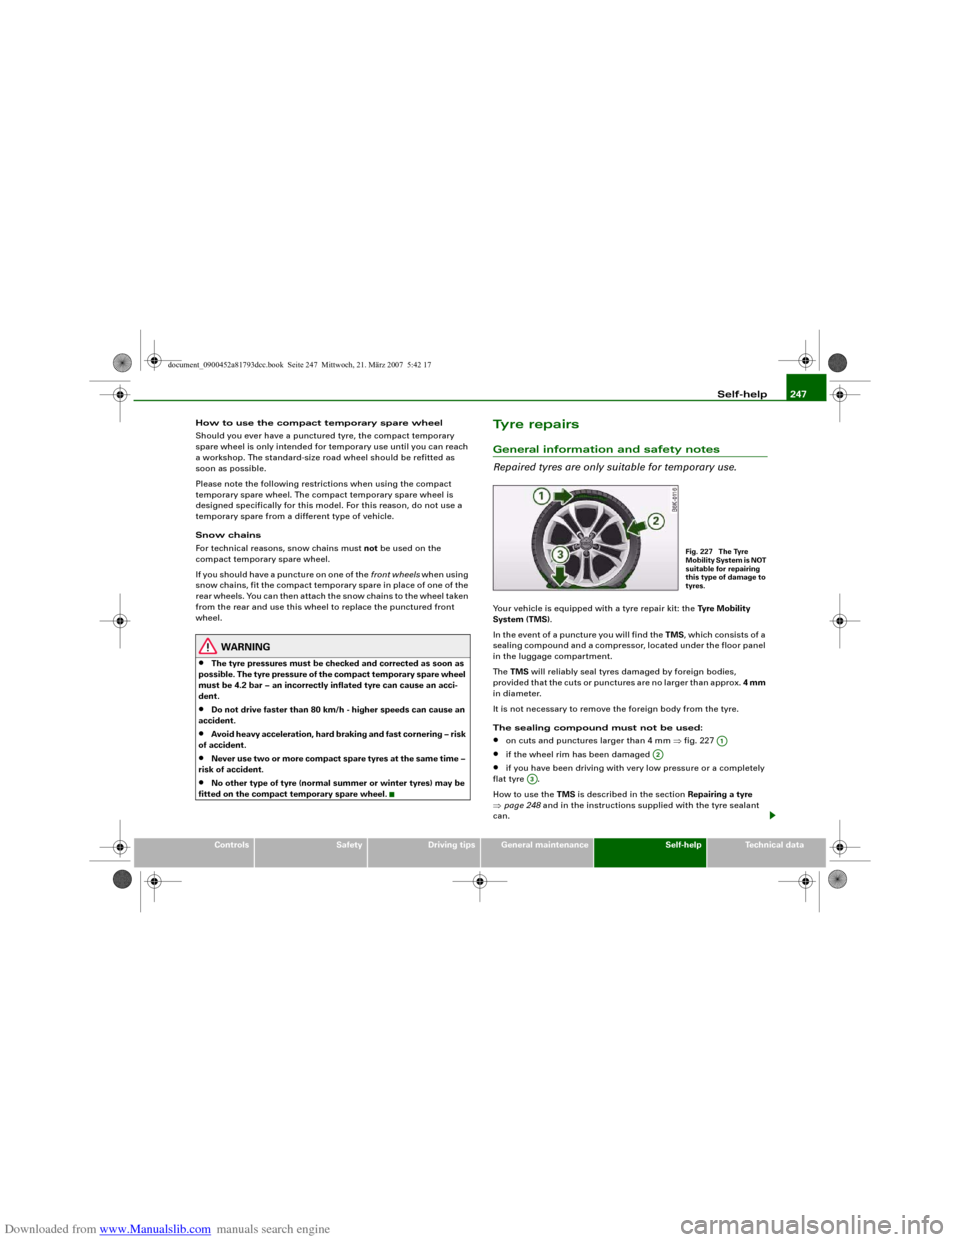
on cuts and punctures larger than 4 mm ⇒fig. 227
•
if the wheel rim has been damaged
•
if you have been driving with very low pressure or a completely
flat tyre .
How to use the TMS is described in the section Repairing a tyre
⇒page 248 and in the instructions supplied with the tyre sealant
can.
Fig. 227 The Tyre
Mobility System is NOT
suitable for repairing
this type of damage to
tyres.
A1
A2
A3
document_0900452a81793dcc.book Seite 247 Mittwoch, 21. März 2007 5:42 17
Page 250 of 294
Downloaded from www.Manualslib.com manuals search engine Self-help 248The TMS can be used at outside temperatures down to – 20 °C.
WARNING
After repairing a tyre please note the following points:•
Do not drive faster than 80 km/h.
•
Avoid heavy acceleration, hard braking and fast cornering.
•
Vehicle handling could be impaired.
•
Tyres which have been sealed using the TMS are only suitable
for temporary use. Damaged tyres must be renewed.
•
The TMS must NOT be used,
−on cuts and punctures larger than 4 mm
−if the wheel rim has been damaged
−if you have been driving with very low pressure or a
completely flat tyre
•
Seek professional assistance if the repair of a tyre puncture is
not possible with the sealing compound.
•
Do not allow the sealant to come into contact with your eyes,
skin or clothing.
•
If you do come into contact with the sealant immediately rinse
the eyes or skin affected with clean water.
•
Change clothing immediately if it becomes soiled with the tyre
sealant.
•
Make sure you do not breathe in the fumes!
•
If any of the tyre sealant is accidentally ingested, immediately
rinse the mouth thoroughly and drink lots of water.
•
Do not induce vomiting. Immediately contact a doctor!
•
If any allergic reactions should occur get medical help immedi-
ately.
•
Keep the sealant away from children.
For the sake of the environment
Used bottles of sealing compound can be returned to an Audi dealer
for disposal.
Note
•
If sealant should leak out, leave it to dry. When it has dried, you
can pull it off like a piece of foil.
•
Observe the expiry date stated on the sealing compound can.
Have the sealing compound exchanged by a qualified workshop.
Repairing a tyrePreparations
– If you have a flat tyre, stop the car well away from moving
traffic.
– Apply the parking brake to stop the vehicle moving acci-
dentally.
–Engage first gear.
– Check whether a repair is possible using the Tyre
Mobility System ⇒page 247.
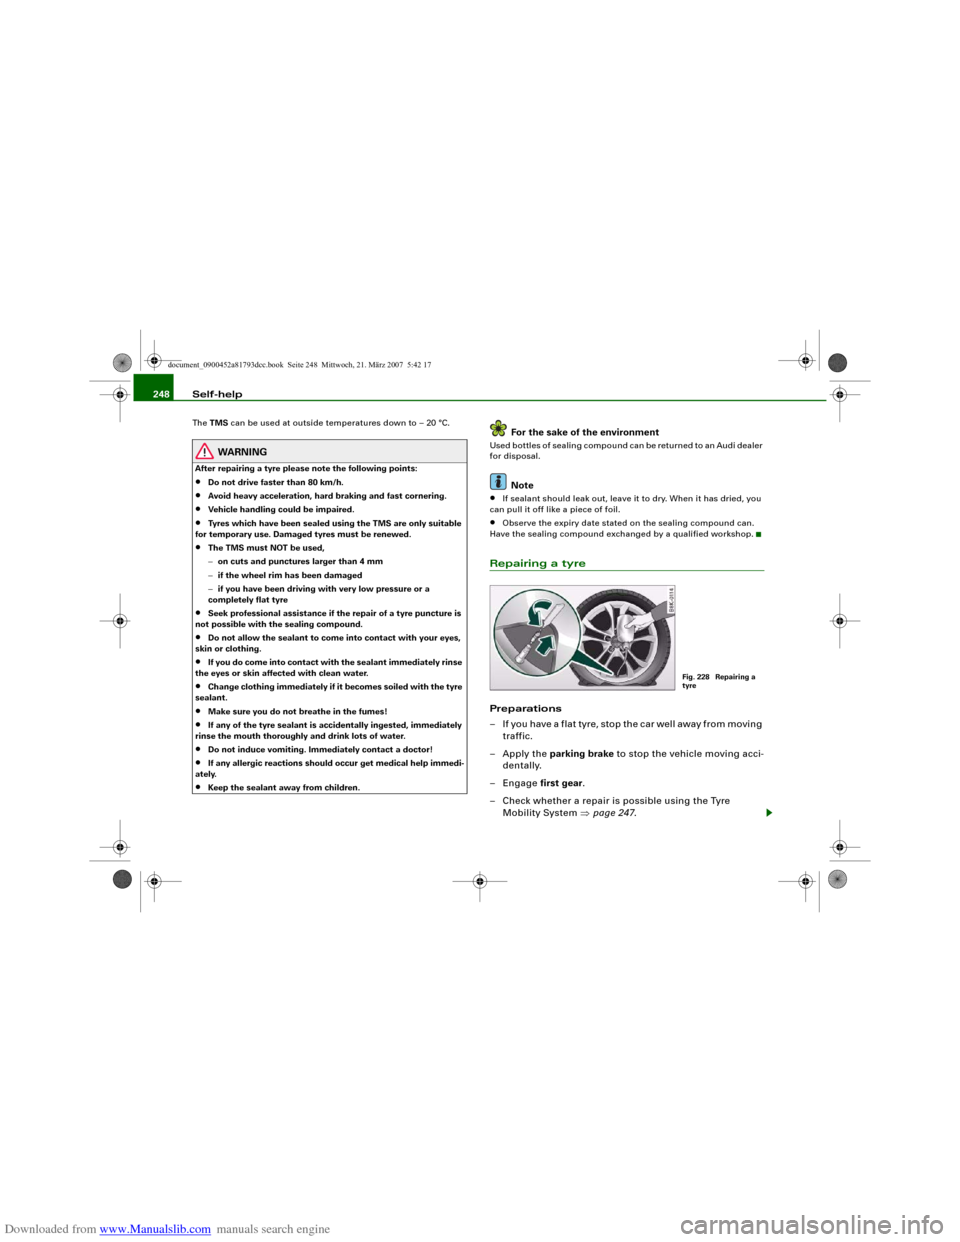
Fig. 228 Repairing a
tyre
document_0900452a81793dcc.book Seite 248 Mittwoch, 21. März 2007 5:42 17
Page 251 of 294
Downloaded from www.Manualslib.com manuals search engine Self-help249
Controls
Safety
Driving tips
General maintenance
Self-help
Technical data
– Ensure that all passengers leave the vehicle and move
away from the danger area ⇒.
– Take the tyre sealant can and the electric compressor out
of the luggage compartment ⇒page 245.
– Fix the sticker “max. 80 km/h”, which is included with the
tyre sealant can, onto the instrument cluster where the
driver will see it.
Filling the tyre
– Shake the tyre sealant can well.
– Screw the enclosed filling hose onto the sealant can as
far as it will go. This will automatically pierce the foil
sealing the can.
– Take the valve cap off the tyre valve and use the enclosed
valve insert tool to unscrew the valve insert ⇒page 248,
fig. 228.
– Place the valve insert onto a clean surface.
– Remove the sealing plug from the filling hose and insert
the hose into the tyre valve.
– Hold the tyre sealant can upside down and fill the
complete contents of the can into the tyre.
– Then disconnect the hose and screw the valve insert
firmly back into the tyre valve.
Inflating the tyre
– Screw the filling hose of the electric compressor onto the
tyre valve and plug the connector into the cigarette
lighter.– Pump the tyre up to 2.0 to 2.5 bar and monitor the pres-
sure shown on the pressure gauge.
– If the tyre pressure remains lower than the value speci-
fied above drive the vehicle approx. 10 metres forwards
or backwards, so that the sealant can spread evenly in
the tyre. If the pressure is still lower than the specifica-
tion the tyre is too badly damaged and cannot be
repaired using the tyre sealant.
Final checks
– After about 10 minutes stop to check the tyre pressure.
– If tyre pressure is less than 1.3 bar, the tyre is too badly
damaged. Do not drive on. You should obtain profes-
sional assistance.
WARNING
•
If you have a puncture in moving traffic, switch on the hazard
warning lights and place the warning triangle in a visible location.
This is for your own safety and also warns other road users.
•
Make sure your passengers wait in a safe place (for instance
behind the roadside crash barrier).
•
Please observe the manufacturers' safety notes on the
compressor and the instructions supplied with the tyre sealant
can.
•
If it was not possible to build up a tyre pressure of 2.0 bar
within 6 minutes this means that the tyre is too badly damaged.
Do not drive on.
•
Seek professional assistance if the repair of a tyre puncture is
not possible with the sealing compound.
•
If tyre pressure is less than 1.3 bar after driving about 10
minutes, the tyre is too badly damaged. Do not drive on. You
should obtain professional assistance.
document_0900452a81793dcc.book Seite 249 Mittwoch, 21. März 2007 5:42 17
Page 253 of 294
Downloaded from www.Manualslib.com manuals search engine Self-help251
Controls
Safety
Driving tips
General maintenance
Self-help
Technical data
– Tighten the wheel bolts firmly i n d i a g o n a l s e qu e n c e w i t h
the box spanner ⇒page 251.
–Fit the hub cap back on.After changing a wheel
What you must do after changing a wheel.– Place the wheel with the defective tyre in the spare wheel
well and secure it.
– Put the tools and the jack* back in the luggage compart-
ment.
–The inflation pressure of the newly fitted spare tyre must
be checked as soon as possible.
–Have the tightening torque of the wheel bolts checked as
soon as possible with a torque wrench. The correct tight-
ening torque is 120 Nm.
– Have the flat tyre replaced as quickly as possible.
Note•
If you notice that the wheel bolts are corroded and difficult to
turn when changing a wheel, they must be replaced before having
the tightening torque checked.
•
In the interest of safety, drive at moderate speeds until the tight-
ening torque of the wheel bolts has been checked.
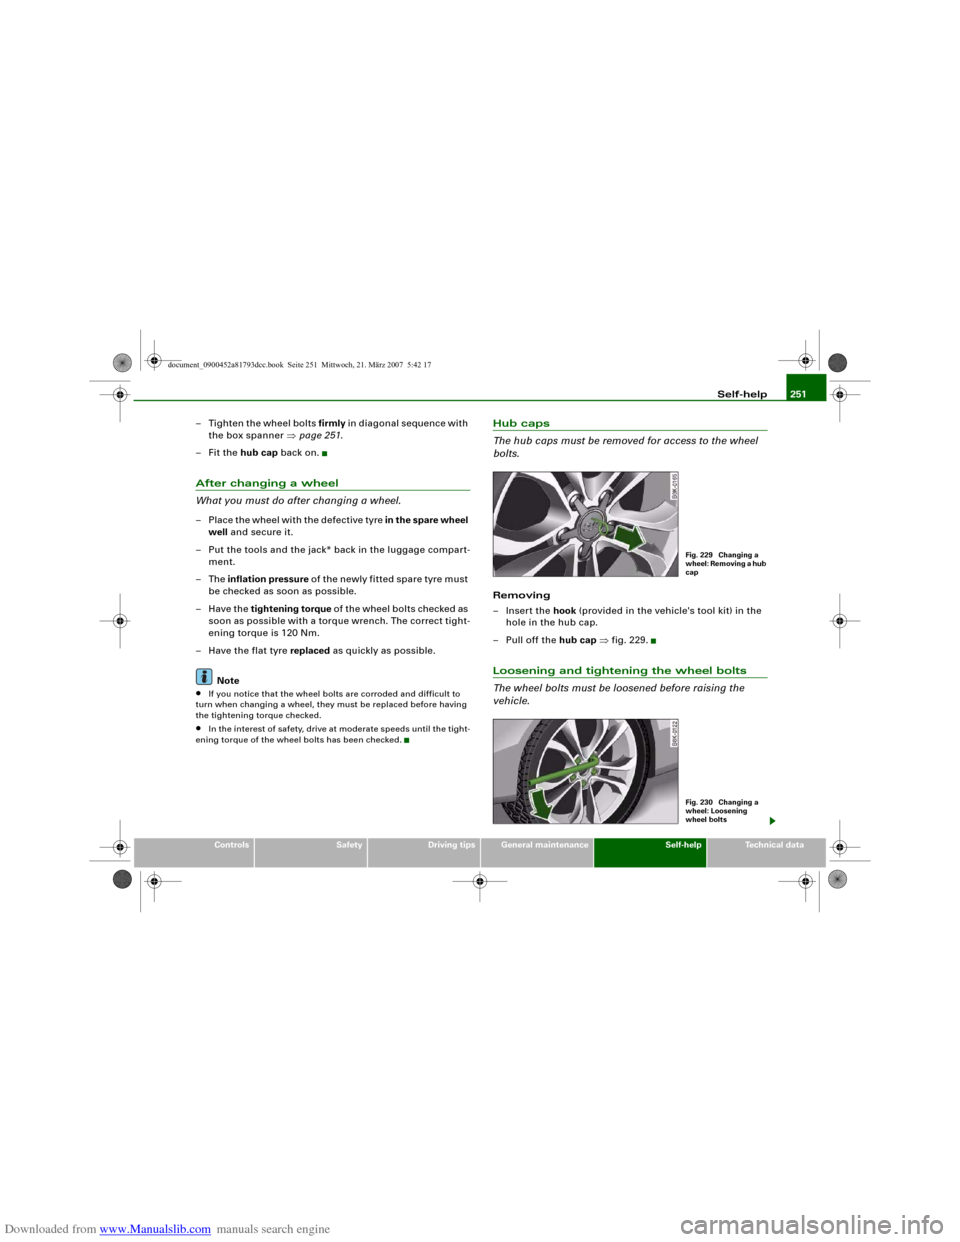
Hub caps
The hub caps must be removed for access to the wheel
bolts.Removing
– Insert the hook (provided in the vehicle's tool kit) in the
hole in the hub cap.
–Pull off the hub cap ⇒fig. 229.Loosening and tightening the wheel bolts
The wheel bolts must be loosened before raising the
vehicle.
Fig. 229 Changing a
wheel: Removing a hub
capFig. 230 Changing a
wheel: Loosening
wheel bolts
document_0900452a81793dcc.book Seite 251 Mittwoch, 21. März 2007 5:42 17
Page 290 of 294
Downloaded from www.Manualslib.com manuals search engine Index 288
Ethanol . . . . . . . . . . . . . . . . . . . . . . . . . 217
Fuel gauge . . . . . . . . . . . . . . . . . . . . . . . 19
Fuel level low . . . . . . . . . . . . . . . . . . . . . 36
Petrol . . . . . . . . . . . . . . . . . . . . . . . . . . 217
Saving fuel . . . . . . . . . . . . . . . . . . . . . . 196
Fuel consumption . . . . . . . . . . . . . . . . . . . 279
Fuel gauge . . . . . . . . . . . . . . . . . . . . . . . . . . 19
Fuel range . . . . . . . . . . . . . . . . . . . . . . . . . . 25
Fuel tank flap . . . . . . . . . . . . . . . . . . . . . . 217
Fuse, changing . . . . . . . . . . . . . . . . . . . . . 261
GGarage door opener . . . . . . . . . . . . . . . . . 145
Gear-change indicator . . . . . . . . . . . . . . . . 21
Generator
SeeAlternator . . . . . . . . . . . . . . . . . . . . 31
Glove box . . . . . . . . . . . . . . . . . . . . . . . . . . . 89HHandbrake
SeeElectro-mechanical parking brake . . .
119
Hazard warning lights . . . . . . . . . . . . . . . . 58
Indicator lamp . . . . . . . . . . . . . . . . . . . . 16
Head restraints
Front seats . . . . . . . . . . . . . . . . . . . . . . . 74
Rear seats . . . . . . . . . . . . . . . . . . . . . . . 74
Headlight flasher . . . . . . . . . . . . . . . . . . . . 58
Headlight range control
Malfunction . . . . . . . . . . . . . . . . . . . . . . 37Headlights . . . . . . . . . . . . . . . . . . . . . . . . . . 54
adaptive light . . . . . . . . . . . . . . . . . . . . . 57
Changing dip settings . . . . . . . . . . . . 195
Washer system . . . . . . . . . . . . . . . . . . . 63
Heated
Exterior mirrors . . . . . . . . . . . . . . . . . . . 66
Front seats (deluxe automatic air
conditioner) . . . . . . . . . . . . . . . . . . . . 112
Rear seats . . . . . . . . . . . . . . . . . . . . . . 113
Rear window . . . . . . . . . . . . . . . . . 96, 104
Washer jets . . . . . . . . . . . . . . . . . . . . . . 62
Heated rear window . . . . . . . . . . . . . . 96, 104
Heating
Deluxe automatic air conditioner . . . . 91
Deluxe automatic air conditioner plus 99
HomeLink . . . . . . . . . . . . . . . . . . . . . . . . . . 145
Horn . . . . . . . . . . . . . . . . . . . . . . . . . . . . . . . . 9
IIgnition key
Emergency release . . . . . . . . . . . . . . . . 41
Safety interlock . . . . . . . . . . . . . . . . . . 114
Ignition lock . . . . . . . . . . . . . . . . . . . . . . . . 114
Malfunction . . . . . . . . . . . . . . . . . . . 34, 37
Immobiliser . . . . . . . . . . . . . . . . . . . . . . 14, 38
Indicator lamps . . . . . . . . . . . . . . . . . . . . . . 15
Cruise control system . . . . . . . . . . . . . . 17
Main beam headlights . . . . . . . . . . . . . 17
Overview . . . . . . . . . . . . . . . . . . . . . . . . . 15
Trailer turn signals . . . . . . . . . . . . . . . . 17
Turn signals . . . . . . . . . . . . . . . . . . . . . . 16
Inflation pressures (tyres) . . . . . . . . . . . . 232Inspection intervals . . . . . . . . . . . . . . . . . . 23
Instrument cluster . . . . . . . . . . . . . . . . . . . 11
Instrument lighting . . . . . . . . . . . . . . . . . . . 56
Interior lights
Dimming . . . . . . . . . . . . . . . . . . . . . . . . . 59
Front . . . . . . . . . . . . . . . . . . . . . . . . . . . . 59
Rear . . . . . . . . . . . . . . . . . . . . . . . . . . . . . 60
Interior mirrors
SeeMirrors . . . . . . . . . . . . . . . . . . . . . . . 65
Interior monitor . . . . . . . . . . . . . . . . . . . . . . 47
Intermittent wipe . . . . . . . . . . . . . . . . . . . . 62
Rain sensor . . . . . . . . . . . . . . . . . . . . . . 62
ISOFIX . . . . . . . . . . . . . . . . . . . . . . . . . . . . . 181
JJack . . . . . . . . . . . . . . . . . . . . . . . . . . 245, 252
Jacking points . . . . . . . . . . . . . . . . . . . . . . 252
Jump-starting . . . . . . . . . . . . . . . . . . . . . . 255KKey-operated switch for front passenger's
airbag . . . . . . . . . . . . . . . . . . . . . . . . . 173
Keys . . . . . . . . . . . . . . . . . . . . . . . . . . . . . . . 38
Emergency key . . . . . . . . . . . . . . . . . . . . 40
Replacement keys . . . . . . . . . . . . . . . . . 38
Replacing the battery . . . . . . . . . . . . . . 39LLeather care
Alcantara . . . . . . . . . . . . . . . . . . . . . . . 216
Natural leather . . . . . . . . . . . . . . . . . . . 215
document_0900452a81793dcc.book Seite 288 Mittwoch, 21. März 2007 5:42 17
Page 293 of 294
Downloaded from www.Manualslib.com manuals search engine Index291
Controls
Safety
Driving tips
General maintenance
Self-help
Technical data Safety notes . . . . . . . . . . . . . . . . . . . . . 161
Taking off . . . . . . . . . . . . . . . . . . . . . . . 164
Warning lamp . . . . . . . . . . . . . . . . . . . . 17
Seat heating
Front (deluxe automatic air conditioner)
112
Rear . . . . . . . . . . . . . . . . . . . . . . . . . . . . 113
Seat memory . . . . . . . . . . . . . . . . . . . . . . . . 72
Service interval display . . . . . . . . . . . . . . . 23
Service position for windscreen wipers . . 64
servotronic . . . . . . . . . . . . . . . . . . . . . . . . . 190
Side lights . . . . . . . . . . . . . . . . . . . . . . . . . . 54
Single journey memory . . . . . . . . . . . . . . . 26
Sitting position
Driver . . . . . . . . . . . . . . . . . . . . . . . . . . . 154
Front passenger . . . . . . . . . . . . . . . . . . 155
Incorrect sitting position . . . . . . . . . . 157
Rear passengers . . . . . . . . . . . . . . . . . 155
Snow chains . . . . . . . . . . . . . . . . . . . . . . . 237
Sockets
230 Volt . . . . . . . . . . . . . . . . . . . . . . . . . . 87
Spare key . . . . . . . . . . . . . . . . . . . . . . . . . . . 38
Starting the engine . . . . . . . . . . . . . . . . 41
Spare parts . . . . . . . . . . . . . . . . . . . . . . . . 239
Spare wheel . . . . . . . . . . . . . . . . . . . . . . . . 246
Speed warning . . . . . . . . . . . . . . . . . . . . . . 28
Speedometer . . . . . . . . . . . . . . . . . . . . . 14, 22
Starting the engine
Jump-starting . . . . . . . . . . . . . . . . . . . . 255
Spare key . . . . . . . . . . . . . . . . . . . . . . . . 41
Tow-starting . . . . . . . . . . . . . . . . . . . . . 257
Starting with jump leads . . . . . . . . . . . . . 255Steering
Locking the steering . . . . . . . . . . . . . . 114
Malfunction . . . . . . . . . . . . . . . . . . . . . . 33
Steering wheel height adjustment
(manual) . . . . . . . . . . . . . . . . . . . . . . . 114
Storage compartments . . . . . . . . . . . . . . . . 89
Front seats . . . . . . . . . . . . . . . . . . . . . . . 90
Stretch net . . . . . . . . . . . . . . . . . . . . . . . . . . 77
Sun blind . . . . . . . . . . . . . . . . . . . . . . . . . . . 61
Sun roof (tilting panorama roof) . . . . . . . . 51
Manual operation . . . . . . . . . . . . . . . . . 52
Tilting open and closed . . . . . . . . . . . . 51
Sun visors . . . . . . . . . . . . . . . . . . . . . . . . . . 60
Sunroof (tilting panorama roof)
Convenience open/close function . . . . 50
Switches on driver's door
Central locking system . . . . . . . . . . . . . 46
Switching off the engine . . . . . . . . . 116, 118
Symbols . . . . . . . . . . . . . . . . . . . . . . . . . . . . 15
TTailgate
SeeBoot lid . . . . . . . . . . . . . . . . . . . . . . . 48
Tank capacity . . . . . . . . . . . . . . . . . . . . . . . 279
Technical data . . . . . . . . . . . . . . . . . . . . . . 278
Text messages . . . . . . . . . . . . . . . . . . . . . . . 30
Tools . . . . . . . . . . . . . . . . . . . . . . . . . . . . . . 245
Total journey memory . . . . . . . . . . . . . . . . 26
Tow-away protection . . . . . . . . . . . . . . . . . 47
Towing
Automatic braking . . . . . . . . . . . . . . . . 199
Trailer stabilisation . . . . . . . . . . . . . . . 199Towing away . . . . . . . . . . . . . . . . . . . . . . . 257
Towing bracket
Parking system . . . . . . . . . . . . . . . . . . . 138
Towing bracket, removable . . . . . . . . . . . 201
Towing bracket, retrofitting . . . . . . . . . . . 206
Towline anchorage
Front . . . . . . . . . . . . . . . . . . . . . . . . . . . 258
Rear . . . . . . . . . . . . . . . . . . . . . . . . . . . . 259
Tow-starting . . . . . . . . . . . . . . . . . . . . . . . . 259
Traction control system
How the system works . . . . . . . . . . . . 188
Trailer . . . . . . . . . . . . . . . . . . . . . . . . . . . . . 198
Accessories . . . . . . . . . . . . . . . . . . . . . . 201
Notes on towing . . . . . . . . . . . . . . . . . . 200
Points to check before towing . . . . . . 198
Technical requirements . . . . . . . . . . . 198
Trailer stabilisation . . . . . . . . . . . . . . . . . . 199
Trailer turn signals
Indicator lamp . . . . . . . . . . . . . . . . . . . . 17
Trailer weights
SeePerformance, weights and
dimensions . . . . . . . . . . . . . . . . . . . . 281
Transport bag
SeeLoad-through hatch . . . . . . . . . . . . 81
Tread depth . . . . . . . . . . . . . . . . . . . . . . . . 234
Trip recorder . . . . . . . . . . . . . . . . . . . . . . . . 14
Trips, checklist . . . . . . . . . . . . . . . . . . . . . . 152
Turn signals . . . . . . . . . . . . . . . . . . . . . . . . . 58
Indicator lamp . . . . . . . . . . . . . . . . . . . . 16
Type plate . . . . . . . . . . . . . . . . . . . . . . . . . . 279
Tyre Mobility System . . . . . . . . . . . . . . . . 247
Tyre pressure . . . . . . . . . . . . . . . . . . . . . . . 232
document_0900452a81793dcc.book Seite 291 Mittwoch, 21. März 2007 5:42 17
Page 294 of 294
Downloaded from www.Manualslib.com manuals search engine Index 292Tyre repair kit . . . . . . . . . . . . . . . . . . . . . . 245
Tyre Mobility System . . . . . . . . . . . . . 247
Tyres
Inflation pressures . . . . . . . . . . . . . . . 232
Tread wear indicators . . . . . . . . . . . . . 234
Tyre service life . . . . . . . . . . . . . . . . . . 232UUniversal transmitter . . . . . . . . . . . . . . . . 145
Unleaded fuel . . . . . . . . . . . . . . . . . . . . . . 217
Unlocking . . . . . . . . . . . . . . . . . . . . . . . . . . 43
Central locking system . . . . . . . . . . . . . 45VVehicle data sticker . . . . . . . . . . . . . . . . . 279
Vehicle identification data . . . . . . . . . . . . 279
Vehicle identification number . . . . . . . . . 279
Ventilation
Deluxe automatic air conditioner . . . . 91
Deluxe automatic air conditioner plus 99
Ventilation slots . . . . . . . . . . . . . . . . . . . . 158WWarning lamps . . . . . . . . . . . . . . . . . . . . . . 15
Airbag system . . . . . . . . . . . . . . . . . . . . 16
Anti-lock brake system . . . . . . . . . . . . . 17
Brake system . . . . . . . . . . . . . . . . . . . . . 19
Electro-mechanical parking brake . . . 18
Electronic stabilisation program . . . . . 16
Emission control system . . . . . . . . . . . 17Engine management . . . . . . . . . . . . . . 15
Seat belt . . . . . . . . . . . . . . . . . . . . . . . . . 17
Warning triangle . . . . . . . . . . . . . . . . . . . . 244
Washer fluid level low . . . . . . . . . . . . . . . . 36
Washing the vehicle
By hand . . . . . . . . . . . . . . . . . . . . . . . . 210
Car wash . . . . . . . . . . . . . . . . . . . . . . . . 210
With high-pressure cleaner . . . . . . . . 210
Waxing . . . . . . . . . . . . . . . . . . . . . . . . . . . . 211
Weights
SeePerformance, weights and
dimensions . . . . . . . . . . . . . . . . . . . . 281
Wheel bolts . . . . . . . . . . . . . . . . . . . . . . . . 236
Wheel imbalance . . . . . . . . . . . . . . . . . . . 232
Wheels . . . . . . . . . . . . . . . . . . . . . . . . 212, 232
Changing . . . . . . . . . . . . . . . . . . . . . . . 250
Changing wheels round . . . . . . . . . . . 234
Window heating . . . . . . . . . . . . . . . . . 96, 104
Windows
Cleaning . . . . . . . . . . . . . . . . . . . . . . . . 212
De-icing . . . . . . . . . . . . . . . . . . . . . . . . 212
Malfunctions . . . . . . . . . . . . . . . . . . . . . 51
Windows (electric)
SeeElectric windows . . . . . . . . . . . . . . 49
Windscreen washer fluid . . . . . . . . . . . . . 231
Windscreen wiper and washer system . . 62
Windscreen wipers . . . . . . . . . . . . . . . . . . . 62
Changing blades . . . . . . . . . . . . . . . . . . 64
Defective . . . . . . . . . . . . . . . . . . . . . . . . 37
Service position . . . . . . . . . . . . . . . . . . . 64
Winter conditions
Battery . . . . . . . . . . . . . . . . . . . . . . . . . 228
Care of vehicle . . . . . . . . . . . . . . . . . . . 210Cooling system . . . . . . . . . . . . . . . . . . 224
Defrosting windows . . . . . . . . . . . 96, 104
De-icing windows . . . . . . . . . . . . . . . . 212
Seat heating (deluxe automatic air
conditioner) . . . . . . . . . . . . . . . . . . . . 112
Seat heating for rear seats . . . . . . . . . 113
Snow chains . . . . . . . . . . . . . . . . . . . . . 237
Tyres . . . . . . . . . . . . . . . . . . . . . . . . . . . 236
Windscreen washer . . . . . . . . . . . . . . . 231
Winter tyres . . . . . . . . . . . . . . . . . . . . . . . . 236
Wiper blades
SeeWindscreen wipers . . . . . . . . . . . . . 64
XXenon lights . . . . . . . . . . . . . . . . . . . . . . . 195
document_0900452a81793dcc.book Seite 292 Mittwoch, 21. März 2007 5:42 17