2008 AUDI A5 warning
[x] Cancel search: warningPage 75 of 313
Seats and storage73
Controls
Safety
Driving tips
General maintenance
Self-help
Technical data
Adjusting head restraint height
– Press switch up or down.
Extending or shortening the thigh support*
– Lift the control below the seat cushion. The front seat
cushion will spring forward.
– Slide the seat cushion back to the desired position.
WARNING
•
Never adjust the driver's seat when the vehicle is moving - this
could lead to an accident.
•
The electrical seat adjustment also works when the ignition is
off and when the key is not in the ignition. To avoid accidental inju-
ries, never leave children unattended in the vehicle.
•
Be careful when adjusting the seat height. Careless or uncon-
trolled use of the height adjustment can cause injuries.
•
Do not drive with the backrests of the front seats reclined too
far as otherwise the seat belt and airbag could fail to restrain the
wearer properly in an accident, possibly leading to injury.
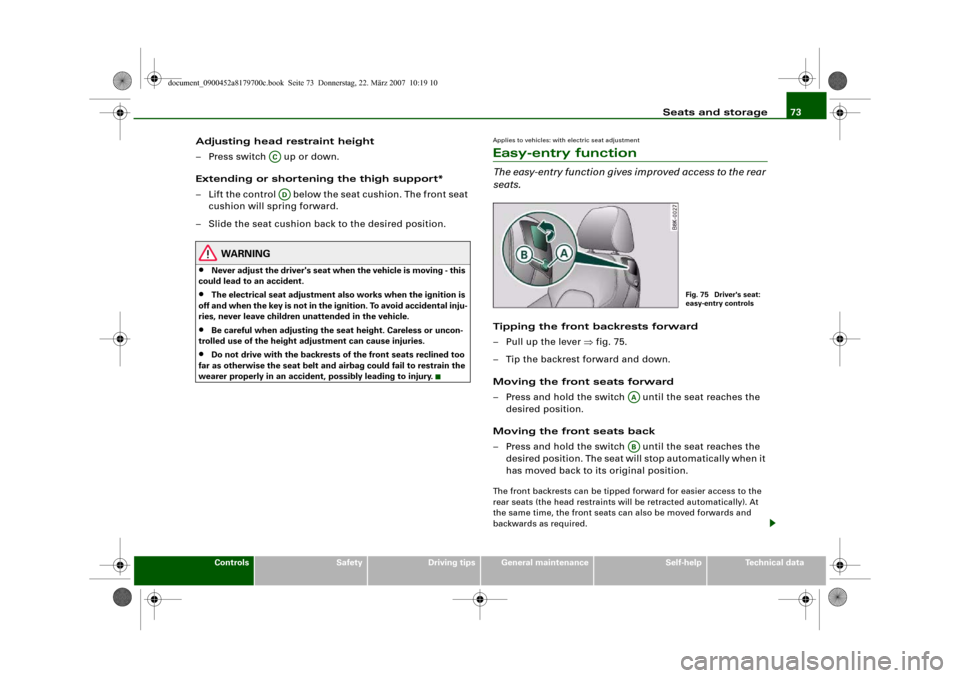
Applies to vehicles: with electric seat adjustmentEasy-entry functionThe easy-entry function gives improved access to the rear
seats.Tipping the front backrests forward
– Pull up the lever ⇒fig. 75.
– Tip the backrest forward and down.
Moving the front seats forward
– Press and hold the switch until the seat reaches the
desired position.
Moving the front seats back
– Press and hold the switch until the seat reaches the
desired position. The seat will stop automatically when it
has moved back to its original position.The front backrests can be tipped forward for easier access to the
rear seats (the head restraints will be retracted automatically). At
the same time, the front seats can also be moved forwards and
backwards as required.
ACAD
Fig. 75 Driver's seat:
easy-entry controls
AAAB
document_0900452a8179700c.book Seite 73 Donnerstag, 22. März 2007 10:19 10
Page 77 of 313
Seats and storage75
Controls
Safety
Driving tips
General maintenance
Self-help
Technical data
Recalling settings
– If the driver's door is open, press the desired recall
button briefly.
– If the driver's door is closed, press and hold down the
desired recall button until the programmed settings are
reached.A tone will sound and the diode in the button ⇒page 74,
fig. 76 will light up to confirm that the settings have been stored.
When you lock the vehicle the current settings are automatically
stored and assigned to the remote control key. However, the
settings assigned to the remote control key will not overwrite the
settings stored on recall buttons 1 and 2. The settings stored on the
recall buttons can be called up at any time. When you unlock the
vehicle, the settings assigned to the remote control key are recalled
automatically.
If your vehicle is also driven by other persons using your remote
control key, it is advisable to store your personal settings on one of
the recall buttons. You can then recall your own settings at any time
simply by pressing the corresponding recall button. When you lock
the vehicle these settings are then stored automatically and
assigned once again to the remote control key.
WARNING
•
For safety reasons, never recall seat settings when the vehicle
is moving - this could lead to an accident.
•
In an emergency the recall function can be stopped at any time
by pressing the switch, or by briefly pressing any of the
recall buttons.
Applies to vehicles: with seat memoryActivating memory for remote control key
The relevant function must be activated on the sound
system or MMI so that the settings stored in the memory
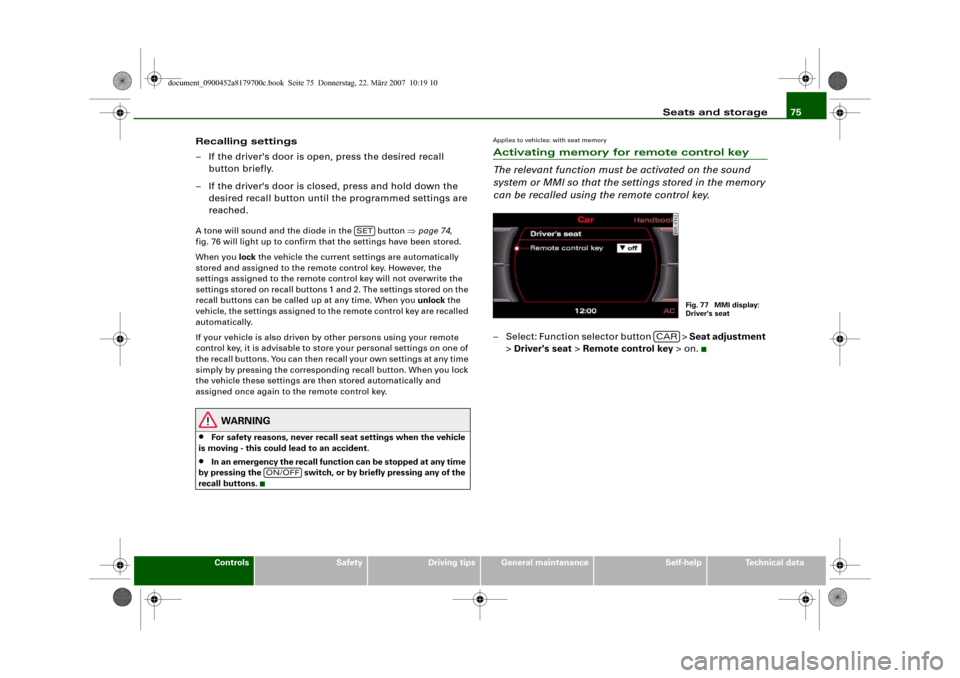
can be recalled using the remote control key.– Select: Function selector button > Seat adjustment
> Driver's seat > Remote control key > on.
SET
ON/OFF
Fig. 77 MMI display:
Driver's seat
CAR
document_0900452a8179700c.book Seite 75 Donnerstag, 22. März 2007 10:19 10
Page 80 of 313
Seats and storage 78
To maintain safe handling on the road, please observe the
following points:
– Distribute the weight as evenly as possible.
– Position heavy items as far forward as possible
⇒page 77, fig. 82.
– Secure the load with the luggage net* or with non-elastic
straps secured to the fastening rings* ⇒page 78.
WARNING
•
Unsecured objects in the luggage compartment can suddenly
shift and cause changes in the handling of the vehicle.
•
In an accident or a sudden manoeuvre, loose objects in the
passenger compartment can be flung forward and possibly injure
vehicle occupants.
•
Always store objects in the luggage compartment and secure
with suitable straps. This is especially important for heavy
objects.
•
When you transport heavy objects, always keep in mind that a
change of the centre of gravity can also cause changes in vehicle
handling.
•
Please observe the important safety warnings ⇒page 162,
“Safe driving”.Note
Adjust the tyre pressure to match the vehicle loading - the correct
pressures are specified on the sticker on the end face of the driver's
door.
Applies to vehicles: with fastening ringsFastening rings
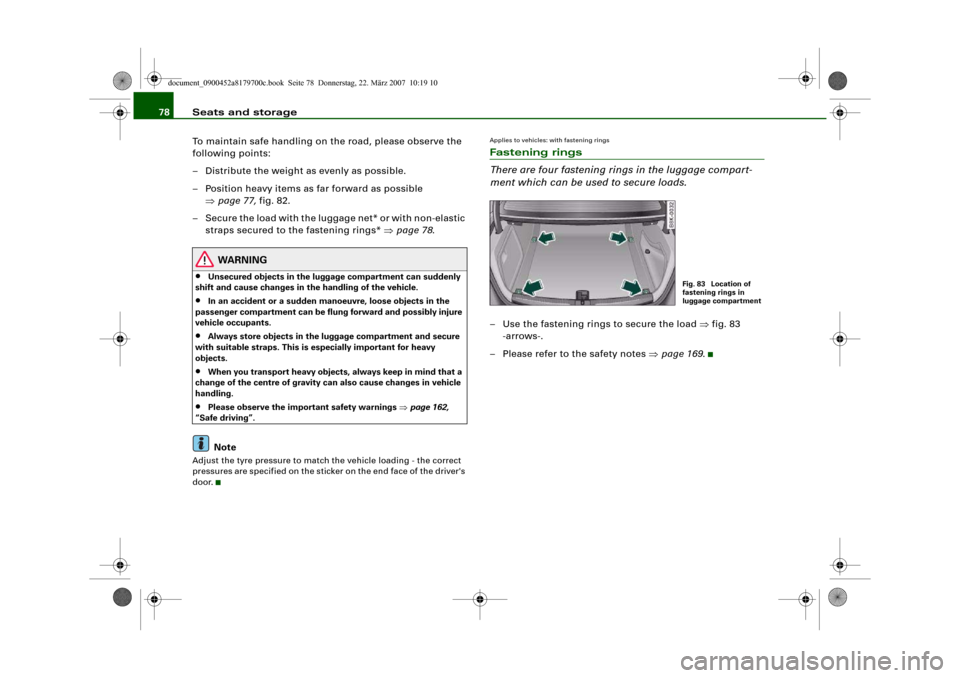
There are four fastening rings in the luggage compart-
ment which can be used to secure loads.– Use the fastening rings to secure the load ⇒fig. 83
-arrows-.
– Please refer to the safety notes ⇒page 169.
Fig. 83 Location of
fastening rings in
luggage compartment
document_0900452a8179700c.book Seite 78 Donnerstag, 22. März 2007 10:19 10
Page 81 of 313
Seats and storage79
Controls
Safety
Driving tips
General maintenance
Self-help
Technical data
Applies to vehicles: with stretch netStretch net / retaining net
The stretch net / retaining net can be used to secure light
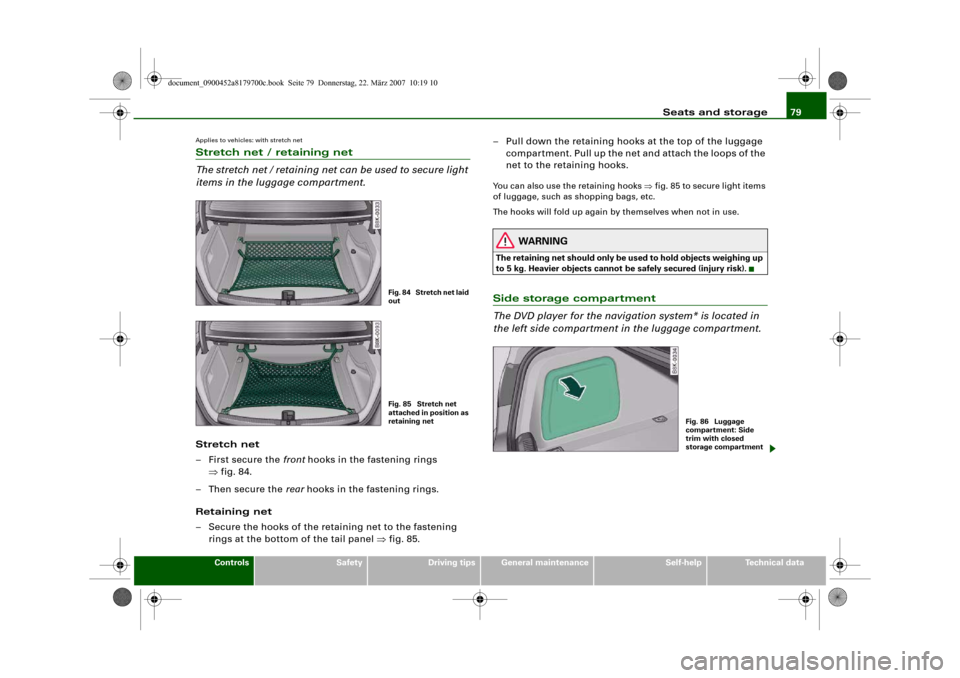
items in the luggage compartment.Stretch net
– First secure the front hooks in the fastening rings
⇒fig. 84.
–Then secure the rear hooks in the fastening rings.
Retaining net
– Secure the hooks of the retaining net to the fastening
rings at the bottom of the tail panel ⇒fig. 85.– Pull down the retaining hooks at the top of the luggage
compartment. Pull up the net and attach the loops of the
net to the retaining hooks.
You can also use the retaining hooks ⇒fig. 85 to secure light items
of luggage, such as shopping bags, etc.
The hooks will fold up again by themselves when not in use.
WARNING
The retaining net should only be used to hold objects weighing up
to 5 kg. Heavier objects cannot be safely secured (injury risk).Side storage compartment
The DVD player for the navigation system* is located in
the left side compartment in the luggage compartment.
Fig. 84 Stretch net laid
outFig. 85 Stretch net
attached in position as
retaining net
Fig. 86 Luggage
compartment: Side
trim with closed
storage compartment
document_0900452a8179700c.book Seite 79 Donnerstag, 22. März 2007 10:19 10
Page 83 of 313
Seats and storage81
Controls
Safety
Driving tips
General maintenance
Self-help
Technical data
Returning backrest to an upright position
– Push the backrest up again until it engages securely
⇒. The red marking on the safety knob ⇒page 80,
fig. 89 should no longer be visible when the backrest is
properly secured.When the backrest is properly engaged in its upright position, it can
be locked and unlocked with the key. This prevents unauthorised
access to the luggage compartment from inside the vehicle.
The luggage compartment can only be extended from the boot
when the backrest has not been locked with the key.
WARNING
The rear backrest must always be securely latched so that objects
stored in the luggage compartment will not fly forward during
sudden braking.
Caution
When returning the backrest to an upright position, make sure that
the seat belts for the rear seats are in their guides so that they
cannot be caught up and damaged in the catches for the backrest.
It is also important to remove any other objects from the rear seats
to avoid damaging the backrest when folding it forwards.
Applies to vehicles: with folding backrestsExtending the luggage compartment from inside the vehicle
The backrests can be folded forwards to increase the
storage space.Folding down backrest
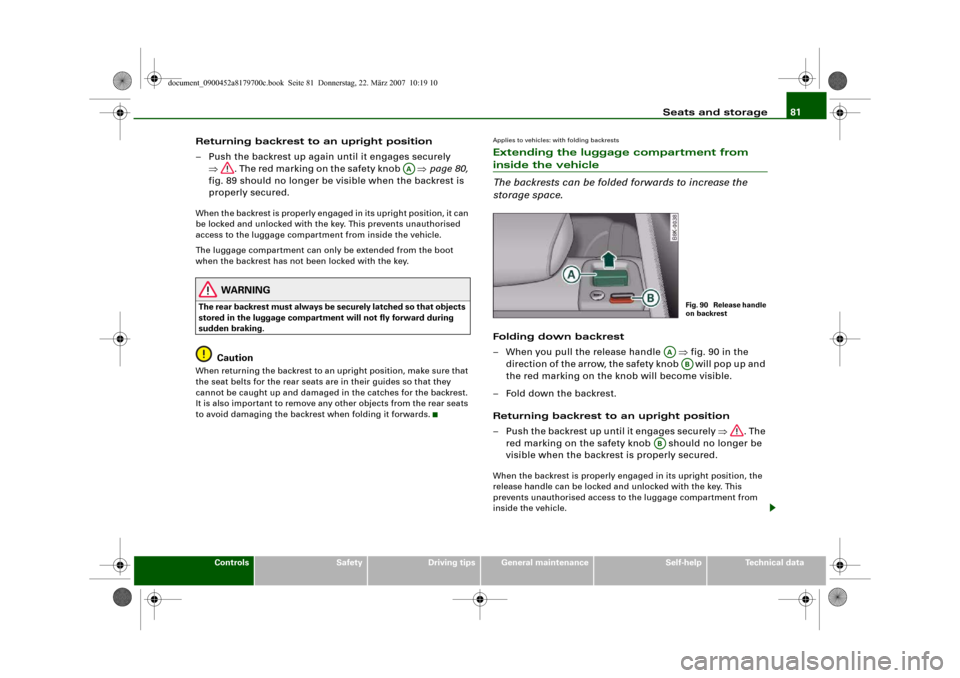
– When you pull the release handle ⇒fig. 90 in the
direction of the arrow, the safety knob will pop up and
the red marking on the knob will become visible.
– Fold down the backrest.
Returning backrest to an upright position
– Push the backrest up until it engages securely ⇒. The
red marking on the safety knob should no longer be
visible when the backrest is properly secured.When the backrest is properly engaged in its upright position, the
release handle can be locked and unlocked with the key. This
prevents unauthorised access to the luggage compartment from
inside the vehicle.
AA
Fig. 90 Release handle
on backrest
AA
AB
AB
document_0900452a8179700c.book Seite 81 Donnerstag, 22. März 2007 10:19 10
Page 84 of 313
Seats and storage 82
WARNING
The rear backrest must always be securely latched so that objects
stored in the luggage compartment will not fly forward during
sudden braking.
Caution
When returning the backrest to an upright position, make sure that
the seat belts for the rear seats are in their guides so that they
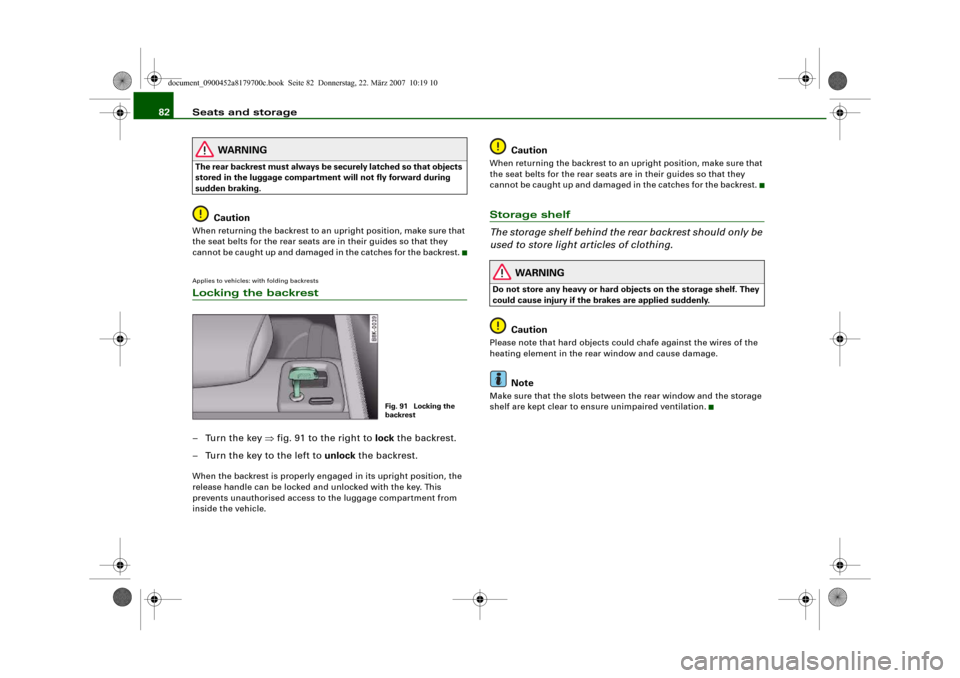
cannot be caught up and damaged in the catches for the backrest.Applies to vehicles: with folding backrestsLocking the backrest–Turn the key ⇒fig. 91 to the right to lock the backrest.
– Turn the key to the left to unlock the backrest.When the backrest is properly engaged in its upright position, the
release handle can be locked and unlocked with the key. This
prevents unauthorised access to the luggage compartment from
inside the vehicle.
Caution
When returning the backrest to an upright position, make sure that
the seat belts for the rear seats are in their guides so that they
cannot be caught up and damaged in the catches for the backrest.Storage shelf
The storage shelf behind the rear backrest should only be
used to store light articles of clothing.
WARNING
Do not store any heavy or hard objects on the storage shelf. They
could cause injury if the brakes are applied suddenly.
Caution
Please note that hard objects could chafe against the wires of the
heating element in the rear window and cause damage.
Note
Make sure that the slots between the rear window and the storage
shelf are kept clear to ensure unimpaired ventilation.
Fig. 91 Locking the
backrest
document_0900452a8179700c.book Seite 82 Donnerstag, 22. März 2007 10:19 10
Page 85 of 313
Seats and storage83
Controls
Safety
Driving tips
General maintenance
Self-help
Technical data
Applies to vehicles: with load-through hatchLoad-through hatch
You can use the load-through hatch and bag to transport
objects safely inside the vehicle.Opening the load-through hatch
– In the passenger compartment, pull down the centre rear
armrest.
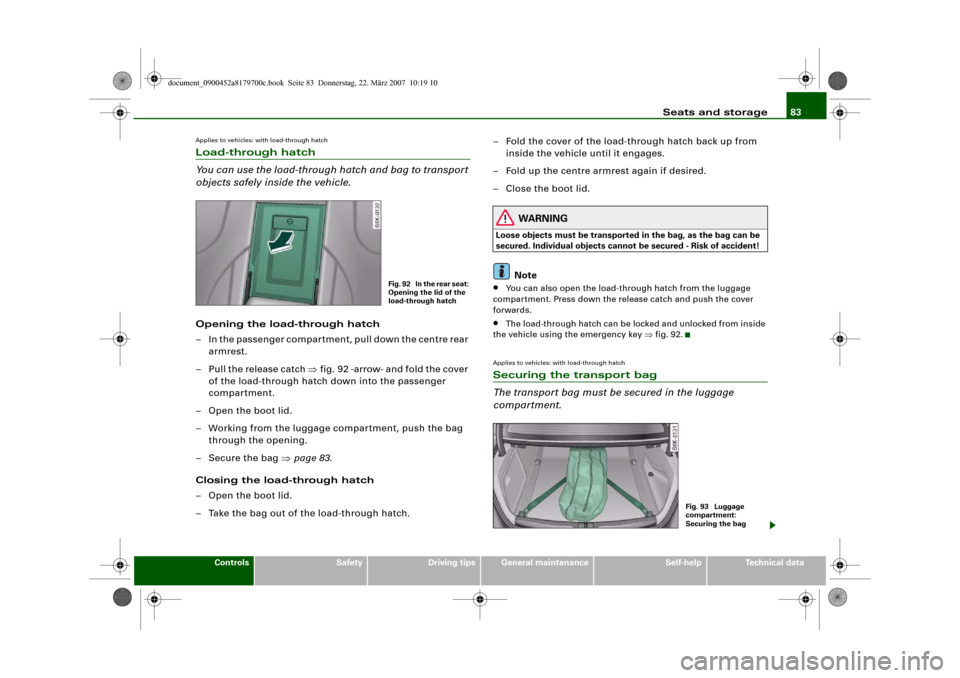
– Pull the release catch ⇒fig. 92 -arrow- and fold the cover
of the load-through hatch down into the passenger
compartment.
– Open the boot lid.
– Working from the luggage compartment, push the bag
through the opening.
– Secure the bag ⇒page 83.
Closing the load-through hatch
– Open the boot lid.
– Take the bag out of the load-through hatch.– Fold the cover of the load-through hatch back up from
inside the vehicle until it engages.
– Fold up the centre armrest again if desired.
– Close the boot lid.
WARNING
Loose objects must be transported in the bag, as the bag can be
secured. Individual objects cannot be secured - Risk of accident!
Note
•
You can also open the load-through hatch from the luggage
compartment. Press down the release catch and push the cover
forwards.
•
The load-through hatch can be locked and unlocked from inside
the vehicle using the emergency key ⇒fig. 92.
Applies to vehicles: with load-through hatchSecuring the transport bag
The transport bag must be secured in the luggage
compartment.
Fig. 92 In the rear seat:
Opening the lid of the
load-through hatch
Fig. 93 Luggage
compartment:
Securing the bag
document_0900452a8179700c.book Seite 83 Donnerstag, 22. März 2007 10:19 10
Page 87 of 313
Seats and storage85
Controls
Safety
Driving tips
General maintenance
Self-help
Technical data
Roof load
Loads carried on the roof must be securely attached. The
car's handling is affected when transporting loads.The maximum permissible roof load for your vehicle is 75 kg. The
load limit applies to the combined weight of the carrier system and
the load itself.
It will not be possible to carry the full maximum load if the roof
carrier you are using is rated for a load which is less than this figure.
Do not exceed the maximum weight limit for the roof carrier, which
is listed in the fitting instructions.
WARNING
•
To prevent accidents, loads carried on the roof must be
securely attached.
•
Do not exceed the maximum roof load for the vehicle, the
maximum axle loads or the maximum gross vehicle weight, as this
could cause an accident.
•
When transporting heavy or bulky loads on the roof, bear in
mind that the car's handling is affected by the extra weight on the
roof and a possible susceptibility to cross winds. Adjust your
speed and driving style accordingly to avoid accidents.For the sake of the environment
The increased air resistance when the roof carrier is fitted means
that the vehicle uses more fuel. For this reason you should always
take off the roof carrier when it is not in use.
Cup holdersFront cup holder
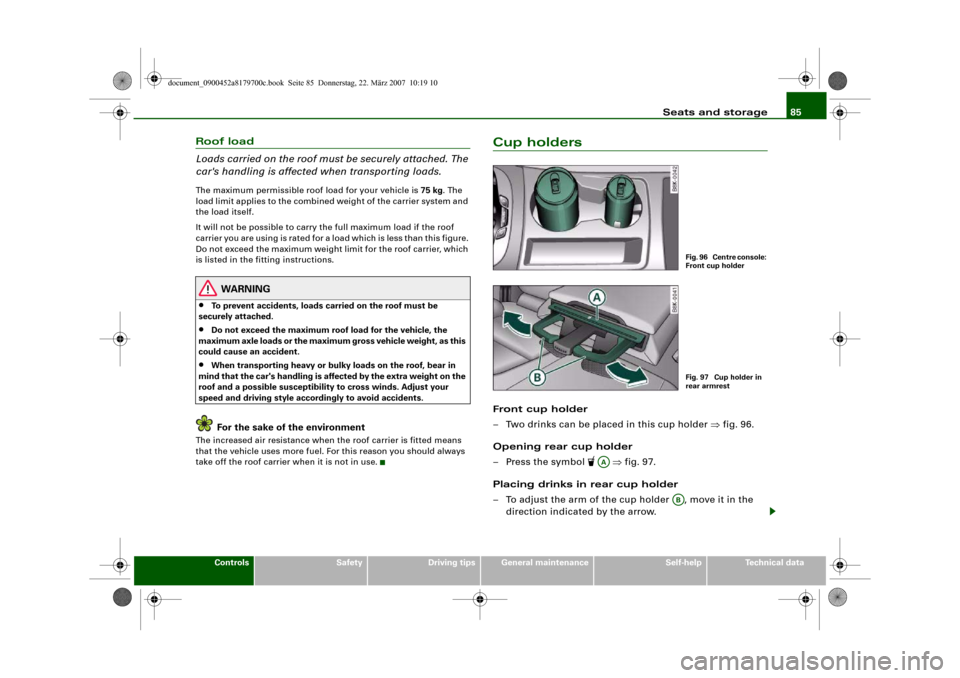
– Two drinks can be placed in this cup holder ⇒fig. 96.
Opening rear cup holder
– Press the symbol
⇒fig. 97.
Placing drinks in rear cup holder
– To adjust the arm of the cup holder , move it in the
direction indicated by the arrow.
Fig. 96 Centre console:
Front cup holderFig. 97 Cup holder in
rear armrest
AA
AB
document_0900452a8179700c.book Seite 85 Donnerstag, 22. März 2007 10:19 10