2008 AUDI A5 airbag off
[x] Cancel search: airbag offPage 11 of 313
Controls and displays9
Controls
Safety
Driving tips
General maintenance
Self-help
Technical data
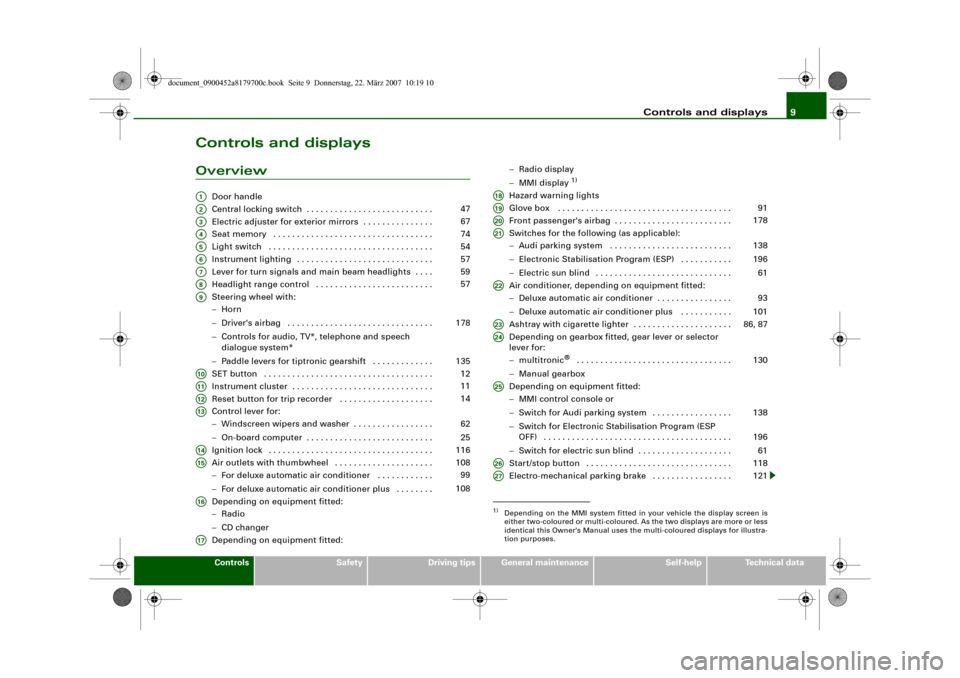
Controls and displaysOverview
Door handle
Central locking switch . . . . . . . . . . . . . . . . . . . . . . . . . . .
Electric adjuster for exterior mirrors . . . . . . . . . . . . . . .
Seat memory . . . . . . . . . . . . . . . . . . . . . . . . . . . . . . . . . .
Light switch . . . . . . . . . . . . . . . . . . . . . . . . . . . . . . . . . . .
Instrument lighting . . . . . . . . . . . . . . . . . . . . . . . . . . . . .
Lever for turn signals and main beam headlights . . . .
Headlight range control . . . . . . . . . . . . . . . . . . . . . . . . .
Steering wheel with:
−Horn
−Driver's airbag . . . . . . . . . . . . . . . . . . . . . . . . . . . . . . .
−Controls for audio, TV*, telephone and speech
dialogue system*
−Paddle levers for tiptronic gearshift . . . . . . . . . . . . .
SET button . . . . . . . . . . . . . . . . . . . . . . . . . . . . . . . . . . . .
Instrument cluster . . . . . . . . . . . . . . . . . . . . . . . . . . . . . .
Reset button for trip recorder . . . . . . . . . . . . . . . . . . . .
Control lever for:
−Windscreen wipers and washer . . . . . . . . . . . . . . . . .
−On-board computer . . . . . . . . . . . . . . . . . . . . . . . . . . .
Ignition lock . . . . . . . . . . . . . . . . . . . . . . . . . . . . . . . . . . .
Air outlets with thumbwheel . . . . . . . . . . . . . . . . . . . . .
−For deluxe automatic air conditioner . . . . . . . . . . . .
−For deluxe automatic air conditioner plus . . . . . . . .
Depending on equipment fitted:
−Radio
−CD changer
Depending on equipment fitted:−Radio display
−MMI display
1)
Hazard warning lights
Glove box . . . . . . . . . . . . . . . . . . . . . . . . . . . . . . . . . . . . .
Front passenger's airbag . . . . . . . . . . . . . . . . . . . . . . . . .
Switches for the following (as applicable):
−Audi parking system . . . . . . . . . . . . . . . . . . . . . . . . . .
−Electronic Stabilisation Program (ESP) . . . . . . . . . . .
−Electric sun blind . . . . . . . . . . . . . . . . . . . . . . . . . . . . .
Air conditioner, depending on equipment fitted:
−Deluxe automatic air conditioner . . . . . . . . . . . . . . . .
−Deluxe automatic air conditioner plus . . . . . . . . . . .
Ashtray with cigarette lighter . . . . . . . . . . . . . . . . . . . . .
Depending on gearbox fitted, gear lever or selector
lever for:
−multitronic
® . . . . . . . . . . . . . . . . . . . . . . . . . . . . . . . . .
−Manual gearbox
Depending on equipment fitted:
−MMI control console or
−Switch for Audi parking system . . . . . . . . . . . . . . . . .
−Switch for Electronic Stabilisation Program (ESP
OFF) . . . . . . . . . . . . . . . . . . . . . . . . . . . . . . . . . . . . . . . .
−Switch for electric sun blind . . . . . . . . . . . . . . . . . . . .
Start/stop button . . . . . . . . . . . . . . . . . . . . . . . . . . . . . . .
Electro-mechanical parking brake . . . . . . . . . . . . . . . . .
A1A2
47
A3
67
A4
74
A5
54
A6
57
A7
59
A8
57
A9
178
135
A10
12
A11
11
A12
14
A13
62
25
A14
116
A15
108
99
108
A16A17
1)Depending on the MMI system fitted in your vehicle the display screen is
either two-coloured or multi-coloured. As the two displays are more or less
identical this Owner's Manual uses the multi-coloured displays for illustra-
tion purposes.A18A19
91
A20
178
A21
138
196
61
A22
93
101
A23
86, 87
A24
130
A25
138
196
61
A26
118
A27
121
document_0900452a8179700c.book Seite 9 Donnerstag, 22. März 2007 10:19 10
Page 18 of 313
Instruments and warning/indicator lamps 16
NoteIf the warning lamp lights up while the vehicle is moving, this indi-
cates a fault in the engine management system. The engine should
be serviced by a qualified workshop without delay.Applies to vehicles: with diesel engineGlow plug system
The indicator lamp lights up to show that the glow plugs
are preheating.Your vehicle is equipped with an automatic glow plug system.
The indicator lamp
lights up while the glow plugs are preheating.
If the engine fails to start immediately, the glow plugs have not
finished preheating. In this case, keep the clutch pedal depressed
(or keep your foot on the brake if your vehicle has an automatic
gearbox) until the engine starts.
Note
•
If the glow plug indicator lamp should start flashing while the
vehicle is moving, this indicates a fault in the engine management
system. The engine should be serviced without delay.
•
If the indicator lamp fails to light up when the ignition is
switched on, this can mean that the glow plug system is defective.
The engine should be serviced.
Electronic stabilisation program (ESP)
This warning lamp monitors the electronic stabilisation
program.The warning lamp
has the following functions:
•
It flashes when the ESP or traction control system (ASR) inter-
venes while the vehicle is in motion.
•
The warning lamp will light up continuously if the ESP or the
traction control system (ASR) has been switched off using the ESP
OFF button ⇒page 196.
•
It lights up when the ignition is switched on and should go out
again after about 2 seconds. This signals that the lamp is working
properly.
•
It will light up continuously if there is a malfunction in the ESP.
•
It will also come on if a fault should occur in the ABS because the
ESP operates in conjunction with the ABS.
If the battery has been disconnected, if the battery voltage is very
low, or if the engine has been started from an outside power source,
the ESP system will perform an initialisation of the various on-board
sensors while you drive the first few metres. The warning lamp will
light up during this period. It will go out when the initialisation has
been completed.
If the warning lamp lights up and stays on after the engine is
started, this may mean that the control system has temporarily
switched off the ESP. In this case the ESP can be reactivated by
switching the ignition off and then on again. If the warning lamp
goes out, this means the system is fully functional.
For further information on the ESP ⇒page 196.
Airbag system
This warning lamp monitors the airbag and seat belt
tensioner system.The warning lamp
should light up for a few seconds when the
ignition is switched on.
If the warning lamp does not go out, or if it lights up, flashes or
flickers when the vehicle is moving, this indicates a malfunction in
the system. This is also the case if the warning lamp does not light
up when the ignition is switched on.
document_0900452a8179700c.book Seite 16 Donnerstag, 22. März 2007 10:19 10
Page 45 of 313
Doors and windows43
Controls
Safety
Driving tips
General maintenance
Self-help
Technical data Lock function can be switched on and off on the sound system or
MMI* ⇒page 44.
In the event of an accident in which the airbags inflate, the doors
will be automatically unlocked to facilitate access and assistance.
Deadlock mechanism
The central locking system is combined with a deadlock mecha-
nism. Once the vehicle has been locked from the outside, the door
handles on the inside are deactivated. This makes it more difficult
to break into the vehicle.
Anti-theft alarm system*
If the anti-theft alarm system senses interference with the vehicle it
triggers an audible and visible alarm.
The anti-theft alarm system switches on automatically when the
vehicle is locked. It switches off automatically if you unlock the
vehicle using the remote control.
If you unlock the vehicle by inserting the key in the drivers door, the
ignition must be switched on within 15 seconds, otherwise the
alarm will be triggered. On some export versions, the alarm is trig-
gered immediately when you open a door.
To deactivate the alarm, press the unlock button on the remote
control key or switch on the ignition. The alarm will also switch itself
off when it comes to the end of its cycle.
Switch off the interior monitor and tow-away protection if you wish
to prevent the alarm from being triggered accidentally.
Turn signals
The turn signals will flash twice when the vehicle is unlocked and
once when the vehicle is locked. If the turn signals do not flash, one
of the doors, the bonnet or the boot lid is still open.
Accidental lock-out
The central locking system prevents you from being locked out of
the vehicle in the following situations:
•
When the driver's door is open, it cannot be locked together with
the other door by pressing the central locking switch and then
closing the door ⇒page 47.
•
On vehicles with advanced key*, the boot lid will be released
again automatically if the remote control key that was last in use is
left inside the boot when the boot lid is closed ⇒page 48.
To prevent yourself from being locked out, do not lock the vehicle
with the remote control key before closing the doors or boot lid.
WARNING
Do not leave anyone (especially children) in the car if it is locked
from the outside and the deadlock mechanism is activated: the
doors and windows cannot then be opened from the inside.
Locked doors could delay assistance in an emergency, potentially
putting lives at risk.
Note
•
Never leave any valuable items in the vehicle unattended. Even a
locked vehicle is not a safe.
•
If the diode on the driver's window sill lights up for about 30
seconds when the vehicle is locked, the central locking system or
anti-theft alarm* is not working properly. Please have the malfunc-
tion repaired by an Audi dealer or qualified workshop.
•
The interior monitor of the anti-theft alarm* system will only
function as intended if the windows and the tilting panorama roof*
are closed.
document_0900452a8179700c.book Seite 43 Donnerstag, 22. März 2007 10:19 10
Page 49 of 313
Doors and windows47
Controls
Safety
Driving tips
General maintenance
Self-help
Technical data
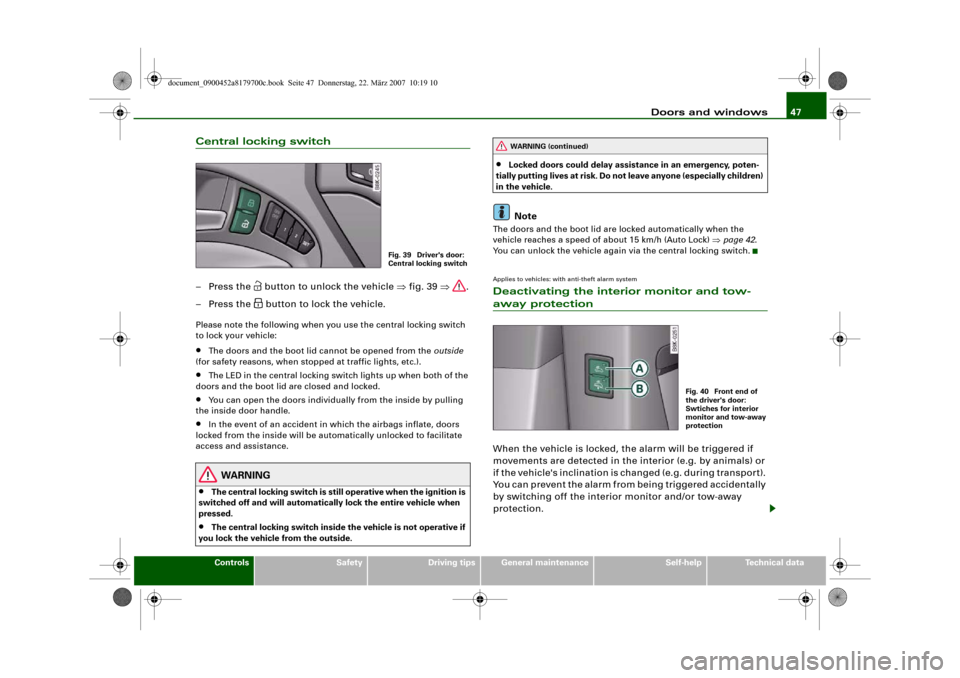
Central locking switch– Press the
button to unlock the vehicle ⇒fig. 39 ⇒.
– Press the button to lock the vehicle.
Please note the following when you use the central locking switch
to lock your vehicle:•
The doors and the boot lid cannot be opened from the outside
(for safety reasons, when stopped at traffic lights, etc.).
•
The LED in the central locking switch lights up when both of the
doors and the boot lid are closed and locked.
•
You can open the doors individually from the inside by pulling
the inside door handle.
•
In the event of an accident in which the airbags inflate, doors
locked from the inside will be automatically unlocked to facilitate
access and assistance.
WARNING
•
The central locking switch is still operative when the ignition is
switched off and will automatically lock the entire vehicle when
pressed.
•
The central locking switch inside the vehicle is not operative if
you lock the vehicle from the outside.
•
Locked doors could delay assistance in an emergency, poten-
tially putting lives at risk. Do not leave anyone (especially children)
in the vehicle.Note
The doors and the boot lid are locked automatically when the
vehicle reaches a speed of about 15 km/h (Auto Lock) ⇒page 42.
You can unlock the vehicle again via the central locking switch.Applies to vehicles: with anti-theft alarm systemDeactivating the interior monitor and tow-away protectionWhen the vehicle is locked, the alarm will be triggered if
movements are detected in the interior (e.g. by animals) or
if the vehicle's inclination is changed (e.g. during transport).
You can prevent the alarm from being triggered accidentally
by switching off the interior monitor and/or tow-away
protection.
Fig. 39 Driver's door:
Central locking switch
WARNING (continued)
Fig. 40 Front end of
the driver's door:
Swtiches for interior
monitor and tow-away
protection
document_0900452a8179700c.book Seite 47 Donnerstag, 22. März 2007 10:19 10
Page 60 of 313
Lights and vision 58Applies to vehicles: with adaptive lightadaptive light
This feature provides better illumination when you drive
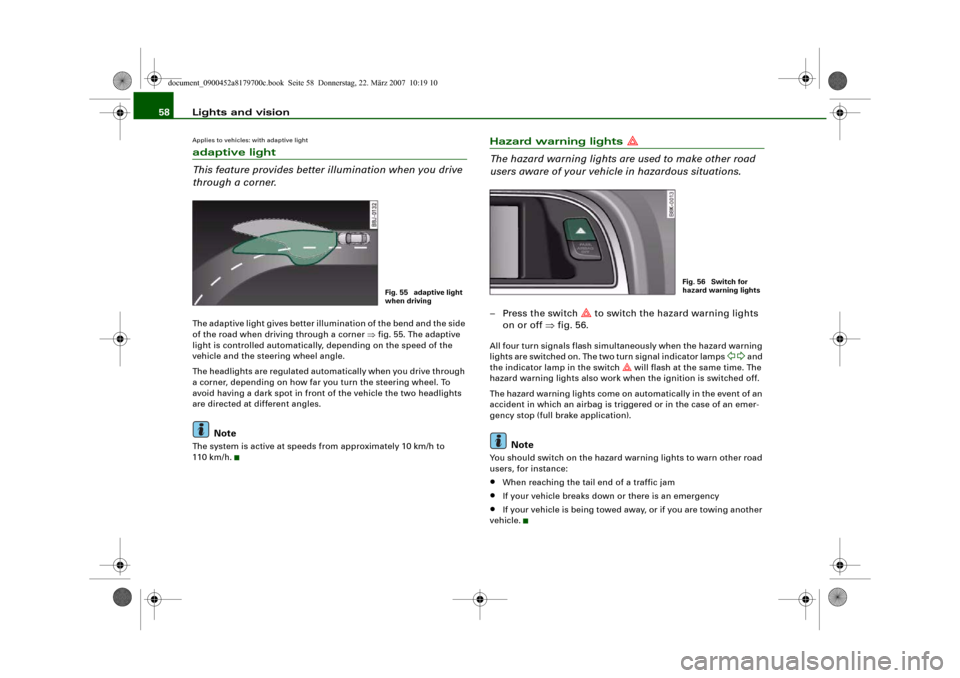
through a corner.The adaptive light gives better illumination of the bend and the side
of the road when driving through a corner ⇒fig. 55. The adaptive
light is controlled automatically, depending on the speed of the
vehicle and the steering wheel angle.
The headlights are regulated automatically when you drive through
a corner, depending on how far you turn the steering wheel. To
avoid having a dark spot in front of the vehicle the two headlights
are directed at different angles.
Note
The system is active at speeds from approximately 10 km/h to
110 km/h.
Hazard warning lights
The hazard warning lights are used to make other road
users aware of your vehicle in hazardous situations.– Press the switch
to switch the hazard warning lights
on or off ⇒fig. 56.
All four turn signals flash simultaneously when the hazard warning
lights are switched on. The two turn signal indicator lamps
and
the indicator lamp in the switch
will flash at the same time. The
hazard warning lights also work when the ignition is switched off.
The hazard warning lights come on automatically in the event of an
accident in which an airbag is triggered or in the case of an emer-
gency stop (full brake application).
Note
You should switch on the hazard warning lights to warn other road
users, for instance:•
When reaching the tail end of a traffic jam
•
If your vehicle breaks down or there is an emergency
•
If your vehicle is being towed away, or if you are towing another
vehicle.
Fig. 55 adaptive light
when driving
Fig. 56 Switch for
hazard warning lights
document_0900452a8179700c.book Seite 58 Donnerstag, 22. März 2007 10:19 10
Page 73 of 313
Seats and storage71
Controls
Safety
Driving tips
General maintenance
Self-help
Technical data
Adjusting height of lumbar support*
– Press the top or bottom part of the adjuster switch to
move the lumbar support upwards or downwards as
required.
Raising or lowering the seat
– Pull the lever ⇒page 70, fig. 72 up or down repeat-
edly (i.e. pump the lever).
Adjusting backrest angle
– Lean forwards to take your weight off the backrest.
– Turn the adjuster wheel ⇒page 70, fig. 72 to set the
angle of the backrest as required.
WARNING
•
Never adjust the driver's seat when the vehicle is moving - this
could lead to an accident.
•
Be careful when adjusting the seat height. Careless or uncon-
trolled use of the seat adjustment can cause injuries.
•
Do not drive with the backrests of the front seats reclined too
far as otherwise the seat belt and airbag could fail to restrain the
wearer properly in an accident, possibly leading to injury.
Applies to vehicles: with manual seat adjustmentEasy-entry functionThe easy-entry function gives improved access to the rear
seats.Folding down backrest and moving front seats
forwards
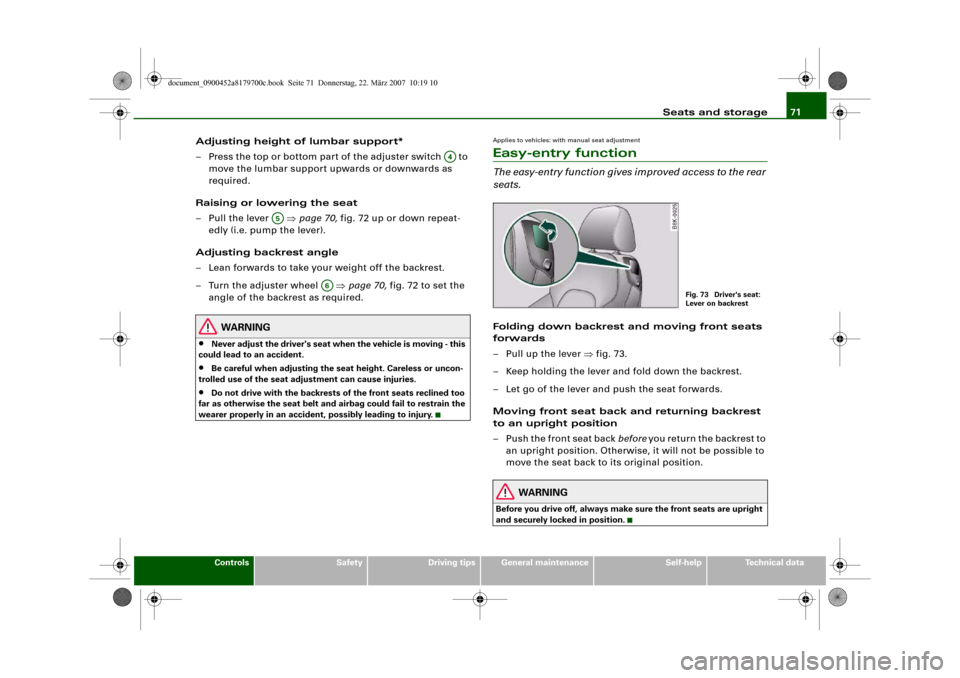
– Pull up the lever ⇒fig. 73.
– Keep holding the lever and fold down the backrest.
– Let go of the lever and push the seat forwards.
Moving front seat back and returning backrest
to an upright position
– Push the front seat back before you return the backrest to
an upright position. Otherwise, it will not be possible to
move the seat back to its original position.
WARNING
Before you drive off, always make sure the front seats are upright
and securely locked in position.
A4
A5
A6
Fig. 73 Driver's seat:
Lever on backrest
document_0900452a8179700c.book Seite 71 Donnerstag, 22. März 2007 10:19 10
Page 75 of 313
Seats and storage73
Controls
Safety
Driving tips
General maintenance
Self-help
Technical data
Adjusting head restraint height
– Press switch up or down.
Extending or shortening the thigh support*
– Lift the control below the seat cushion. The front seat
cushion will spring forward.
– Slide the seat cushion back to the desired position.
WARNING
•
Never adjust the driver's seat when the vehicle is moving - this
could lead to an accident.
•
The electrical seat adjustment also works when the ignition is
off and when the key is not in the ignition. To avoid accidental inju-
ries, never leave children unattended in the vehicle.
•
Be careful when adjusting the seat height. Careless or uncon-
trolled use of the height adjustment can cause injuries.
•
Do not drive with the backrests of the front seats reclined too
far as otherwise the seat belt and airbag could fail to restrain the
wearer properly in an accident, possibly leading to injury.
Applies to vehicles: with electric seat adjustmentEasy-entry functionThe easy-entry function gives improved access to the rear
seats.Tipping the front backrests forward
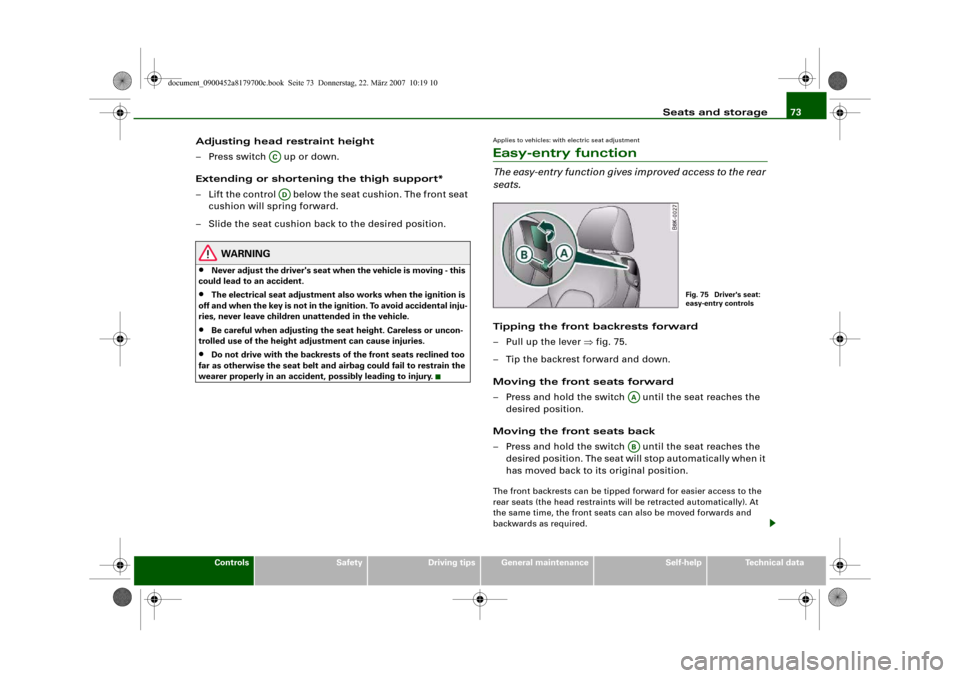
– Pull up the lever ⇒fig. 75.
– Tip the backrest forward and down.
Moving the front seats forward
– Press and hold the switch until the seat reaches the
desired position.
Moving the front seats back
– Press and hold the switch until the seat reaches the
desired position. The seat will stop automatically when it
has moved back to its original position.The front backrests can be tipped forward for easier access to the
rear seats (the head restraints will be retracted automatically). At
the same time, the front seats can also be moved forwards and
backwards as required.
ACAD
Fig. 75 Driver's seat:
easy-entry controls
AAAB
document_0900452a8179700c.book Seite 73 Donnerstag, 22. März 2007 10:19 10
Page 178 of 313
Airbag system 176Airbag systemDescription of airbag systemGeneral notes on airbag system
The airbag is an integral part of the car's passive safety
system.In conjunction with the three-point seat belts, the airbag system
gives the front occupants additional protection for the head and
chest in the event of a severe frontal collision.
In a severe side collision the side airbags and the head-protection
airbags reduce the risk of injury to the occupants in the areas of the
body facing the impact ⇒.
In addition to their normal function of protecting the occupants in a
collision, the seat belts also hold them in a position where the
airbags can inflate properly and provide maximum protection.
The airbag system will only work with the ignition on. The airbag
system is monitored electronically; the airbag warning lamp indi-
cates whether the system is functioning properly.
The main parts of the airbag system are:•
the electronic monitoring system (control unit and sensors),
•
the two front airbags,
•
the front side airbags and head-protection airbags,
•
The airbag warning lamp in the instrument cluster.
There is a fault in the airbag system if the warning
lamp
•
does not come on when the ignition is switched on,
•
does not go out about 4 seconds after the ignition is switched
on,
•
goes out and then comes on again after the ignition is switched
on,
•
comes on or flickers while the car is moving.
WARNING
•
The airbags are not a substitute for the seat belts; they are an
integral part of the car's overall passive safety system. The airbags
can only offer effective protection if the occupants are wearing
their seat belts. For this reason it is very important to wear the
seat belts at all times ⇒page 170, “Why is it so important to use
seat belts?”.
•
The seat belts and airbags can only provide maximum protec-
tion if the occupants are seated correctly ⇒page 70, “Seats and
storage”.
•
If you do not wear a seat belt, if you lean forward, or are not
seated correctly while the vehicle is in motion, you are at greater
risk of injury should the airbag system be triggered in an accident.
•
Components of the airbag system are located in various parts
of the vehicle. If repairs to other vehicle components make it
necessary to perform work on the airbag system or to remove or
install parts of the airbag system, this may cause damage to the
airbag system. As a result, the airbags may not inflate correctly or
may not be triggered at all in an accident situation. For this reason,
you should always have the work carried out by a qualified work-
shop.
•
If a fault should occur in the airbag system, have the system
checked immediately by a qualified workshop. Otherwise the
system may fail to trigger in an accident.
•
Do not attempt to modify components of the airbag system in
any way.
•
Never make any alterations to the front bumper or the body.
document_0900452a8179700c.book Seite 176 Donnerstag, 22. März 2007 10:19 10