2008 AUDI A5 light
[x] Cancel search: lightPage 242 of 313
Checking and topping up fluids 240Important safety warnings for handling a car battery
All work on batteries requires specialist knowledge.The vehicle battery is located under the floor panel in the luggage
compartment.
WARNING
Always be aware of the danger of injury and chemical burns as
well as the risk of accident or fire when working on the battery and
the electrical system.•
Wear safety glasses. Do not allow acid or lead particles to come
into contact with eyes, skin or clothing.
•
Battery acid is extremely corrosive. Wear protective gloves and
safety glasses. Do not tilt the battery - acid can leak out of the
vapour vent. If electrolyte should splash into the eyes rinse at once
for several minutes using clear water. Then seek medical care
immediately. Neutralize any acid splashes on the skin or clothing
with soap solution, and rinse off with plenty of water. If acid is
swallowed by mistake, consult a doctor immediately.
•
Keep open flames, sparks, uncovered lights and lit cigarettes
away from battery. Avoid sparks (including those from static charges) when handling cables and electrical equipment. Never
cross the battery poles. The resulting high-energy sparks can
cause injury.
•
A highly explosive mixture of gases is given off when the
battery is under charge. Only charge battery in a well ventilated
area.
•
Keep children away from the battery and battery acid.
•
Switch off all electrical equipment before starting any work on
the vehicle electrical system. Remove the ignition key. The minus
cable of the battery must be disconnected. When changing a light
bulb, it is sufficient to only turn off the light.
•
Before disconnecting the battery, turn off the anti-theft
system! Otherwise, the alarm will sound.
•
When disconnecting the battery from the vehicle's electrical
system, first disconnect the minus cable and then the plus cable.
•
Before reconnecting the battery, turn off all electrical equip-
ment. First connect the plus cable, then the minus cable. The
battery cables must not be connected to the wrong battery poles
- serious risk of cable fire.
•
Never charge a frozen or thawed out battery - risk of explosion
and chemical burns! A battery must be replaced once it has been
frozen. When it is discharged the battery can freeze at tempera-
tures around 0°C.
•
Make sure that the vapour hose is always attached to the
battery.
•
Never use a damaged battery - risk of explosion! Replace a
damaged battery immediately.Caution
•
Never disconnect the car's battery with the engine running or
with the ignition turned on, otherwise the electrical system or elec-
trical components will be damaged.
Wear safety glasses!
Battery acid is extremely corrosive. Wear protec-
tive gloves and safety glasses.
Keep open flames, sparks, uncovered lights and
lit cigarettes away from battery!
A highly explosive mixture of gases is given off
when the battery is under charge!
Keep children away from the battery and battery
acid.
WARNING (continued)
document_0900452a8179700c.book Seite 240 Donnerstag, 22. März 2007 10:19 10
Page 243 of 313
Checking and topping up fluids241
Controls
Safety
Driving tips
General maintenance
Self-help
Technical data
•
Do not expose the battery to direct sunlight over a long period of
time, as the intense ultraviolet radiation can affect the battery
housing.
•
If the car is left standing for long periods, protect the battery
from extreme cold temperature so that it does not “freeze up” and
become damaged.
Charging the battery
Terminals for charging the battery are fitted in the engine
compartment.– Note the warnings ⇒ in “Important safety warnings
for handling a car battery” on page 240 and ⇒.
– Switch off all electrical equipment. Remove the ignition
key.
– Open the bonnet ⇒page 230.
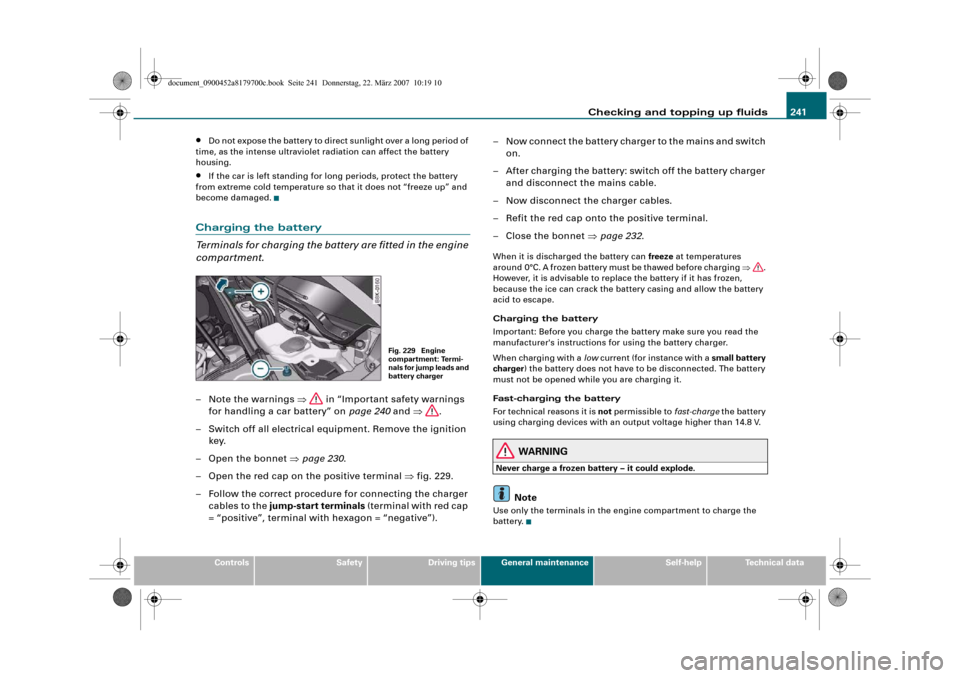
– Open the red cap on the positive terminal ⇒fig. 229.
– Follow the correct procedure for connecting the charger
cables to the jump-start terminals (terminal with red cap
= “positive”, terminal with hexagon = “negative”).– Now connect the battery charger to the mains and switch
on.
– After charging the battery: switch off the battery charger
and disconnect the mains cable.
– Now disconnect the charger cables.
– Refit the red cap onto the positive terminal.
– Close the bonnet ⇒page 232.
When it is discharged the battery can freeze at temperatures
around 0°C. A frozen battery must be thawed before charging ⇒.
However, it is advisable to replace the battery if it has frozen,
because the ice can crack the battery casing and allow the battery
acid to escape.
Charging the battery
Important: Before you charge the battery make sure you read the
manufacturer's instructions for using the battery charger.
When charging with a low current (for instance with a small battery
charger) the battery does not have to be disconnected. The battery
must not be opened while you are charging it.
Fast-charging the battery
For technical reasons it is not permissible to fast-charge the battery
using charging devices with an output voltage higher than 14.8 V.
WARNING
Never charge a frozen battery – it could explode.
Note
Use only the terminals in the engine compartment to charge the
battery.
Fig. 229 Engine
compartment: Termi-
nals for jump leads and
battery charger
document_0900452a8179700c.book Seite 241 Donnerstag, 22. März 2007 10:19 10
Page 244 of 313
Checking and topping up fluids 242Replacing the battery
A replacement battery must have the same specifications
as the original equipment battery.Your vehicle is equipped with an intelligent power management
system to control the distribution of electrical energy ⇒page 202.
The power management function ensures that the battery is
charged much more efficiently than on vehicles without a power
management system. For this additional power to be available after
replacing the battery, we recommend that the replacement battery
used is of the same make and type as the original-equipment
battery. The battery must be encoded in the control unit for power
management. This has to be done by a qualified workshop.
A replacement battery must have the same capacity, voltage (12 V)
and current rating. It must also have the same dimensions as the
original, factory-fitted battery and have sealed caps. The battery
must comply with the standards TL 825 06 (dated December 1997 or
later) and VW 7 50 73 (August 2001 or later).
Caution
•
Make sure that the vent hose is always attached to the opening
on the side of the battery. Gases or battery acid can otherwise
escape and possibly cause damage.
•
The battery holder and clamps must always be correctly secured.
•
Before starting any work on the battery, always observe the
warnings listed under ⇒page 240, “Important safety warnings for
handling a car battery”.For the sake of the environment
Batteries contain toxic substances including sulphuric acid and
lead. They must be disposed of appropriately and must not be put
together with ordinary household waste. Make sure the battery
removed from the vehicle cannot tip over. Otherwise, sulphuric acid
could escape.
Windscreen washerPlain water on its own is not sufficient for the windscreen
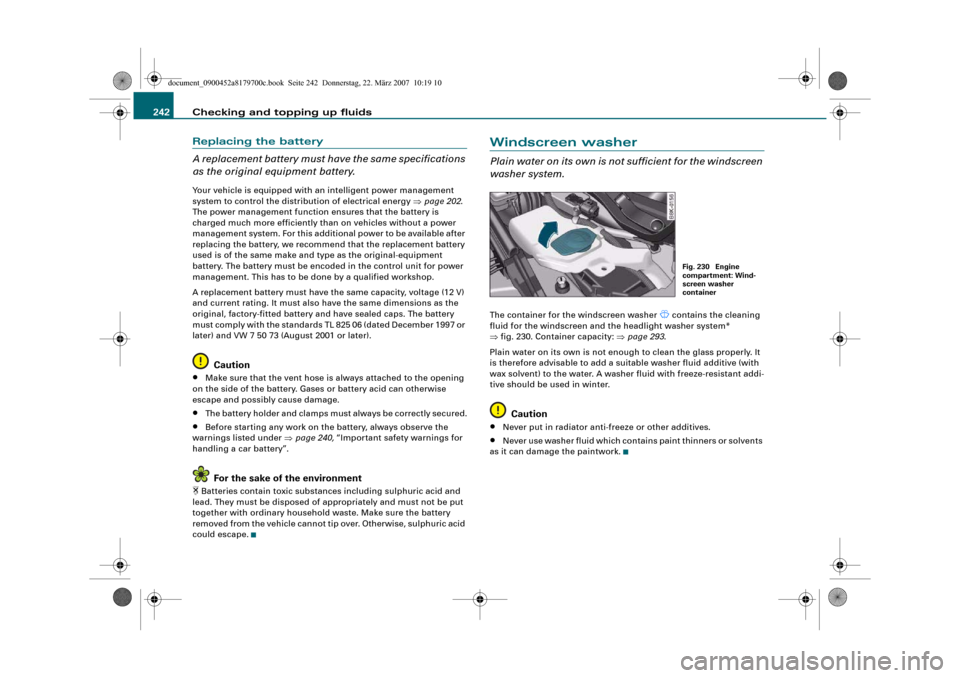
washer system.The container for the windscreen washer
contains the cleaning
fluid for the windscreen and the headlight washer system*
⇒fig. 230. Container capacity: ⇒page 293.
Plain water on its own is not enough to clean the glass properly. It
is therefore advisable to add a suitable washer fluid additive (with
wax solvent) to the water. A washer fluid with freeze-resistant addi-
tive should be used in winter.
Caution
•
Never put in radiator anti-freeze or other additives.
•
Never use washer fluid which contains paint thinners or solvents
as it can damage the paintwork.
Fig. 230 Engine
compartment: Wind-
screen washer
container
document_0900452a8179700c.book Seite 242 Donnerstag, 22. März 2007 10:19 10
Page 246 of 313
Wheels and tyres 244
– The tyre pressures should only be checked when the
tyres are cold. The slightly raised pressures of warm tyres
must not be reduced.
– The pressures must be altered to suit major changes in
the load being carried.
– Avoid fast cornering and hard acceleration.
– Inspect the tyres for irregular wear from time to time.Tyre pressure and vehicle loading
The tyre pressure must be adjusted according to the load the vehicle
is carrying. We recommend adhering to the tyre pressure specifica-
tions for a maximum load. The tyre inflation pressures are listed on
a sticker on the end face of the driver's door ⇒page 243, fig. 231.
However, if you prefer an extra-smooth ride and the vehicle is not
fully loaded, you can select the tyre pressure for a normal load (no
more than three people travelling in the vehicle). However, should
you wish to drive with a full load you must increase the tyre pressure
to the specified maximum.
Under-inflation or over-inflation will reduce the life of the tyres
considerably and also impair the car's handling. Correct inflation
pressures are very important, especially at high speeds. The pres-
sures should therefore be checked at least once a month and before
starting a journey.
Do not forget the spare wheel* when checking the tyre pressures.
Keep the spare tyre inflated to the highest pressure required for the
road wheels.
Driving habits
Fast cornering, heavy acceleration and hard braking (squealing
tyres) all increase tyre wear.Wheel balancing
The wheels on new vehicles are balanced. However, various factors
encountered in normal driving can cause them to become unbal-
anced, which results in steering vibration.
Unbalanced wheels should be rebalanced, as they otherwise cause
excessive wear on steering, suspension and tyres. A wheel must
also be rebalanced when a new tyre is fitted or if a tyre is repaired.
Incorrect wheel alignment
Incorrect wheel alignment causes excessive tyre wear, impairing the
safety of the vehicle. If you notice excessive tyre wear, contact your
Audi dealer.
WARNING
•
Always adapt the tyre pressure accordingly when the vehicle
load changes.
•
Under-inflated tyres flex more and can overheat at continuous
high speeds. This can cause tread separation and tyre blow-out,
which could result in an accident.For the sake of the environment
Under-inflated tyres will increase the fuel consumption.
document_0900452a8179700c.book Seite 244 Donnerstag, 22. März 2007 10:19 10
Page 261 of 313
Self-help259
Controls
Safety
Driving tips
General maintenance
Self-help
Technical data
– Check whether a repair is possible using the Tyre
Mobility System ⇒page 257.
– Ensure that all passengers leave the vehicle and move
away from the danger area ⇒.
– Take the tyre sealant can and the electric compressor out
of the luggage compartment ⇒page 255.
– Fix the sticker “max. 80 km/h”, which is included with the
tyre sealant can, onto the instrument cluster where the
driver will see it.
Filling the tyre
– Shake the tyre sealant can well.
– Screw the enclosed filling hose onto the sealant can as
far as it will go. This will automatically pierce the foil
sealing the can.
– Take the valve cap off the tyre valve and use the enclosed
valve insert tool to unscrew the valve insert ⇒page 258,
fig. 240.
– Place the valve insert onto a clean surface.
– Remove the sealing plug from the filling hose and insert
the hose into the tyre valve.
– Hold the tyre sealant can upside down and fill the
complete contents of the can into the tyre.
– Then disconnect the hose and screw the valve insert
firmly back into the tyre valve.Inflating the tyre
– Screw the filling hose of the electric compressor onto the
tyre valve and plug the connector into the cigarette
lighter.
– Pump the tyre up to 2.0 to 2.5 bar and monitor the pres-
sure shown on the pressure gauge.
– If the tyre pressure remains lower than the value speci-
fied above drive the vehicle approx. 10 metres forwards
or backwards, so that the sealant can spread evenly in
the tyre. If the pressure is still lower than the specifica-
tion the tyre is too badly damaged and cannot be
repaired using the tyre sealant.
Final checks
– After about 10 minutes stop to check the tyre pressure.
– If tyre pressure is less than 1.3 bar, the tyre is too badly
damaged. Do not drive on. You should obtain profes-
sional assistance.
WARNING
•
If you have a puncture in moving traffic, switch on the hazard
warning lights and place the warning triangle in a visible location.
This is for your own safety and also warns other road users.
•
Make sure your passengers wait in a safe place (for instance
behind the roadside crash barrier).
•
Please observe the manufacturers' safety notes on the
compressor and the instructions supplied with the tyre sealant
can.
•
If it was not possible to build up a tyre pressure of 2.0 bar
within 6 minutes this means that the tyre is too badly damaged.
Do not drive on.
document_0900452a8179700c.book Seite 259 Donnerstag, 22. März 2007 10:19 10
Page 262 of 313
Self-help 260•
Seek professional assistance if the repair of a tyre puncture is
not possible with the sealing compound.
•
If tyre pressure is less than 1.3 bar after driving about 10
minutes, the tyre is too badly damaged. Do not drive on. You
should obtain professional assistance.Caution
Take special care if you have to repair a tyre on a gradient.
Note
•
Do not use the compressor for longer than 6 minutes at a time,
as it could overheat. When the compressor has cooled down, you
can use it again.
•
If tyre sealant should leak out, leave it to dry and then pull it off
like foil.
•
After carrying out a tyre repair remember to buy a new tyre
sealant can at a qualified workshop. This will ensure that the Tyre
Mobility System is operative again.
•
Please observe the relevant regulations.
Changing a wheelPreparations
Some preparations are necessary before changing a
wheel.– If you have a flat tyre, stop the car well away from moving
traffic. Choose a location that is as level as possible.– All passengers should leave the car. They should wait in
a safe place (for instance behind the roadside crash
barrier).
– Apply the parking brake to stop the vehicle moving acci-
dentally.
–Engage first gear (manual gearbox) or move selector
lever to position P (automatic gearbox).
– When towing a trailer: unhitch the trailer from your
vehicle.
– Take the tools ⇒page 255 and the spare wheel*
⇒page 256 out of the luggage compartment.
WARNING
If you have a puncture in moving traffic, switch on the hazard
warning lights and place the warning triangle in a visible location.
This is for your own safety and also warns other road users.
Caution
If you have to change the tyre on a gradient, block the wheel oppo-
site the wheel being changed by placing a stone or similar object
under it to prevent the vehicle from rolling away.
Note
Please observe the relevant regulations.How to change a wheel
Change the wheel as described below.–Pull off the hub cap. Also refer to ⇒page 261, “Hub
caps”.
WARNING (continued)
document_0900452a8179700c.book Seite 260 Donnerstag, 22. März 2007 10:19 10
Page 264 of 313
Self-help 262
Loosening
–Fit the box spanner as far as it will go over the wheel
bolt
7).
– Grip the box spanner as close to the end as possible and
turn the wheel bolts about one turn anti-clockwise
⇒page 261, fig. 242 -arrow-.
Tightening
– Fit the box spanner as far as it will go over the wheel
bolt7).
– Grip the box spanner as close to the end as possible and
tighten the bolt firmly by turning clockwise.
WARNING
To avoid accidents, the wheel bolts should only be loosened
slightly (about one turn) before raising the vehicle with the jack*.
Note
•
Do not use the hexagonal socket in the screwdriver handle to
loosen or tighten the wheel bolts.
•
If the wheel bolt is very tight, it may be possible to loosen it by
pushing down the end of the spanner carefully with your foot. Hold
on to the car for support and take care not to slip.
Raising the vehicle
The vehicle must be raised with the jack* to remove the
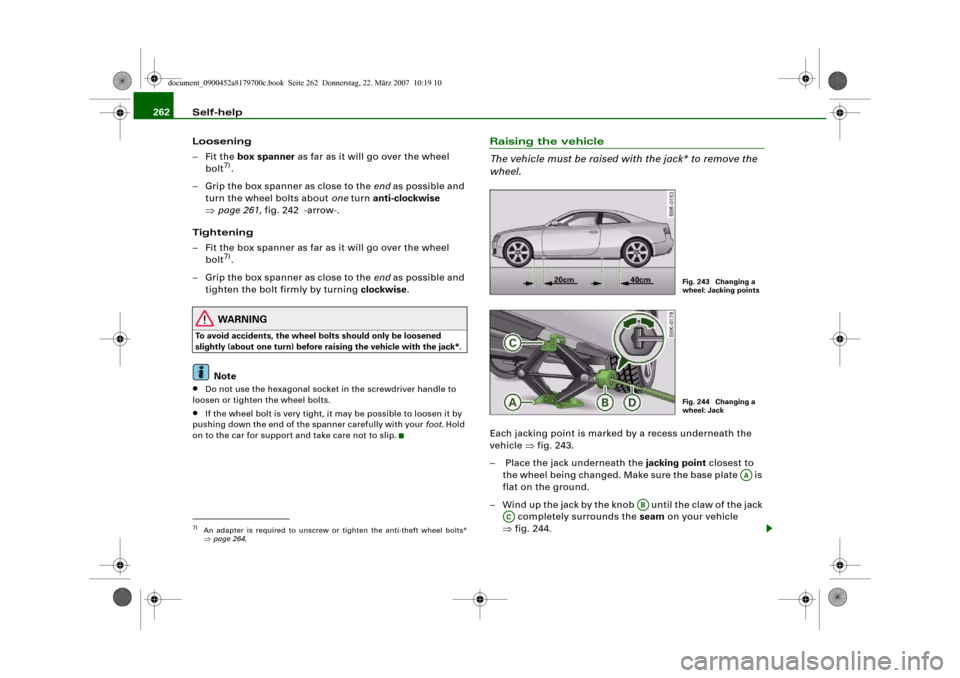
wheel.Each jacking point is marked by a recess underneath the
vehicle ⇒fig. 243.
– Place the jack underneath the jacking point closest to
the wheel being changed. Make sure the base plate is
flat on the ground.
– Wind up the jack by the knob until the claw of the jack
completely surrounds the seam on your vehicle
⇒fig. 244.
7)An adapter is required to unscrew or tighten the anti-theft wheel bolts*
⇒page 264.
Fig. 243 Changing a
wheel: Jacking pointsFig. 244 Changing a
wheel: Jack
AA
AB
AC
document_0900452a8179700c.book Seite 262 Donnerstag, 22. März 2007 10:19 10
Page 266 of 313
Self-help 264
– Screw in the mounting pin (provided in the vehicle's tool
kit) by hand in place of the wheel bolt ⇒page 263,
fig. 246.
– Then unscrew the other wheel bolts as described above.
– Take off the wheel. The mounting pin stays where it is.
Putting on the spare wheel
– Put on the spare wheel, using the mounting pin to guide
it into place.
– Screw in the wheel bolts and tighten them lightly using
the hexagonal opening in the screwdriver handle.
– Then unscrew the mounting pin and tighten the
remaining wheel bolt lightly.
– Carry out the steps required after you have changed the
wheel ⇒page 261, “After changing a wheel”.The wheel bolts should be clean and turn easily. Before putting on
the spare wheel, inspect the condition of the wheel and hub
mounting surfaces. These surfaces must be clean before mounting
the wheel.
The wheel bolts are easier to remove from the wheel rim if you use
the hexagonal socket in the screwdriver handle. The reversible
screwdriver blade should be removed as a precautionary measure
when the tool is used for this purpose.
Note the direction of rotation when putting on a tyre with direc-
tional tread pattern ⇒page 264.
Note
Do not use the hexagonal socket in the screwdriver handle to loosen
or tighten the wheel bolts.
Tyres with directional tread pattern
Tyres with directional tread pattern must be mounted so
that they rotate in the correct direction.A directional tread pattern is identified by arrows on the sidewall
pointing in the forward running direction. Always note the direction
of rotation indicated when mounting the wheel. This is important so
that these tyres can give maximum grip and avoid excessive noise,
tread wear and aquaplaning.
Drive carefully should you ever have a puncture and have to mount
the spare wheel so it rotates in the wrong direction. This is because
the tyre will not give optimum performance. Bear this in mind
particularly when driving on wet roads.
To benefit from the advantages of tyres with this type of tread
pattern, the defective tyre should be replaced and refitted as soon
as possible so that all tyres again rotate in the correct direction.Applies to vehicles: with anti-theft wheel boltsAnti-theft wheel bolts
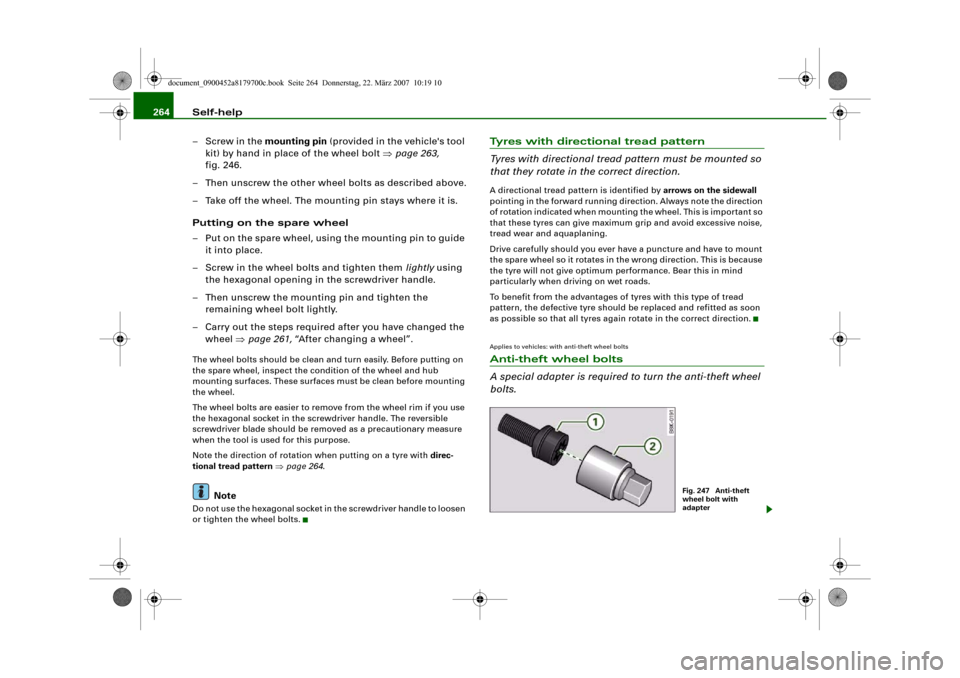
A special adapter is required to turn the anti-theft wheel
bolts.
Fig. 247 Anti-theft
wheel bolt with
adapter
document_0900452a8179700c.book Seite 264 Donnerstag, 22. März 2007 10:19 10