2008 AUDI A5 cigaret
[x] Cancel search: cigaretPage 4 of 313
Contents 2ContentsNotes on this Owner's
Manual
. . . . . . . . . . . . . . . . . . . . . .
Controls
. . . . . . . . . . . . . . . . . . . . .
Controls and displays
. . . . . . . . . .
Overview . . . . . . . . . . . . . . . . . . . . . .
Instruments and
warning/indicator lamps
. . . . . . .
Instruments . . . . . . . . . . . . . . . . . . . .
Warning and indicator lamps . . . . .
Driver information system
. . . . . .
Introduction . . . . . . . . . . . . . . . . . . . .
On-board computer . . . . . . . . . . . . .
Speed warning function . . . . . . . . .
Auto-check control . . . . . . . . . . . . . .
Doors and windows
. . . . . . . . . . . .
Remote control keys . . . . . . . . . . . .
Central locking system . . . . . . . . . .
Boot lid . . . . . . . . . . . . . . . . . . . . . . . .
Electric windows . . . . . . . . . . . . . . .
Tilting panorama roof . . . . . . . . . . .
Lights and vision
. . . . . . . . . . . . . . .
Lights . . . . . . . . . . . . . . . . . . . . . . . . .
Interior lights . . . . . . . . . . . . . . . . . . .
Clear vision . . . . . . . . . . . . . . . . . . . .
Windscreen wipers . . . . . . . . . . . . . .Rear-view mirrors . . . . . . . . . . . . . .
Digital compass . . . . . . . . . . . . . . . .
Seats and storage
. . . . . . . . . . . . .
Manual adjustment of front seats
Easy-entry function . . . . . . . . . . . . .
Electric adjustment of front seats
Easy-entry function . . . . . . . . . . . . .
Seat memory . . . . . . . . . . . . . . . . . .
Head restraints . . . . . . . . . . . . . . . .
Front armrest . . . . . . . . . . . . . . . . . .
Luggage compartment . . . . . . . . .
Roof carrier . . . . . . . . . . . . . . . . . . . .
Cup holders . . . . . . . . . . . . . . . . . . .
Ashtrays . . . . . . . . . . . . . . . . . . . . . .
Cigarette lighter and electrical
sockets . . . . . . . . . . . . . . . . . . . . . . .
On-board 230 Volt Euro socket . . .
Storage compartments . . . . . . . . .
Heating and cooling
. . . . . . . . . . .
Deluxe automatic air conditioner .
Deluxe automatic air conditioner -
basic settings . . . . . . . . . . . . . . . . . .
Deluxe automatic air conditioner
plus . . . . . . . . . . . . . . . . . . . . . . . . . .
Deluxe automatic air conditioner
plus - basic settings . . . . . . . . . . . .
Auxiliary heating and auxiliary
ventilation . . . . . . . . . . . . . . . . . . . . .
Seat heating . . . . . . . . . . . . . . . . . . .
Driving
. . . . . . . . . . . . . . . . . . . . . . . . .
Steering . . . . . . . . . . . . . . . . . . . . . . .
Ignition lock . . . . . . . . . . . . . . . . . . .
Starting and stopping the engine
with the advanced key . . . . . . . . . .
Electro-mechanical parking brake
Cruise control system . . . . . . . . . .
Automatic gearbox
. . . . . . . . . . . . .
multitronic® . . . . . . . . . . . . . . . . . . .
Audi parking system
. . . . . . . . . . .
Parking aid systems . . . . . . . . . . . .
parking system . . . . . . . . . . . . . . . . .
parking system plus . . . . . . . . . . . .
parking system advanced . . . . . . .
Towing bracket . . . . . . . . . . . . . . . . .
Settings . . . . . . . . . . . . . . . . . . . . . . .
Special parking situations . . . . . . .
Safety notes . . . . . . . . . . . . . . . . . . .
HomeLink
. . . . . . . . . . . . . . . . . . . . . .
Universal transmitter . . . . . . . . . . . .
Safety
. . . . . . . . . . . . . . . . . . . . . . .
Safe driving
. . . . . . . . . . . . . . . . . . . .
General notes . . . . . . . . . . . . . . . . . .
Correct sitting positions . . . . . . . . .
Pedal area . . . . . . . . . . . . . . . . . . . . .
Stowing luggage safely . . . . . . . . .
Seat belts
. . . . . . . . . . . . . . . . . . . . . .
Why is it so important to use seat
belts? . . . . . . . . . . . . . . . . . . . . . . . . .
Forces acting in a collision . . . . . .
How to wear seat belts properly .
Belt tensioners . . . . . . . . . . . . . . . . . 5
7
9
9
11
11
15
20
20
25
28
29
39
39
42
48
50
52
54
54
60
61
6265
68
70
70
71
72
73
74
76
77
77
84
85
86
87
89
91
93
93
100
101
109
111
115
116
116
116
118
121
125130
130
137
137
137
138
140
147
148
150
152
154
154
161
162
162
164
167
168
170
170
171
173
175
document_0900452a8179700c.book Seite 2 Donnerstag, 22. März 2007 10:19 10
Page 11 of 313
Controls and displays9
Controls
Safety
Driving tips
General maintenance
Self-help
Technical data
Controls and displaysOverview
Door handle
Central locking switch . . . . . . . . . . . . . . . . . . . . . . . . . . .
Electric adjuster for exterior mirrors . . . . . . . . . . . . . . .
Seat memory . . . . . . . . . . . . . . . . . . . . . . . . . . . . . . . . . .
Light switch . . . . . . . . . . . . . . . . . . . . . . . . . . . . . . . . . . .
Instrument lighting . . . . . . . . . . . . . . . . . . . . . . . . . . . . .
Lever for turn signals and main beam headlights . . . .
Headlight range control . . . . . . . . . . . . . . . . . . . . . . . . .
Steering wheel with:
−Horn
−Driver's airbag . . . . . . . . . . . . . . . . . . . . . . . . . . . . . . .
−Controls for audio, TV*, telephone and speech
dialogue system*
−Paddle levers for tiptronic gearshift . . . . . . . . . . . . .
SET button . . . . . . . . . . . . . . . . . . . . . . . . . . . . . . . . . . . .
Instrument cluster . . . . . . . . . . . . . . . . . . . . . . . . . . . . . .
Reset button for trip recorder . . . . . . . . . . . . . . . . . . . .
Control lever for:
−Windscreen wipers and washer . . . . . . . . . . . . . . . . .
−On-board computer . . . . . . . . . . . . . . . . . . . . . . . . . . .
Ignition lock . . . . . . . . . . . . . . . . . . . . . . . . . . . . . . . . . . .
Air outlets with thumbwheel . . . . . . . . . . . . . . . . . . . . .
−For deluxe automatic air conditioner . . . . . . . . . . . .
−For deluxe automatic air conditioner plus . . . . . . . .
Depending on equipment fitted:
−Radio
−CD changer
Depending on equipment fitted:−Radio display
−MMI display
1)
Hazard warning lights
Glove box . . . . . . . . . . . . . . . . . . . . . . . . . . . . . . . . . . . . .
Front passenger's airbag . . . . . . . . . . . . . . . . . . . . . . . . .
Switches for the following (as applicable):
−Audi parking system . . . . . . . . . . . . . . . . . . . . . . . . . .
−Electronic Stabilisation Program (ESP) . . . . . . . . . . .
−Electric sun blind . . . . . . . . . . . . . . . . . . . . . . . . . . . . .
Air conditioner, depending on equipment fitted:
−Deluxe automatic air conditioner . . . . . . . . . . . . . . . .
−Deluxe automatic air conditioner plus . . . . . . . . . . .
Ashtray with cigarette lighter . . . . . . . . . . . . . . . . . . . . .
Depending on gearbox fitted, gear lever or selector
lever for:
−multitronic
® . . . . . . . . . . . . . . . . . . . . . . . . . . . . . . . . .
−Manual gearbox
Depending on equipment fitted:
−MMI control console or
−Switch for Audi parking system . . . . . . . . . . . . . . . . .
−Switch for Electronic Stabilisation Program (ESP
OFF) . . . . . . . . . . . . . . . . . . . . . . . . . . . . . . . . . . . . . . . .
−Switch for electric sun blind . . . . . . . . . . . . . . . . . . . .
Start/stop button . . . . . . . . . . . . . . . . . . . . . . . . . . . . . . .
Electro-mechanical parking brake . . . . . . . . . . . . . . . . .
A1A2
47
A3
67
A4
74
A5
54
A6
57
A7
59
A8
57
A9
178
135
A10
12
A11
11
A12
14
A13
62
25
A14
116
A15
108
99
108
A16A17
1)Depending on the MMI system fitted in your vehicle the display screen is
either two-coloured or multi-coloured. As the two displays are more or less
identical this Owner's Manual uses the multi-coloured displays for illustra-
tion purposes.A18A19
91
A20
178
A21
138
196
61
A22
93
101
A23
86, 87
A24
130
A25
138
196
61
A26
118
A27
121
document_0900452a8179700c.book Seite 9 Donnerstag, 22. März 2007 10:19 10
Page 89 of 313
Seats and storage87
Controls
Safety
Driving tips
General maintenance
Self-help
Technical data
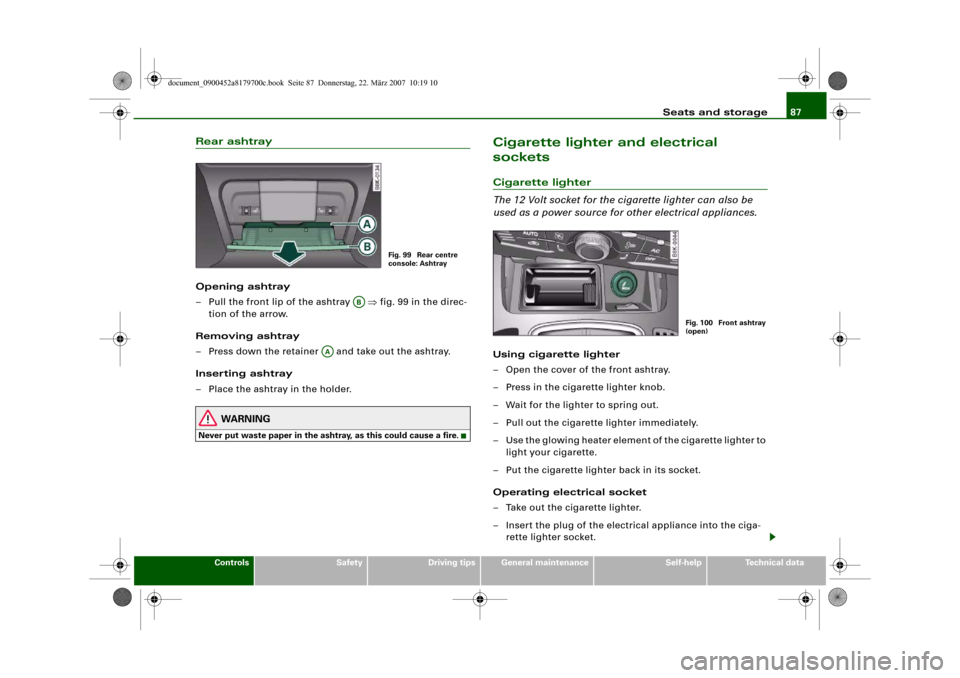
Rear ashtrayOpening ashtray
– Pull the front lip of the ashtray ⇒fig. 99 in the direc-
tion of the arrow.
Removing ashtray
– Press down the retainer and take out the ashtray.
Inserting ashtray
– Place the ashtray in the holder.
WARNING
Never put waste paper in the ashtray, as this could cause a fire.
Cigarette lighter and electrical
socketsCigarette lighter
The 12 Volt socket for the cigarette lighter can also be
used as a power source for other electrical appliances.Using cigarette lighter
– Open the cover of the front ashtray.
– Press in the cigarette lighter knob.
– Wait for the lighter to spring out.
– Pull out the cigarette lighter immediately.
– Use the glowing heater element of the cigarette lighter to
light your cigarette.
– Put the cigarette lighter back in its socket.
Operating electrical socket
– Take out the cigarette lighter.
– Insert the plug of the electrical appliance into the ciga-
rette lighter socket.
Fig. 99 Rear centre
console: Ashtray
AB
AA
Fig. 100 Front ashtray
(open)
document_0900452a8179700c.book Seite 87 Donnerstag, 22. März 2007 10:19 10
Page 90 of 313
Seats and storage 88The cigarette lighter employs a standard 12 Volt socket which can
also be used as a power source for electrical appliances. The appli-
ances connected to the socket must not exceed a power rating of
100 W.
WARNING
•
Take care when using the cigarette lighter. Carelessness or
negligence when using the cigarette lighter can cause burns.
•
The cigarette lighter also works when the ignition is off and
when the ignition key is removed. To avoid the risk of fire, never
leave children unsupervised in the vehicle.
•
The electrical sockets and any appliances connected to them
will operate only when the ignition is switched on. Improper use
of the electrical sockets or the appliances connected to them can
cause injuries or fire. To avoid the risk of injury, never leave chil-
dren unsupervised in the vehicle with the key.Caution
Always use the correct type of plugs to avoid damaging the sockets.
Note
Using electrical appliances with the engine switched off will drain
the battery.
Applies to vehicles: with 12 Volt sockets12 Volt sockets
Electrical equipment can be connected to both 12 Volt
sockets.Electrical socket in luggage compartment and
front centre console
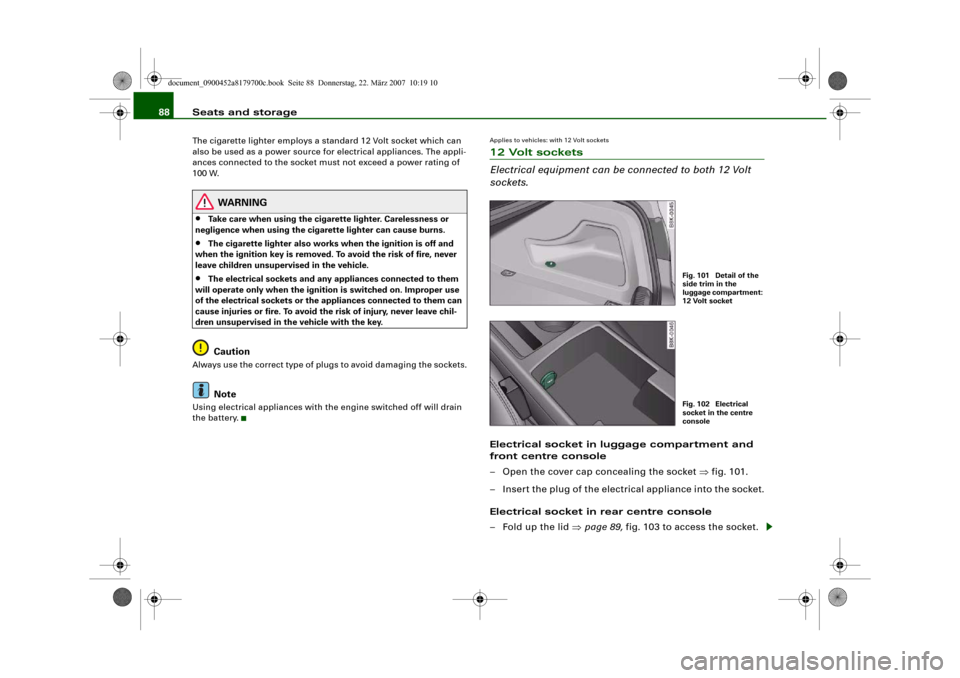
– Open the cover cap concealing the socket ⇒fig. 101.
– Insert the plug of the electrical appliance into the socket.
Electrical socket in rear centre console
– Fold up the lid ⇒page 89, fig. 103 to access the socket.
Fig. 101 Detail of the
side trim in the
luggage compartment:
12 Volt socketFig. 102 Electrical
socket in the centre
console
document_0900452a8179700c.book Seite 88 Donnerstag, 22. März 2007 10:19 10
Page 91 of 313
Seats and storage89
Controls
Safety
Driving tips
General maintenance
Self-help
Technical data
– Insert the plug of the electrical appliance into the socket.Electrical equipment can be connected to the 12 Volt socket. The
appliances connected to the socket must not exceed a power rating
of 100 W.
WARNING
The electrical sockets and any appliances connected to them will
operate only when the ignition is switched on. Improper use of the
electrical sockets or the appliances connected to them can cause
injuries or fire. To avoid the risk of injury, never leave children
unsupervised in the vehicle with the key.
Caution
•
To avoid damage to the vehicle's electrical system, never
connect equipment that generates electrical current, such as a solar
panel or battery charger, to the 12 Volt sockets or cigarette lighter in
order to charge the vehicle's battery.
•
Use only equipment which has been tested for electromagnetic
compatibility in compliance with EC Directive 2004/104/EC.Note
Using electrical appliances with the engine switched off will drain
the battery.
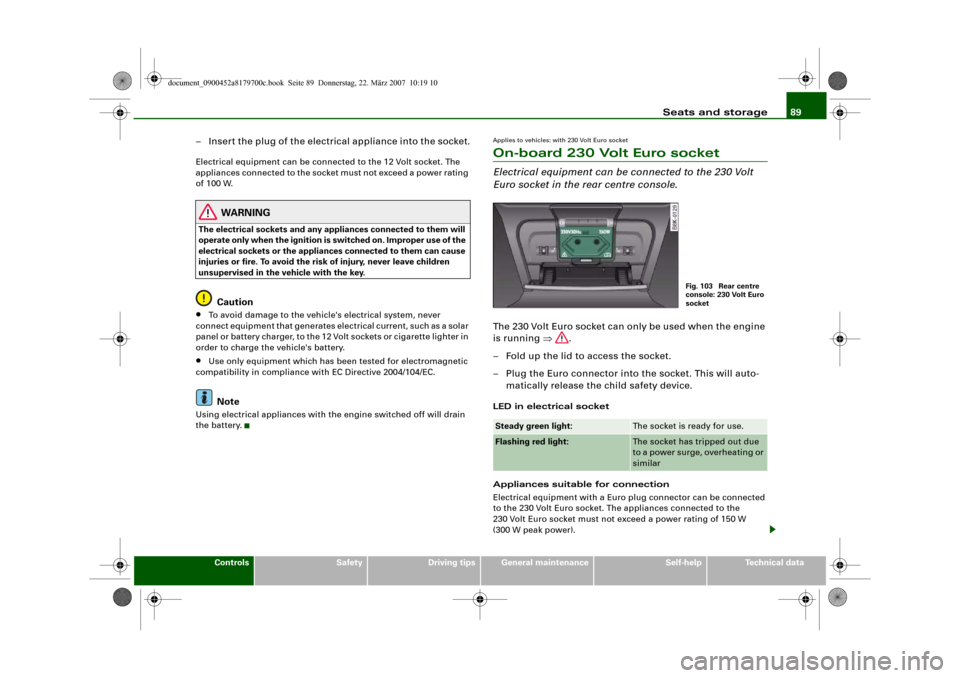
Applies to vehicles: with 230 Volt Euro socketOn-board 230 Volt Euro socketElectrical equipment can be connected to the 230 Volt
Euro socket in the rear centre console.The 230 Volt Euro socket can only be used when the engine
is running ⇒.
– Fold up the lid to access the socket.
– Plug the Euro connector into the socket. This will auto-
matically release the child safety device.LED in electrical socket
Appliances suitable for connection
Electrical equipment with a Euro plug connector can be connected
to the 230 Volt Euro socket. The appliances connected to the
230 Volt Euro socket must not exceed a power rating of 150 W
(300 W peak power).Steady green light:
The socket is ready for use.
Flashing red light:
The socket has tripped out due
to a power surge, overheating or
similar
Fig. 103 Rear centre
console: 230 Volt Euro
socket
document_0900452a8179700c.book Seite 89 Donnerstag, 22. März 2007 10:19 10
Page 242 of 313
Checking and topping up fluids 240Important safety warnings for handling a car battery
All work on batteries requires specialist knowledge.The vehicle battery is located under the floor panel in the luggage
compartment.
WARNING
Always be aware of the danger of injury and chemical burns as
well as the risk of accident or fire when working on the battery and
the electrical system.•
Wear safety glasses. Do not allow acid or lead particles to come
into contact with eyes, skin or clothing.
•
Battery acid is extremely corrosive. Wear protective gloves and
safety glasses. Do not tilt the battery - acid can leak out of the
vapour vent. If electrolyte should splash into the eyes rinse at once
for several minutes using clear water. Then seek medical care
immediately. Neutralize any acid splashes on the skin or clothing
with soap solution, and rinse off with plenty of water. If acid is
swallowed by mistake, consult a doctor immediately.
•
Keep open flames, sparks, uncovered lights and lit cigarettes
away from battery. Avoid sparks (including those from static charges) when handling cables and electrical equipment. Never
cross the battery poles. The resulting high-energy sparks can
cause injury.
•
A highly explosive mixture of gases is given off when the
battery is under charge. Only charge battery in a well ventilated
area.
•
Keep children away from the battery and battery acid.
•
Switch off all electrical equipment before starting any work on
the vehicle electrical system. Remove the ignition key. The minus
cable of the battery must be disconnected. When changing a light
bulb, it is sufficient to only turn off the light.
•
Before disconnecting the battery, turn off the anti-theft
system! Otherwise, the alarm will sound.
•
When disconnecting the battery from the vehicle's electrical
system, first disconnect the minus cable and then the plus cable.
•
Before reconnecting the battery, turn off all electrical equip-
ment. First connect the plus cable, then the minus cable. The
battery cables must not be connected to the wrong battery poles
- serious risk of cable fire.
•
Never charge a frozen or thawed out battery - risk of explosion
and chemical burns! A battery must be replaced once it has been
frozen. When it is discharged the battery can freeze at tempera-
tures around 0°C.
•
Make sure that the vapour hose is always attached to the
battery.
•
Never use a damaged battery - risk of explosion! Replace a
damaged battery immediately.Caution
•
Never disconnect the car's battery with the engine running or
with the ignition turned on, otherwise the electrical system or elec-
trical components will be damaged.
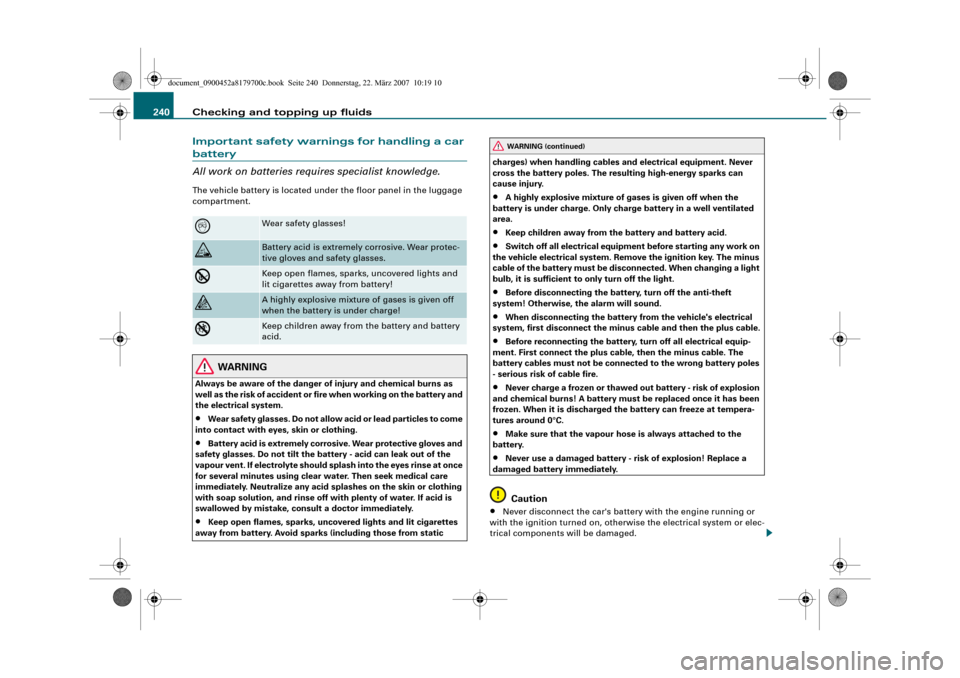
Wear safety glasses!
Battery acid is extremely corrosive. Wear protec-
tive gloves and safety glasses.
Keep open flames, sparks, uncovered lights and
lit cigarettes away from battery!
A highly explosive mixture of gases is given off
when the battery is under charge!
Keep children away from the battery and battery
acid.
WARNING (continued)
document_0900452a8179700c.book Seite 240 Donnerstag, 22. März 2007 10:19 10
Page 261 of 313
Self-help259
Controls
Safety
Driving tips
General maintenance
Self-help
Technical data
– Check whether a repair is possible using the Tyre
Mobility System ⇒page 257.
– Ensure that all passengers leave the vehicle and move
away from the danger area ⇒.
– Take the tyre sealant can and the electric compressor out
of the luggage compartment ⇒page 255.
– Fix the sticker “max. 80 km/h”, which is included with the
tyre sealant can, onto the instrument cluster where the
driver will see it.
Filling the tyre
– Shake the tyre sealant can well.
– Screw the enclosed filling hose onto the sealant can as
far as it will go. This will automatically pierce the foil
sealing the can.
– Take the valve cap off the tyre valve and use the enclosed
valve insert tool to unscrew the valve insert ⇒page 258,
fig. 240.
– Place the valve insert onto a clean surface.
– Remove the sealing plug from the filling hose and insert
the hose into the tyre valve.
– Hold the tyre sealant can upside down and fill the
complete contents of the can into the tyre.
– Then disconnect the hose and screw the valve insert
firmly back into the tyre valve.Inflating the tyre
– Screw the filling hose of the electric compressor onto the
tyre valve and plug the connector into the cigarette
lighter.
– Pump the tyre up to 2.0 to 2.5 bar and monitor the pres-
sure shown on the pressure gauge.
– If the tyre pressure remains lower than the value speci-
fied above drive the vehicle approx. 10 metres forwards
or backwards, so that the sealant can spread evenly in
the tyre. If the pressure is still lower than the specifica-
tion the tyre is too badly damaged and cannot be
repaired using the tyre sealant.
Final checks
– After about 10 minutes stop to check the tyre pressure.
– If tyre pressure is less than 1.3 bar, the tyre is too badly
damaged. Do not drive on. You should obtain profes-
sional assistance.
WARNING
•
If you have a puncture in moving traffic, switch on the hazard
warning lights and place the warning triangle in a visible location.
This is for your own safety and also warns other road users.
•
Make sure your passengers wait in a safe place (for instance
behind the roadside crash barrier).
•
Please observe the manufacturers' safety notes on the
compressor and the instructions supplied with the tyre sealant
can.
•
If it was not possible to build up a tyre pressure of 2.0 bar
within 6 minutes this means that the tyre is too badly damaged.
Do not drive on.
document_0900452a8179700c.book Seite 259 Donnerstag, 22. März 2007 10:19 10
Page 269 of 313
Self-help267
Controls
Safety
Driving tips
General maintenance
Self-help
Technical data terminal must not touch metal parts of the vehicle: this can cause
short circuiting.
•
Do not bend over the batteries – risk of acid burns.
•
The screw plugs on the battery cells must be screwed in firmly.
•
Keep sparks, flame and lighted cigarettes away from batteries:
the gases given off can cause an explosion.
•
If jump-starting another vehicle, position the jump leads in
such a way that they cannot come into contact with any moving
parts in the engine compartment of the other vehicle.Caution
Please note that the above method of connecting the leads is meant
for jump-starting your vehicle. If jump-starting another vehicle, you
should not connect the negative lead (–) to the negative terminal of
the discharged battery, but directly to the engine block or a solid
metal part bolted to the engine block. If the battery of the other
vehicle does not have a gas vent, there is a risk that a mixture of
oxygen and hydrogen gas can accumulate and cause an
explosion.Tow-starting and towing awayGeneral notes
Points to observe when tow-starting or towing awayIf you use a towrope:
Notes for the driver of the towing vehicle
– The towrope must be taut before driving off.– Engage the clutch very gently when starting to move; on
vehicles with automatic gearbox press the accelerator
slowly.
Notes for the driver of the towed vehicle
– The ignition should be switched on so that the turn
signals, horn, windscreen wipers and washers can be
used. Please ensure that the steering wheel is unlocked
when you switch on the ignition, and that it moves freely.
–Put gear lever in neutral (manual gearbox) or move
selector lever to position N (automatic gearbox).
– The brake servo and power steering only work when the
engine is running. Considerably more effort is required
on the brake pedal and steering wheel when the engine
is switched off.
– Ensure that the towrope remains taut at all times when
towing.
Towrope or towbar
It is easier and safer to tow a vehicle with a towbar. You should only
use a towrope if you do not have a towbar.
A towrope should be slightly elastic to reduce the loading on both
vehicles. It is advisable to use a towrope made of synthetic fibre or
similar material.
Attach the tow-rope or tow-bar only to the towing anchorages
intended for this purpose ⇒page 268 or ⇒page 269.
Driving technique
Towing requires some experience – especially when using a
towrope. Both drivers should be familiar with the technique required
for towing. Inexperienced drivers should not attempt to tow-start or
tow away another vehicle.
WARNING (continued)
document_0900452a8179700c.book Seite 267 Donnerstag, 22. März 2007 10:19 10