2008 AUDI A4 display
[x] Cancel search: displayPage 46 of 342
Doors and windows 44Data stored on remote control key
Data related to the service and maintenance of the vehicle are
stored continuously on your remote control key. Your Audi dealer
can read out the data and will then be able to tell you what service
work is required. This also applies to vehicles with advanced key.
Personal convenience settings
If two people use the same car regularly, it is a good idea for each
person to have his or her “own” remote control key. When you
switch off the ignition or lock the vehicle, your personal settings for
the following convenience features are stored and assigned to the
remote control key:•
Air conditioner
•
Central locking system
•
Windows
•
parking system*
•
adaptive cruise control*
•
Audi drive select*
•
Seat memory*
The stored settings are then recalled automatically the next time the
vehicle is unlocked, the doors are opened or the ignition is switched
on.
WARNING
•
Always take the key with you when leaving the vehicle - even if
you only intend to be gone for a short time. This is especially
important if children are left in the car. They might otherwise be
able to start the engine or use power-operated equipment such as
the electric windows - this could lead to injuries.
•
Wait for the vehicle to come to a standstill before removing the
ignition key from the lock. Otherwise the steering lock could
engage suddenly, causing an accident.
Note
The function of the remote control key may be impaired by interfer-
ence from other nearby radio signals (for example from a mobile
telephone or TV transmitter) if these are in the same frequency
range.Indicator lamp on remote control key
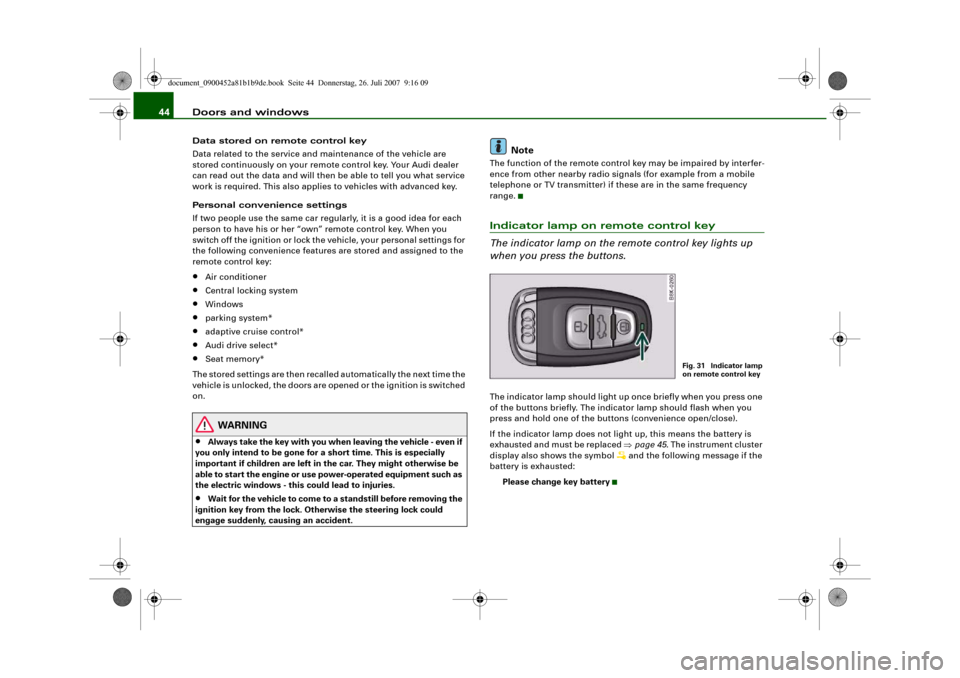
The indicator lamp on the remote control key lights up
when you press the buttons.The indicator lamp should light up once briefly when you press one
of the buttons briefly. The indicator lamp should flash when you
press and hold one of the buttons (convenience open/close).
If the indicator lamp does not light up, this means the battery is
exhausted and must be replaced ⇒page 45. The instrument cluster
display also shows the symbol
and the following message if the
battery is exhausted:
Please change key battery
Fig. 31 Indicator lamp
on remote control key
document_0900452a81b1b9de.book Seite 44 Donnerstag, 26. Juli 2007 9:16 09
Page 52 of 342
Doors and windows 50•
Locked doors could delay assistance in an emergency, poten-
tially putting lives at risk. Do not leave anyone (especially children)
in the vehicle.Note
The doors and the boot lid are locked automatically when the
vehicle reaches a speed of about 15 km/h (Auto Lock) ⇒page 42.
You can unlock the vehicle again via the central locking switch.Setting the central locking system
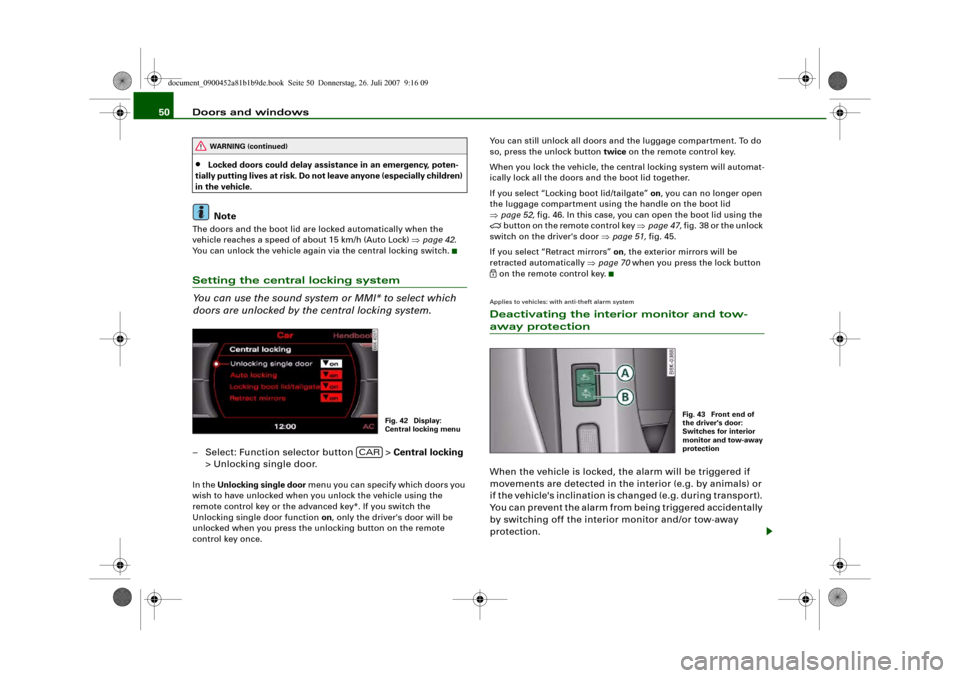
You can use the sound system or MMI* to select which
doors are unlocked by the central locking system.– Select: Function selector button > Central locking
> Unlocking single door.In the Unlocking single door menu you can specify which doors you
wish to have unlocked when you unlock the vehicle using the
remote control key or the advanced key*. If you switch the
Unlocking single door function on, only the driver's door will be
unlocked when you press the unlocking button on the remote
control key once.You can still unlock all doors and the luggage compartment. To do
so, press the unlock button twice on the remote control key.
When you lock the vehicle, the central locking system will automat-
ically lock all the doors and the boot lid together.
If you select “Locking boot lid/tailgate” on, you can no longer open
the luggage compartment using the handle on the boot lid
⇒page 52, fig. 46. In this case, you can open the boot lid using the
button on the remote control key ⇒page 47, fig. 38 or the unlock
switch on the driver's door ⇒page 51, fig. 45.
If you select “Retract mirrors” on, the exterior mirrors will be
retracted automatically ⇒page 70 when you press the lock button
on the remote control key.Applies to vehicles: with anti-theft alarm systemDeactivating the interior monitor and tow-away protectionWhen the vehicle is locked, the alarm will be triggered if
movements are detected in the interior (e.g. by animals) or
if the vehicle's inclination is changed (e.g. during transport).
You can prevent the alarm from being triggered accidentally
by switching off the interior monitor and/or tow-away
protection.
WARNING (continued)
Fig. 42 Display:
Central locking menu
CAR
Fig. 43 Front end of
the driver's door:
Switches for interior
monitor and tow-away
protection
document_0900452a81b1b9de.book Seite 50 Donnerstag, 26. Juli 2007 9:16 09
Page 57 of 342
Doors and windows55
Controls
Safety
Driving tips
General maintenance
Self-help
Technical data
Settings for convenience open function
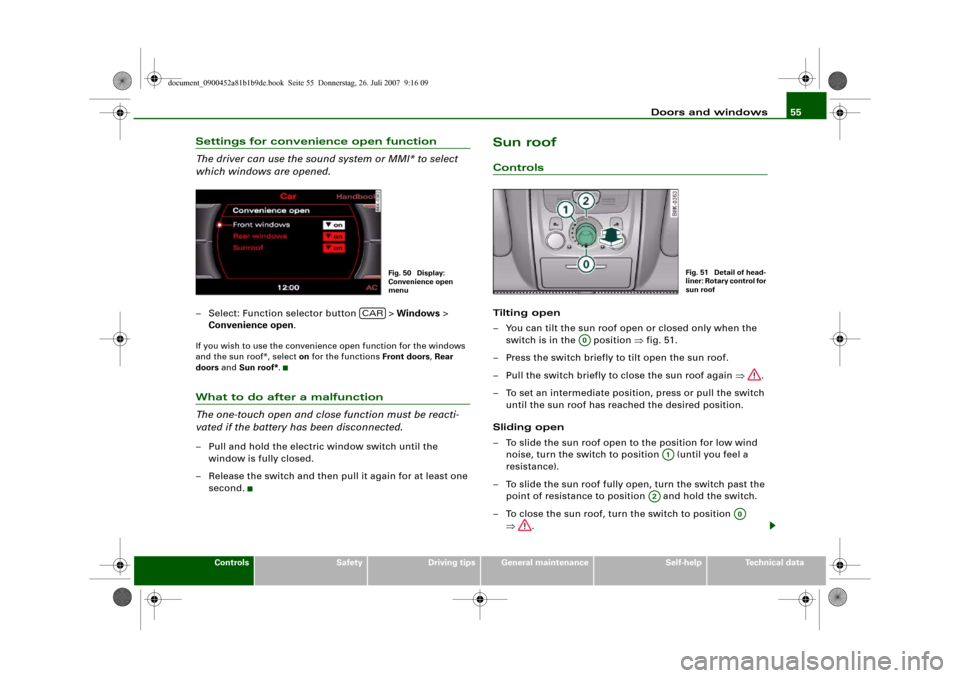
The driver can use the sound system or MMI* to select
which windows are opened.– Select: Function selector button > Windows >
Convenience open.If you wish to use the convenience open function for the windows
and the sun roof*, select on for the functions Front doors, Rear
doors and Sun roof*.What to do after a malfunction
The one-touch open and close function must be reacti-
vated if the battery has been disconnected.– Pull and hold the electric window switch until the
window is fully closed.
– Release the switch and then pull it again for at least one
second.
Sun roofControlsTilting open
– You can tilt the sun roof open or closed only when the
switch is in the position ⇒fig. 51.
– Press the switch briefly to tilt open the sun roof.
– Pull the switch briefly to close the sun roof again ⇒.
– To set an intermediate position, press or pull the switch
until the sun roof has reached the desired position.
Sliding open
– To slide the sun roof open to the position for low wind
noise, turn the switch to position (until you feel a
resistance).
– To slide the sun roof fully open, turn the switch past the
point of resistance to position and hold the switch.
– To close the sun roof, turn the switch to position
⇒.
Fig. 50 Display:
Convenience open
menu
CAR
Fig. 51 Detail of head-
liner: Rotary control for
sun roof
A0
A1
A2
A0
document_0900452a81b1b9de.book Seite 55 Donnerstag, 26. Juli 2007 9:16 09
Page 61 of 342
Lights and vision59
Controls
Safety
Driving tips
General maintenance
Self-help
Technical data
Exterior lighting settings
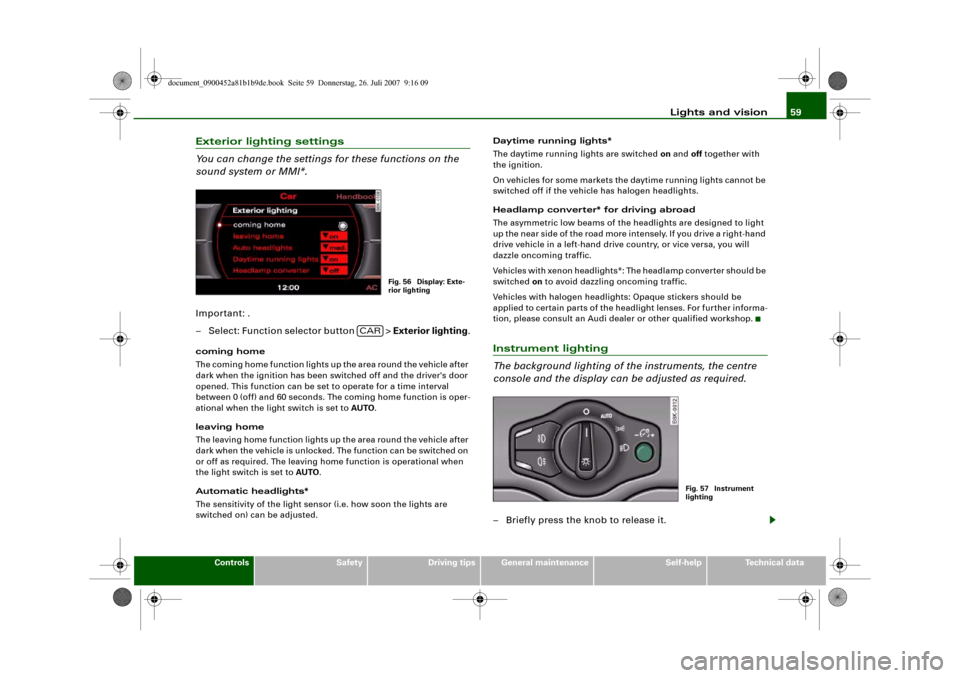
You can change the settings for these functions on the
sound system or MMI*.Important: .
– Select: Function selector button > Exterior lighting.coming home
The coming home function lights up the area round the vehicle after
dark when the ignition has been switched off and the driver's door
opened. This function can be set to operate for a time interval
between 0 (off) and 60 seconds. The coming home function is oper-
ational when the light switch is set to AUTO.
leaving home
The leaving home function lights up the area round the vehicle after
dark when the vehicle is unlocked. The function can be switched on
or off as required. The leaving home function is operational when
the light switch is set to AUTO.
Automatic headlights*
The sensitivity of the light sensor (i.e. how soon the lights are
switched on) can be adjusted.Daytime running lights*
The daytime running lights are switched on and off together with
the ignition.
On vehicles for some markets the daytime running lights cannot be
switched off if the vehicle has halogen headlights.
Headlamp converter* for driving abroad
The asymmetric low beams of the headlights are designed to light
up the near side of the road more intensely. If you drive a right-hand
drive vehicle in a left-hand drive country, or vice versa, you will
dazzle oncoming traffic.
Vehicles with xenon headlights*: The headlamp converter should be
switched on to avoid dazzling oncoming traffic.
Vehicles with halogen headlights: Opaque stickers should be
applied to certain parts of the headlight lenses. For further informa-
tion, please consult an Audi dealer or other qualified workshop.
Instrument lighting
The background lighting of the instruments, the centre
console and the display can be adjusted as required.– Briefly press the knob to release it.
Fig. 56 Display: Exte-
rior lighting
CAR
Fig. 57 Instrument
lighting
document_0900452a81b1b9de.book Seite 59 Donnerstag, 26. Juli 2007 9:16 09
Page 62 of 342
Lights and vision 60
– Turn the button clockwise +” to increase the brightness
of the instrument lighting in dark conditions.
– Turn the button anti-clockwise -” to reduce the bright-
ness of the instrument lighting in dark conditions.
– Press the knob in again to prevent the setting from being
changed unintentionally.The instrument lighting (dials and needles), the centre console illu-
mination and the illumination of the displays are regulated by a
light sensor incorporated in the instrument cluster. In bright condi-
tions any changes made to the brightness of the instrument lighting
have no effect.
Note
The instrument lighting (illumination of dials and needles) is
switched on when the ignition is on and the vehicle's lights are off.
The instrument lighting is dimmed automatically as the daylight
starts to fade; it is switched off completely when the light condi-
tions become very poor. This function is intended to remind the
driver to switch on the dipped-beam headlights in good time when
light conditions become poor.
Applies to vehicles: with headlight range controlHeadlight range control
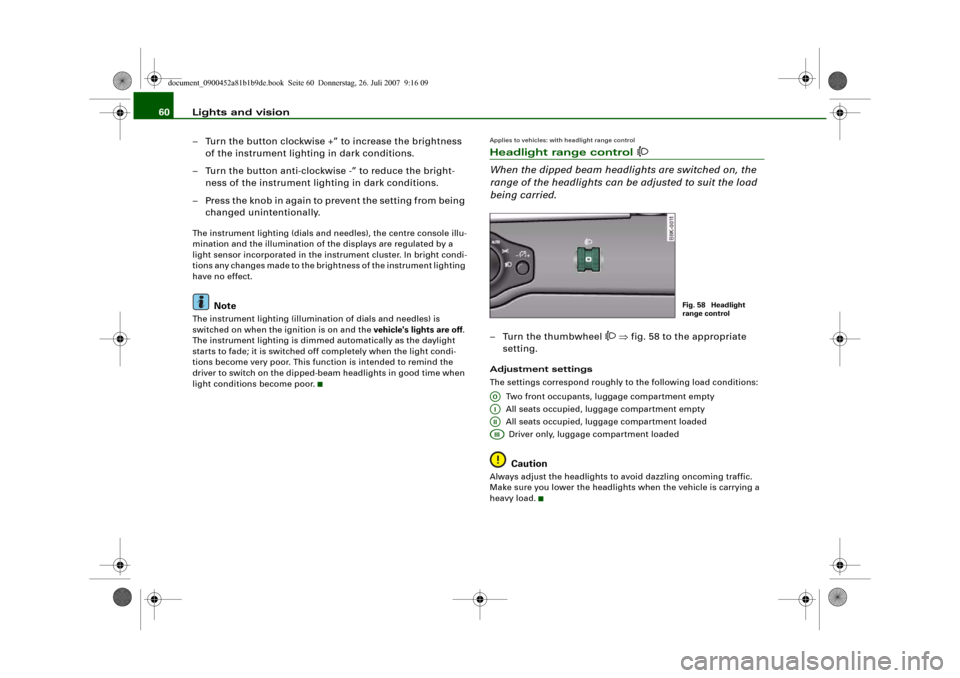
When the dipped beam headlights are switched on, the
range of the headlights can be adjusted to suit the load
being carried.– Turn the thumbwheel
⇒fig. 58 to the appropriate
setting.
Adjustment settings
The settings correspond roughly to the following load conditions:
Two front occupants, luggage compartment empty
All seats occupied, luggage compartment empty
All seats occupied, luggage compartment loaded
Driver only, luggage compartment loaded
Caution
Always adjust the headlights to avoid dazzling oncoming traffic.
Make sure you lower the headlights when the vehicle is carrying a
heavy load.
Fig. 58 Headlight
range control
AOAIAIIAIII
document_0900452a81b1b9de.book Seite 60 Donnerstag, 26. Juli 2007 9:16 09
Page 69 of 342
Lights and vision67
Controls
Safety
Driving tips
General maintenance
Self-help
Technical data
Note
•
Check that the washer fluid reservoir is full before starting a long
journey. Filling the reservoir ⇒page 267.
•
Worn or dirty wiper blades can cause smearing on the glass
which can also impair the effectiveness of the rain sensor. Please
check the wiper blades regularly.
Applies to vehicles: with headlight washersHeadlight washer systemThe headlight washer system only operates when the lights
are switched on.
– Move the automatic wash and wipe lever to position
⇒page 65, fig. 67.The headlight washer system is always activated the first time you
operate the automatic wash and wipe. Subsequently, it is only acti-
vated about every five wash and wipe cycles. The headlights are
always washed if you hold the lever for longer than about
2seconds.
The headlight washer jets come out of the bumper automatically
(under water pressure).
Clean off stubborn dirt (insects, etc.) from the lenses at regular
intervals, for instance when stopping for fuel.
To ensure that the system works properly in winter, keep the nozzle
holders free of snow and remove any ice with a de-icer spray.
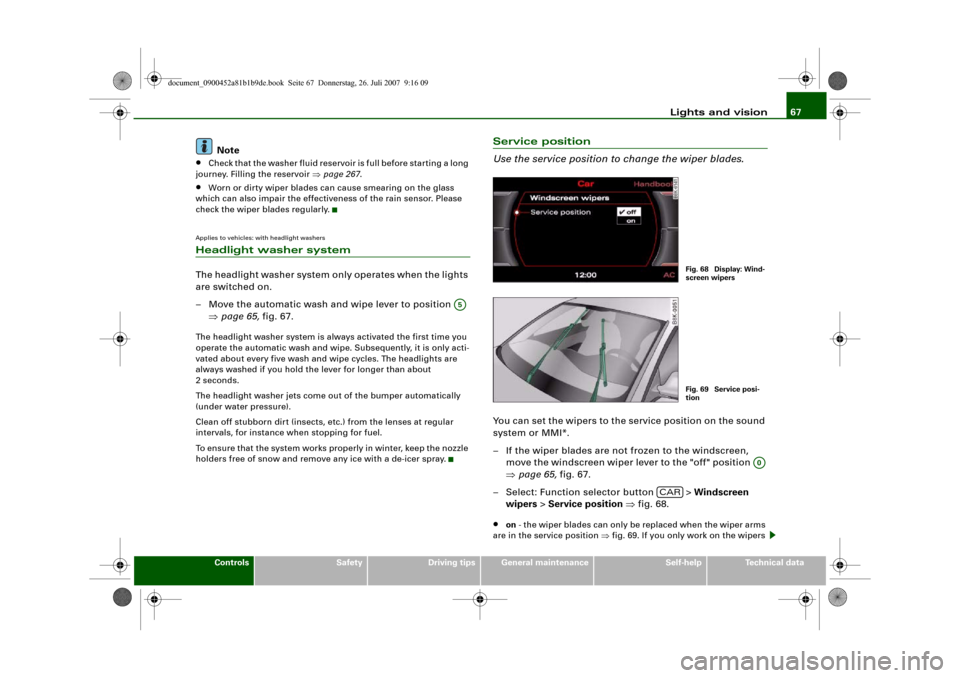
Service position
Use the service position to change the wiper blades.You can set the wipers to the service position on the sound
system or MMI*.
– If the wiper blades are not frozen to the windscreen,
move the windscreen wiper lever to the "off" position
⇒page 65, fig. 67.
– Select: Function selector button > Windscreen
wipers > Service position ⇒fig. 68.•
on - the wiper blades can only be replaced when the wiper arms
are in the service position ⇒fig. 69. If you only work on the wipers
A5
Fig. 68 Display: Wind-
screen wipersFig. 69 Service posi-
tion
A0
CAR
document_0900452a81b1b9de.book Seite 67 Donnerstag, 26. Juli 2007 9:16 09
Page 73 of 342
Lights and vision71
Controls
Safety
Driving tips
General maintenance
Self-help
Technical data
Applies to vehicles: with automatic anti-dazzle adjustment for exterior mirrorsAutomatic anti-dazzle adjustment for exterior mirrorsThe exterior mirrors darken together with the automatically
adjusting interior mirror. When the ignition is on, the mirrors will
darken automatically according to the amount of light received (for
example from the headlights of a vehicle behind).
When the interior lights are switched on, or when reverse gear is
engaged, the mirrors revert to their original (i.e. not darkened)
condition.
WARNING
Electrolyte fluid can leak from a broken mirror. This fluid can cause
irritation to the skin, eyes, and respiratory organs. Wash thor-
oughly with clean water should you come into contact with this
fluid. Seek medical assistance if needed.
Caution
Electrolyte fluid leaking from a broken mirror can cause damage to
the paintwork or plastic surfaces. Use a sponge or similar to remove
the fluid as soon as possible.
Note
•
If you switch off the anti-dazzle function for the interior mirror,
this will also deactivate the anti-dazzle function for the exterior
mirrors.
•
The automatic anti-dazzle function will only work properly if the
sun blind* for the rear window is not in use and there are no other
objects preventing light from reaching the interior mirror.
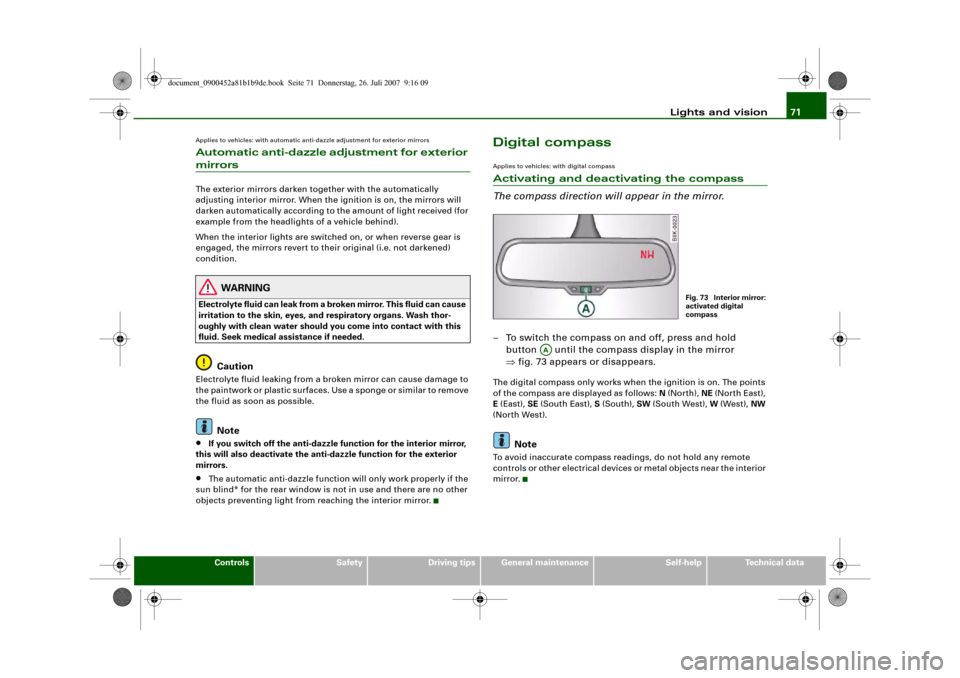
Digital compassApplies to vehicles: with digital compassActivating and deactivating the compass
The compass direction will appear in the mirror.– To switch the compass on and off, press and hold
button until the compass display in the mirror
⇒fig. 73 appears or disappears.The digital compass only works when the ignition is on. The points
of the compass are displayed as follows: N (North), NE (North East),
E (East), SE (South East), S (South), SW (South West), W (West), NW
(North West).
Note
To avoid inaccurate compass readings, do not hold any remote
controls or other electrical devices or metal objects near the interior
mirror.
Fig. 73 Interior mirror:
activated digital
compass
AA
document_0900452a81b1b9de.book Seite 71 Donnerstag, 26. Juli 2007 9:16 09
Page 74 of 342
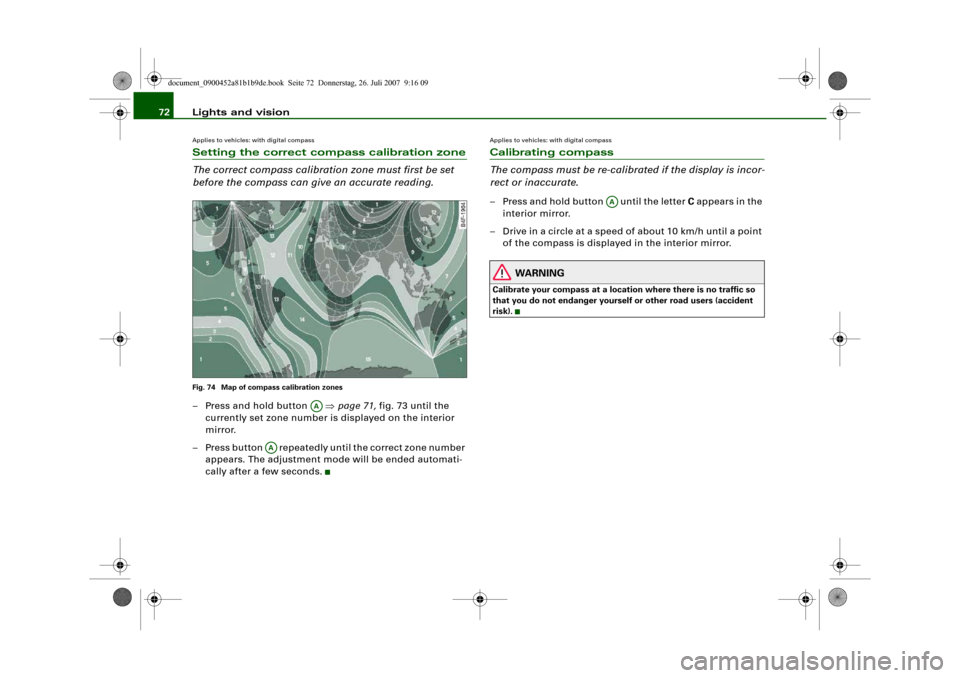
Lights and vision 72Applies to vehicles: with digital compassSetting the correct compass calibration zone
The correct compass calibration zone must first be set
before the compass can give an accurate reading.Fig. 74 Map of compass calibration zones– Press and hold button ⇒page 71, fig. 73 until the
currently set zone number is displayed on the interior
mirror.
– Press button repeatedly until the correct zone number
appears. The adjustment mode will be ended automati-
cally after a few seconds.
Applies to vehicles: with digital compassCalibrating compass
The compass must be re-calibrated if the display is incor-
rect or inaccurate.– Press and hold button until the letter C appears in the
interior mirror.
– Drive in a circle at a speed of about 10 km/h until a point
of the compass is displayed in the interior mirror.
WARNING
Calibrate your compass at a location where there is no traffic so
that you do not endanger yourself or other road users (accident
risk).
AA
AA
AA
document_0900452a81b1b9de.book Seite 72 Donnerstag, 26. Juli 2007 9:16 09