2008 AUDI A4 steering
[x] Cancel search: steeringPage 150 of 342
Audi lane assist 148driving on a straight section. On narrow roads, the system will give
off warnings later than on wide roads.
late: In this setting, the driver will be warned when a wheel crosses
a lane marking.
Setting steering wheel vibration
You can set the steering vibration to low, medium or strong. The
steering wheel will vibrate so that you can check your selection.
Note
•
The lane assist is not active while you are changing the setting;
the brief vibration of the steering wheel is only intended to help you
make the desired setting.
•
Your personal settings are stored automatically and assigned to
the remote control key which is being used.
document_0900452a81b1b9de.book Seite 148 Donnerstag, 26. Juli 2007 9:16 09
Page 161 of 342
Audi drive select159
Controls
Safety
Driving tips
General maintenance
Self-help
Technical data
Audi drive selectAdjusting the vehicle set-upApplies to vehicles: with Audi drive selectIntroductionAudi drive select allows you to use different set-ups on your vehicle.
Using the three modes COMFORT, AUTO and DYNAMIC, you can
change the set-up at the press of a button for a more comfort-
oriented or dynamic drive.
On vehicles with MMI*, you also have the INDIVIDUAL* mode, which
allows you to adapt the vehicle set-up individually to your personal
driving style. For example, you might choose to combine a more
dynamic engine set-up with a lighter steering response.Applies to vehicles: with Audi drive selectDescriptionThe possible vehicle set-up in each mode depends on which equip-
ment is installed on your vehicle. The engine and the servotronic
power steering are basic parts of your vehicle which are always
included in the set-up. In addition, you can change the characteris-
tics of the automatic gearbox*, dynamic steering* and suspension
control*.
The response of the engine and automatic gearbox* to accelerator
pedal movements will be more spontaneous or balanced,
depending on which mode you select.
The servotronic power steering ⇒page 225 will also respond to
different drive set-ups.
The dynamic steering* alters the steering ratio depending on the
road speed to optimise the amount of steering effort required by the
driver at any given time. This enables the sensitivity of the steering to be reduced at higher speeds in order to improve the handling of
the vehicle. The steering is more direct at lower speeds to minimise
the amount of steering effort required by the driver, e.g. when
manoevring in tight spaces. The dynamic steering* also provides a
more agile steering response at low and medium speeds. You can
adjust the basic characteristics of the steering in the Audi drive
select menu.
The suspension control* uses sensors to collect information on
steering movements, braking and acceleration input by the driver,
road surface quality, road speed and vehicle loading. Using this
information, the suspension can be adapted almost instantane-
ously to changing driving conditions. With Audi drive select, the
driver can choose between dynamic and comfort-oriented suspen-
sion set-ups (DYNAMIC and COMFORT modes), or opt for a more
balanced set-up (AUTO mode).
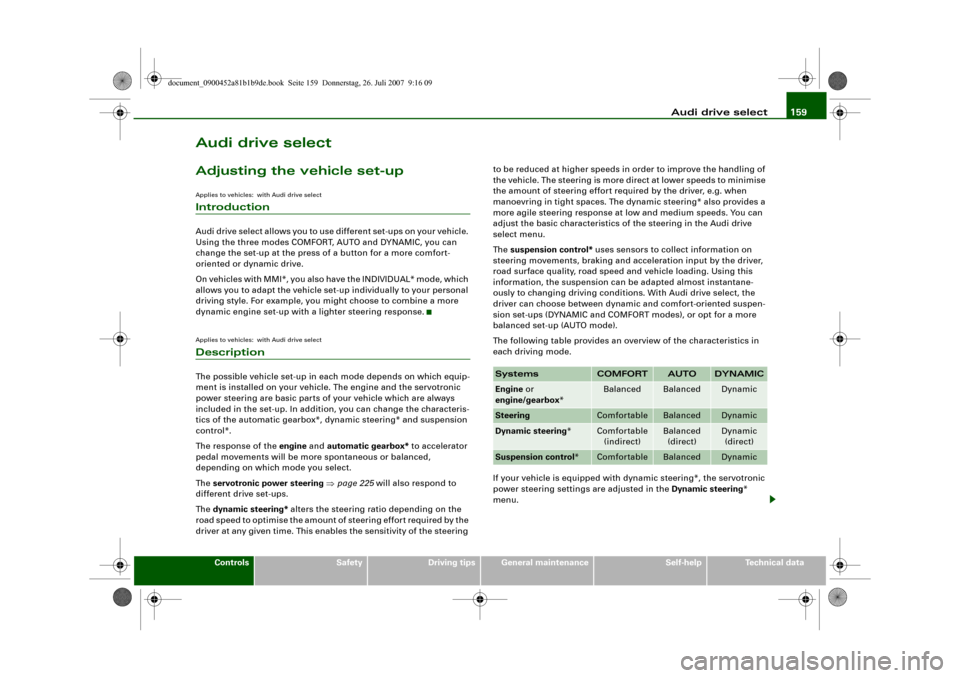
The following table provides an overview of the characteristics in
each driving mode.
If your vehicle is equipped with dynamic steering*, the servotronic
power steering settings are adjusted in the Dynamic steering*
menu.
Systems
COMFORT
AUTO
DYNAMIC
Engine or
engine/gearbox*
Balanced
Balanced
Dynamic
Steering
Comfortable
Balanced
Dynamic
Dynamic steering*
Comfortable
(indirect)
Balanced
(direct)
Dynamic
(direct)
Suspension control*
Comfortable
Balanced
Dynamic
document_0900452a81b1b9de.book Seite 159 Donnerstag, 26. Juli 2007 9:16 09
Page 162 of 342
Audi drive select 160
Note•
You can select the sport program for gear changes on vehicles
with an automatic gearbox* by activating the DYNAMIC mode. There
is no S position on the selector lever.
•
You may hear a noise on vehicles with dynamic steering* when
you start or stop the engine. This is no cause for concern.
Applies to vehicles: with Audi drive selectSelecting the driving mode
You can choose between COMFORT, AUTO, DYNAMIC and
INDIVIDUAL*.
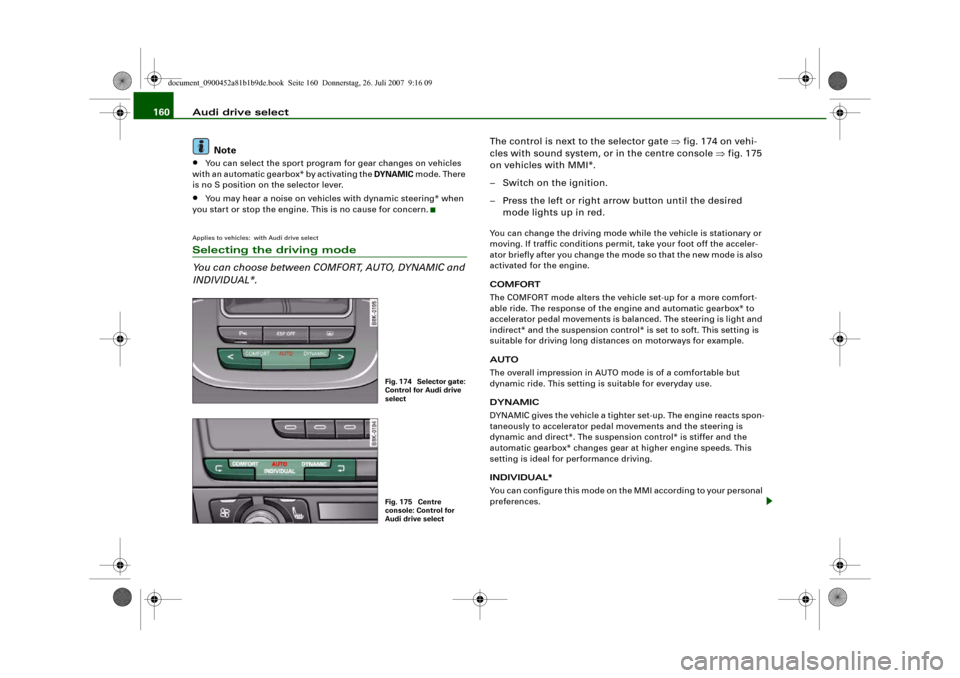
The control is next to the selector gate ⇒fig. 174 on vehi-
cles with sound system, or in the centre console ⇒fig. 175
on vehicles with MMI*.
– Switch on the ignition.
– Press the left or right arrow button until the desired
mode lights up in red.You can change the driving mode while the vehicle is stationary or
moving. If traffic conditions permit, take your foot off the acceler-
ator briefly after you change the mode so that the new mode is also
activated for the engine.
COMFORT
The COMFORT mode alters the vehicle set-up for a more comfort-
able ride. The response of the engine and automatic gearbox* to
accelerator pedal movements is balanced. The steering is light and
indirect* and the suspension control* is set to soft. This setting is
suitable for driving long distances on motorways for example.
AUTO
The overall impression in AUTO mode is of a comfortable but
dynamic ride. This setting is suitable for everyday use.
DYNAMIC
DYNAMIC gives the vehicle a tighter set-up. The engine reacts spon-
taneously to accelerator pedal movements and the steering is
dynamic and direct*. The suspension control* is stiffer and the
automatic gearbox* changes gear at higher engine speeds. This
setting is ideal for performance driving.
INDIVIDUAL*
You can configure this mode on the MMI according to your personal
preferences.
Fig. 174 Selector gate:
Control for Audi drive
selectFig. 175 Centre
console: Control for
Audi drive select
document_0900452a81b1b9de.book Seite 160 Donnerstag, 26. Juli 2007 9:16 09
Page 169 of 342
Automatic gearbox167
Controls
Safety
Driving tips
General maintenance
Self-help
Technical data
Shifting up a gear
– Briefly push the selector lever forwards (in the tiptronic
gate) ⇒page 166, fig. 180 .
Shifting down a gear
– Briefly pull the selector lever backwards (in the tiptronic
gate) .With the tiptronic system the driver can manually choose between
7 different pre-programmed gears. The manual programme can be
selected either with the vehicle stationary or on the move.
When accelerating, the gearbox automatically shifts up into the next
gear shortly before the maximum engine speed is reached.
If you select a gear which is lower than the gear shown in the instru-
ment display ⇒page 166, fig. 181, the gearbox will only shift down
when there is no longer a risk of overrevving the engine.
When the vehicle slows down (for instance when braking), the
gearbox automatically shifts down into the next gear when the
minimum engine speed is reached.
Changing down to a lower gear increases the engine braking effect
on downhill gradients.
When the accelerator pedal is pressed right down past the point of
resistance at full throttle, the gearbox will select a lower gear,
depending on road speed and engine speed.Applies to vehicles: with multitronic® or tiptronicBack-up programme
A back-up system is in place should a fault occur in the
control system.The automatic gearbox switches to the back-up programme if a fault
should occur in the control system. This is indicated by all segments of the display panel either lighting up together or going out
completely.
It is still possible to move the selector lever to all positions. The
manual shift programme (tiptronic) is not available when the back-
up programme is active.
Vehicles with tiptronic gearbox: When the selector lever is in posi-
tion D or S or in the manual shift programme, the gearbox will
remain in 3rd gear if 1st, 2nd or 3rd gears were engaged when the
fault occurred. The gearbox will remain in 5th gear if 4th, 5th or 6th
gears were engaged. The gearbox will then engage 3rd gear when
you drive away from a standstill or after the engine is restarted.
It will still be possible to use reverse gear in the normal way.
However, the electronic lock for reverse gear will be switched off.
Caution
Should the gearbox ever switch into the back-up programme, you
should take the vehicle to an Audi dealer or qualified workshop as
soon as possible.Applies to vehicles: Paddle leversSteering wheel with paddle levers
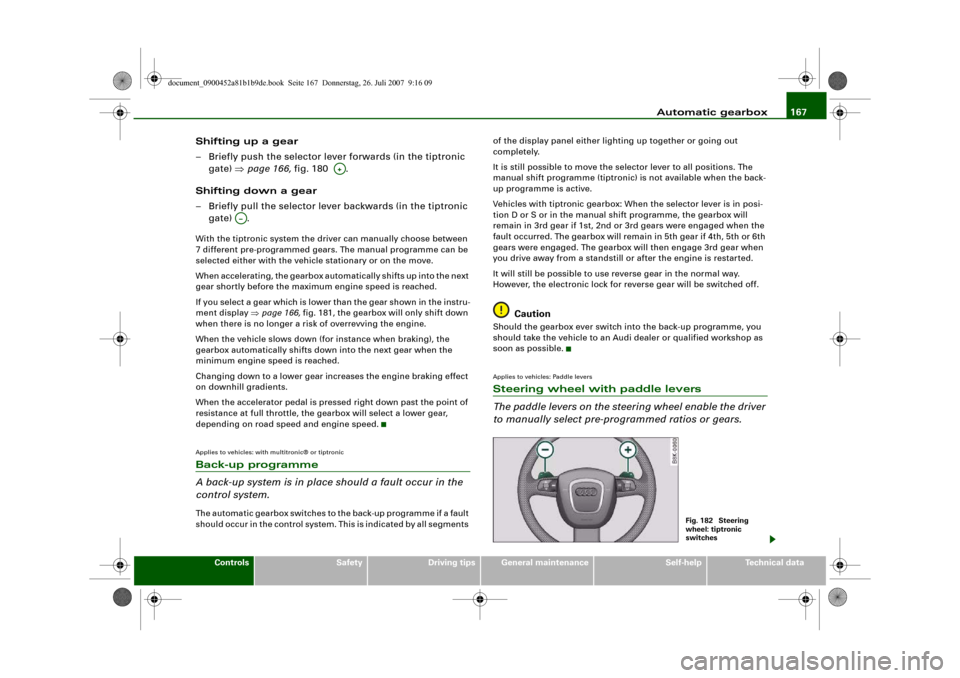
The paddle levers on the steering wheel enable the driver
to manually select pre-programmed ratios or gears.
A+
A…
Fig. 182 Steering
wheel: tiptronic
switches
document_0900452a81b1b9de.book Seite 167 Donnerstag, 26. Juli 2007 9:16 09
Page 176 of 342
Parking aid 174•
Only use the reversing camera to assist you if it is supplying
you with a good and clear picture. The quality of the picture could
be impaired by adverse light, dirt on the lens or a defect (accident
risk).
•
Only use the reversing camera when the boot lid is completely
c lo s e d . P l e a se m a k e su re t h a t t here are no objects mounted to the
rear end of the vehicle which could block the view of the reversing
camera.Note
•
If your vehicle is near an obstacle, the graphic display will also
appear in the reversing camera image. This superimposed graphic
helps the driver to localise the critical area of the vehicle.
•
You can change the display and adjust the volume and pitch of
the beeps ⇒page 177.
•
Please refer to the notes on towing ⇒page 177.
•
There is a slight delay in the picture display.
Applies to vehicles: with Audi parking system advancedParking perpendicular to the roadside
Parking mode 1 can be used when parking your vehicle in
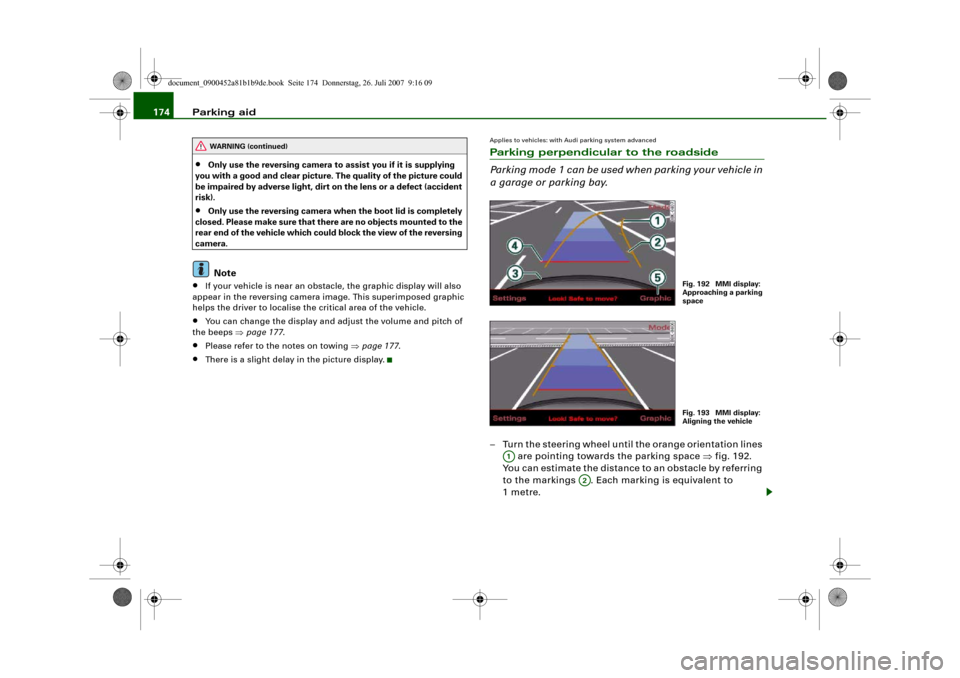
a garage or parking bay.– Turn the steering wheel until the orange orientation lines
are pointing towards the parking space ⇒fig. 192.
You can estimate the distance to an obstacle by referring
to the markings . Each marking is equivalent to
1metre.
WARNING (continued)
Fig. 192 MMI display:
Approaching a parking
spaceFig. 193 MMI display:
Aligning the vehicle
A1
A2
document_0900452a81b1b9de.book Seite 174 Donnerstag, 26. Juli 2007 9:16 09
Page 177 of 342
Parking aid175
Controls
Safety
Driving tips
General maintenance
Self-help
Technical data
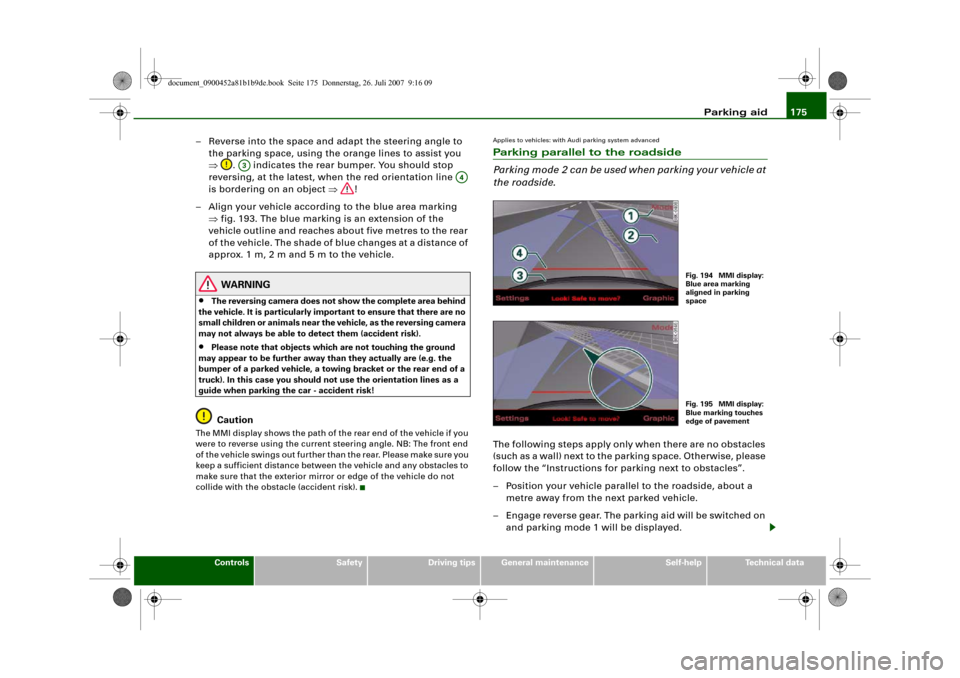
– Reverse into the space and adapt the steering angle to
the parking space, using the orange lines to assist you
⇒. indicates the rear bumper. You should stop
reversing, at the latest, when the red orientation line
is bordering on an object ⇒!
– Align your vehicle according to the blue area marking
⇒fig. 193. The blue marking is an extension of the
vehicle outline and reaches about five metres to the rear
of the vehicle. The shade of blue changes at a distance of
approx. 1m, 2m and 5m to the vehicle.
WARNING
•
The reversing camera does not show the complete area behind
the vehicle. It is particularly important to ensure that there are no
small children or animals near the vehicle, as the reversing camera
may not always be able to detect them (accident risk).
•
Please note that objects which are not touching the ground
may appear to be further away than they actually are (e.g. the
bumper of a parked vehicle, a towing bracket or the rear end of a
truck). In this case you should not use the orientation lines as a
guide when parking the car - accident risk!Caution
The MMI display shows the path of the rear end of the vehicle if you
were to reverse using the current steering angle. NB: The front end
of the vehicle swings out further than the rear. Please make sure you
keep a sufficient distance between the vehicle and any obstacles to
make sure that the exterior mirror or edge of the vehicle do not
collide with the obstacle (accident risk).
Applies to vehicles: with Audi parking system advancedParking parallel to the roadside
Parking mode 2 can be used when parking your vehicle at
the roadside.The following steps apply only when there are no obstacles
(such as a wall) next to the parking space. Otherwise, please
follow the “Instructions for parking next to obstacles”.
– Position your vehicle parallel to the roadside, about a
metre away from the next parked vehicle.
– Engage reverse gear. The parking aid will be switched on
and parking mode 1 will be displayed.
A3
A4
Fig. 194 MMI display:
Blue area marking
aligned in parking
spaceFig. 195 MMI display:
Blue marking touches
edge of pavement
document_0900452a81b1b9de.book Seite 175 Donnerstag, 26. Juli 2007 9:16 09
Page 178 of 342
Parking aid 176
– Press the control button for Mode ⇒fig. 194 on the
MMI control console. Parking mode 2 is displayed.
– Reverse and align your vehicle in such a way that the blue
area marking borders onto the vehicle behind or onto
the parking space line marking. The blue marking is an
extension of the vehicle outline and reaches about five
metres to the rear of the vehicle. The long side of the blue
marking should border onto the kerb. The complete blue
area marking must fit into the parking space.
– When the vehicle is stationary turn the steering wheel to
the left as far as it will go.
– Reverse into the parking space.
– Stop the vehicle as soon as the blue curve touches the
kerb ⇒page 175, fig. 195.
– When the vehicle is stationary turn the steering wheel to
the right as far as it will go.
– Continue to reverse into the parking space until the
vehicle is standing parallel to the kerb. indicates the
rear bumper. You should stop reversing, at the latest,
when the red orientation line is bordering on an
object ⇒! Keep a close watch on the front of your
vehicle ⇒.Parking next to obstacles
If an obstacle (such as a wall) is located next to the parking space,
the clearance at the side of the vehicle must be larger. Position the
long side of the blue marking so that there is sufficient clearance
from the kerb. The marking must not touch the kerb. You must also
start turning the steering wheel much earlier. The blue curve
⇒page 175, fig. 195 must not touch the kerb - make sure there is
sufficient clearance from the kerb.
WARNING
•
The reversing camera does not show the complete area behind
the vehicle. It is particularly important to ensure that there are no
small children or animals near the vehicle, as the reversing camera
may not always be able to detect them (accident risk).
•
Please note that objects which are not touching the ground
may appear to be further away than they actually are (e.g. the
bumper of a parked vehicle, a towing bracket or the rear end of a
truck). In this case you should not use the orientation lines as a
guide when parking the car - accident risk!Caution
The MMI display shows the path of the rear end of the vehicle if you
were to reverse using the current steering angle. NB: The front end
of the vehicle swings out further than the rear. Please make sure you
keep a sufficient distance between the vehicle and any obstacles to
make sure that the exterior mirror or edge of the vehicle do not
collide with the obstacle (accident risk).
Note
The orientation lines and markings appear on the left or right side,
depending on which turn signals are on.
A1
A2
A3
A4
document_0900452a81b1b9de.book Seite 176 Donnerstag, 26. Juli 2007 9:16 09
Page 188 of 342
Safe driving 186Safe drivingGeneral notesSafety is the first priority
Your safety is our first priority.This chapter contains important information, tips, sugges-
tions and warnings that you should read and observe for
your own safety and the safety of your passengers.
WARNING
•
The information in this chapter is important for the driver of
the vehicle and all passengers. The other chapters in this manual
(and, where applicable, in the other literature supplied with the
vehicle) contain further important notes which you should read
and observe for your own safety and that of your passengers.
•
Ensure that the complete vehicle wallet is always in the vehicle.
This is especially important when you lend or sell the vehicle to
others.
Safety features
The safety features listed here are part of the vehicle's
occupant restraint system. They work together to help
reduce the risk of injury in a wide variety of accident situ-
ations.Your safety and the safety of your passengers should not be left to
chance. In the event of an accident, the safety features incorporated
in your vehicle are capable of reducing the risk of injury. These are
just a few of the safety features in your Audi:•
Optimised three-point seat belts for all seats,
•
Belt force limiters for the front seats,
•
Belt pre-tensioners for the front seats,
•
Head restraints for all seats,
•
Optimised protection against injuries of the cervical vertebrae,
•
Front airbags,
•
Side airbags in the front seat backrests and on the outer rear
seats*,
•
Head-protection airbags (sideguard system),
•
“ISOFIX” mountings* for “ISOFIX” child safety seats on the rear
seats,
•
Height-adjustable head restraints on the seats,
•
Adjustable steering column.
These individual safety features are harmonised to provide you and
your passengers with the best possible protection in accident situ-
ations. However, they can only be effective if you and your passen-
gers sit in the correct position and adjust and use the safety equip-
ment properly.
For these reasons, this chapter explains why these safety features
are so important, how they can protect you, what you need to
remember when using them, and how you and your passengers can
gain the most benefit from them. There are also a number of impor-
tant safety warnings which you and your passengers should always
observe in order to minimise the risk of injury.
Safety is everyone's responsibility!
document_0900452a81b1b9de.book Seite 186 Donnerstag, 26. Juli 2007 9:16 09