2008 AUDI A4 coolant
[x] Cancel search: coolantPage 112 of 342
Heating and cooling 110The synchronisation is cancelled as soon as any adjustments are
made on the front passenger's side.Applies to vehicles: with diesel engineSupplementary heater– Set the Supplementary heater to auto or off.Models with a diesel engine are equipped with a supplementary
heater to help warm up the interior more quickly. At outside temper-
atures below about +5 °C the supplementary heater is switched on
(and off) automatically when the engine is running, depending on
the coolant temperature, the temperature in the vehicle interior and
the temperature the heater is set to.Auxiliary heating and auxiliary
ventilationApplies to vehicles: with auxiliary heating - under development at the time of printingDescription
The auxiliary heating and ventilation systems heat and
cool the interior independently of the engine.The auxiliary heating
works in conjunction with the air condi-
tioner system, but does not rely on heat from the engine. Instead of
this, the system burns fuel. The system's main function is to warm
up the interior of the vehicle and to defrost the windows in cold
weather.
The auxiliary heating system can be used both when the vehicle is
stationary and when driving (to provide extra heat while the engine
is warming up).The auxiliary ventilation
also operates independently of the
engine. This feature can be used to cool the interior with the blower
when the vehicle is left parked in the sun.
The system will automatically activate either the auxiliary heating or
the auxiliary ventilation mode, depending on the actual tempera-
ture measured inside the car and the temperature you have set with
the air conditioner controls. It is possible to alter the temperature
setting while the auxiliary heating/ventilation is running.
Switching on and off
There are two different ways of switching on the auxiliary
heating/ventilation system.
•
Immediate start: You can switch the auxiliary heating/ventilation
on and off at any time via the sound system or MMI ⇒page 111. You
can also switch the system on and off using the remote control
⇒page 113.
•
Switching on via timer: You can programme various start times
using the timers ⇒page 111. However you must first activate the
timer before the auxiliary heating/ventilation system will switch on
automatically.
The auxiliary heating/ventilation will switch itself off at the end of
the programmed running time. The running time can be set to 15,
30, 45 or 60 minutes ⇒page 112.
WARNING
•
The auxiliary heating must not be allowed to run when the
vehicle is in a confined space because it can give off toxic fumes.
•
To avoid any possible fire risk, never have the auxiliary heating
switched on when refuelling the vehicle.
•
Because of the high temperatures which occur when the auxil-
iary heating is running, make sure when parking the car that the
exhaust outlet under the car is not obstructed in any way and that
the exhaust gases do not come into contact with flammable mate-
rials (fire risk).
document_0900452a81b1b9de.book Seite 110 Donnerstag, 26. Juli 2007 9:16 09
Page 120 of 342
Driving 118
Note•
If the key should become stuck in the ignition lock, remove the
top part of the key and use it to lock the vehicle.
•
If you open the driver's door while the ignition is switched on, a
warning buzzer will sound, and the message Ignition is on will
appear in the display. In this case, please switch off the ignition.
Switching off the engine– Stop the vehicle.
– Automatic gearbox: Move the selector lever to position P
or N.
–Press in the ignition key to switch off the engine.Emergency Off function
If necessary in an emergency, the engine can be switched off while
the vehicle is still moving. The engine will be switched off if you
press and hold the ignition key.
WARNING
•
Never switch off the engine until the vehicle is stationary.
•
The brake servo and the power steering system work only
when the engine is running. You need more strength to steer and
brake the vehicle when the engine is switched off. This would
mean a greater risk of accidents and serious injury, because you
cannot steer and brake in the normal manner.Caution
If the engine has been working hard for a long time, there is a risk
of heat building up in the engine compartment after the engine has
been switched off; this could cause engine damage. For this reason, you should leave the engine idling for about 2 minutes before
switching it off.
Note
After the engine is stopped the radiator fan may run on for up to
10 minutes, even if the ignition is switched off. The fan may also
start running again after some time if the coolant temperature rises
due to a build-up of heat, or if the engine is hot and the engine
compartment is heated up further by direct sunlight.Starting and stopping the engine
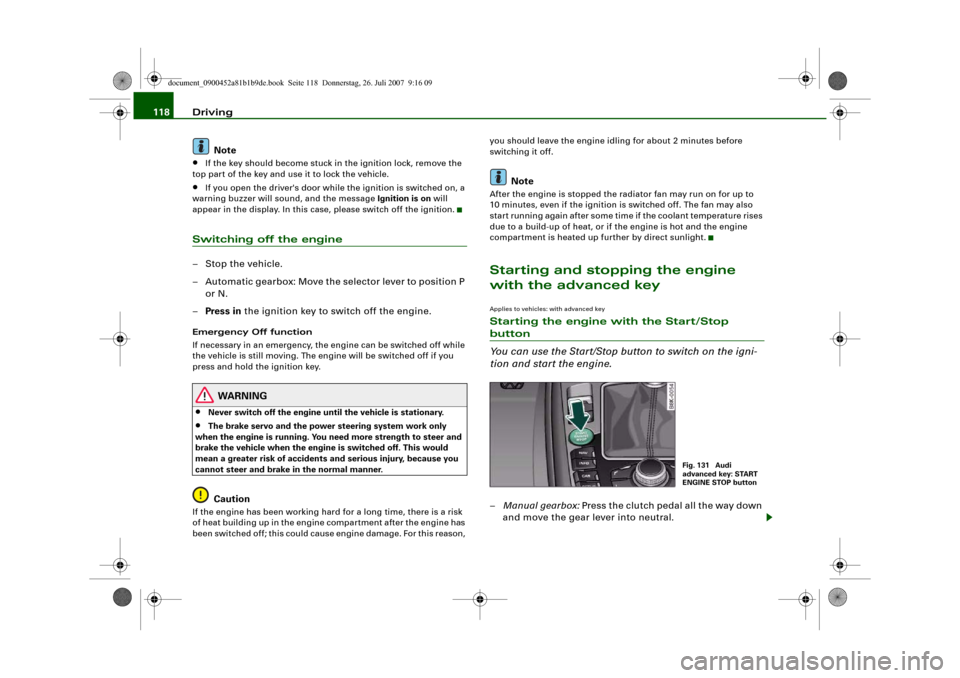
with the advanced keyApplies to vehicles: with advanced keyStarting the engine with the Start/Stop button
You can use the Start/Stop button to switch on the igni-
tion and start the engine.–Manual gearbox: Press the clutch pedal all the way down
and move the gear lever into neutral.
Fig. 131 Audi
advanced key: START
ENGINE STOP button
document_0900452a81b1b9de.book Seite 118 Donnerstag, 26. Juli 2007 9:16 09
Page 123 of 342
Driving121
Controls
Safety
Driving tips
General maintenance
Self-help
Technical data start running again after some time if the coolant temperature rises
due to a build-up of heat, or if the engine is hot and the engine
compartment is heated up further by direct sunlight.
Electro-mechanical parking brakeOperation
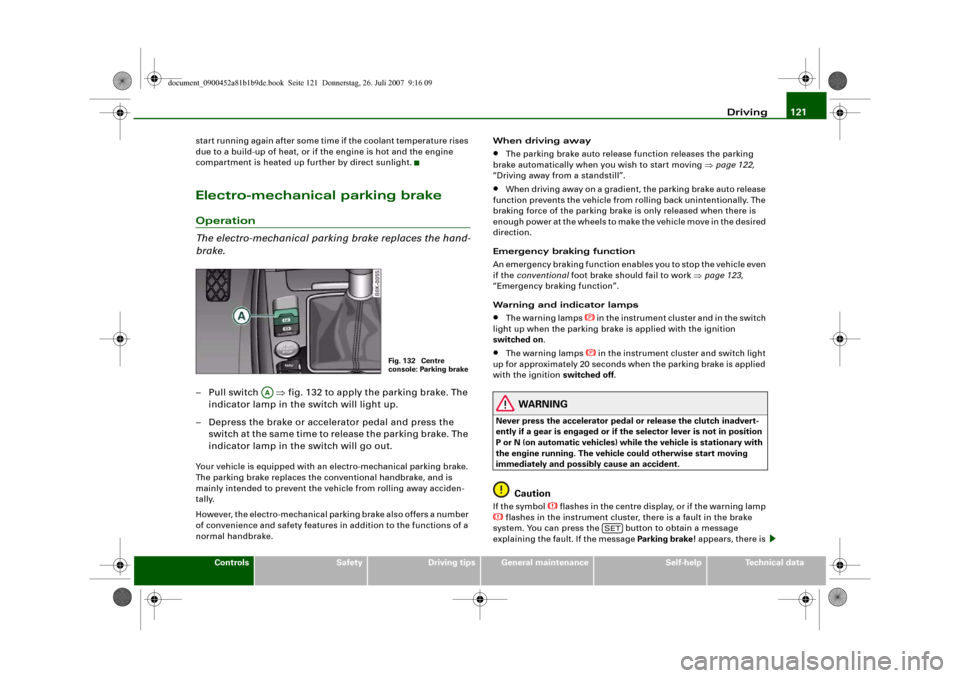
The electro-mechanical parking brake replaces the hand-
brake.– Pull switch ⇒fig. 132 to apply the parking brake. The
indicator lamp in the switch will light up.
– Depress the brake or accelerator pedal and press the
switch at the same time to release the parking brake. The
indicator lamp in the switch will go out.Your vehicle is equipped with an electro-mechanical parking brake.
The parking brake replaces the conventional handbrake, and is
mainly intended to prevent the vehicle from rolling away acciden-
tally.
However, the electro-mechanical parking brake also offers a number
of convenience and safety features in addition to the functions of a
normal handbrake.When driving away
•
The parking brake auto release function releases the parking
brake automatically when you wish to start moving ⇒page 122,
“Driving away from a standstill”.
•
When driving away on a gradient, the parking brake auto release
function prevents the vehicle from rolling back unintentionally. The
braking force of the parking brake is only released when there is
enough power at the wheels to make the vehicle move in the desired
direction.
Emergency braking function
An emergency braking function enables you to stop the vehicle even
if the conventional foot brake should fail to work ⇒page 123,
“Emergency braking function”.
Warning and indicator lamps
•
The warning lamps
in the instrument cluster and in the switch
light up when the parking brake is applied with the ignition
switched on.
•
The warning lamps
in the instrument cluster and switch light
up for approximately 20 seconds when the parking brake is applied
with the ignition switched off.
WARNING
Never press the accelerator pedal or release the clutch inadvert-
ently if a gear is engaged or if the selector lever is not in position
P or N (on automatic vehicles) while the vehicle is stationary with
the engine running. The vehicle could otherwise start moving
immediately and possibly cause an accident.
Caution
If the symbol
flashes in the centre display, or if the warning lamp
flashes in the instrument cluster, there is a fault in the brake
system. You can press the button to obtain a message
explaining the fault. If the message Parking brake ! appears, there is
Fig. 132 Centre
console: Parking brake
AA
SET
document_0900452a81b1b9de.book Seite 121 Donnerstag, 26. Juli 2007 9:16 09
Page 236 of 342
Towing a trailer 234•
The trailer overrun brake must be set correctly. This is important
to ensure that the trailer can be braked correctly, to avoid the vehicle
and trailer “jack-knifing” and to prevent excess braking of the trailer.
•
At low outside temperatures, both the towing vehicle and the
trailer should be fitted with winter tyres.
WARNING
It is essential that you adjust your speed to suit the weather, road
and traffic conditions. Do not let the trailer stabilisation system
tempt you into taking any risks when driving – this can cause acci-
dents.•
The ESP and trailer stabilisation system cannot defy the laws
of physics. This should be kept in mind, particularly on slippery
and wet roads and when towing a trailer with a light load.
•
The trailer stabilisation system is functional, regardless of
whether the trailer has a mechanical overrun brake or not.
•
The trailer stabilisation system is not always able to detect
swaying of trailers with a light load and will therefore not inter-
vene.
•
A trailer can still “jack-knife” on slippery roads with little grip,
even if the towing vehicle is equipped with the trailer stabilisation
system.
•
Trailers with a high centre of gravity may even tip over before
they start to sway sideways.
•
If you are not towing a trailer, but the trailer socket is being
used (e.g. for an illuminated bicycle rack), the trailer stabilisation
system may be activated in extreme driving conditions.
•
Please note the additional information and warnings
⇒page 234.
Notes on towing
Driving with a trailer always requires extra care.Weight distribution
Try to avoid towing a loaded trailer with an unladen vehicle. If this
cannot be avoided, drive extra slowly to allow for the unbalanced
weight distribution.
Speed
The stability of the car and trailer is reduced with increasing speed.
For this reason it is advisable not to drive at the maximum permis-
sible top speed in unfavourable road, weather or wind conditions.
This applies especially on a downhill gradient.
You should always reduce speed immediately if the trailer shows
the slightest sign of swaying. Never try to stop the swaying by accel-
erating further.
Always brake in good time. If the trailer has an overrun brake, apply
the brakes gently at first and then firmly. This will prevent the jerking
that can be caused by the trailer wheels locking. Change down in
good time before going down a steep hill so that you can use the
engine braking effect to slow down the vehicle.
Swaying and pitching can be reduced by stabiliser aids. We recom-
mend having stabiliser aids installed when towing trailers with a
high trailer weight. They can be purchased and installed at an Audi
dealer.
Overheating
When climbing long hills in hot weather with the engine running
fast in low gear, you should keep an eye on the coolant temperature
gauge ⇒page 11. Reduce speed immediately if the needle moves to
the top end of the scale. If the temperature warning lamp
in the
instrument cluster should start flashing, stop the car and let the
engine cool down by running it at idling speed for a few minutes.
document_0900452a81b1b9de.book Seite 234 Donnerstag, 26. Juli 2007 9:16 09
Page 256 of 342
Checking and topping up fluids 254Checking and topping up fluidsBonnetReleasing the bonnet
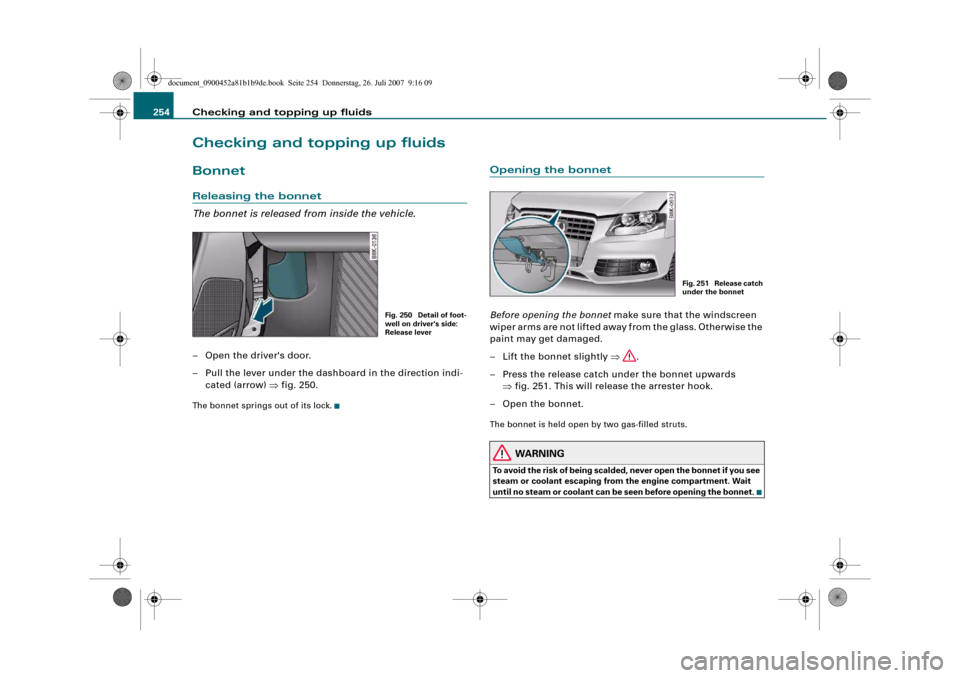
The bonnet is released from inside the vehicle.– Open the driver's door.
– Pull the lever under the dashboard in the direction indi-
cated (arrow) ⇒fig. 250.The bonnet springs out of its lock.
Opening the bonnetBefore opening the bonnet make sure that the windscreen
wiper arms are not lifted away from the glass. Otherwise the
paint may get damaged.
– Lift the bonnet slightly ⇒.
– Press the release catch under the bonnet upwards
⇒fig. 251. This will release the arrester hook.
– Open the bonnet.The bonnet is held open by two gas-filled struts.
WARNING
To avoid the risk of being scalded, never open the bonnet if you see
steam or coolant escaping from the engine compartment. Wait
until no steam or coolant can be seen before opening the bonnet.
Fig. 250 Detail of foot-
well on driver's side:
Release lever
Fig. 251 Release catch
under the bonnet
document_0900452a81b1b9de.book Seite 254 Donnerstag, 26. Juli 2007 9:16 09
Page 257 of 342
Checking and topping up fluids255
Controls
Safety
Driving tips
General maintenance
Self-help
Technical data
Working on components in the engine compartment
Extra caution is necessary when working on components
in the engine compartment.Always be aware of the danger of injury and scalding as well as the
risk of accident or fire when working in the engine compartment
(e.g. when checking and refilling fluids). Always observe the warn-
ings listed below and follow all normal safety precautions. The
engine compartment of any motor vehicle is a potentially
hazardous area. ⇒.
WARNING
•
Switch off the engine.
•
Remove the ignition key.
•
Apply the parking brake.
•
Put the gear lever in neutral or selector in P.
•
Wait for the engine to cool down.
•
Keep children away from engine compartment.
•
Never spill fluids on hot engine components. These fluids can
cause a fire (e.g. radiator anti-freeze).
•
Take care not to cause short circuits in the electrical system,
especially when working on the battery.
•
Do not touch the radiator fan when the engine is hot. The fan
may start running suddenly.
•
Do not unscrew the cap on the expansion tank when the engine
is hot. The cooling system is under pressure.
•
Protect face, hands and arms by covering the cap with a large,
thick rag to protect against escaping coolant and steam.
•
If any tests have to be performed with the engine running,
there is an extra safety risk from the rotating parts, such as the
drive belts, alternator and radiator fan, etc., and from the high-
voltage ignition system.
•
Vehicles with automatic gearbox: Never open the throttle inad-
vertently (for instance by hand from the engine compartment) if a
gear is engaged while the vehicle is stationary with the engine
running. The vehicle could otherwise start moving immediately
and possibly cause an accident.
•
Observe the following additional warnings if work on the fuel
system or the electrical system is necessary:
−Always disconnect the battery.
−Do not smoke.
−Never work near naked flames.
−Always keep an approved fire extinguisher immediately
available.Caution
When topping up fluids make sure the correct fluid is put into the
correct filler opening. This can otherwise cause serious malfunc-
tions or engine damage.
For the sake of the environment
Inspect the ground underneath your vehicle regularly so that any
leaks are detected at an early stage. If you find oil spots or other
fluids, have your vehicle inspected by a qualified workshop.
Note
On right-hand drive vehicles* some of the containers / reservoirs
mentioned below are located on the other side of the engine
compartment.
WARNING (continued)
document_0900452a81b1b9de.book Seite 255 Donnerstag, 26. Juli 2007 9:16 09
Page 262 of 342
Checking and topping up fluids 260
Caution•
The oil level must never be above area ⇒page 258, fig. 254,
as this may result in damage to the catalytic converter or to the
engine. On vehicles without an oil dipstick, you can check the oil
level via the sound system or MMI*. Contact a qualified workshop to
extract the engine oil if necessary.
•
No additives should be used with engine oil. Any damage caused
by the use of such additives would not be covered by the factory
warranty.For the sake of the environment
•
Never pour oil down drains or into the ground.
•
Always observe statutory requirements when disposing of
empty oil canisters.
Cooling systemCoolant
The purpose of the coolant is to carry heat away from the
engine. The correct amount of anti-freeze is important to
prevent the cooling system from freezing in winter.The cooling system is filled for life at the factory, so the coolant does
not need to be changed. The coolant consists of a mixture of water
and anti-freeze additive G12++. This is a glycol-based anti-freeze
with anti-corrosion additives.
Anti-freeze additive
The amount of anti-freeze additive required depends on the temper-
atures to be expected in the winter season. If the anti-freeze concen-
tration is too low the coolant can freeze, resulting in failure of the
cooling system and heater.The cooling system is filled at the factory with the correct amount of
anti-freeze for the country concerned.
In most cases the mixture consists of 60% water and 40% additive.
This mixture gives the required anti-freeze protection at tempera-
tures down to -25 °C and protects the alloy parts of the cooling
system against corrosion. It also prevents scaling and raises the
boiling point of the coolant.
Countries with warm climate
The coolant concentration must not be reduced by adding plain
water, even in the summer or in warm climates. The concentration
of the anti-freeze additive must always be at least 40%.
Countries with cold climate
If greater anti-freeze protection is required in very cold climates, the
proportion of the anti-freeze additive G12++ can be increased. A
concentration of 60% offers protection down to about - 40 °C. The
concentration of the anti-freeze additive must not be more than
60%, otherwise this would reduce the anti-freeze protection. In addi-
tion, the cooling effect will be adversely affected.
Vehicles for export to countries with a cold climate (such as Sweden,
Norway and Finland) are supplied with antifreeze protection down
to about -35 °C. The concentration of the antifreeze additive for
these countries should always be at least 50%.
Caution
•
It is advisable to have the cooling system checked before the
winter season to make sure that the antifreeze concentration is
adequate for the conditions to be expected. This applies particularly
if you intend to take the car into a colder climate zone. If necessary,
have the anti-freeze concentration increased to 50 - 60% as required.
•
Use only anti-freeze additive G12++, an additive meeting the
specification “TL 774 G”. Other additives may give considerably
inferior corrosion protection. The resulting corrosion in the cooling
system can lead to a loss of coolant, causing serious damage to the
engine.
Aa
document_0900452a81b1b9de.book Seite 260 Donnerstag, 26. Juli 2007 9:16 09
Page 263 of 342
Checking and topping up fluids261
Controls
Safety
Driving tips
General maintenance
Self-help
Technical data
•
The coolant additive G12++ can be mixed only with additives
G12+ and G12.
Checking coolant level
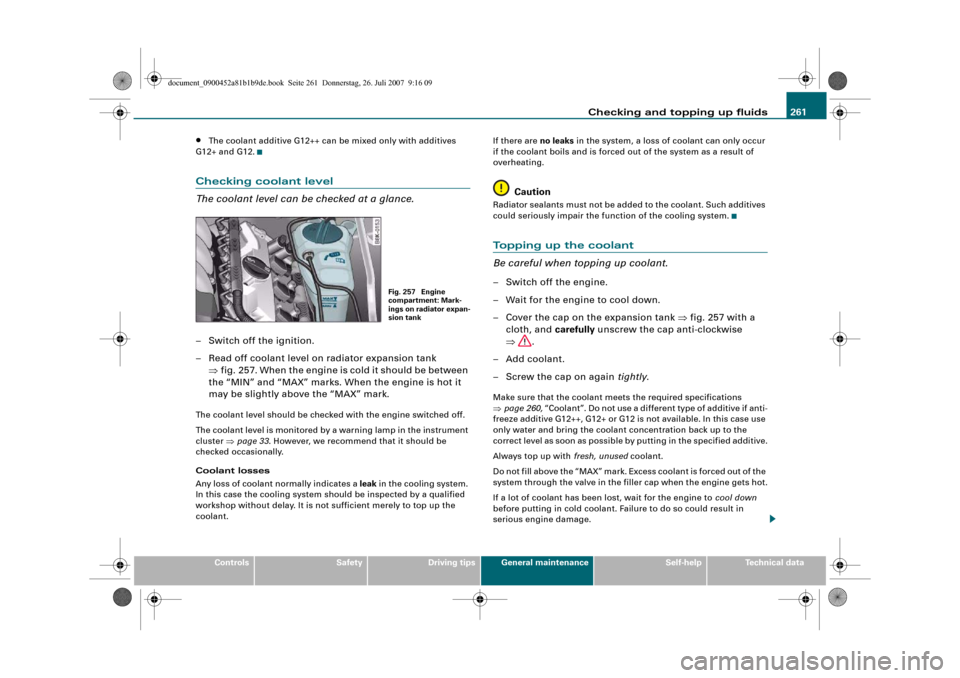
The coolant level can be checked at a glance.– Switch off the ignition.
– Read off coolant level on radiator expansion tank
⇒fig. 257. When the engine is cold it should be between
the “MIN” and “MAX” marks. When the engine is hot it
may be slightly above the “MAX” mark.The coolant level should be checked with the engine switched off.
The coolant level is monitored by a warning lamp in the instrument
cluster ⇒page 33. However, we recommend that it should be
checked occasionally.
Coolant losses
Any loss of coolant normally indicates a leak in the cooling system.
In this case the cooling system should be inspected by a qualified
workshop without delay. It is not sufficient merely to top up the
coolant.If there are no leaks in the system, a loss of coolant can only occur
if the coolant boils and is forced out of the system as a result of
overheating.
Caution
Radiator sealants must not be added to the coolant. Such additives
could seriously impair the function of the cooling system.Topping up the coolant
Be careful when topping up coolant.– Switch off the engine.
– Wait for the engine to cool down.
– Cover the cap on the expansion tank ⇒fig. 257 with a
cloth, and carefully unscrew the cap anti-clockwise
⇒.
– Add coolant.
– Screw the cap on again tightly.Make sure that the coolant meets the required specifications
⇒page 260, “Coolant”. Do not use a different type of additive if anti-
freeze additive G12++, G12+ or G12 is not available. In this case use
only water and bring the coolant concentration back up to the
correct level as soon as possible by putting in the specified additive.
Always top up with fresh, unused coolant.
Do not fill above the “MAX” mark. Excess coolant is forced out of the
system through the valve in the filler cap when the engine gets hot.
If a lot of coolant has been lost, wait for the engine to cool down
before putting in cold coolant. Failure to do so could result in
serious engine damage.
Fig. 257 Engine
compartment: Mark-
ings on radiator expan-
sion tank
document_0900452a81b1b9de.book Seite 261 Donnerstag, 26. Juli 2007 9:16 09