2008 AUDI A4 boot
[x] Cancel search: bootPage 50 of 342
Doors and windows 48
Locking the vehicle
– Move the selector lever to position P (automatic
gearbox), otherwise it will not be possible to lock the
vehicle.
– Touch the sensor on the door handle once to lock the
vehicle ⇒.
– Touch the sensor a second time within 2 seconds to lock
the vehicle without activating the deadlock mechanism.The vehicle can be locked and unlocked from any of the doors. The
driver's door will always be unlocked as well when the passenger's
door is unlocked. The remote control key has to be within a range of
about 1.5 metres of the relevant door or the boot lid. It does not
matter where you carry the key, for instance whether it is in your
jacket pocket or in a briefcase.
The unlocking function may be affected if the sensor area on the
door handle is touched while the vehicle is being unlocked.
The locking function may be affected if you grasp the door handle
while the vehicle is being locked.
Once the doors have been locked, they cannot be opened again
immediately. This will enable you to check that the doors are prop-
erly closed.
The system will either unlock all the doors or one door only,
depending on the settings you have chosen on the sound system or
MMI* ⇒page 50.
WARNING
Do not leave anyone (especially children) in the car if it is locked
from the outside and the deadlock mechanism is activated: the
doors and windows cannot then be opened from the inside.
Locked doors could delay assistance in an emergency, potentially
putting lives at risk.
Note
Please note the following points if the vehicle is left parked for long
periods:•
To save electrical power, the proximity sensors are switched off
after a few days. You will then need to pull the door handle once to
unlock the vehicle, and a second time to open it.
•
To prevent the battery from becoming discharged and thus
maintain the vehicle's starting ability for as long as possible, the
power management system will gradually switch off convenience
functions that are not required. In this case you may not be able to
unlock the vehicle with this convenience function.
Locking and unlocking the vehicle using the key
If the central locking system should fail to work, you can
still lock and unlock the driver's door by turning the emer-
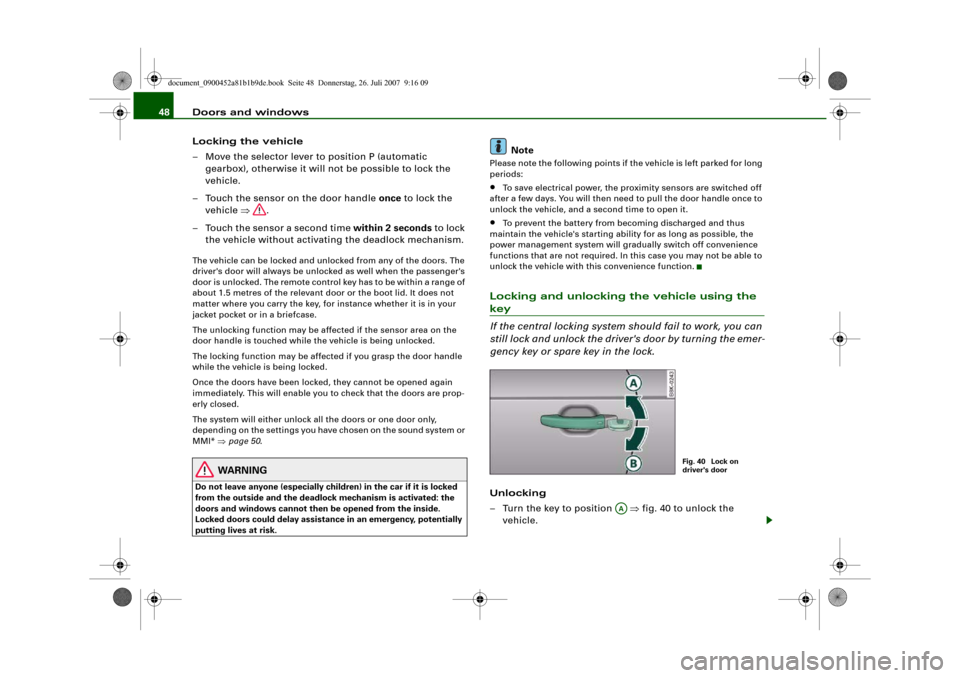
gency key or spare key in the lock.Unlocking
– Turn the key to position ⇒fig. 40 to unlock the
vehicle.
Fig. 40 Lock on
driver's door
AA
document_0900452a81b1b9de.book Seite 48 Donnerstag, 26. Juli 2007 9:16 09
Page 51 of 342
Doors and windows49
Controls
Safety
Driving tips
General maintenance
Self-help
Technical data
Locking
– Move the selector lever to position P (automatic
gearbox).
–Turn the key once to position ⇒ to lock the vehicle.
– If you turn the key to position a second time within
2seconds, this will lock the vehicle without activating
the deadlock mechanism.In order to switch off the anti-theft alarm*, you must switch on the
ignition within 15 seconds after opening the driver's door. Other-
wise the alarm will be triggered.
If the central locking system should fail to work at any time, the
passenger's door can be locked manually ⇒page 51.
WARNING
Do not leave anyone (especially children) in the car if it is locked
from the outside and the deadlock mechanism is activated: the
doors and windows cannot then be opened from the inside.
Locked doors could delay assistance in an emergency, potentially
putting lives at risk.
Note
•
The central locking switch and the release button for the boot lid
will function after the ignition is switched on.
•
If the vehicle is locked with the key when the central locking
system is operational, it is only possible to unlock all the doors and
the boot lid centrally with the key within the next 45 seconds. After
this period, the key will only unlock the driver's door.
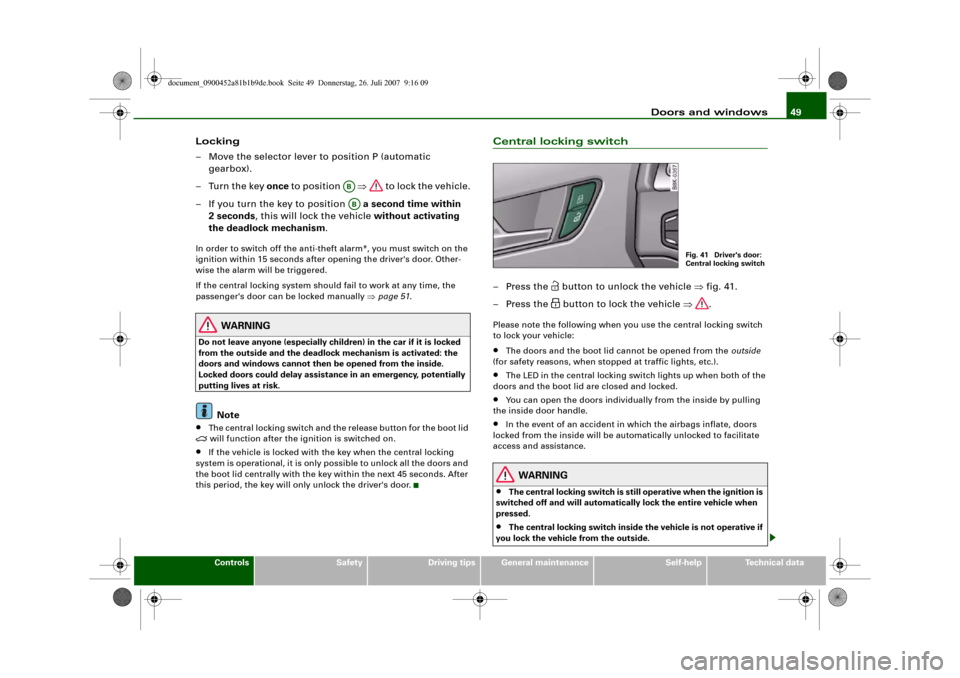
Central locking switch– Press the
button to unlock the vehicle ⇒fig. 41.
– Press the button to lock the vehicle ⇒.
Please note the following when you use the central locking switch
to lock your vehicle:•
The doors and the boot lid cannot be opened from the outside
(for safety reasons, when stopped at traffic lights, etc.).
•
The LED in the central locking switch lights up when both of the
doors and the boot lid are closed and locked.
•
You can open the doors individually from the inside by pulling
the inside door handle.
•
In the event of an accident in which the airbags inflate, doors
locked from the inside will be automatically unlocked to facilitate
access and assistance.
WARNING
•
The central locking switch is still operative when the ignition is
switched off and will automatically lock the entire vehicle when
pressed.
•
The central locking switch inside the vehicle is not operative if
you lock the vehicle from the outside.
ABAB
Fig. 41 Driver's door:
Central locking switch
document_0900452a81b1b9de.book Seite 49 Donnerstag, 26. Juli 2007 9:16 09
Page 52 of 342
Doors and windows 50•
Locked doors could delay assistance in an emergency, poten-
tially putting lives at risk. Do not leave anyone (especially children)
in the vehicle.Note
The doors and the boot lid are locked automatically when the
vehicle reaches a speed of about 15 km/h (Auto Lock) ⇒page 42.
You can unlock the vehicle again via the central locking switch.Setting the central locking system
You can use the sound system or MMI* to select which
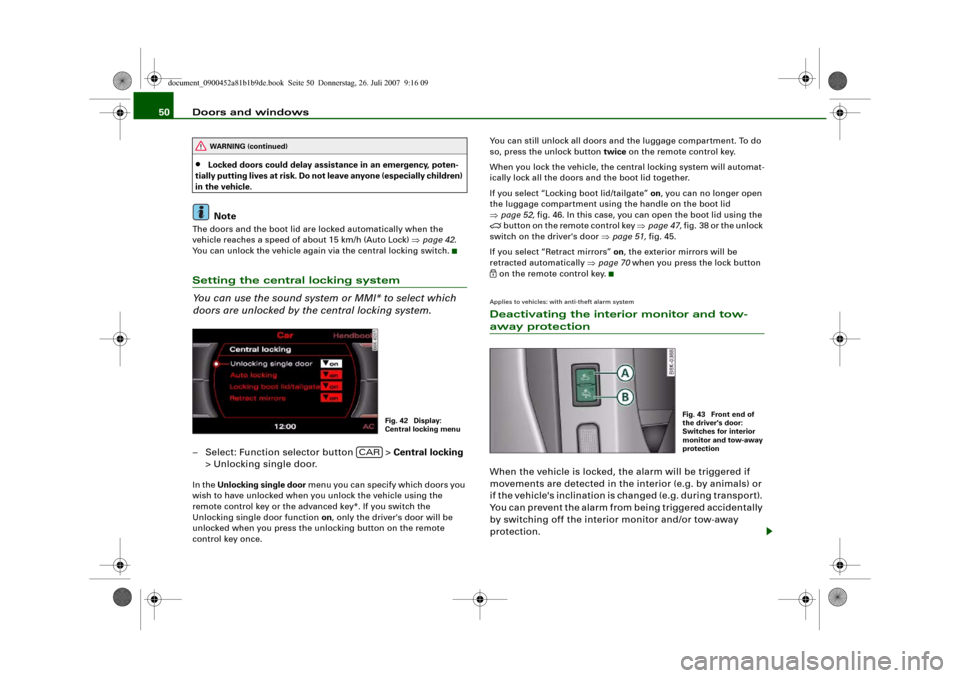
doors are unlocked by the central locking system.– Select: Function selector button > Central locking
> Unlocking single door.In the Unlocking single door menu you can specify which doors you
wish to have unlocked when you unlock the vehicle using the
remote control key or the advanced key*. If you switch the
Unlocking single door function on, only the driver's door will be
unlocked when you press the unlocking button on the remote
control key once.You can still unlock all doors and the luggage compartment. To do
so, press the unlock button twice on the remote control key.
When you lock the vehicle, the central locking system will automat-
ically lock all the doors and the boot lid together.
If you select “Locking boot lid/tailgate” on, you can no longer open
the luggage compartment using the handle on the boot lid
⇒page 52, fig. 46. In this case, you can open the boot lid using the
button on the remote control key ⇒page 47, fig. 38 or the unlock
switch on the driver's door ⇒page 51, fig. 45.
If you select “Retract mirrors” on, the exterior mirrors will be
retracted automatically ⇒page 70 when you press the lock button
on the remote control key.Applies to vehicles: with anti-theft alarm systemDeactivating the interior monitor and tow-away protectionWhen the vehicle is locked, the alarm will be triggered if
movements are detected in the interior (e.g. by animals) or
if the vehicle's inclination is changed (e.g. during transport).
You can prevent the alarm from being triggered accidentally
by switching off the interior monitor and/or tow-away
protection.
WARNING (continued)
Fig. 42 Display:
Central locking menu
CAR
Fig. 43 Front end of
the driver's door:
Switches for interior
monitor and tow-away
protection
document_0900452a81b1b9de.book Seite 50 Donnerstag, 26. Juli 2007 9:16 09
Page 53 of 342
Doors and windows51
Controls
Safety
Driving tips
General maintenance
Self-help
Technical data
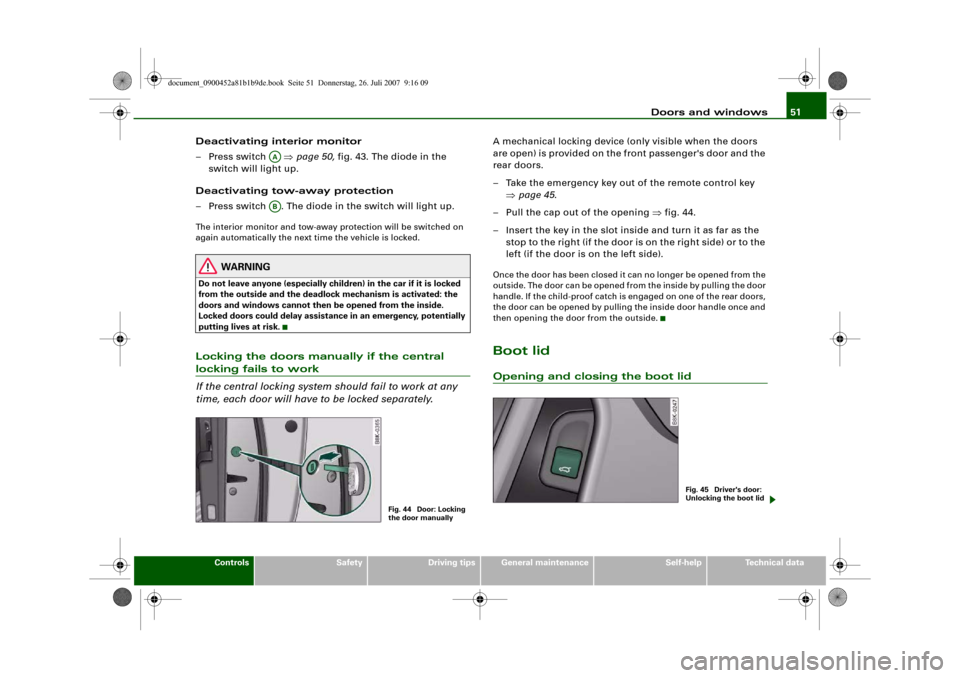
Deactivating interior monitor
– Press switch ⇒page 50, fig. 43. The diode in the
switch will light up.
Deactivating tow-away protection
– Press switch . The diode in the switch will light up.The interior monitor and tow-away protection will be switched on
again automatically the next time the vehicle is locked.
WARNING
Do not leave anyone (especially children) in the car if it is locked
from the outside and the deadlock mechanism is activated: the
doors and windows cannot then be opened from the inside.
Locked doors could delay assistance in an emergency, potentially
putting lives at risk.Locking the doors manually if the central locking fails to work
If the central locking system should fail to work at any
time, each door will have to be locked separately.
A mechanical locking device (only visible when the doors
are open) is provided on the front passenger's door and the
rear doors.
– Take the emergency key out of the remote control key
⇒page 45.
– Pull the cap out of the opening ⇒fig. 44.
– Insert the key in the slot inside and turn it as far as the
stop to the right (if the door is on the right side) or to the
left (if the door is on the left side).Once the door has been closed it can no longer be opened from the
outside. The door can be opened from the inside by pulling the door
handle. If the child-proof catch is engaged on one of the rear doors,
the door can be opened by pulling the inside door handle once and
then opening the door from the outside.Boot lidOpening and closing the boot lid
AAAB
Fig. 44 Door: Locking
the door manually
Fig. 45 Driver's door:
Unlocking the boot lid
document_0900452a81b1b9de.book Seite 51 Donnerstag, 26. Juli 2007 9:16 09
Page 54 of 342
Doors and windows 52
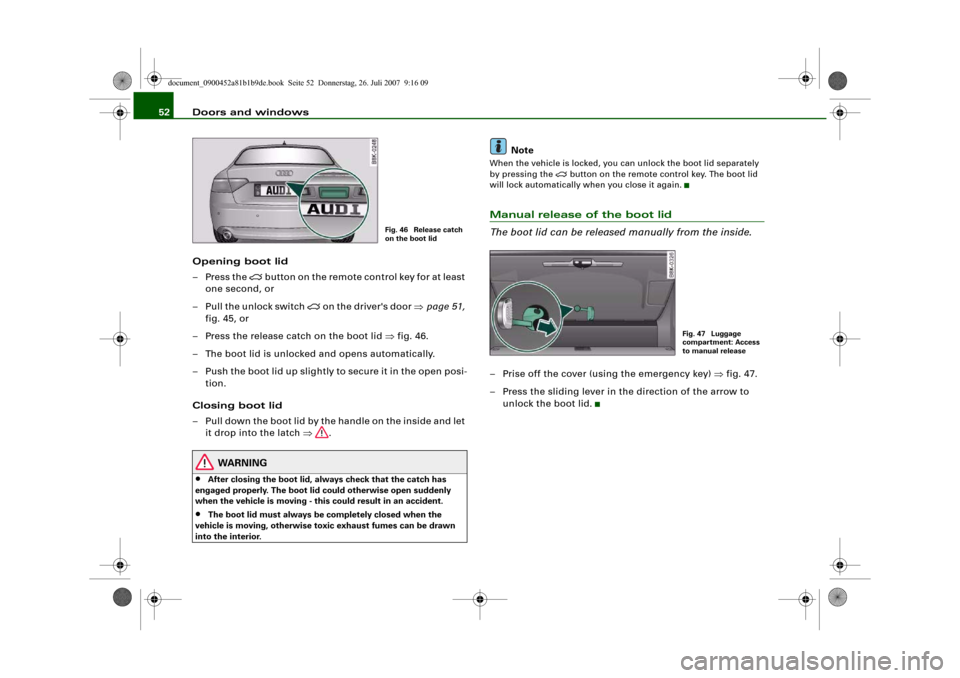
Opening boot lid
– Press the
button on the remote control key for at least
one second, or
– Pull the unlock switch
on the driver's door ⇒page 51,
fig. 45, or
– Press the release catch on the boot lid ⇒fig. 46.
– The boot lid is unlocked and opens automatically.
– Push the boot lid up slightly to secure it in the open posi-
tion.
Closing boot lid
– Pull down the boot lid by the handle on the inside and let
it drop into the latch ⇒.
WARNING
•
After closing the boot lid, always check that the catch has
engaged properly. The boot lid could otherwise open suddenly
when the vehicle is moving - this could result in an accident.
•
The boot lid must always be completely closed when the
vehicle is moving, otherwise toxic exhaust fumes can be drawn
into the interior.
Note
When the vehicle is locked, you can unlock the boot lid separately
by pressing the
button on the remote control key. The boot lid
will lock automatically when you close it again.
Manual release of the boot lid
The boot lid can be released manually from the inside.– Prise off the cover (using the emergency key) ⇒fig. 47.
– Press the sliding lever in the direction of the arrow to
unlock the boot lid.
Fig. 46 Release catch
on the boot lid
Fig. 47 Luggage
compartment: Access
to manual release
document_0900452a81b1b9de.book Seite 52 Donnerstag, 26. Juli 2007 9:16 09
Page 85 of 342
Seats and storage83
Controls
Safety
Driving tips
General maintenance
Self-help
Technical data
– Open the boot lid.
– Open out the ski bag and fill it with the items you wish to
transport.
– Push the ski bag from the luggage compartment into the
passenger compartment through the opening in the
backrest ⇒.
Securing
– Insert the fastening belt ⇒page 82, fig. 91 of the ski
bag into the centre seat belt buckle .
– Pull the free end of belt to tighten.
Storage
– Pull the ski bag towards the rear through the opening in
the backrest.
– Close the cover of the load-through hatch in the
passenger compartment.
–Fold up the ski bag.
WARNING
The ski bag must be secured in place with the fastening belt after
it has been loaded.
Note
Allow the ski bag to dry before folding it up.
Roof carrierApplies to vehicles: with roof carrier: Under development at the time of printDescription
Additional loads can be transported using the roof carrier.Note the following points if you intend to carry loads on the roof:•
The rain channels are moulded into the roof as part of the aero-
dynamic roof design. It is therefore not possible to mount conven-
tional roof luggage racks. We recommend using the carrier units
from the range of Audi Genuine accessories.
•
These carrier units form the basic elements of a complete roof
carrier system. Special fixtures must then be added in order to
safely transport luggage, bicycles, skis, surf boards or boats on the
roof. All the elements of this system are available from Audi dealers.Caution
Any damage to the vehicle caused by the use of other types of roof
rack or incorrect installation will not be covered by the factory
warranty. The roof carrier system must therefore be installed exactly
according to the instructions provided.
AA
AB
AC
document_0900452a81b1b9de.book Seite 83 Donnerstag, 26. Juli 2007 9:16 09
Page 176 of 342
Parking aid 174•
Only use the reversing camera to assist you if it is supplying
you with a good and clear picture. The quality of the picture could
be impaired by adverse light, dirt on the lens or a defect (accident
risk).
•
Only use the reversing camera when the boot lid is completely
c lo s e d . P l e a se m a k e su re t h a t t here are no objects mounted to the
rear end of the vehicle which could block the view of the reversing
camera.Note
•
If your vehicle is near an obstacle, the graphic display will also
appear in the reversing camera image. This superimposed graphic
helps the driver to localise the critical area of the vehicle.
•
You can change the display and adjust the volume and pitch of
the beeps ⇒page 177.
•
Please refer to the notes on towing ⇒page 177.
•
There is a slight delay in the picture display.
Applies to vehicles: with Audi parking system advancedParking perpendicular to the roadside
Parking mode 1 can be used when parking your vehicle in
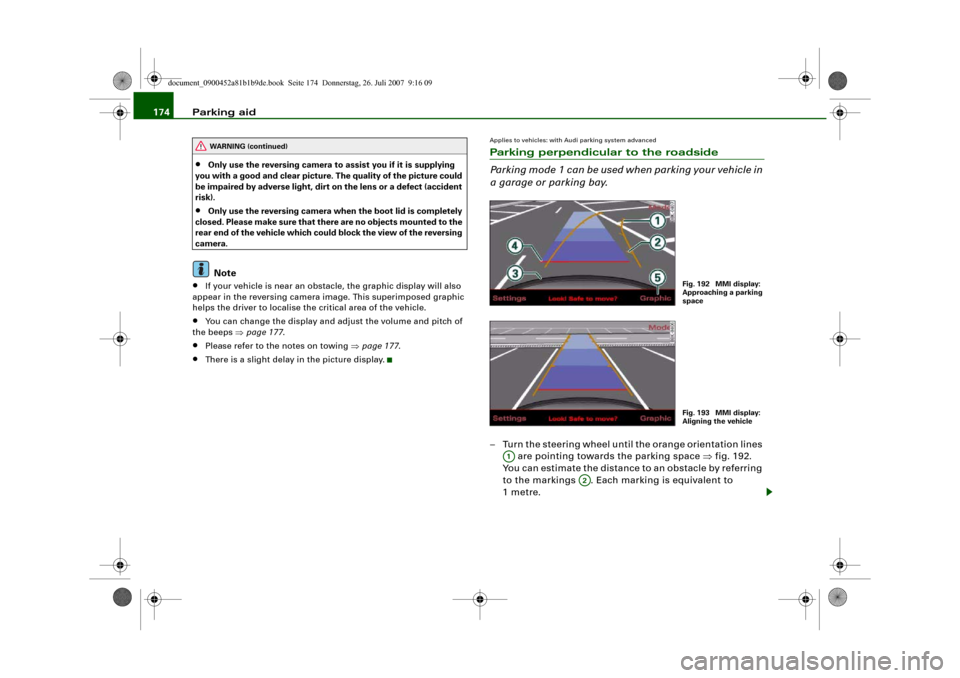
a garage or parking bay.– Turn the steering wheel until the orange orientation lines
are pointing towards the parking space ⇒fig. 192.
You can estimate the distance to an obstacle by referring
to the markings . Each marking is equivalent to
1metre.
WARNING (continued)
Fig. 192 MMI display:
Approaching a parking
spaceFig. 193 MMI display:
Aligning the vehicle
A1
A2
document_0900452a81b1b9de.book Seite 174 Donnerstag, 26. Juli 2007 9:16 09
Page 194 of 342

Safe driving 192
WARNING
Any obstructions that restrict pedal travel can cause loss of
vehicle control and critical situations on the road.•
Never place objects in the driver's footwell. Such objects could
move under the pedals and interfere with their proper function. In
the event of sudden braking or a change of direction, you would
not be able to use the pedals. This could result in a loss of control
and possibly cause an accident.
Floor mats on the driver's side
Use only floor mats which can be securely fastened in the
footwell and do not obstruct the pedals.– Make sure that floor mats are securely fastened and
cannot interfere with the pedals ⇒.Use only floor mats that leave the pedal area unobstructed and are
firmly secured to prevent them from slipping. You can obtain suit-
able floor mats from your dealer or a specialist retailer.
WARNING
Any obstructions that restrict pedal travel can cause loss of
vehicle control and increase the risk of serious personal injury. •
Always make sure that floor mats are properly secured.
•
Never lay or install additional floor mats or other floor cover-
ings over the existing floor mats; this would restrict the pedal area
and possibly obstruct the pedals, which could cause an
accident.
Stowing luggage safelyLuggage compartment
All luggage and other objects must be safely secured in
the luggage compartment.Loose items in the luggage compartment can shift suddenly
and cause a safety hazard or impair the handling of the
vehicle by changing the weight distribution.
– Distribute the load evenly in the luggage compartment
⇒page 79.
– Place heavy items as far forward as possible in the
luggage compartment and secure them properly.
– Use the fastening rings* provided ⇒page 193 or the
luggage net* for securing heavy items.
WARNING
•
Loose items in the luggage compartment can shift suddenly
and cause a safety hazard or impair the handling of the vehicle by
changing the weight distribution.
•
Always stow objects in the luggage compartment and secure
them on the fastening rings*.
•
Transporting heavy objects may affect the vehicle's handling by
shifting the centre of gravity – this could cause an accident. Take
extra care when driving and adjust your speed accordingly.
•
Never exceed the maximum axle loads or the maximum gross
weight for the vehicle ⇒page 323, “Performance, weights and
dimensions”. Exceeding the permitted axle loads or gross weight
limit can affect the vehicle's handling characteristics, and increase
the risk of accidents, personal injuries or damage to the vehicle.
•
Never leave your vehicle unattended when the boot lid is open.
Children could climb into the boot and close the boot lid from the
document_0900452a81b1b9de.book Seite 192 Donnerstag, 26. Juli 2007 9:16 09