2008 AUDI A4 display
[x] Cancel search: displayPage 179 of 342
Parking aid177
Controls
Safety
Driving tips
General maintenance
Self-help
Technical data
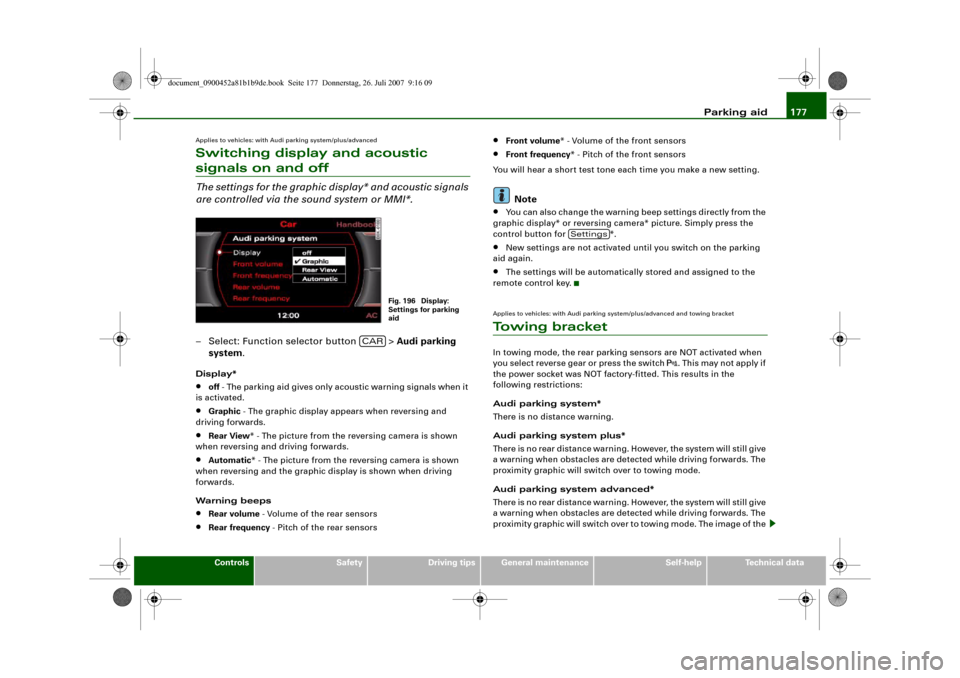
Applies to vehicles: with Audi parking system/plus/advancedSwitching display and acoustic signals on and offThe settings for the graphic display* and acoustic signals
are controlled via the sound system or MMI*.– Select: Function selector button > Audi parking
system.Display*•
off - The parking aid gives only acoustic warning signals when it
is activated.
•
Graphic - The graphic display appears when reversing and
driving forwards.
•
Rear View* - The picture from the reversing camera is shown
when reversing and driving forwards.
•
Automatic* - The picture from the reversing camera is shown
when reversing and the graphic display is shown when driving
forwards.
Warning beeps
•
Rear volume - Volume of the rear sensors
•
Rear frequency - Pitch of the rear sensors
•
Front volume* - Volume of the front sensors
•
Front frequency* - Pitch of the front sensors
You will hear a short test tone each time you make a new setting.Note
•
You can also change the warning beep settings directly from the
graphic display* or reversing camera* picture. Simply press the
control button for *.
•
New settings are not activated until you switch on the parking
aid again.
•
The settings will be automatically stored and assigned to the
remote control key.
Applies to vehicles: with Audi parking system/plus/advanced and towing bracketTo w i n g b r a c k e tIn towing mode, the rear parking sensors are NOT activated when
you select reverse gear or press the switch
. This may not apply if
the power socket was NOT factory-fitted. This results in the
following restrictions:
Audi parking system*
There is no distance warning.
Audi parking system plus*
There is no rear distance warning. However, the system will still give
a warning when obstacles are detected while driving forwards. The
proximity graphic will switch over to towing mode.
Audi parking system advanced*
There is no rear distance warning. However, the system will still give
a warning when obstacles are detected while driving forwards. The
proximity graphic will switch over to towing mode. The image of the
Fig. 196 Display:
Settings for parking
aid
CAR
Settings
document_0900452a81b1b9de.book Seite 177 Donnerstag, 26. Juli 2007 9:16 09
Page 225 of 342
Intelligent technology223
Controls
Safety
Driving tips
General maintenance
Self-help
Technical data
Note
•
To ensure that the ASR works properly, all four wheels must be
fitted with identical tyres. Any differences in the rolling radius of the
tyres can cause the system to reduce engine power when this is not
desired.
•
Should a malfunction occur in the ABS or EDL, both the ABS
warning lamp
and the ESP warning lamp
⇒page 19 will light
up.
•
In the event of a malfunction in the ESP system, the warning
lamp ⇒page 17 will light up.
•
If a malfunction should occur in the ABS, the ESP, EDL and ASR
will also be out of action.
•
The systems can make noises when they intervene.
Switching on and off
The ESP is switched on automatically when the engine is
started.
Switching off the traction control system (ASR)
In particular circumstances, it may be advisable to switch off the
traction control system (ASR) to allow a certain amount of wheel
slip. For example:•
Rocking the car backwards and forwards to free it
•
Driving in deep snow or on loose surfaces
•
Driving with snow chains
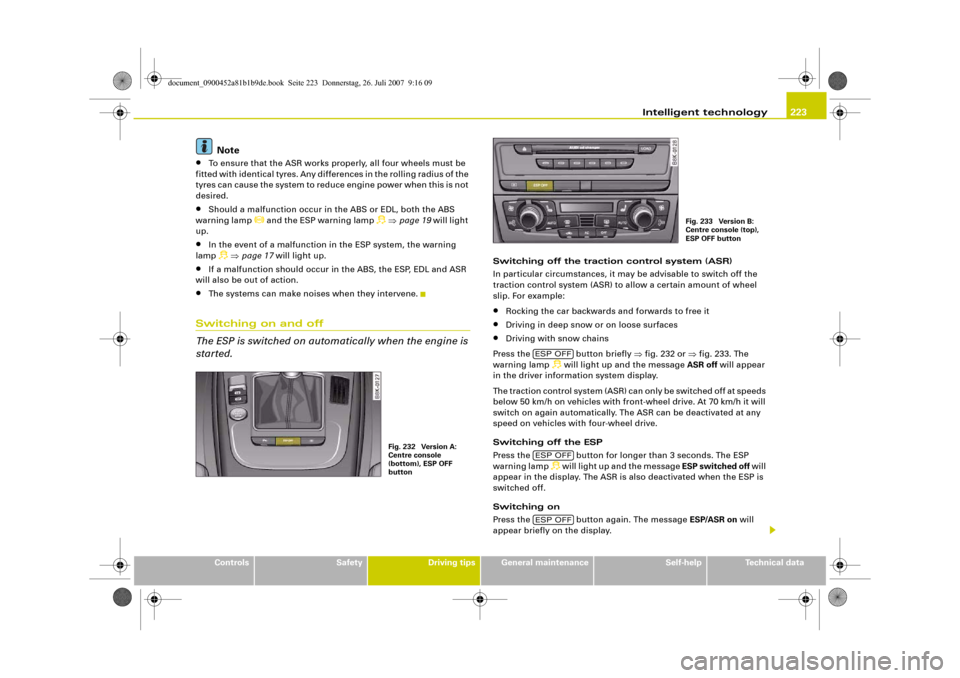
Press the button briefly ⇒fig. 232 or ⇒fig. 233. The
warning lamp
will light up and the message ASR off will appear
in the driver information system display.
The traction control system (ASR) can only be switched off at speeds
below 50 km/h on vehicles with front-wheel drive. At 70 km/h it will
switch on again automatically. The ASR can be deactivated at any
speed on vehicles with four-wheel drive.
Switching off the ESP
Press the button for longer than 3 seconds. The ESP
warning lamp will light up and the message ESP switched off will
appear in the display. The ASR is also deactivated when the ESP is
switched off.
Switching on
Press the button again. The message ESP/ASR on will
appear briefly on the display.
Fig. 232 Version A:
Centre console
(bottom), ESP OFF
button
Fig. 233 Version B:
Centre console (top),
ESP OFF button
ESP OFFESP OFFESP OFF
document_0900452a81b1b9de.book Seite 223 Donnerstag, 26. Juli 2007 9:16 09
Page 229 of 342
Intelligent technology227
Controls
Safety
Driving tips
General maintenance
Self-help
Technical data current even when the ignition is off. In some cases there may not
be enough power available to start the engine.
Your vehicle is equipped with an intelligent power management
system to control the distribution of electrical energy. This signifi-
cantly improves reliability when starting the engine, and also
prolongs the life of the battery.
The main functions incorporated in the power management system
are battery diagnosis, residual current management and dynamic
power management.
Battery diagnosis
The battery diagnosis function constantly registers the condition of
the battery. Sensors detect the battery voltage, battery current and
battery temperature. This enables the system to calculate the
current power level and charge condition of the battery.
Residual current management
The residual current management reduces power consumption
while the vehicle is parked. It controls the supply of power to the
various electrical components while the ignition is switched off. The
system takes the battery diagnosis data into consideration.
Depending on the power level of the battery, the individual electrical
components are switched off one after the other to prevent the
battery from losing too much charge and to ensure that the engine
can be started reliably.
Dynamic power management
While the vehicle is moving, this function distributes the available
power to the various electrical components and systems according
to their requirements. The power management ensures that on-
board systems do not consume more electrical power than the
alternator can supply, and thus maintains the maximum possible
battery power level.
Note
•
The power management system is not able to overcome the
given physical limits. Please remember that the power and life of
the battery are limited.
•
A warning message will appear ⇒page 228, “Driver message in
the instrument cluster display” if the battery power has dropped to
a level where reliable starting is impaired.
Points to remember
Starting ability has first priority.Short trips, city traffic and low temperatures all place a heavy load
on the battery. In these conditions a large amount of power is
consumed, but only a small amount is supplied. The situation is also
critical if electrical equipment is in use when the engine is not
running. In this case power is consumed when none is being gener-
ated.
In these situations you will be aware that the power management
system is intervening to control the distribution of electrical power.
When the vehicle is parked for long periods
If you do not drive your vehicle for a period of several days or weeks,
the power management will gradually shut off the on-board
systems one by one, or reduce the amount of current they are using.
This limits the amount of power consumed and helps to ensure reli-
able starting even after a long period.
Please note that certain convenience features, such as the Audi
advanced key*, the remote control key or the electrical seat adjust-
ment may not be available when you unlock the vehicle. These func-
tions will be restored when you switch on the ignition and start the
engine.
document_0900452a81b1b9de.book Seite 227 Donnerstag, 26. Juli 2007 9:16 09
Page 230 of 342
Intelligent technology 228With the engine switched off
If you listen to the radio or use the other MMI functions when the
engine is not running, this will discharge the battery.
The MMI display will show this warning message before the battery
power drops to a level where the starting ability is impaired.
Please start engine, otherwise system will switch off
in 3 minutes.
This message warns you that the system you are using will be
switched off automatically after 3 minutes. You should therefore
start the engine if you wish to continue using the system.
When the engine is running
Although the alternator generates electrical power, the battery can
still become discharged while the vehicle is being driven. This can
occur when a lot of power is being consumed but only a small
amount supplied, especially if the battery is not fully charged
initially.
To restore the necessary energy balance, the system will then
temporarily shut off the electrical components that are using a lot
of power, or reduce the current they are consuming. Heating
systems in particular use a large amount of electrical power. If you
notice, for instance, that the seat heating* or the rear window
heater is not working, they may have been temporarily switched off
or regulated to a lower heat output. These systems will be available
again as soon as sufficient electrical power is available.
You may also notice that the engine runs at a slightly faster idling
speed. This is quite normal, and no cause for concern. The increased
idling speed allows the alternator to meet the greater power
requirement and charge the battery at the same time.
Driver message in the instrument cluster displayIf battery power drops to a level at which you may encounter prob-
lems when starting the engine, the following message will appear
in the instrument cluster display:
Low battery charge: Battery will be charged while driving
This message reminds you that the starting reliability may be
impaired. The message will disappear as soon as you set off and the
battery is charged.
Message comes on and goes out again
If the message appears in the display after the ignition is switched
on or while driving, and goes out again after a period of time, the
battery has been charged up again sufficiently while the vehicle was
being driven.
Message comes on and does not go out
If the message appears in the display after the ignition is switched
on or while driving, and does not go out again, the battery is not
being maintained at the proper power level. Starting reliability may
be impaired. You should have the battery checked by a qualified
workshop as soon as possible.
document_0900452a81b1b9de.book Seite 228 Donnerstag, 26. Juli 2007 9:16 09
Page 235 of 342
Towing a trailer233
Controls
Safety
Driving tips
General maintenance
Self-help
Technical data additional mirrors fitted. Both exterior mirrors should be mounted
on hinged extension brackets. Adjust the mirrors to give sufficient
vision to the rear.
Headlights
Before starting a journey, check the headlight beam settings with
the trailer hitched up. If necessary, alter the height of the headlight
beams by means of the headlight range control ⇒page 60.
Power supply
When you remove the ignition key the power supply to the trailer is
interrupted.
Removable ball joint coupling
Vehicles with a factory-fitted towing bracket are equipped with a
removable ball joint coupling. It is carried under the floor panel on
the left-hand side of the luggage compartment and is secured by a
strap.
Note
We recommend having the car serviced between the normal inspec-
tion intervals if it used frequently for towing a trailer.Applies to vehicles: with towing bracketTrailer stabilisation system
Trailer stabilisation helps to reduce the risk of the vehicle
skidding when towing a trailer.The trailer stabilisation system is operational only when the ESP is
switched on and there is no malfunction in the ESP ⇒page 17.
When is the trailer stabilisation system activated?
Trailer stabilisation is active when the following requirements are
met:•
The ESP must NOT be switched off ⇒page 222,
•
The trailer connector must be properly secured in the vehicle
socket.
•
Vehicle speed must be higher than approx. 60 km/h.
How trailer stabilisation works:
In many cases, the driver can stabilise a swaying trailer by manually
braking the vehicle.
However, if the ESP detects that the trailer is swaying and this is
affecting the towing vehicle, it will automatically brake the vehicle
to stabilise the trailer by slowing it down. The warning lamp
will
light up in the instrument cluster. If possible, do not turn the
steering wheel at this stage.
In order to warn traffic behind you, the brake lights will come on
during this automatic braking operation.
A trailer weighing less than 70% of the kerb weight of the towing
vehicle may sway quite considerably without the trailer stabilisation
system intervening. This can happen when the swaying movements
of the light-weight trailer are not or hardly passed on to the towing
vehicle and are therefore not detected by the ESP.
If the system for activating the trailer brake lights is defective, this
will be indicated in the instrument cluster display ⇒page 37, “Bulb
monitor ”.
Requirements for correct functioning of the trailer
stabilisation system
If these conditions are not met in full, the trailer stabilisation system
will only intervene to a limited extent or not at all ⇒.
•
The electrical connection between the towing vehicle and the
trailer must be functioning correctly, without any defects.
•
The load on the trailer must be properly secured.
•
The tyre pressures on both the vehicle and the trailer must be
adapted to the load that is being carried.
•
Where possible, operate the trailer with the maximum permitted
draw bar weight.
document_0900452a81b1b9de.book Seite 233 Donnerstag, 26. Juli 2007 9:16 09
Page 249 of 342
Care of vehicle and cleaning247
Controls
Safety
Driving tips
General maintenance
Self-help
Technical data After washing, the wheels should only be cleaned with an "acid-
free" cleaning agent for alloy wheels. This is available from Audi
dealers and specialist retailers. Never leave the cleaning agent on
the rims for any longer than specified in the instructions before
rinsing it off. If the wheel cleaner fluid contains acid it can attack the
surfaces of the wheel bolts.
Car polish or other abrasive agents should not be used. If the
protective paint coating is damaged by stone chips etc., the
damaged area should be touched up immediately.
WARNING
Please note when cleaning the wheels that water, ice and road salt
can impair the effectiveness of the brakes – this can cause an
accident.Care of interiorSound system / MMI* display screen and MMI control console*The display screen can be cleaned with a soft cloth and a special
“LCD cleaner” (available from retailers of electrical goods). Moisten
the cloth with a small amount of the cleaning fluid.
Clean the MMI control console with a fine brush first to prevent any
dirt from getting in between the control buttons and the housing.
We then recommend wiping the MMI control console using a cloth
moistened with washing-up liquid and water.
Caution
To avoid scratching the screen, do not wipe the display with a dry
cloth.
•
To avoid any possibility of damage, do not let any liquid get
inside the control console.
Plastic parts and leatherettePlastic parts and leatherette can be cleaned with a damp cloth. If
this is not sufficient, plastic parts and leatherette should only be
treated with a special solvent-free plastic cleaner.Textile covers and trim partsTextile covers and trim parts (e.g. seats, door trim) should be
cleaned regularly with a vacuum cleaner. This will remove surface
dirt which could otherwise be rubbed into the textile material
during use. Do not use steam cleaners, as the steam could carry the
dirt deeper into the textile material.
Normal cleaning
We recommend that you use a soft sponge or lint-free, micro-fibre
cloth for normal cleaning. Only use brushes on floor coverings and
mats, as other textile surfaces could become damaged.
In the case of normal surface dirt you can use a foam cleaner. Use a
sponge to spread the foam on the textile surface and to work it into
the material lightly. However, make sure that the textile material
does not become soaking wet. Then dab off the foam with a dry and
absorbent cloth (e.g. a micro-fibre cloth) and vacuum off any
residue once the surface is completely dry.
Removal of stains
To treat stains caused by spilled drinks (coffee, fruit juice or similar)
make up a solution with a mild detergent for sensitive fabrics and
apply it with a sponge. If the stains are difficult to remove, a
washing paste can be applied directly onto the stain and worked
into the fabric. The surface will then have to be wiped with clear
document_0900452a81b1b9de.book Seite 247 Donnerstag, 26. Juli 2007 9:16 09
Page 259 of 342
Checking and topping up fluids257
Controls
Safety
Driving tips
General maintenance
Self-help
Technical data The positions of the engine oil filler cap and the engine oil dipstick
⇒page 256, fig. 252 (items and ) may be different on some
engine versions.
Engine oilGeneral notesWe recommend that you have the oil change carried out by an Audi
dealership / qualified workshop according to the intervals stated in
the Service Schedule or according to the service interval display in
the instrument cluster.
Whether your vehicle is serviced at flexible service intervals or fixed
service intervals is shown in the Service Schedule.
The correct oil specifications for your engine are listed in the Te c h -
nical data section ⇒page 323, “Performance, weights and dimen-
sions”.
Check that the specifications quoted (VW standards) appear on the
container either singly or in combination with other specifications.
Flexible service intervals (Audi LongLife Service*)
Special engine oils ⇒page 323, “Performance, weights and dimen-
sions” have been developed as part of the Audi LongLife Service
(⇒“Service Schedule”).
This type of oil must be used if you intend to take advantage of the
extended maintenance intervals allowed by the Audi LongLife
Service.•
Do not mix the LongLife oil with oil intended for fixed service
intervals, as the requirements for the extended service intervals are
then no longer guaranteed.
•
In exceptional circumstances, if the engine oil level is too low
⇒page 258 and you cannot obtain the specified LongLife oil, you
can put in a small quantity of oil for fixed service intervals -
⇒page 323, “Performance, weights and dimensions”. This should not be done more than once and no more than 0.5 litres should be
used.
Fixed service intervals (Inspection Service)*
If you do not take advantage of the LongLife service for your car, you
can use the oils for fixed service intervals - ⇒page 323, “Perform-
ance, weights and dimensions”. In this case, your car must be serv-
iced after a fixed interval of 1 year / 15,000 km (9,000 miles) – see
Service Schedule.
•
In exceptional circumstances, if the engine oil level is too low
⇒page 258 and you cannot obtain the oil specified for your vehicle,
you can put in a small quantity of oil conforming to the specification
ACEA A2 or ACEA A3 (petrol engines) or ACEA B3 or ACEA B4 (diesel
engines). This should not be done more than once and no more than
0.5 litres should be used.
Vehicles with diesel particulate filter*
The Service Schedule states whether your vehicle is fitted with a
diesel particulate filter.
•
Vehicles with diesel particulate filter must only be filled with
engine oil VW 507 00. This oil can be used regardless of whether the
vehicle is serviced at flexible service intervals (Audi LongLife
Service) or fixed service intervals.
•
Avoid mixing this oil with other engine oils.
•
In exceptional circumstances, if the engine oil level is too low
⇒page 258 and you cannot obtain the oil specified for your vehicle,
you can put in a small quantity of oil conforming to the specification
VW 506 00 / VW 506 01 or VW 505 00 / VW 505 01 or ACEA B3 /
ACEA B4. This should not be done more than once and no more than
0.5 litres should be used.
A3
A4
document_0900452a81b1b9de.book Seite 257 Donnerstag, 26. Juli 2007 9:16 09
Page 261 of 342
Checking and topping up fluids259
Controls
Safety
Driving tips
General maintenance
Self-help
Technical data
Applies to vehicles: without oil dipstickChecking the oil level (without dipstick)
You can check the engine oil level via the sound system or
MMI*.– Select: Function selector button > Oil level.
– Park your vehicle on a level surface.
– Allow the warm engine to run briefly at idling speed and
then switch off the ignition.
– Wait approx. 2 minutes.
– Read off the oil level on the display ⇒fig. 255. Top up the
engine oil if the bar in the oil level display is near the
“min” mark ⇒page 259.Depending on how you drive and the conditions in which the car is
used, oil consumption can be up to 0.5 ltr./1000 km. Oil consump-
tion is likely to be higher for the first 5000 km.
Note
The oil level display is intended solely for information purposes. An
oil level warning will appear in the instrument cluster if the oil level
is too low. Add more oil ⇒page 259. If the bonnet has been opened, the current oil level will be shown in the instrument cluster the next
time the ignition is switched on.
Topping up the engine oil
–Unscrew cap
from oil filler opening ⇒fig. 256.
– Carefully put in the specified grade of oil ⇒page 323
0.5 litres at a time.
– Check the oil level again after two minutes by calling up
the sound system or MMI* display or using the oil
dipstick ⇒page 258.
– If the oil level is too low, add more engine oil.
– Replace the oil filler cap carefully and push the dipstick
all the way in (on vehicles with dipstick).
WARNING
•
Ensure that no oil comes into contact with hot engine compo-
nents when topping up: this could cause a fire.
•
Wash your skin thoroughly if it comes into contact with engine
oil.
Fig. 255 Display: Oil
level
CAR
Fig. 256 Engine
compartment: Engine
oil filler cap
document_0900452a81b1b9de.book Seite 259 Donnerstag, 26. Juli 2007 9:16 09