2007 VOLVO S80 bulb
[x] Cancel search: bulbPage 3 of 251
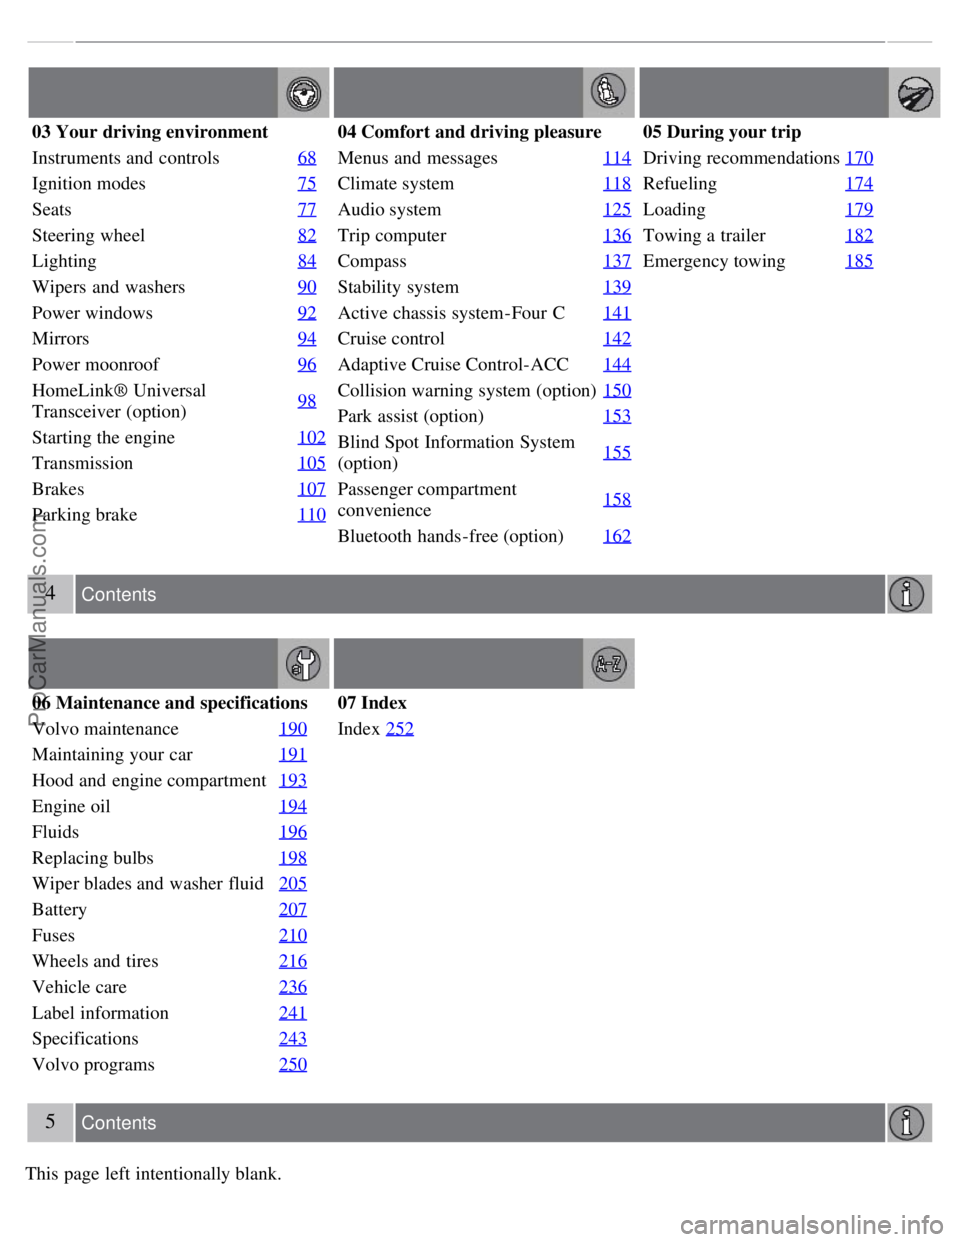
03 Your driving environment
Instruments and controls68
Ignition modes75
Seats77
Steering wheel82
Lighting84
Wipers and washers90
Power windows92
Mirrors94
Power moonroof96
HomeLink® Universal
Transceiver (option)98
Starting the engine
102
Transmission105
Brakes107
Parking brake110
04 Comfort and driving pleasure
Menus and messages114
Climate system118
Audio system125
Trip computer136
Compass137
Stability system139
Active chassis system-Four C141
Cruise control142
Adaptive Cruise Control-ACC144
Collision warning system (option)150
Park assist (option)153
Blind Spot Information System
(option)155
Passenger compartment
convenience158
Bluetooth hands-free (option)
162
05 During your trip
Driving recommendations170
Refueling174
Loading179
Towing a trailer182
Emergency towing185
4 Contents
06 Maintenance and specifications
Volvo maintenance 190
Maintaining your car191
Hood and engine compartment193
Engine oil194
Fluids196
Replacing bulbs198
Wiper blades and washer fluid205
Battery207
Fuses210
Wheels and tires216
Vehicle care236
Label information241
Specifications243
Volvo programs250
07 Index
Index252
5 Contents
This page left intentionally blank.
ProCarManuals.com
Page 80 of 251
NOTE
Regulations regarding the use of the hazard warning flasher may vary, depending on where you live.
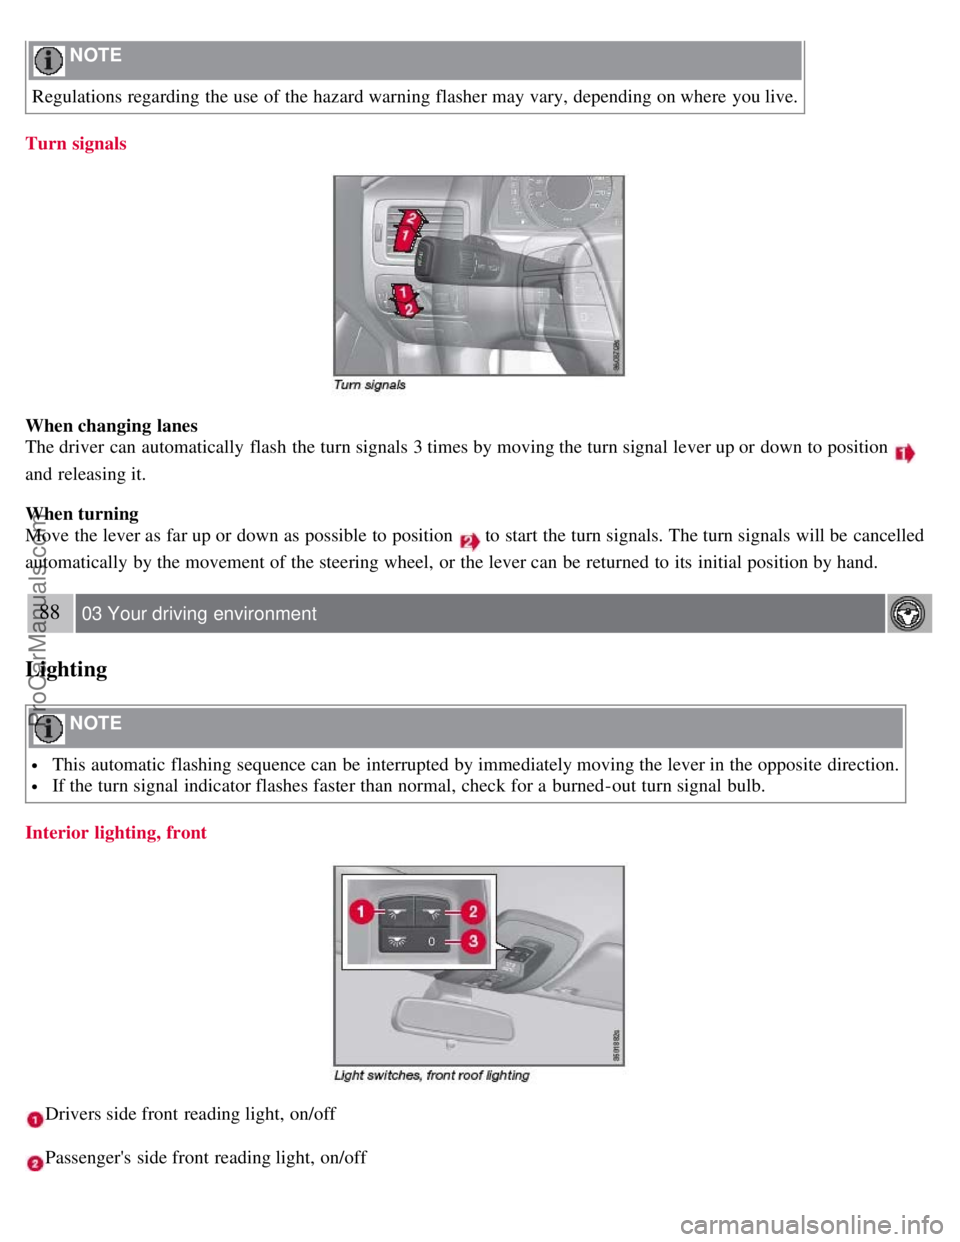
Turn signals
When changing lanes
The driver can automatically flash the turn signals 3 times by moving the turn signal lever up or down to position
and releasing it.
When turning
Move the lever as far up or down as possible to position
to start the turn signals. The turn signals will be cancelled
automatically by the movement of the steering wheel, or the lever can be returned to its initial position by hand.
88 03 Your driving environment
Lighting
NOTE
This automatic flashing sequence can be interrupted by immediately moving the lever in the opposite direction.
If the turn signal indicator flashes faster than normal, check for a burned-out turn signal bulb.
Interior lighting, front
Drivers side front reading light, on/off
Passenger's side front reading light, on/off
ProCarManuals.com
Page 168 of 251

CAUTION
Engine damage will occur if water is drawn into the air cleaner.
If the vehicle is driven through water deeper than 9 in (25 cm), water may enter the differential and the
transmission. This reduces the oil's lubricating capacity and may shorten the service life of these components.
Do not allow the vehicle to stand in water up to the door sills longer than absolutely necessary. This could result
in electrical malfunctions.
If the engine has been stopped while the vehicle is in water, do not attempt to restart the engine. Have the vehicle
towed out of the water.
Engine and cooling system
Under special conditions, for example when driving in hilly terrain, extreme heat or with heavy loads, there is a risk
that the engine and cooling system will overheat. Proceed as follows to avoid overheating the engine.
Maintain a low speed when driving with a trailer up long, steep hills.
Do not turn the engine off immediately you stop after a hard drive.
Remove any auxiliary lights from in front of the grille when driving in hot weather conditions.
Do not exceed engine speeds of 4500 rpm if driving with a trailer in hilly terrain. The oil temperature could become
too high.
Conserving electrical current
Keep the following in mind to help minimize battery drain:
When the engine is not running, avoid using ignition mode II. Many electrical systems (the audio system, the
optional navigation system, power windows, etc) will function in ignition modes 0 and I. These modes reduce drain on
the battery.
Please keep in mind that using systems, accessories, etc., that consume a great deal of current when the engine is not
running could result in the battery being completely drained.
The optional 12 volt socket in the trunk provides electrical current even with the ignition switched off, which drains
the battery.
Before a long distance trip
It is always worthwhile to have your vehicle checked by a trained and qualified Volvo service technician before
driving long distances. Your retailer will also be able to supply you with bulbs, fuses, spark plugs and wiper blades for
your use in the event that problems occur.
172 05 During your trip
Driving recommendations
As a minimum, the following items should be checked before any long trip:
Check that engine runs smoothly and that fuel consumption is normal.
Check for fuel, oil, and fluid leakage
Have the transmission oil level checked.
Check condition of drive belts.
Check state of the battery's charge.
Examine tires carefully (the spare tire as well), and replace those that are worn. Check tire pressures.
The brakes, front wheel alignment, and steering gear should be checked by a trained and qualified Volvo service
technician only.
Check all lights, including high beams.
Reflective warning triangles are legally required in some states/provinces.
ProCarManuals.com
Page 182 of 251
2 0 0 7
VOLVO S80
188 06 Maintenance and specifications
Volvo maintenance 190
Maintaining your car191
Hood and engine compartment193
Engine oil194
Fluids196
Replacing bulbs198
Wiper blades and washer fluid205
Battery207
Fuses210
Wheels and tires216
Vehicle care236
Label information241
Specifications243
Volvo programs250
189 06 Maintenance and specifications
190 06 Maintenance and specifications
Volvo maintenance
Introduction
Volvo advises you to follow the maintenance program outlined in the Warranty and Service Records Information
booklet. This maintenance program contains inspections and services necessary for the proper function of your vehicle.
The maintenance services contain several checks that require special tools and training, and therefore must be
performed by a qualified technician. To keep your Volvo in top condition, specify time-tested and proven Genuine
Volvo Parts and Accessories.
ProCarManuals.com
Page 190 of 251
Check the level frequently. The fluid does not require changing. The fluid level must be between the MIN and MAX
marks. For capacities and recommended fluid grade, see page 248.
WARNING
If a problem should occur in the power steering system or if the vehicle has no electrical current and must be towed,
it is still possible to steer the vehicle. However, keep in mind that greater effort will be required to turn the steering
wheel.
CAUTION
Keep the area around the power steering fluid reservoir clean when checking.
198 06 Maintenance and specifications
Replacing bulbs
Introduction
All bulb specifications are listed on page 204
. The following bulbs should only be replaced by a trained and qualified
Volvo service technician:
Dome lighting
Reading lights
Glove compartment lighting
Turn signals in the door mirror
Approach lighting in the door mirror
Brake lights
Active Bi -Xenon and LED bulbs
WARNING
Active Bi -Xenon headlights (option) - due to the high voltage used by these headlights, these bulbs should only be
replaced by a trained and qualified Volvo service technician.
Turn off the lights and remove the remote key from the ignition before changing any bulbs.
Headlight housing
ProCarManuals.com
Page 191 of 251
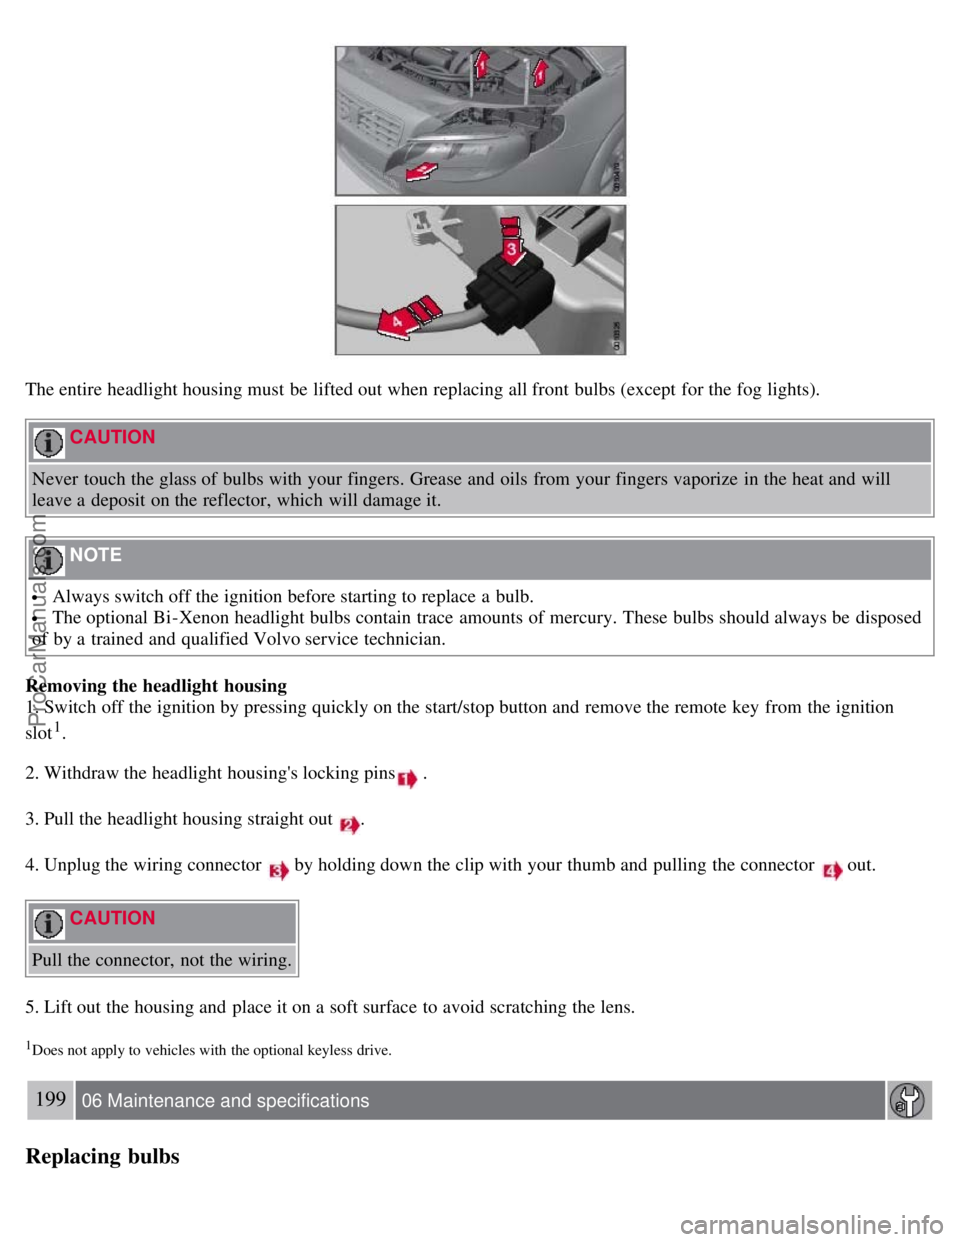
The entire headlight housing must be lifted out when replacing all front bulbs (except for the fog lights).
CAUTION
Never touch the glass of bulbs with your fingers. Grease and oils from your fingers vaporize in the heat and will
leave a deposit on the reflector, which will damage it.
NOTE
Always switch off the ignition before starting to replace a bulb.
The optional Bi -Xenon headlight bulbs contain trace amounts of mercury. These bulbs should always be disposed
of by a trained and qualified Volvo service technician.
Removing the headlight housing
1. Switch off the ignition by pressing quickly on the start/stop button and remove the remote key from the ignition
slot
1.
2. Withdraw the headlight housing's locking pins
.
3. Pull the headlight housing straight out
.
4. Unplug the wiring connector
by holding down the clip with your thumb and pulling the connector out.
CAUTION
Pull the connector, not the wiring.
5. Lift out the housing and place it on a soft surface to avoid scratching the lens.
1Does not apply to vehicles with the optional keyless drive.
199 06 Maintenance and specifications
Replacing bulbs
ProCarManuals.com
Page 192 of 251
6. Replace the defective bulb(s), see page 204.
Reinserting the headlight housing
1. Plug in the connector until it clicks into place.
2. Reinstall the headlight housing and locking pins. Check that they are correctly inserted. The headlight housing must
be properly inserted and secured in place before the lighting is switched on or the remote key is inserted into the
ignition slot.
3. Check that the lights function properly.
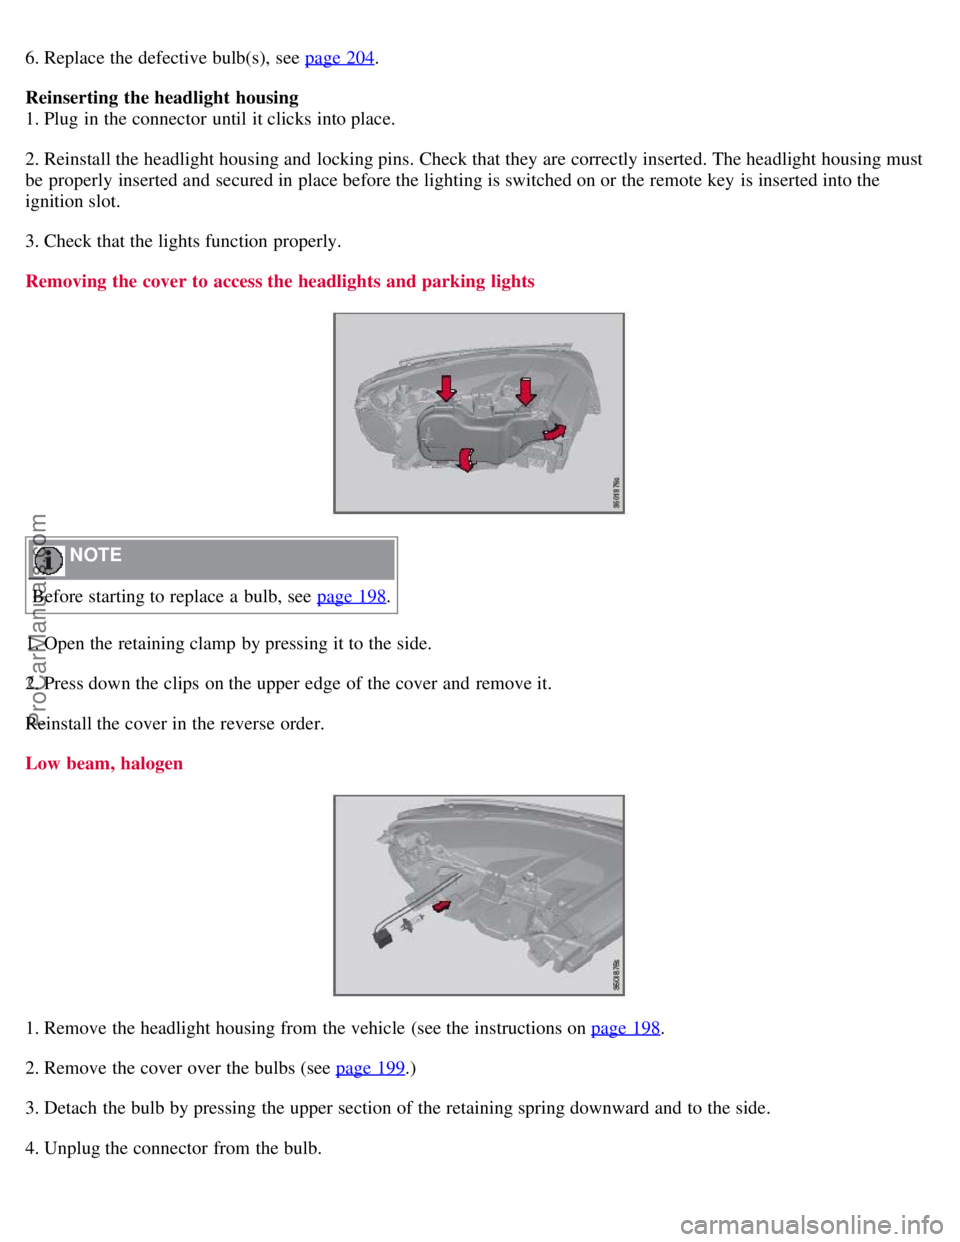
Removing the cover to access the headlights and parking lights
NOTE
Before starting to replace a bulb, see page 198
.
1. Open the retaining clamp by pressing it to the side.
2. Press down the clips on the upper edge of the cover and remove it.
Reinstall the cover in the reverse order.
Low beam, halogen
1. Remove the headlight housing from the vehicle (see the instructions on page 198.
2. Remove the cover over the bulbs (see page 199
.)
3. Detach the bulb by pressing the upper section of the retaining spring downward and to the side.
4. Unplug the connector from the bulb.
ProCarManuals.com
Page 193 of 251
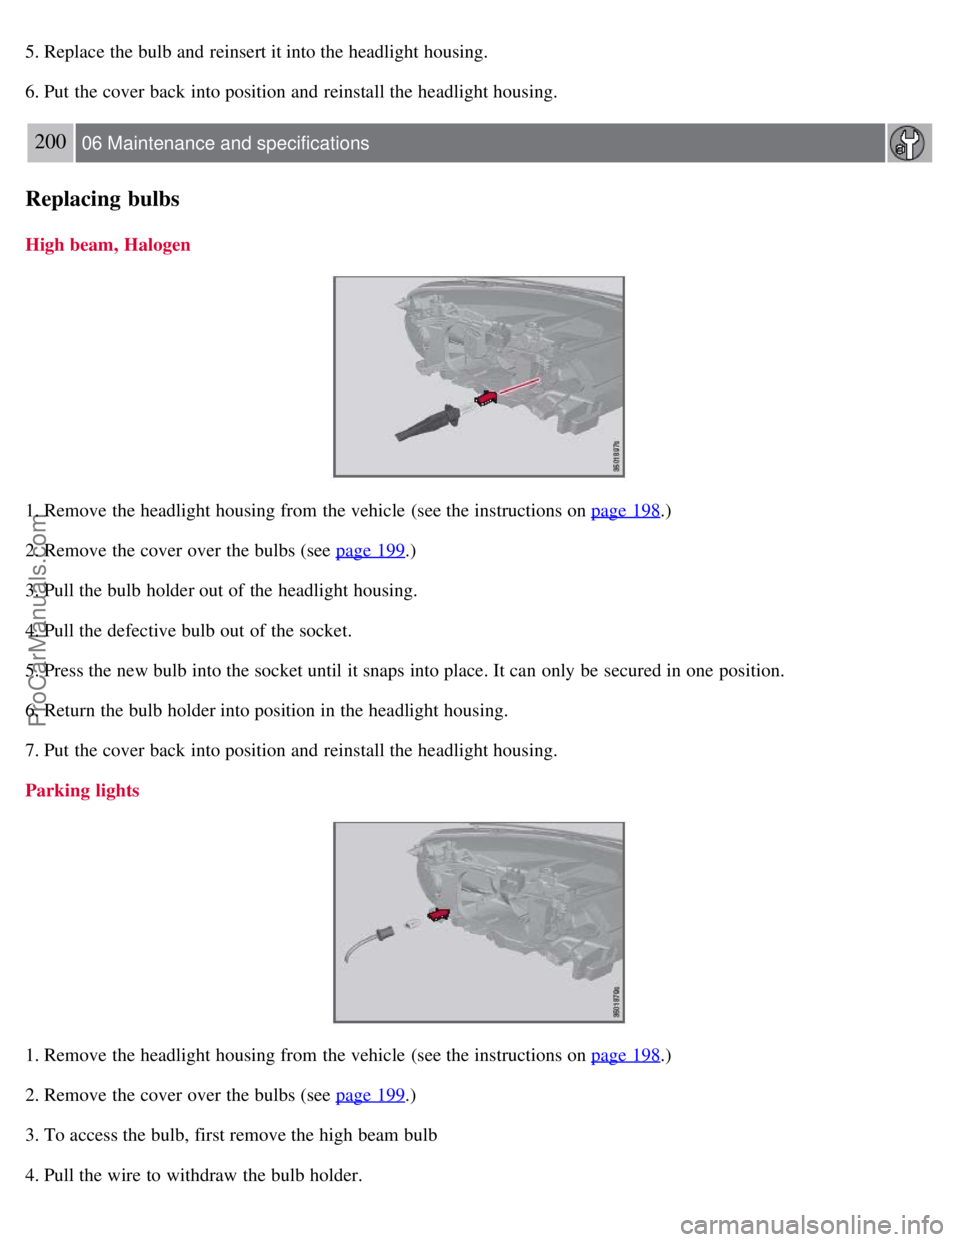
5. Replace the bulb and reinsert it into the headlight housing.
6. Put the cover back into position and reinstall the headlight housing.
200 06 Maintenance and specifications
Replacing bulbs
High beam, Halogen
1. Remove the headlight housing from the vehicle (see the instructions on page 198.)
2. Remove the cover over the bulbs (see page 199
.)
3. Pull the bulb holder out of the headlight housing.
4. Pull the defective bulb out of the socket.
5. Press the new bulb into the socket until it snaps into place. It can only be secured in one position.
6. Return the bulb holder into position in the headlight housing.
7. Put the cover back into position and reinstall the headlight housing.
Parking lights
1. Remove the headlight housing from the vehicle (see the instructions on page 198.)
2. Remove the cover over the bulbs (see page 199
.)
3. To access the bulb, first remove the high beam bulb
4. Pull the wire to withdraw the bulb holder.
ProCarManuals.com