2007 VOLVO S40 keyless
[x] Cancel search: keylessPage 3 of 208

Personal settings74
Home Link® Universal
Transceiver (option)76
3 Contents
03 Climate
General information
82
Air vents84
Manual climate control85
Electronic Climate Control (ECC) -
option87
Air distribution
90
04 Interior
Front seats94
Interior lighting97
Storage compartments99
Rear seat101
Trunk103
05 Locks and alarm
Remote control and key blade 106
Valet locking110
Keyless drive (option as
available)112
Locking and unlocking
115
Locking the glove compartment,
Child safety locks116
Alarm
117
4 Contents
06 Starting and driving
General information122
Fuel requirements125
Starting the vehicle129
Starting the car with keyless drive
(option as available)131
Manual transmission, 5-speed
133
Manual transmission, 6-speed134
Automatic transmission135
Shiftlock override138
All Wheel Drive (option)139
Brake system140
Stability system142
Towing144
Jump starting146
Towing a trailer147
Detachable trailer hitch149
Transporting loads150
07 Wheel and tires
General information154
Tire inflation156
Tire designations160
Glossary of tire terminology162
Vehicle loading163
Uniform tire quality gradings165
Snow chains, snow tires, studded
tires166
Temporary spare
167
Wheel nuts168
Tire rotation169
Changing a wheel170
08 Car care
Washing and cleaning the car176
Paint touch up180
5 Contents
ProCarManuals.com
Page 26 of 208

Never attempt to repair the vehicle yourself or to reset the electrical system after the vehicle has displayed
CRASH MODE SEE MANUAL. This could result in injury or improper system function.
Restoring the vehicle to normal operating mode should only be done by a trained and qualified Volvo service
technician.
After CRASH MODE SEE MANUAL has been displayed, if you detect the odor of fuel vapor, or see any signs of
fuel leakage, do not attempt to start the vehicle. Leave the vehicle immediately.
Attempting to start the vehicle
If damage to the vehicle is minor and there is no fuel leakage, you may attempt to start the vehicle. To do so:
1. Remove the ignition key or optional keyless drive start control (see page 131
).
2. Reinsert the key or start control in the ignition switch. The vehicle will then attempt to reset CRASH MODE to
normal mode.
3. Try to start the vehicle.
Moving the vehicle
If the electrical system is able to reset system status to normal (CRASH MODE SEE MANUAL will no longer be
displayed), the vehicle may be moved carefully from its present position, if for example, it is blocking traffic. It
should, however, not be moved farther than is absolutely necessary.
WARNING
Even if the vehicle appears to be drivable after CRASH MODE has been set, it should not be driven or towed
(pulled by another vehicle). There may be concealed damage that could make it difficult or impossible to control.
The vehicle should be transported on a flatbed tow truck to a trained and qualified Volvo service technician for
inspection/ repairs.
30 01 Safety
Child safety
Children should be seated safely
Volvo recommends the proper use of restraint systems for all occupants including children. Remember that, regardless
of age and size, a child should always be properly restrained in a car.
Your car is also equipped with ISOFIX/LATCH attachments, which make it more convenient to install child seats.
Some restraint systems for children are designed to be secured in the vehicle by lap belts or the lap portion of a lap-
shoulder belt. Such child restraint systems can help protect children in cars in the event of an accident only if they are
used properly. However, children could be endangered in a crash if the child restraints are not properly secured in the
vehicle. Failure to follow the installation instructions for your child restraint can result in your child striking the
vehicle's interior in a sudden stop.
Holding a child in your arms is NOT a suitable substitute for a child restraint system. In an accident, a child held in a
person's arms can be crushed between the vehicle's interior and an unrestrained person. The child could also be injured
by striking the interior, or by being ejected from the vehicle during a sudden maneuver or impact. The same can also
happen if the infant or child rides unrestrained on the seat. Other occupants should also be properly restrained to help
reduce the chance of injuring or increasing the injury of a child.
All states and provinces have legislation governing how and where children should be carried in a car. Find out the
ProCarManuals.com
Page 44 of 208

12. High beam indicator
13. Clock setting button - Turn the button to set the time.
14. Temperature gauge - The gauge indicates the temperature of the engine cooling system. If the temperature is
abnormally high and the needle enters the red zone, a message is shown in the display. Bear in mind that auxiliary
lamps in front of the air intake reduce the cooling capacity at high outside temperatures and high engine loads.
15. Indicator and warning symbols
51 02 Instruments and controls
Indicator and warning symbols
Function check
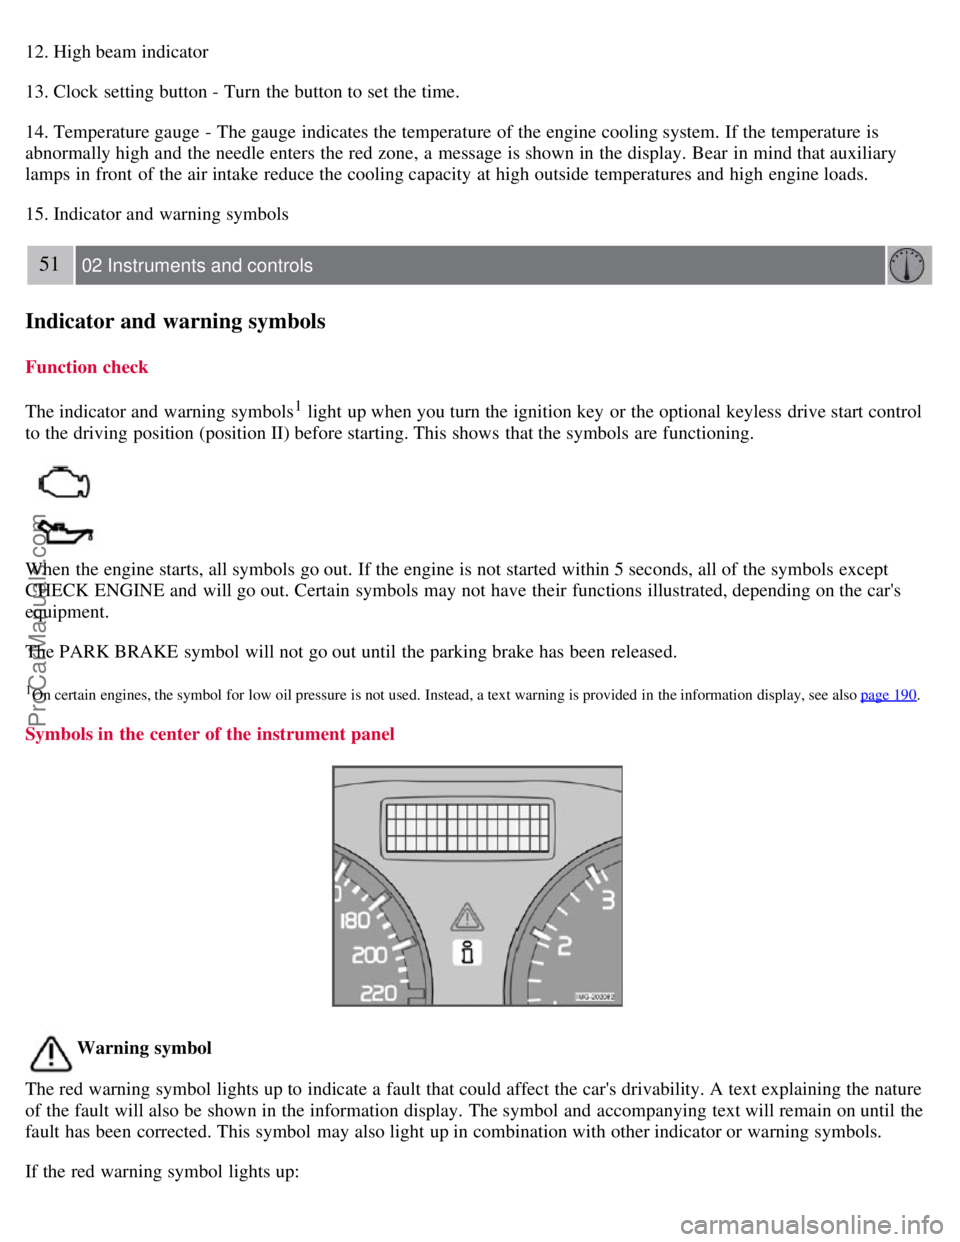
The indicator and warning symbols
1 light up when you turn the ignition key or the optional keyless drive start control
to the driving position (position II) before starting. This shows that the symbols are functioning.
When the engine starts, all symbols go out. If the engine is not started within 5 seconds, all of the symbols except
CHECK ENGINE and will go out. Certain symbols may not have their functions illustrated, depending on the car's
equipment.
The PARK BRAKE symbol will not go out until the parking brake has been released.
1On certain engines, the symbol for low oil pressure is not used. Instead, a text warning is provided in the information display, see also page 190.
Symbols in the center of the instrument panel
Warning symbol
The red warning symbol lights up to indicate a fault that could affect the car's drivability. A text explaining the nature
of the fault will also be shown in the information display. The symbol and accompanying text will remain on until the
fault has been corrected. This symbol may also light up in combination with other indicator or warning symbols.
If the red warning symbol lights up:
ProCarManuals.com
Page 71 of 208

Information
VIN number - The VIN (Vehicle Identification Number) is the car's unique identity number.
Number of Keys - the number of keys registered for the car is displayed here.
Climate functions
Blower speed in AUTO mode - the blower speed can be set to AUTO mode in models equipped with ECC. Choose
between "Low", "Normal" and "High".
Timer for recirculation - when the timer is active, the air recirculates in the car for 3- 12 minutes depending on the
ambient temperature. Select On/Off depending on whether the recirculation timer is to be active or not.
Keyless locking and unlocking (option as available)
The following alternatives can be selected for locking and unlocking the doors and trunk:
All doors - all doors are locked or unlocked at the same time.
Doors on the same side - front and rear doors on the same side are unlocked together.
Both front doors - both front doors are unlocked together.
One front door - either of the front doors can be unlocked separately1.
Reset to factory settings
Use this alternative to return to the default climate system settings.
1Factory default
76 02 Instruments and controls
Home Link® Universal Transceiver (option)
Introduction
HomeLink1 is a system that can be programmed to learn the codes of three different remote controlled-devices (for
example, a garage door opener, remote lighting, entry gate). HomeLink's sun visor-mounted transceiver, powered by
your car's electrical system, may then be used in place of your handheld remote controls. The HomeLink transceiver
consists of three programmable buttons and an indicator light.
1 HomeLink is a registered trademark of Johnson Controls, Intl.
© JCI, All rights reserved
ProCarManuals.com
Page 95 of 208

2 0 0 7
VOLVO S40
104 05 Locks and alarm
Remote control and key blade 106
Valet locking110
Keyless drive (option as available)112
Locking and unlocking115
Locking the glove compartment, Child safety locks116
Alarm117
105 05 Locks and alarm
106 05 Locks and alarm
Remote control and key blade
Remote controls
Two remote controls that also function as ignition keys are provided with your car. The remote controls contain
detachable metal key blades for manually locking or unlocking the driver's door and the glove compartment.
USA - FCC ID: LTQVO315TX
This device complies with part 15 of the FCC rules. Operation is subject to the following conditions: (1) This device
may not cause harmful interference, and (2) this device must accept any interference received, including interference
that may cause undesired operation.
Canada - IC: 3659AVO315TX
Operation is subject to the following conditions: (1) this device may not cause interference, and (2) this device must
accept any interference, including interference that may cause undesired operation of the device.
Loss of a remote control
ProCarManuals.com
Page 97 of 208

The car can also be locked if a door is open (does not apply to vehicles with the optional keyless drive.
2. Unlock - Press the Unlock button on the remote once to unlock the driver's door. The turn signals will flash twice to
confirm unlocking.
After a short pause, press the Unlock button a second time within 10 seconds to unlock the other doors and the trunk.
A long press (at least 2 seconds) opens all side windows.
NOTE
The turn signals flash to confirm that the vehicle has been correctly locked/unlocked with the remote control or
the optional keyless drive. When locking the vehicle, the turn signals will flash a confirmation only if all the doors
are securely closed and locked. Flashing confirmation for locking and unlocking may be customized in the vehicle's
Personal settings menu. See page 74
for more information.
The two-step unlocking function can be changed so that one press of the Unlock button unlocks all of the doors
and the trunk. See Personal settings on page 74
for more information.
Automatic relocking: If the doors are unlocked, the locks will automatically reengage (re-lock) and the alarm will
rearm after 2 minutes unless a door or the trunk has been opened.
Automatic locking : When the car starts to move, the doors and trunk can be locked automatically. This feature can
be turned on or off, see Personal settings on page 74
for more information.
Airbag deployment will automatically attempt to unlock the doors.
3. Approach lighting - As you approach the car:
Press the yellow button on the remote control to light the interior lighting, position/parking lamps, and license plate
lighting. These lights will switch off automatically after 30, 60 or 90 seconds. See the Personal settings on page 75
for
information about adjusting the time setting.
4. Unlock trunk - Press the button once to disarm the alarm system and unlock only the trunk. After closing, the trunk
will not automatically relock. Press Lock to relock it and rearm the alarm.
NOTE
This function will unlock, but not pop open, the trunk.
5. Panic alarm : - This button can be used to attract attention during emergency situations.
To activate the panic alarm, press and hold the red button for at least 3 seconds or press it twice within 3 seconds. The
turn signals and horn will be activated.
The panic alarm will stop automatically after 30 seconds.
108 05 Locks and alarm
Remote control and key blade
To deactivate, wait approximately 5 seconds and press the red button again.
NOTE
This button will NOT unlock the car.
Weak battery in the remote control
ProCarManuals.com
Page 99 of 208

The key blade can be removed from the remote control. When removed, the key blade can be used as follows:
To lock/unlock the driver's door
To lock/unlock the glove compartment (see page 116)
For valet locking (see the explanation below)
Removing the key blade
Slide the spring loaded catch (1) to the side and pull the key blade (2) out of the remote control.
Reinserting the key blade in the remote control
1. Hold the remote control with the pointed end down.
2. Carefully slide the key blade into its groove.
3. Gently press the key blade in the groove until it clicks into place.
Unlocking the doors with the detached key blade
Insert the key blade as far as possible in the driver's door lock. Turn the key blade clockwise approximately one -
quarter turn to unlock the driver's door only.
NOTE
After unlocking the driver's door with the key blade, opening the door will trigger the alarm.
To disable the alarm:
Models with the standard remote control : Press the Unlock button on the remote control, or insert the key in the
ignition switch.
Models with the optional keyless drive : Press the Unlock button on the keyless drive remote control. If the
batteries in the remote are weak, remove the keyless drive start control from the ignition switch by pressing the catch
(see the illustration on page 131
) and pulling the control out of the ignition switch. Insert the ignition key section of a
keyless drive remote control in the ignition switch.
Locking the doors with the detached key blade
1. Lock the rear doors and the front passenger's door by pressing the lock button on each door.
2. Turn the key blade one -quarter turn counterclockwise to lock the driver's door.
NOTE
This does not arm the alarm or lock the trunk.
ProCarManuals.com
Page 101 of 208

valet locking, and use the key blade to unlock the rear seat backrests.
See page 116 for information on locking the glove compartment normally.
112 05 Locks and alarm
Keyless drive (option as available)
Keyless locking and unlocking
This system makes it possible to unlock and lock the vehicle without having to use the remote control. It is only
necessary to have a keyless drive remote control in your possession to operate the central locking system.
NOTE
The buttons on the keyless drive remote control can also be used to lock and unlock the vehicle. See page 107
for
more information.
Both of the remote controls provided with the vehicle have the keyless function, and additional remotes can be
ordered. The system can accommodate up to six keyless drive remote controls.
NOTE
The number of doors that are unlocked at the same time can be set in the Personal settings menu. See page 74
for
ProCarManuals.com