2007 VOLVO S40 heating
[x] Cancel search: heatingPage 80 of 208
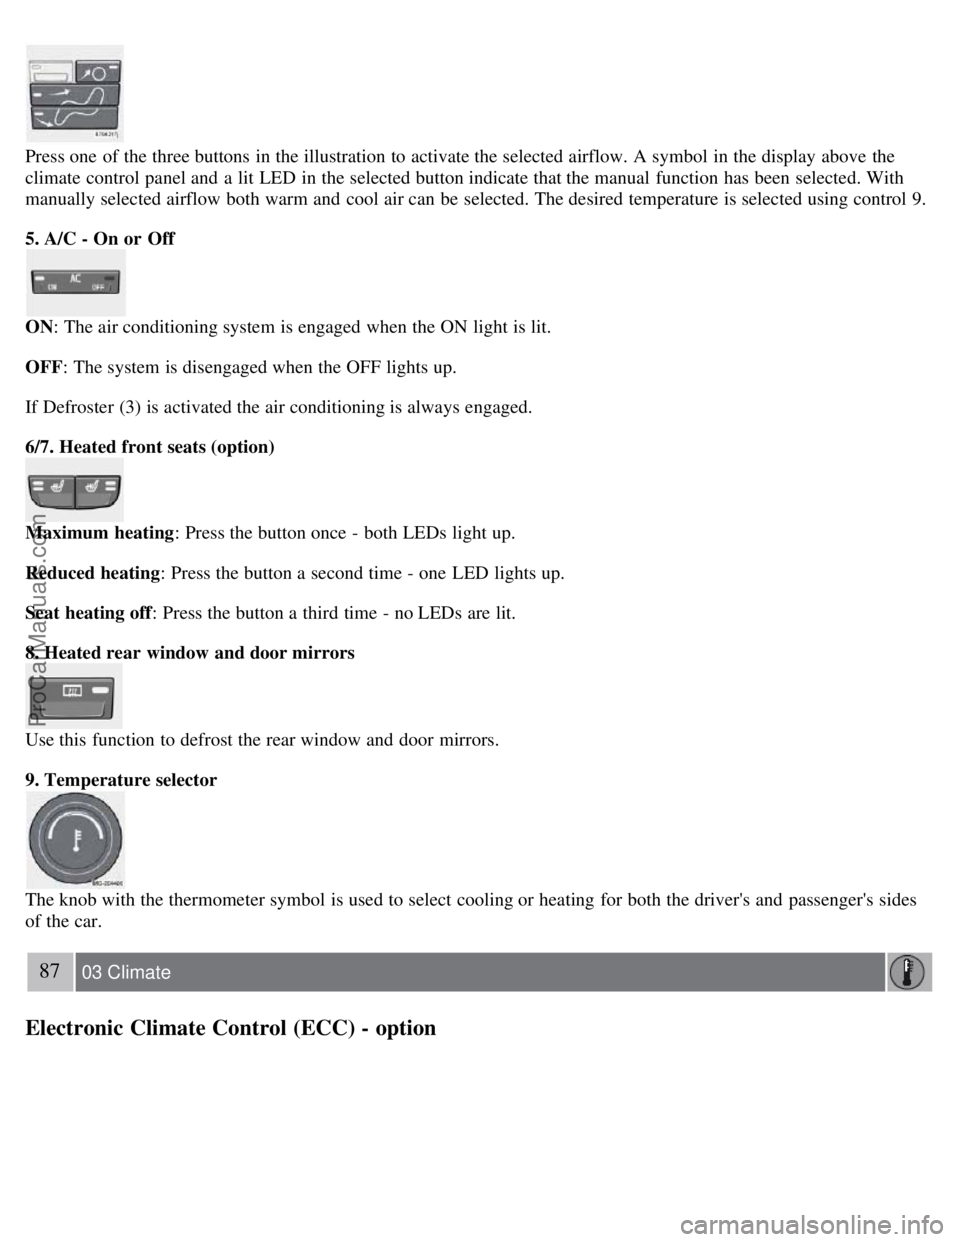
Press one of the three buttons in the illustration to activate the selected airflow. A symbol in the display above the
climate control panel and a lit LED in the selected button indicate that the manual function has been selected. With
manually selected airflow both warm and cool air can be selected. The desired temperature is selected using control 9.
5. A/C - On or Off
ON: The air conditioning system is engaged when the ON light is lit.
OFF: The system is disengaged when the OFF lights up.
If Defroster (3) is activated the air conditioning is always engaged.
6/7. Heated front seats (option)
Maximum heating: Press the button once - both LEDs light up.
Reduced heating : Press the button a second time - one LED lights up.
Seat heating off : Press the button a third time - no LEDs are lit.
8. Heated rear window and door mirrors
Use this function to defrost the rear window and door mirrors.
9. Temperature selector
The knob with the thermometer symbol is used to select cooling or heating for both the driver's and passenger's sides
of the car.
87 03 Climate
Electronic Climate Control (ECC) - option
ProCarManuals.com
Page 81 of 208
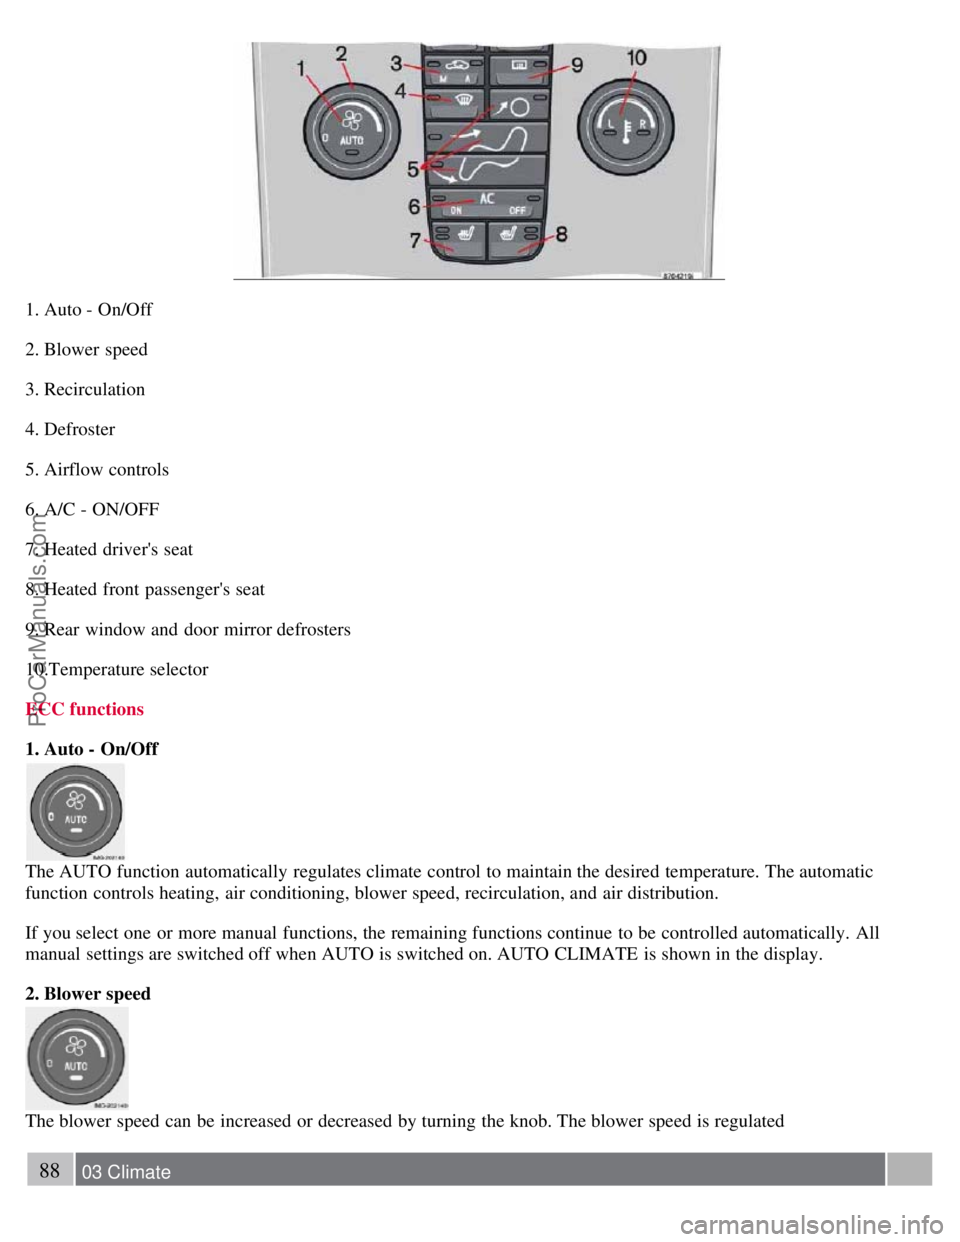
1. Auto - On/Off
2. Blower speed
3. Recirculation
4. Defroster
5. Airflow controls
6. A/C - ON/OFF
7. Heated driver's seat
8. Heated front passenger's seat
9. Rear window and door mirror defrosters
10.Temperature selector
ECC functions
1. Auto - On/Off
The AUTO function automatically regulates climate control to maintain the desired temperature. The automatic
function controls heating, air conditioning, blower speed, recirculation, and air distribution.
If you select one or more manual functions, the remaining functions continue to be controlled automatically. All
manual settings are switched off when AUTO is switched on. AUTO CLIMATE is shown in the display.
2. Blower speed
The blower speed can be increased or decreased by turning the knob. The blower speed is regulated
88 03 Climate
ProCarManuals.com
Page 83 of 208
6. Air conditioning On/Off
ON: The air conditioning system is engaged when the ON light is lit and is controlled automatically by the system to
maintain the selected temperature.
OFF: The system is disengaged when the OFF lights up.
When OFF is selected and the OFF LED is lit, the air conditioning system is deactivated. Other functions are still
controlled automatically.
When Defroster (4) is selected, the air conditioning system is activated for maximum dehumidifying.
89 03 Climate
Electronic Climate Control (ECC) - option
7 and 8. Heated front seats (option)
Maximum heating: Press the button once - both LEDs light up.
Reduced heating : Press the button a second time - one LED lights up.
Seat heating off : Press the button a third time - no LEDs are lit.
9. Rear window and door mirror defrosters
Press to defrost the rear window and door mirrors.
The rear window and door mirrors are defrosted simultaneously if the switch is pressed once. The function is active if
one LED is lit in the switch. The door mirrors are deactivated automatically after approximately 6 minutes. The rear
windscreen is deactivated after approximately 12 minutes.
10. Temperature selector
The temperatures on the driver's and passenger's sides can be set separately using the knob (with the thermometer in
it). The temperature can be set for both sides of the car when the ignition is switched on (both LEDs will be on), which
means that a temperature setting will apply to both sides of the car.
To set the temperature on one side of the car:
1. Press the knob once. The LED for one side of the car will light up. Turn the knob to adjust the temperature.
2. Press the knob a second time to set the temperature on the opposite side of the car.
3. Press the knob a third time to set the temperature on both sides of the car at the same time.
ProCarManuals.com
Page 119 of 208

WARNING
Volvo's floor mats are specially manufactured for your car. They must be firmly secured in the clips on the floor so
that they cannot slide and become trapped under the pedals on the driver's side.
CAUTION
Automatic transmission: The engine should be idling when you move the gear selector. Never accelerate until after
you feel the transmission engage! Accelerating immediately after selecting a gear will cause harsh engagement and
premature transmission wear. Selecting P or N when idling at a standstill for prolonged periods of time will help
prevent overheating of the automatic transmission fluid.
WARNING
Always place the gear selector in Park (manual transmission: first or reverse gear) and apply the parking brake
before leaving the vehicle.and apply the parking brake before leaving the vehicle. Never leave the vehicle unattended
with the engine running.
Always open garage doors fully before starting the engine inside a garage to ensure adequate ventilation. The
exhaust gases contain carbon monoxide, which is invisible and odorless but very poisonous.
131 06 Starting and driving
Starting the car with keyless drive (option as available)
Starting a vehicle with keyless drive
Starting a vehicle with keyless drive
Keyless drive makes it possible to unlock, start and lock the vehicle without using a remote control.
A start control is fitted in the ignition switch on vehicles equipped with the optional keyless drive. This control is used
in the same way as the ignition key to start the engine.
See also page 129
for general information on starting the engine.
NOTE
A keyless drive remote control must be in the passenger's compartment or in the trunk/cargo area in order to start the
engine.
ProCarManuals.com
Page 132 of 208

WARNING
Towing a vehicle with a locked steering wheel will make the vehicle impossible to steer.
3. Turn the ignition key to position II.
4. Place the gear selector in neutral. For vehicles with automatic transmissions, follow instruction on page 138
,
"Shiftlock override" to allow the gear selector to be moved from the Park position.
5. Keep firm pressure on the brake pedal while releasing the parking brake.
6. When towing has been completed, return the gear selector to Park (automatic) or Reverse (manual) and apply the
parking brake.
The following points should also be observed:
Never exceed 50 mph (80 km/h) . Never exceed local towing speed limits and heed all local towing restrictions.
Never tow farther than 50 miles (80 km) .
Keep the tow rope taut at all times while the vehicle is in motion.
The disabled vehicle should be towed in the forward direction only.
145 06 Starting and driving
Towing
WARNING
Never allow a vehicle to be towed without a driver behind the wheel of the disabled vehicle.
Never remove the key from the ignition while the vehicle is moving. The steering wheel could lock, making it
impossible to steer the vehicle.
When the engine is not running, steering resistance and the effort needed to apply the brakes will be great.
Never attempt to tow a vehicle with a dead battery at night.
CAUTION
Check with state and local authorities before attempting this type of towing, as vehicles being towed are subject to
regulations regarding maximum towing speed, length and type of towing device, lighting, marker flags, etc.
Never attempt to push- or tow-start a vehicle with a dead battery. This would inject unburned fuel into the three-
way catalytic converter(s), causing overheating, backfiring, and damage. See page 146
for instructions on jump
starting the vehicle.
Towing vehicles with front wheel drive
ProCarManuals.com
Page 147 of 208
All weight added to the curb weight, including cargo and optional equipment. When towing, trailer hitch tongue load
is also part of cargo weight.
NOTE
For trailer towing information, please refer to the section "Towing a trailer" on page 147
.
Permissible axle weight
The maximum allowable weight that can be carried by a single axle (front or rear). These numbers are shown on the
Federal/Canadian Motor Vehicle Safety Standards (FMVSS/CMVSS) label. The total load on each axle must never
exceed its maximum permissible weight.
Gross vehicle weight (GVW)
The vehicle's curb weight + cargo + passengers.
NOTE
The location of the various labels in your vehicle can be found on page 227.
A table listing important weight limits for your vehicle can be found on page 229.
Steps for Determining Correct Load Limit
(1) Locate the statement ''the combined weight of occupants and cargo should never exceed XXX pounds'' on your
vehicle's placard.
(2) Determine the combined weight of the driver and passengers that will be riding in your vehicle.
(3) Subtract the combined weight of the driver and passengers from XXX kilograms or XXX pounds.
(4) The resulting figure equals the available amount of cargo and luggage load capacity. For example, if the ''XXX''
amount equals 1400 lbs. and there will be five 150 lb. passengers in your vehicle, the amount of available cargo and
luggage load capacity is 650 lbs. (1400-750 (5 x 150) = 650 lbs.)
(5) Determine the combined weight of luggage and cargo being loaded on the vehicle. That weight may not safely
exceed the available cargo and luggage load capacity calculated in Step 4.
(6) If your vehicle will be towing a trailer, load from your trailer will be transferred to your vehicle. Consult this
manual
1 to determine
1 See "Towing a trailer" on page 147.
164 07 Wheels and tires
Vehicle loading
how this reduces the available cargo and luggage load capacity of your vehicle.
WARNING
Exceeding the permissible axle weight, gross vehicle weight, or any other weight rating limits can cause tire
overheating resulting in permanent deformation or catastrophic failure.
Do not use replacement tires with lower load carrying capacities than the tires that were original equipment on the
ProCarManuals.com
Page 207 of 208
Models equipped with the High Performance audio system
2Models equipped with the Premium Sound audio system, the Volvo Navigation System and/or keyless drive
If the battery must be replaced, replace it with one with the same cold start capacity and reserve capacity as the original
(see the decal on the battery).
WARNING
PROPOSITION 65 WARNING!
Battery posts, terminals, and related accessories contain lead and lead compounds, chemicals known to the state of
California to cause cancer and reproductive harm. Wash hands after handling.
235 11 Specifications
Electrical system
Three-way catalytic converter - general information
Keep your engine properly tuned. Certain engine malfunctions, particularly involving the electrical, fuel or distributor
ignition systems, may cause unusually high three-way catalytic converter temperatures. Do not continue to operate your
vehicle if you detect engine misfire, noticeable loss of power or other unusual operating conditions, such as engine
overheating or backfiring. A properly tuned engine will help avoid malfunctions that could damage the three-way
catalytic converter.
Do not park your vehicle over combustible materials, such as grass or leaves, which can come into contact with the
hot exhaust system and cause such materials to ignite under certain wind and weather conditions.
Excessive starter cranking (in excess of one minute), or an intermittently firing or flooded engine can cause three-way
catalytic converter or exhaust system overheating.
Remember that tampering or unauthorized modifications to the engine, the Electronic Control Module, or the vehicle
may be illegal and can cause three-way catalytic converter or exhaust system overheating.
This includes:
- Altering fuel injection settings or components.
- Altering emission system components or location or removing components.
- Repeated use of leaded fuel.
NOTE
Unleaded fuel is required for vehicles with three-way catalytic converters.
236 11 Specifications
Volvo programs
Volvo On Call Roadside Assistance
Your new Volvo comes with a four year ON CALL roadside assistance. Additional information, features, and benefits
are described in a separate information package in your glove compartment. If you have misplaced your package, dial:
In the U.S.A. 1-800-638-6586 (1-800-63- VOLVO)
In Canada: 1-800-263-0475
Technician certification
ProCarManuals.com