2007 VOLVO S40 AUX
[x] Cancel search: AUXPage 44 of 208
12. High beam indicator
13. Clock setting button - Turn the button to set the time.
14. Temperature gauge - The gauge indicates the temperature of the engine cooling system. If the temperature is
abnormally high and the needle enters the red zone, a message is shown in the display. Bear in mind that auxiliary
lamps in front of the air intake reduce the cooling capacity at high outside temperatures and high engine loads.
15. Indicator and warning symbols
51 02 Instruments and controls
Indicator and warning symbols
Function check
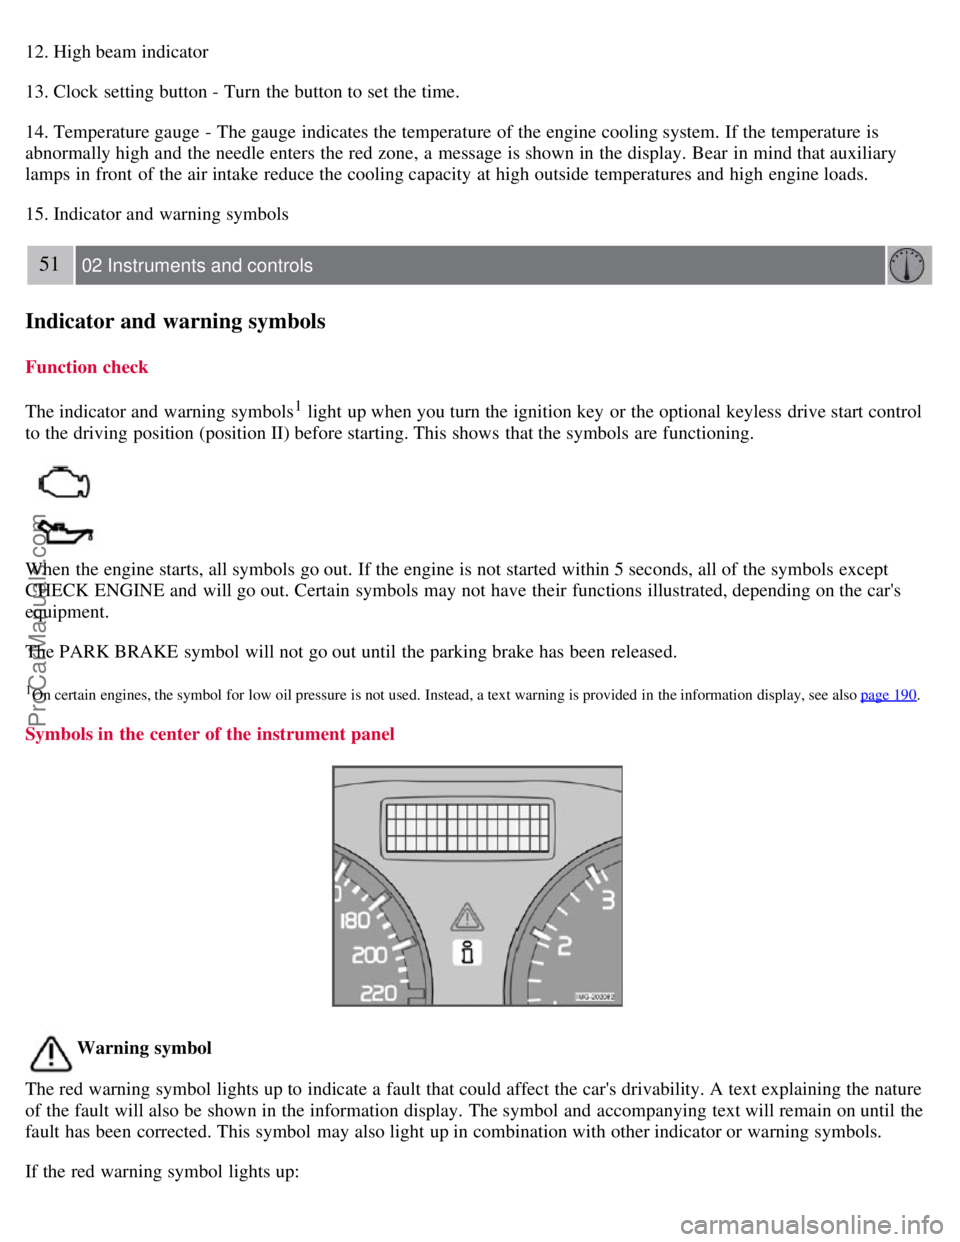
The indicator and warning symbols
1 light up when you turn the ignition key or the optional keyless drive start control
to the driving position (position II) before starting. This shows that the symbols are functioning.
When the engine starts, all symbols go out. If the engine is not started within 5 seconds, all of the symbols except
CHECK ENGINE and will go out. Certain symbols may not have their functions illustrated, depending on the car's
equipment.
The PARK BRAKE symbol will not go out until the parking brake has been released.
1On certain engines, the symbol for low oil pressure is not used. Instead, a text warning is provided in the information display, see also page 190.
Symbols in the center of the instrument panel
Warning symbol
The red warning symbol lights up to indicate a fault that could affect the car's drivability. A text explaining the nature
of the fault will also be shown in the information display. The symbol and accompanying text will remain on until the
fault has been corrected. This symbol may also light up in combination with other indicator or warning symbols.
If the red warning symbol lights up:
ProCarManuals.com
Page 50 of 208
57 02 Instruments and controls
Center console controls
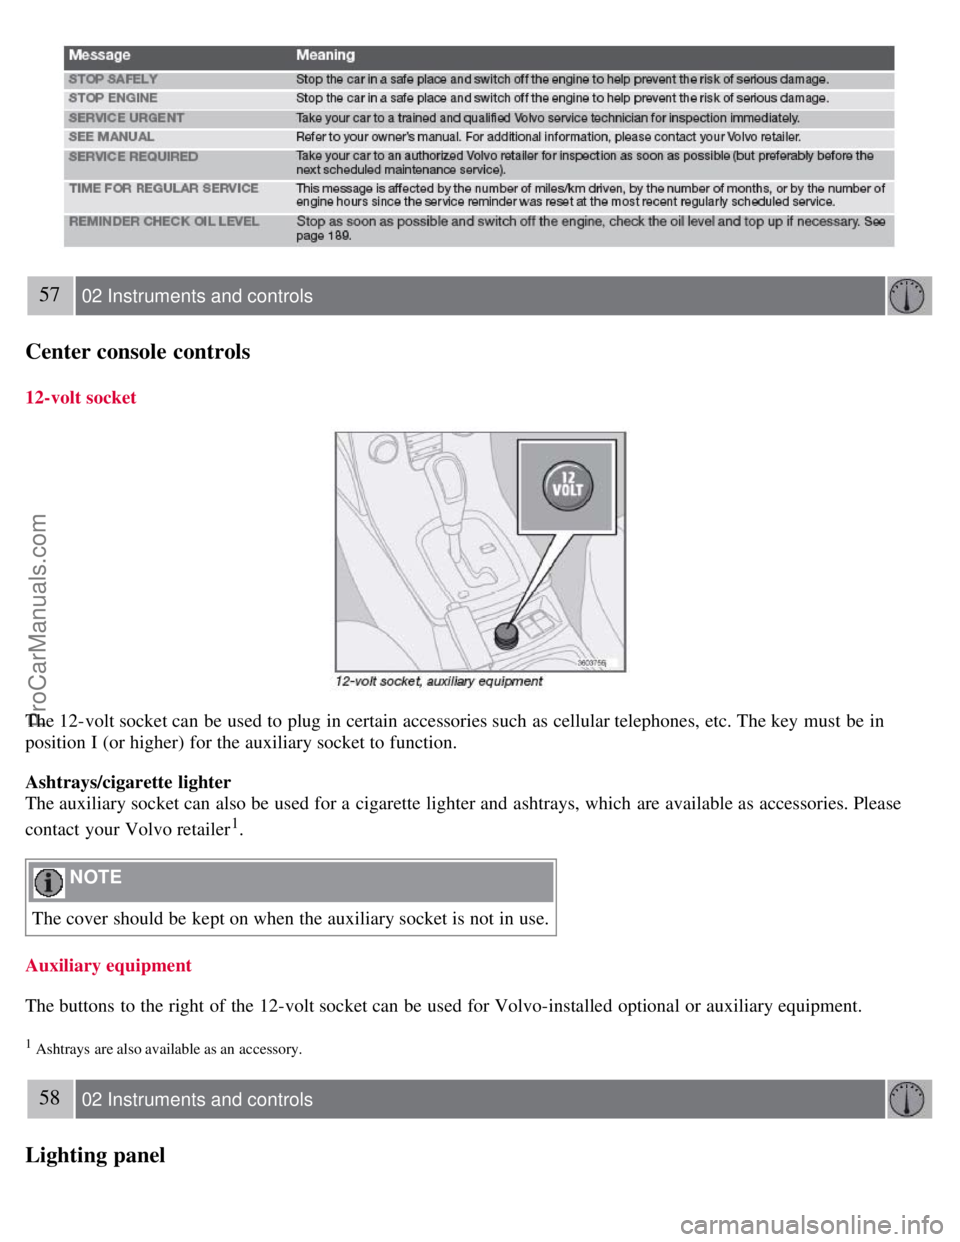
12-volt socket
The 12-volt socket can be used to plug in certain accessories such as cellular telephones, etc. The key must be in
position I (or higher) for the auxiliary socket to function.
Ashtrays/cigarette lighter
The auxiliary socket can also be used for a cigarette lighter and ashtrays, which are available as accessories. Please
contact your Volvo retailer
1.
NOTE
The cover should be kept on when the auxiliary socket is not in use.
Auxiliary equipment
The buttons to the right of the 12-volt socket can be used for Volvo-installed optional or auxiliary equipment.
1 Ashtrays are also available as an accessory.
58 02 Instruments and controls
Lighting panel
ProCarManuals.com
Page 62 of 208
Pull up the parking brake lever up firmly to its full extent.
Ashtrays/cigarette lighter
The auxiliary sockets can also be used for cigarette lighters. Ashtrays and lighters are available as accessories. Please
contact your Volvo retailer.
68 02 Instruments and controls
Power windows
Operation
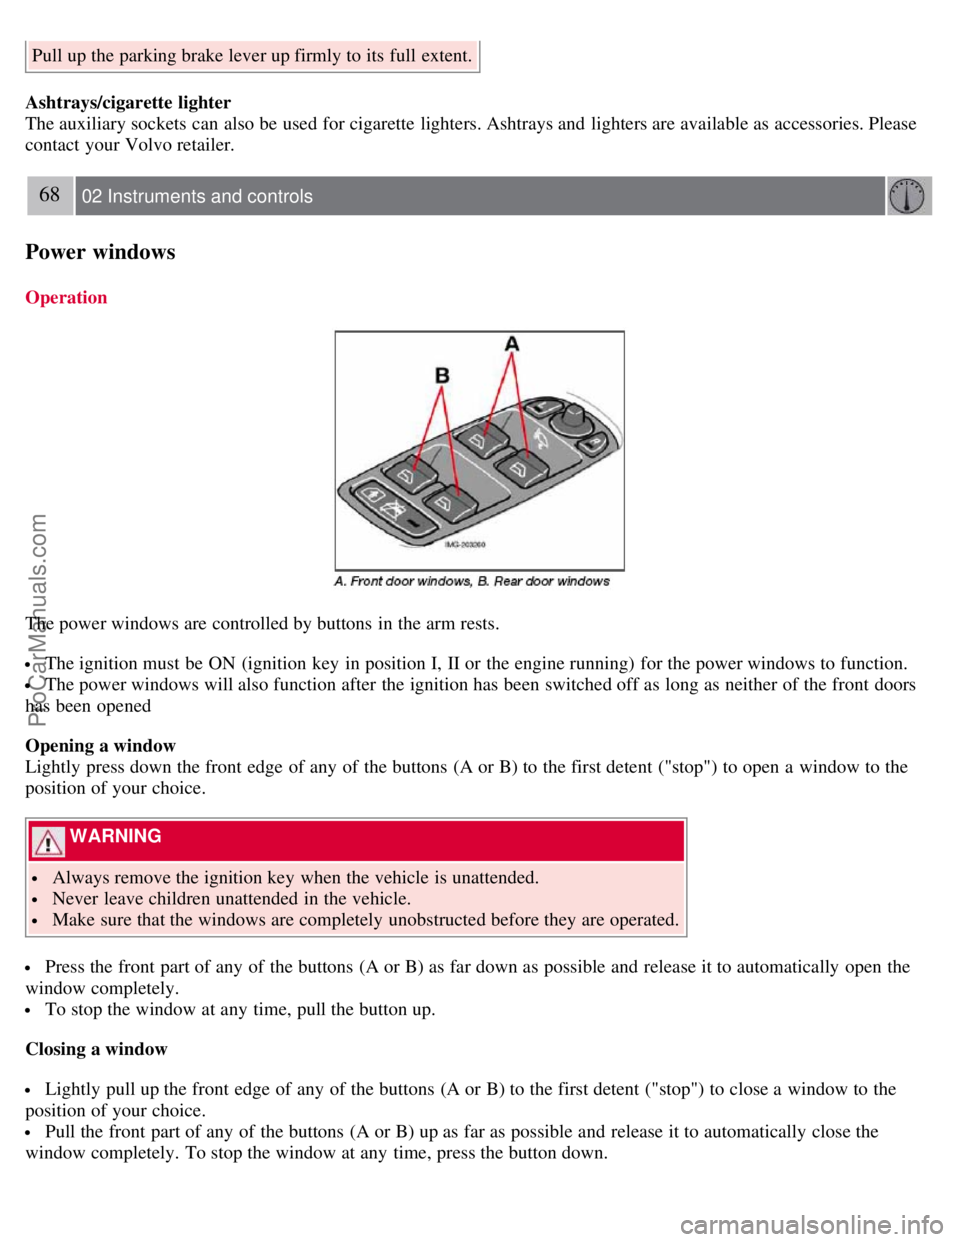
The power windows are controlled by buttons in the arm rests.
The ignition must be ON (ignition key in position I, II or the engine running) for the power windows to function.
The power windows will also function after the ignition has been switched off as long as neither of the front doors
has been opened
Opening a window
Lightly press down the front edge of any of the buttons (A or B) to the first detent ("stop") to open a window to the
position of your choice.
WARNING
Always remove the ignition key when the vehicle is unattended.
Never leave children unattended in the vehicle.
Make sure that the windows are completely unobstructed before they are operated.
Press the front part of any of the buttons (A or B) as far down as possible and release it to automatically open the
window completely.
To stop the window at any time, pull the button up.
Closing a window
Lightly pull up the front edge of any of the buttons (A or B) to the first detent ("stop") to close a window to the
position of your choice.
Pull the front part of any of the buttons (A or B) up as far as possible and release it to automatically close the
window completely. To stop the window at any time, press the button down.
ProCarManuals.com
Page 134 of 208

your vehicle. If the 12-volt auxiliary battery to be used is in another vehicle, check that the vehicles are not touching to
prevent premature completion of a circuit. Be sure to follow jump starting instructions provided for the other vehicle.
To jump start your vehicle:
1. Switch off the ignition.
2. First connect the auxiliary battery positive (+) terminal (1) to the positive (+) terminal in your vehicle's battery (2),
marked with a "+" sign.
3. Connect the auxiliary battery's negative (-) terminal (3) to the ground point in your vehicle's engine compartment
near the driver's side spring strut (4).
4. Start the engine in the assisting vehicle, then start the engine in the vehicle with dead battery.
5. After the engine has started, first remove the negative (-) terminal jumper cable. Then remove the positive (+)
terminal jumper cable.
WARNING
PROPOSITION 65 WARNING!
Battery posts, terminals, and related accessories contain lead and lead compounds, chemicals known to the state of
California to cause cancer and reproductive harm. Wash hands after handling.
WARNING
Do not connect the jumper cable to any part of the fuel system or to any moving parts. Avoid touching hot
manifolds.
Batteries generate hydrogen gas, which is flammable and explosive.
Battery fluid contains sulfuric acid. Do not allow battery fluid to contact eyes, skin, fabrics or painted surfaces. If
contact occurs, flush the affected area immediately with water. Obtain medical help immediately if eyes are affected.
Never expose the battery to open flame or electric spark.
Do not smoke near the battery.
Failure to follow the instructions for jump starting can lead to personal injury.
Do not touch the jumper cables during the attempt to start the vehicle. This could cause sparks.
147 06 Starting and driving
Towing a trailer
General information
Volvo recommends the use of Volvo trailer hitches that are specially designed for the vehicle.
CAUTION
Models equipped with the B5244S7 engine (engine code 39, which is the 6th and 7th digits from the left in your
vehicle's VIN number, see page 227
for the location of the VIN plate), may not be used to tow trailers or vehicles of
any kind. This could cause damage to the vehicle's emission control systems.
Maximum trailer weights recommended by Volvo are:
ProCarManuals.com
Page 156 of 208

Exterior plastic components
Cleaning exterior plastic components should be done with a cleaning agent specially designed for this purpose.
Solvents or stain removers should not be used. Consult your Volvo retailer.
NOTE
When washing the car, remember to remove dirt from the drain holes in the doors and sills.
NOTE
During high pressure washing, the spray mouthpiece must never be closer to the vehicle than 13" (30 cm). Do not
spray into the locks.
When washing or steam cleaning the engine, avoid spraying water or steam directly on the electrical components
or toward the rear side of the engine. Special moonroof cautions:
Always close the moonroof and sun shade before washing your vehicle.
Never use abrasive cleaning agents on the moonroof.
Never use wax on the rubber seals around the moonroof
Automatic washing - simple and quick
We do NOT recommend washing your car in an automatic wash during the first six months (because the paint will not
have hardened sufficiently).
An automatic wash is a simple and quick way to clean your car, but it is worth remembering that it may not be as
thorough as when you yourself go over the car with sponge and water. Keeping the underbody clean is most important,
especially in the winter. Some
177 08 Car care
Washing and cleaning the car
automatic washers do not have facilities for washing the underbody.
CAUTION
Before driving into an automatic car wash, turn off the optional rain sensor to avoid damaging the windshield
wipers.
Make sure that side view mirrors, auxiliary lamps, etc, are secure, and that any antenna(s) are retracted or
removed. Otherwise there is risk of the machine dislodging them.
Chromed wheels : Clean chrome-plated wheels using the same detergents used for the body of the vehicle.
Aggressive wheel-cleaning agents can permanently stain chrome-plated wheels
WARNING
When the car is driven immediately after being washed, apply the brakes several times in order to remove any
moisture from the brake linings.
Engine cleaning agents should not be used when the engine is warm. This constitutes a fire risk.
Exterior lighting
Condensation may form temporarily on the inside of the lenses of exterior lights such as headlights, fog lights, or
taillights. This is normal and the lights are designed to withstand moisture. Normally, condensation will dissipate after
the lights have been on for a short time.
ProCarManuals.com
Page 184 of 208
3. MODE - select a sound source
4. TUNING dial
5. SOUND button
Selecting a sound source
Press AM/FM (2) repeatedly to toggle between FM1, FM2, and AM.
Press MODE (3) repeatedly to toggle between the CD player and the optional external sound source AUX or the
optional Sirius satellite radio.
The currently selected sound source will be shown in the display.
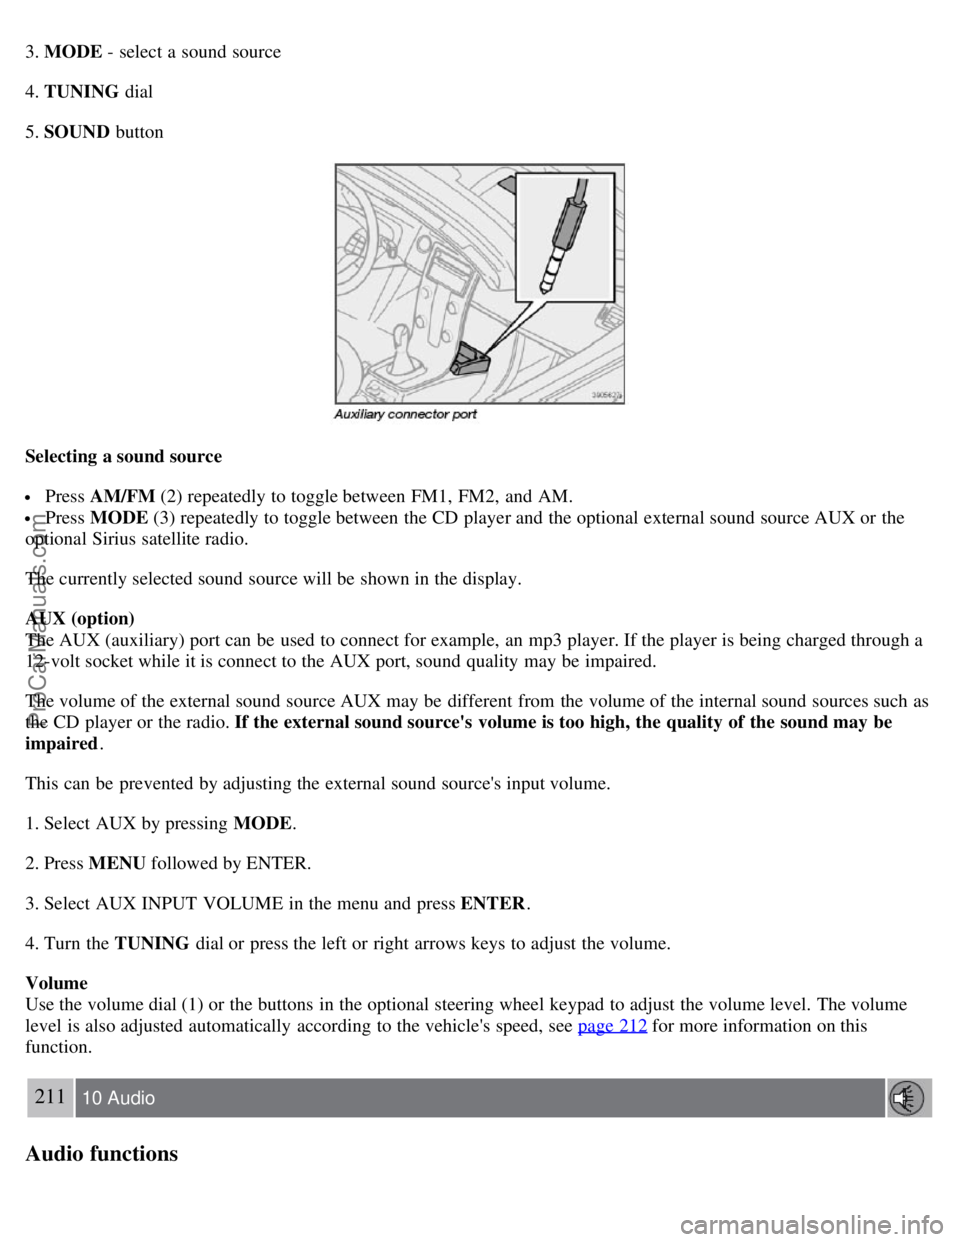
AUX (option)
The AUX (auxiliary) port can be used to connect for example, an mp3 player. If the player is being charged through a
12-volt socket while it is connect to the AUX port, sound quality may be impaired.
The volume of the external sound source AUX may be different from the volume of the internal sound sources such as
the CD player or the radio. If the external sound source's volume is too high, the quality of the sound may be
impaired .
This can be prevented by adjusting the external sound source's input volume.
1. Select AUX by pressing MODE .
2. Press MENU followed by ENTER.
3. Select AUX INPUT VOLUME in the menu and press ENTER .
4. Turn the TUNING dial or press the left or right arrows keys to adjust the volume.
Volume
Use the volume dial (1) or the buttons in the optional steering wheel keypad to adjust the volume level. The volume
level is also adjusted automatically according to the vehicle's speed, see page 212
for more information on this
function.
211 10 Audio
Audio functions
ProCarManuals.com
Page 186 of 208
3. Select SUBWOOFER and press ENTER.
Surround sound
Surround sound settings are used to balance sound levels throughout the vehicle. Surround settings for the various
sound sources are made separately.
NOTE
Dolby Surround Pro Logic II is only available on the Premium Sound system.
When listening to FM radio stations, Dolby Surround Pro Logic II functions best in areas with strong reception. If
reception is weak, selecting 2 or 3-channel stereo may provide better sound quality.
The Dolby symbol will be appear in the display when Dolby Pro Logic II is activated.
There are three alternative settings:
Pro Logic II
3-channel
212 10 Audio
Audio functions
Off (normal 2-channel stereo)
Activating/deactivating Surround sound
1. Press MENU followed by ENTER .
2. Select AUDIO SETTINGS in the menu and press ENTER .
3. Select Surround FM/AM/CD/AUX and press ENTER.
4. Select PRO LOGIC II , 3-channel stereo or OFF and press ENTER.
Equalizer Front/Rear
This function is used to fine-tune the sound level for different frequencies separately.
NOTE
This function is only available on certain sound systems.
To adjust the equalizer settings:
1. Press MENU followed by ENTER .
2. Select AUDIO SETTINGS in the menu and press ENTER .
3. Select EQUALIZER FRONT/REAR and press ENTER.
The column in the display indicates the sound level for the current frequency.
ProCarManuals.com
Page 199 of 208
1. 1. AUDIO SETTINGS
CD menu
1. RANDOM
2. AUDIO SETTINGS
CD changer menu
1. RANDOM
2. DISC TEXT ON/OFF
3. AUDIO SETTINGS
AUX menu
1. AUX VOLUME
2. SOUND SETTINGS
Contents | Top of Page
ProCarManuals.com