Page 102 of 208

additional information.
Unlocking the vehicle
1. A keyless drive remote control must be on the same side of the vehicle as the door to be opened, and be within 5
feet (1.5 meters) of the lock or the trunk opening control (see the shaded areas in the illustration).
2. Pull a door handle to unlock and open the door or press the trunk opening control on the trunk lid.
Locking the vehicle
The doors and the trunk can be locked by pressing the lock button in any of the outside door handles.
NOTE
If one or more doors and/or the trunk is not fully closed when the lock button is pressed, the door(s) or trunk will not
be locked.
Locking or unlocking the vehicle with the key blade
The driver's door on vehicles equipped with keyless drive can be locked or unlocked with the remote control's
detachable key blade if necessary. See page 109
for information on removing the key blade from the remote control.
To access the keyhole in the driver's door:
113 05 Locks and alarm
Keyless drive (option as available)
1. Pry off the keyhole cover by inserting the key blade or a small screwdriver in the hole on the underside of the cover
(indicated by the arrow in the inset illustration in page above).
2. Insert the key blade as far as possible in the driver's door lock. Turn the key blade clockwise approximately one
quarter turn to unlock the driver's door only. This will trigger the alarm.
Disabling the alarm : Press the Unlock button on the keyless drive remote control. If the batteries in the remote are
weak, remove the keyless drive start control from the ignition switch by pressing the catch (see the illustration on page
131) and pulling the control out of the ignition switch. Insert the ignition key section of a keyless drive remote control
in the ignition switch.
Keyless drive remote control and driver's seat memory
This function is only available on vehicles equipped with the optional power driver's seat.
When you leave the car with a keyless drive remote control in your possession and lock any door, the position of
the driver's seat will be stored in the seat's memory.
The next time a door is opened by a person with the same remote control in his/her possession, the driver's seat will
automatically move to the position that it was in when the door was most recently locked.
NOTE
If several people carrying keyless drive remote controls approach the vehicle at the same time, the driver's seat will
assume the position it was in for the person who opens a door first.
Keyless drive information messages
If anyone leaves the vehicle with the only keyless drive remote control in his or her possession while the ignition is
switched on, a message will be shown in the information display and an audible signal will sound.
ProCarManuals.com
Page 105 of 208

Locking the glove compartment, Child safety locks
Locking the glove compartment
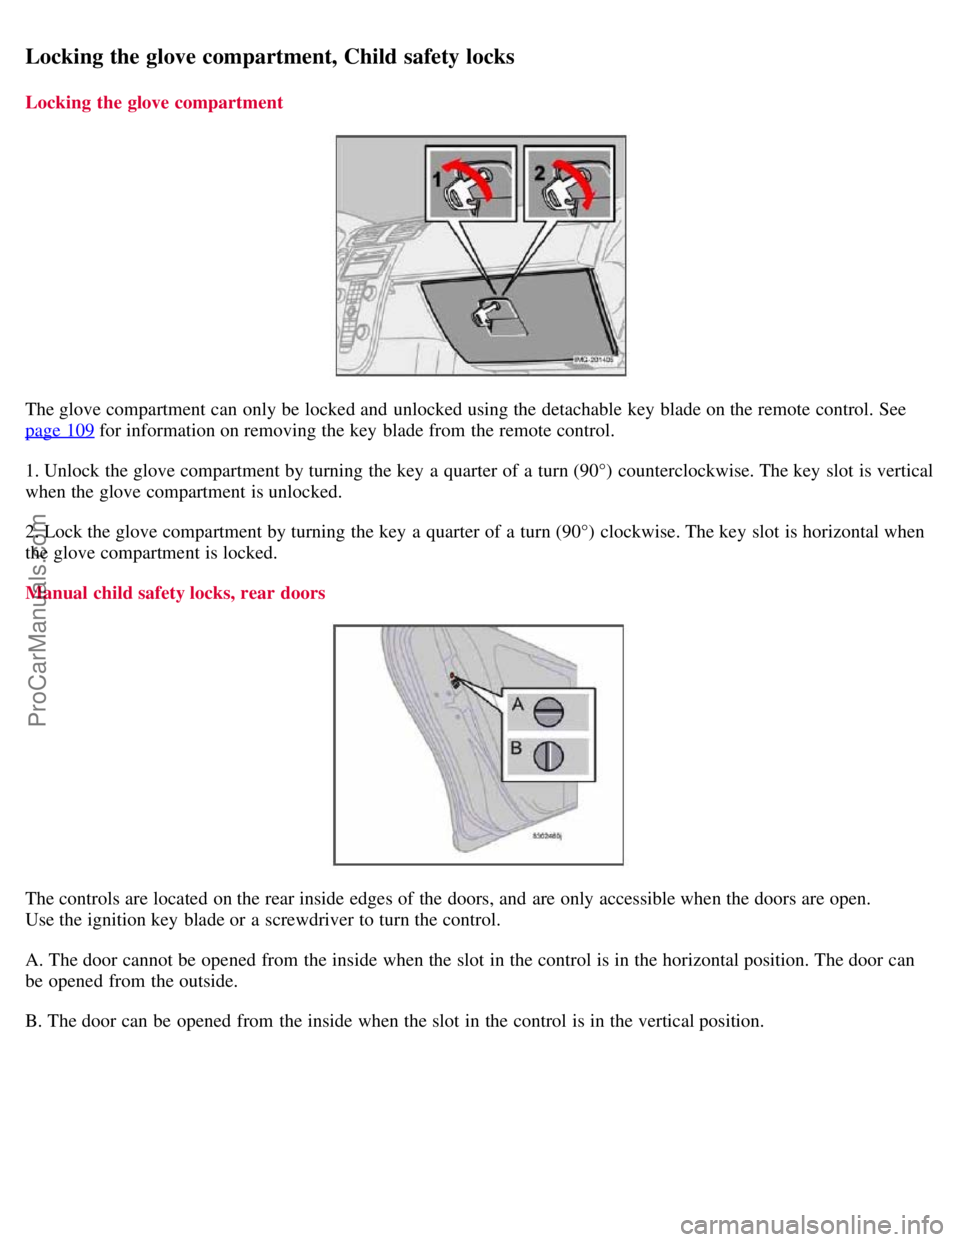
The glove compartment can only be locked and unlocked using the detachable key blade on the remote control. See
page 109
for information on removing the key blade from the remote control.
1. Unlock the glove compartment by turning the key a quarter of a turn (90°) counterclockwise. The key slot is vertical
when the glove compartment is unlocked.
2. Lock the glove compartment by turning the key a quarter of a turn (90°) clockwise. The key slot is horizontal when
the glove compartment is locked.
Manual child safety locks, rear doors
The controls are located on the rear inside edges of the doors, and are only accessible when the doors are open.
Use the ignition key blade or a screwdriver to turn the control.
A. The door cannot be opened from the inside when the slot in the control is in the horizontal position. The door can
be opened from the outside.
B. The door can be opened from the inside when the slot in the control is in the vertical position.
ProCarManuals.com
Page 116 of 208

CAUTION
Do not refuel with the engine running1. Turn the ignition off or to position I. If the ignition is on, an incorrect
reading could occur in the fuel gauge
After refueling, close the fuel filler cap by turning it clockwise until it clicks into place.
Avoid overfilling the fuel tank. Do not press the handle on the filler nozzle more than one extra time. Too much
fuel in the tank in hot weather conditions can cause the fuel to overflow. Overfilling could also cause damage to the
emission control systems.
Avoid spilling gasoline during refueling. In addition to causing damage to the environment, gasolines containing
alcohol can cause damage to painted surfaces, which may not be covered under the New Vehicle Limited Warranty.
Do not use gasolines containing methanol (methyl alcohol, wood alcohol). This practice can result in vehicle
performance deterioration and can damage critical parts in the fuel system. Such damage may not be covered under
the New Vehicle Limited Warranty.
1If the fuel filler cap is not closed tightly or if the engine is running when the vehicle is refueled, the Check Engine Light (malfunction indicator
lamp) may indicate a fault. However, your vehicle's performance will not be affected. Use only Volvo original or approved fuel filler caps.
128 06 Starting and driving
Ignition switch/Steering wheel lock
Ignition switch and steering wheel lock
0 - Locked position
Remove the key to lock the steering wheel1. Never turn the key to position 0 while driving or when the vehicle is
being towed.
NOTE
A ticking sound may be audible if the key is turned to a position between 0 and I. To stop this sound, turn the key to
position II and back to position 0.
I - Intermediate position
2
Certain accessories, radio, etc. on, daytime running lights off.
1Automatic transmission: the gear selector must be in the Park position. The optional keyless drive start control does not need to be removed.
2Please be aware that leaving the key in this positions I or II will increase battery drain.
II - Drive position
ProCarManuals.com
Page 152 of 208
suspension problem. Each tire, if left in place, tells a story about the suspension. Tire rotation, on the other hand, could
make suspension wear harder to detect. Early detection is very important, because suspension problems can make tire
wear worse.
If you do rotate your tires...
Please follow the tire manufacturer's recommendations, as outlined in the tire manufacturers tire warranty pamphlet.
170 07 Wheels and tires
Changing a wheel
Changing a wheel
The spare tire, jack, and crank are located under the carpet on the floor of the cargo area.
To change a tire:
1. Engage the parking brake.
2. Put the gear selector in Park (P).
3. Block the wheels that are on the ground with wooden blocks or large stones.
4. Remove the wheel cap (where applicable) using the lug wrench in the tool bag.
5. With the car still on the ground, use the lug wrench to loosen the wheel nuts 1/2 - 1 turn by exerting downward
pressure. Turn the nuts counterclockwise to loosen.
ProCarManuals.com
Page 174 of 208
High beam bulb
1. Open the hood.
2. Remove the headlight housing.
3. Turn the bulb holder counterclockwise and pull it out. Replace the bulb. Note how the bulb holder is positioned.
4. Reinstall the bulb holder. It can only be installed in one position.
5. Reinstall the headlight housing.
Parking light bulb
1. Pull out the bulb holder with a pair of pliers. The bulb holder should not be pulled out by the wire.
2. Replace the bulb.
3. Press the bulb holder back into place. It can only be installed in one position.
198 09 Maintenance and servicing
Replacing front bulbs
Turn signal
ProCarManuals.com
Page 175 of 208
1. Turn the bulb holder counterclockwise and remove it.
2. Remove the bulb from the holder by pressing it in and twisting it counterclockwise.
3. Insert a new bulb and reinstall the bulb holder in the headlight housing.
Side marker light
1. Turn the bulb holder counterclockwise, pull it out, and replace the bulb.
2. Reinstall the bulb holder. It can only be installed in one position.
Front fog light (option)
1. Switch off all lights and turn the key to position 0.
2. Remove the panel around the fog light housing.
3. Unscrew both torx screws in the fog light housing and remove it.
ProCarManuals.com
Page 176 of 208
4. Disconnect the connector from the bulb.
5. Turn the bulb counterclockwise and pull it out.
6. Install the new bulb in its seat and turn it clockwise.
7. Reconnect the connector to the bulb.
199 09 Maintenance and servicing
Replacing front bulbs
8. Secure the fog light housing with the screws and press the panel back into place.
200 09 Maintenance and servicing
Replacing taillight bulbs
Removing the taillight bulb holder
All bulbs in the taillight cluster can be replaced from the cargo area. To access the bulb holders:
1. Switch off all lights and turn the key to position 0.
2. Remove the covers in the left/right panels to access the bulb holders.
3. Disconnect the wiring connector from the affected bulb holder.
4. Press the catches together and pull out the bulb holder.
5. Replace the defective bulb.
ProCarManuals.com
Page 178 of 208

2. Remove the screw with a screw driver.
3. Detach the entire bulb housing and carefully pull it out. Turn the connector counterclockwise and pull out the bulb.
4. Replace the bulb.
5. Reinstall the connector and turn it clockwise.
6. Reinstall the entire bulb housing and screw it into place.
Footwell lighting
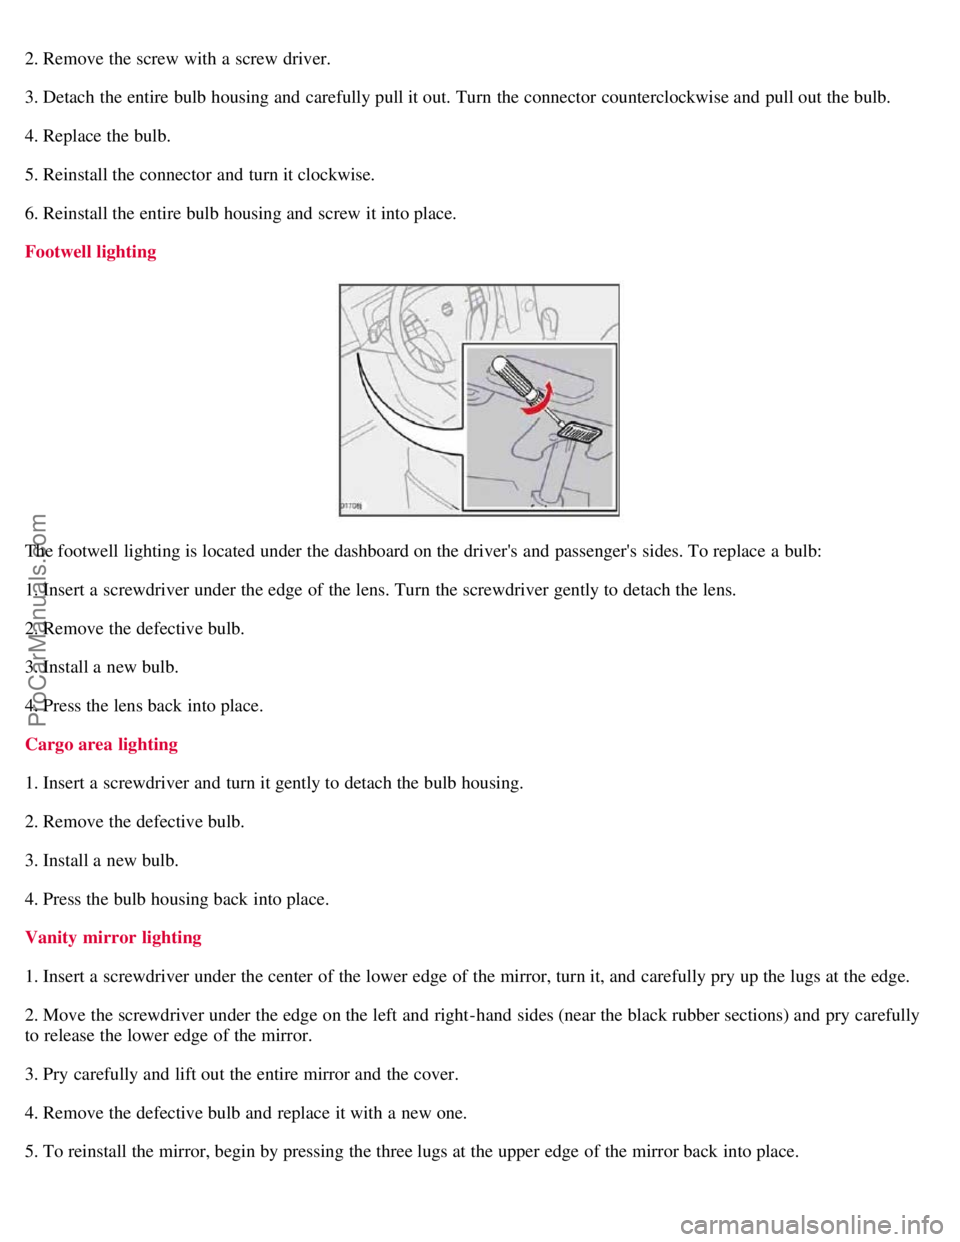
The footwell lighting is located under the dashboard on the driver's and passenger's sides. To replace a bulb:
1. Insert a screwdriver under the edge of the lens. Turn the screwdriver gently to detach the lens.
2. Remove the defective bulb.
3. Install a new bulb.
4. Press the lens back into place.
Cargo area lighting
1. Insert a screwdriver and turn it gently to detach the bulb housing.
2. Remove the defective bulb.
3. Install a new bulb.
4. Press the bulb housing back into place.
Vanity mirror lighting
1. Insert a screwdriver under the center of the lower edge of the mirror, turn it, and carefully pry up the lugs at the edge.
2. Move the screwdriver under the edge on the left and right-hand sides (near the black rubber sections) and pry carefully
to release the lower edge of the mirror.
3. Pry carefully and lift out the entire mirror and the cover.
4. Remove the defective bulb and replace it with a new one.
5. To reinstall the mirror, begin by pressing the three lugs at the upper edge of the mirror back into place.
ProCarManuals.com