2007 VOLVO S40 brake
[x] Cancel search: brakePage 44 of 208

12. High beam indicator
13. Clock setting button - Turn the button to set the time.
14. Temperature gauge - The gauge indicates the temperature of the engine cooling system. If the temperature is
abnormally high and the needle enters the red zone, a message is shown in the display. Bear in mind that auxiliary
lamps in front of the air intake reduce the cooling capacity at high outside temperatures and high engine loads.
15. Indicator and warning symbols
51 02 Instruments and controls
Indicator and warning symbols
Function check
The indicator and warning symbols
1 light up when you turn the ignition key or the optional keyless drive start control
to the driving position (position II) before starting. This shows that the symbols are functioning.
When the engine starts, all symbols go out. If the engine is not started within 5 seconds, all of the symbols except
CHECK ENGINE and will go out. Certain symbols may not have their functions illustrated, depending on the car's
equipment.
The PARK BRAKE symbol will not go out until the parking brake has been released.
1On certain engines, the symbol for low oil pressure is not used. Instead, a text warning is provided in the information display, see also page 190.
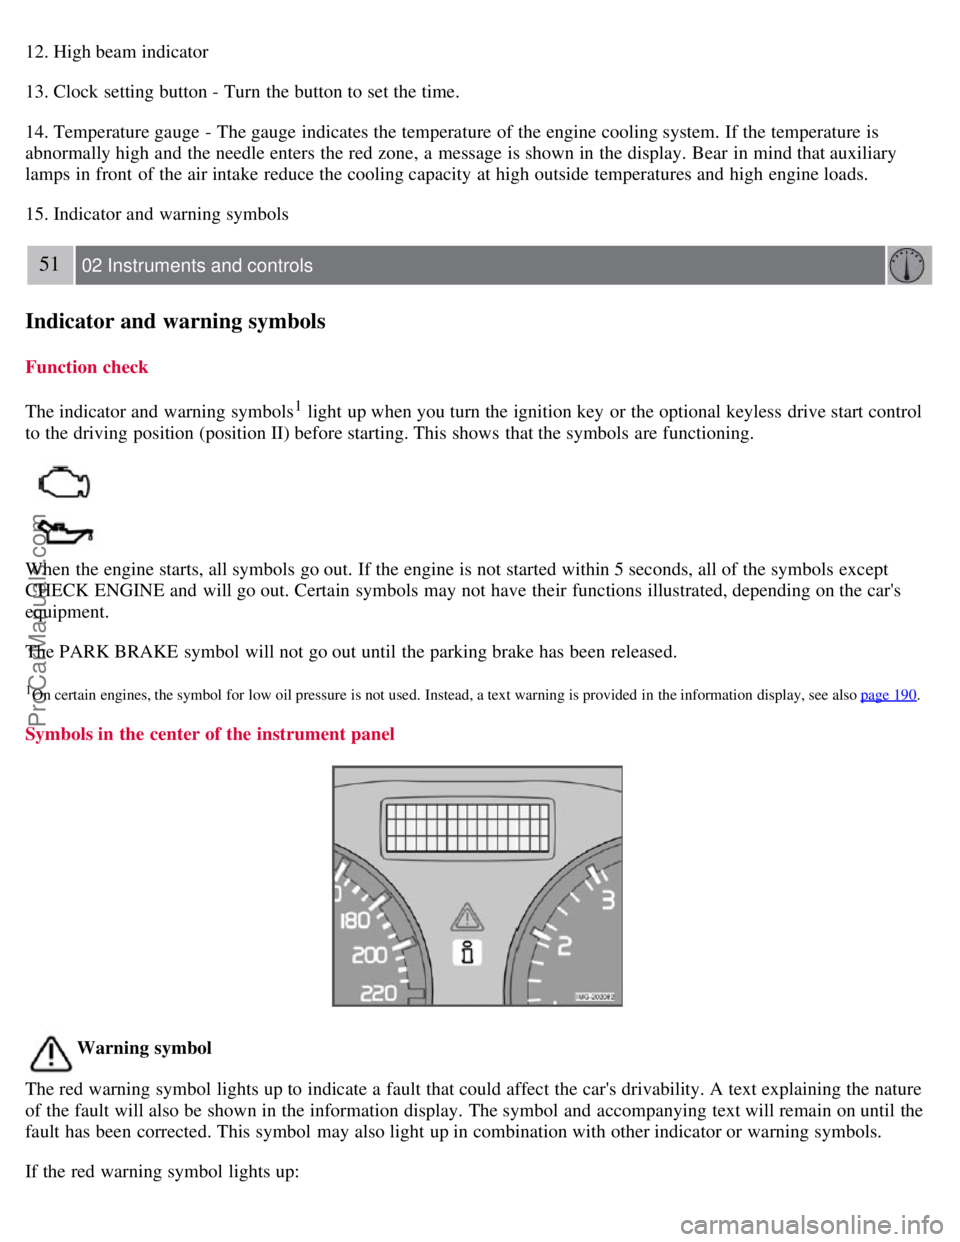
Symbols in the center of the instrument panel
Warning symbol
The red warning symbol lights up to indicate a fault that could affect the car's drivability. A text explaining the nature
of the fault will also be shown in the information display. The symbol and accompanying text will remain on until the
fault has been corrected. This symbol may also light up in combination with other indicator or warning symbols.
If the red warning symbol lights up:
ProCarManuals.com
Page 46 of 208

Even so, an uncorrected condition could hurt fuel economy, emission controls, and drivability. Extended driving
without correcting the cause could even damage other components in your car.
NOTE
Canadian models are equipped with the second symbol.
2. Anti-lock Brake system (ABS)
If the warning light comes on, there is a malfunction of the ABS system (the standard braking system will still
function).
The vehicle should be driven to a trained and qualified Volvo service technician for inspection. See page 140
for
additional information.
NOTE
Canadian models are equipped with the second symbol.
3. Rear fog light
This symbol indicates that the rear fog light (located in the driver's side taillight cluster) is on.
4. Stability system STC or DSTC
This indicator symbol flashes when the STC (Stability and Traction control system) or the DSTC (Dynamic Stability
and Traction control system) is actively working to stabilize the car. See page 142
for more detailed information.
5. Not in use
6. Fuel level warning light
When this light comes on, there are approximately 2.1 US gallons (8 liters) of fuel remaining in the tank.
53 02 Instruments and controls
Symbols - instrument panel
Symbols - right side
ProCarManuals.com
Page 47 of 208

1. Turn signal indicator for trailer (certain models)
If you are towing a trailer, this light will flash simultaneously with the turn signals on the trailer. If the light does not
flash when signaling, one of the turn signals on the trailer or on the car are not functioning properly.
2. Parking brake applied
This light is on when the parking brake (hand brake) is applied. The parking brake lever is situated between the front
seats. See page 67
for more information.
NOTE
Canadian models are equipped with the second symbol.
3. SRS system warning light
If this light comes on while the car is being driven, or remains on for longer than approximately 10 seconds after the
car has been started, the SRS system's diagnostic functions have detected a fault in a seat belt lock or tensioner, a front
airbag, side impact airbag, and/or an inflatable curtain. Have the system(s) inspected by a trained and qualified Volvo
service technician as soon as possible.
4. Oil pressure warning light
1
If the light comes on while driving the car, stop the engine immediately, and check the engine oil level. If the oil level
is normal and the light stays on after restart, have the car towed to the nearest authorized Volvo retailer. After hard
driving, the light may come on occasionally when the engine is idling. This is normal, provided it goes off when the
engine speed is increased.
5. Seat belt reminder
This symbol (and the seat belt reminder light above the rear view mirror) will light up if either front seat occupant has
not buckled his/her seat belt. If the car is not moving, the symbols will go out after approximately 6 seconds.
ProCarManuals.com
Page 48 of 208

6. Generator warning light
If the light comes on while the engine is running, have the charging system checked by an authorized Volvo workshop.
1 On certain engines, this symbol is not used to indicate low oil pressure. Instead, a text warning is provided in the information display, see also
page 190
.
54 02 Instruments and controls
Symbols - instrument panel
7. Brake failure warning light
If this light comes on while driving or braking, stop the car as quickly as possible in a safe place, open the hood, and
check the brake fluid level in the reservoir. See page 188
for the location of the reservoir.
NOTE
Canadian models are equipped with the second symbol.
WARNING
If the fluid level is below the MIN mark in the reservoir or if a "Brake failure - Service urgent" message is displayed
in the information display: DO NOT DRIVE . Have the car towed to a trained and qualified Volvo service technician
and have the brake system inspected.
If the BRAKE and ABS warning lights come on at the same time, this could indicate a fault in the brake system.
In this case:
1. Stop the car in a suitable place and switch off the engine.
2. Restart the engine.
3. If both warning lights go off, no further action is required and the car can be driven.
4. If both lights remain on after the engine has been restarted, switch off the engine again and check the brake fluid
level. See page 188
for the location of the reservoir.
Door open warning
The driver will be alerted if one of the doors, the hood, or the trunk lid are open or ajar.
At low speeds
If the car is moving at a speed of less than approximately 4 m.p.h. (7 km/h), the Information symbol in the instrument
ProCarManuals.com
Page 56 of 208

The cruise control buttons are located on the left side of the steering wheel hub.
1. Press the CRUISE button. CRUISE will appear in the function display in the center of the instrument panel.
NOTE
This does not set the vehicle's speed.
2. Press + or - to set the current speed. CRUISE ON will be displayed.
Increasing or decreasing speed
Use + or - in the following ways to increase or decrease the vehicle's speed:
1. Press and hold down + or - until the vehicle reaches the desired speed. This will become the set speed when the
button is released.
2. Press + or - for approximately a half second and release the button to increase or decrease vehicle speed by
approximately 1 mph (1.6 km/h).
NOTE
Cruise control will not function at speeds below 20 mph. (30 km/h).
Momentary acceleration, for less than 1 minute (e.g. when passing another car), does not affect cruise control
operation. The car will automatically return to the previously set speed when the accelerator pedal is released.
Temporarily disengaging the cruise control
Press 0 to temporarily disengage cruise control.
CRUISE will appear in the function display. The currently set speed is stored in the system's memory.
Cruise control is also automatically disengaged:
If the speed drops below approximately 20 mph (30 km/h) when driving uphill.
When the brake or clutch pedal is depressed.
If the gear selector is moved to the Neutral ( N) position.
During wheel spin or wheel lock-up.
If the vehicle's speed is increased by using the accelerator pedal for more than 1 minute.
Returning to the set speed
ProCarManuals.com
Page 61 of 208

NOTE
Regulations regarding the use of the hazard warning flasher may vary, depending on where you live.
67 02 Instruments and controls
Parking brake
Parking brake (hand brake)
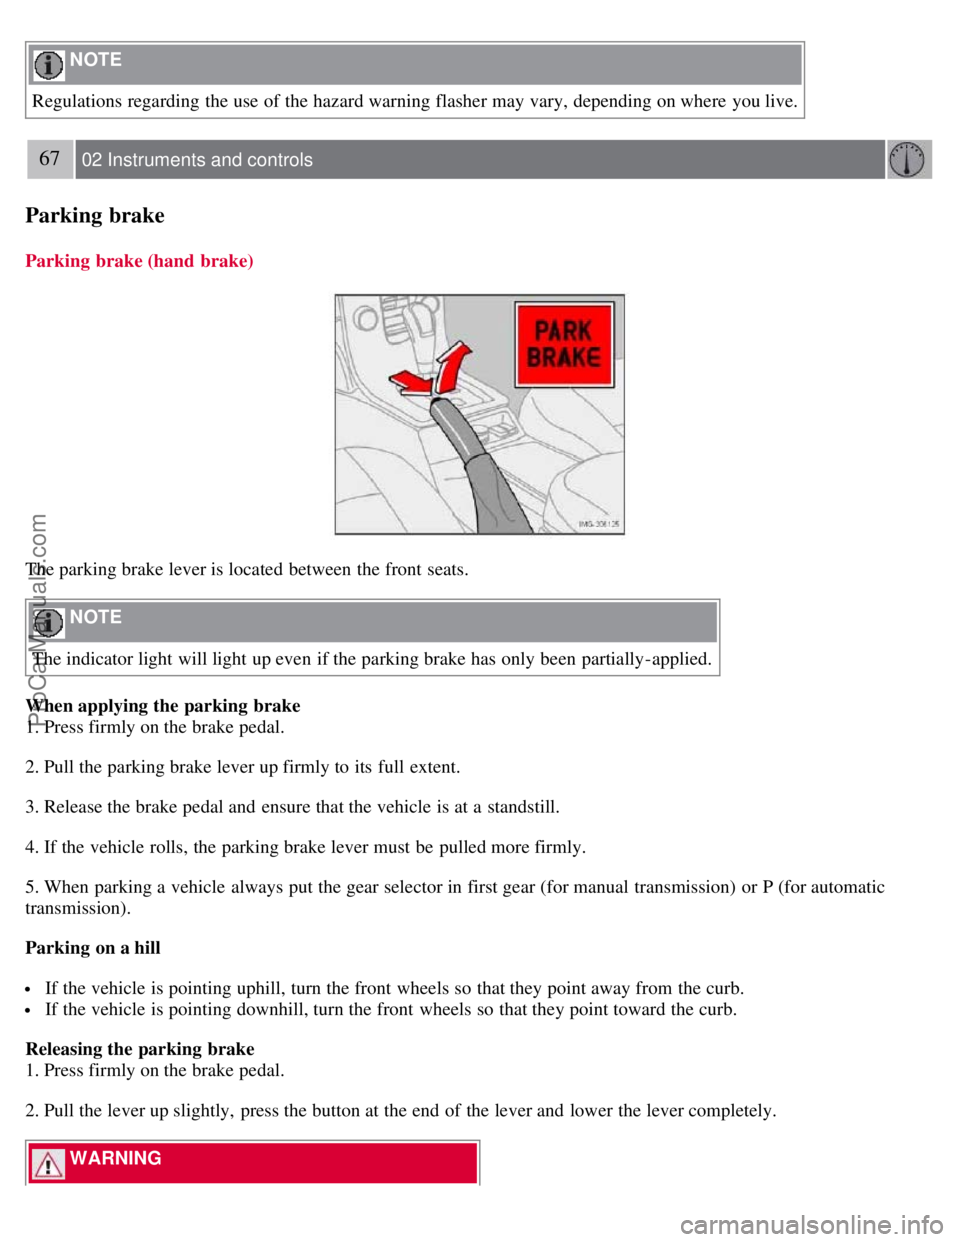
The parking brake lever is located between the front seats.
NOTE
The indicator light will light up even if the parking brake has only been partially-applied.
When applying the parking brake
1. Press firmly on the brake pedal.
2. Pull the parking brake lever up firmly to its full extent.
3. Release the brake pedal and ensure that the vehicle is at a standstill.
4. If the vehicle rolls, the parking brake lever must be pulled more firmly.
5. When parking a vehicle always put the gear selector in first gear (for manual transmission) or P (for automatic
transmission).
Parking on a hill
If the vehicle is pointing uphill, turn the front wheels so that they point away from the curb.
If the vehicle is pointing downhill, turn the front wheels so that they point toward the curb.
Releasing the parking brake
1. Press firmly on the brake pedal.
2. Pull the lever up slightly, press the button at the end of the lever and lower the lever completely.
WARNING
ProCarManuals.com
Page 62 of 208

Pull up the parking brake lever up firmly to its full extent.
Ashtrays/cigarette lighter
The auxiliary sockets can also be used for cigarette lighters. Ashtrays and lighters are available as accessories. Please
contact your Volvo retailer.
68 02 Instruments and controls
Power windows
Operation
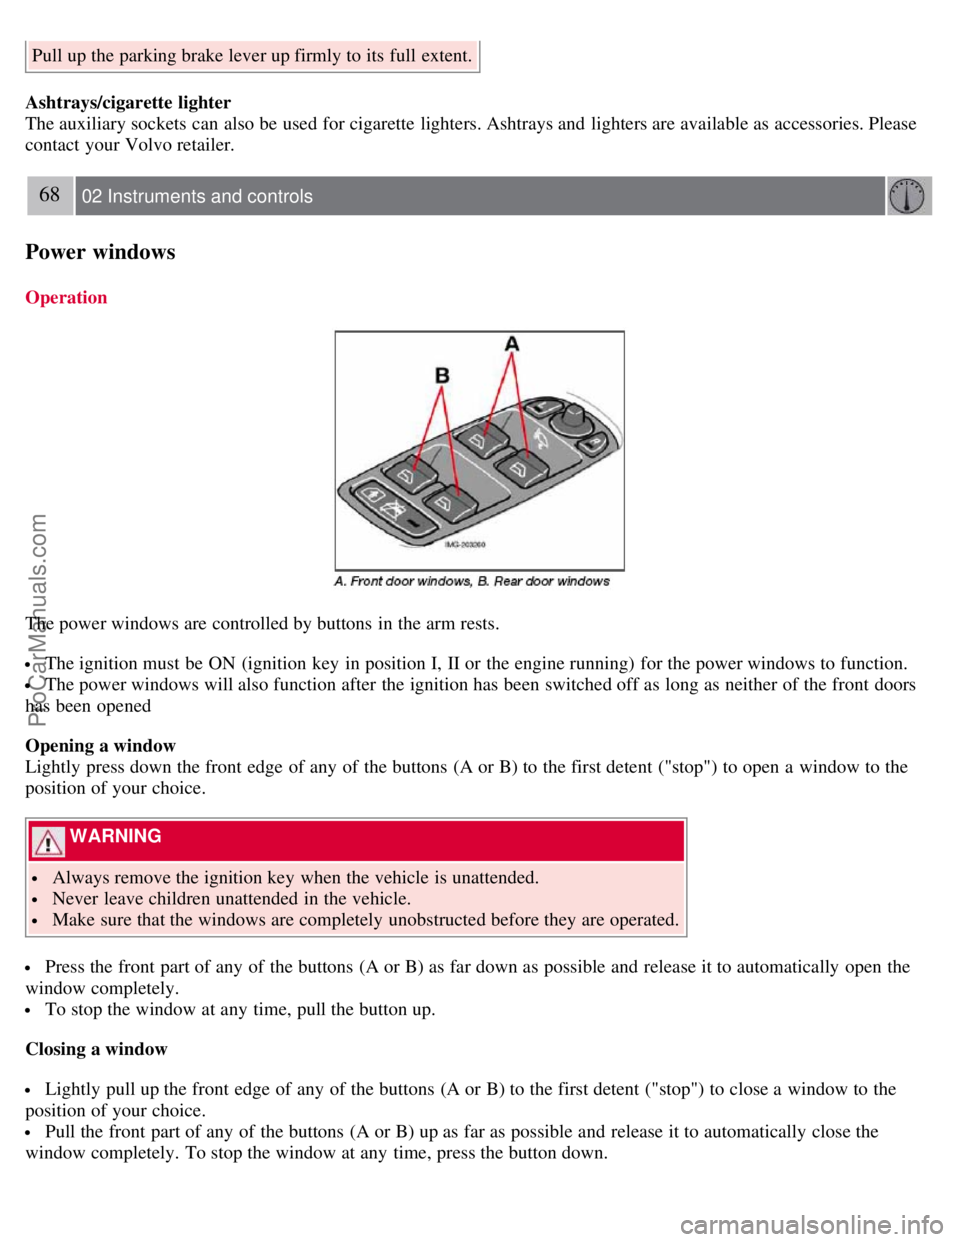
The power windows are controlled by buttons in the arm rests.
The ignition must be ON (ignition key in position I, II or the engine running) for the power windows to function.
The power windows will also function after the ignition has been switched off as long as neither of the front doors
has been opened
Opening a window
Lightly press down the front edge of any of the buttons (A or B) to the first detent ("stop") to open a window to the
position of your choice.
WARNING
Always remove the ignition key when the vehicle is unattended.
Never leave children unattended in the vehicle.
Make sure that the windows are completely unobstructed before they are operated.
Press the front part of any of the buttons (A or B) as far down as possible and release it to automatically open the
window completely.
To stop the window at any time, pull the button up.
Closing a window
Lightly pull up the front edge of any of the buttons (A or B) to the first detent ("stop") to close a window to the
position of your choice.
Pull the front part of any of the buttons (A or B) up as far as possible and release it to automatically close the
window completely. To stop the window at any time, press the button down.
ProCarManuals.com
Page 86 of 208

2. Use this control to raise or lower the front edge of the seat cushion.
3. Use this control to raise or lower the rear edge of the seat cushion.
4. Turn this knob (option on some passenger's seats) to adjust the firmness of the lumbar support
1.
5. Turn this knob to adjust the backrest tilt.
6. Control panel for the optional power seat.
WARNING
Do not adjust the seat while driving.
The seat should be adjusted so that the brake pedal can be depressed fully.
Position the seat as far rearward as comfort and control allow.
1 Also applies to the optional power seat.
Folding down the front seat backrests
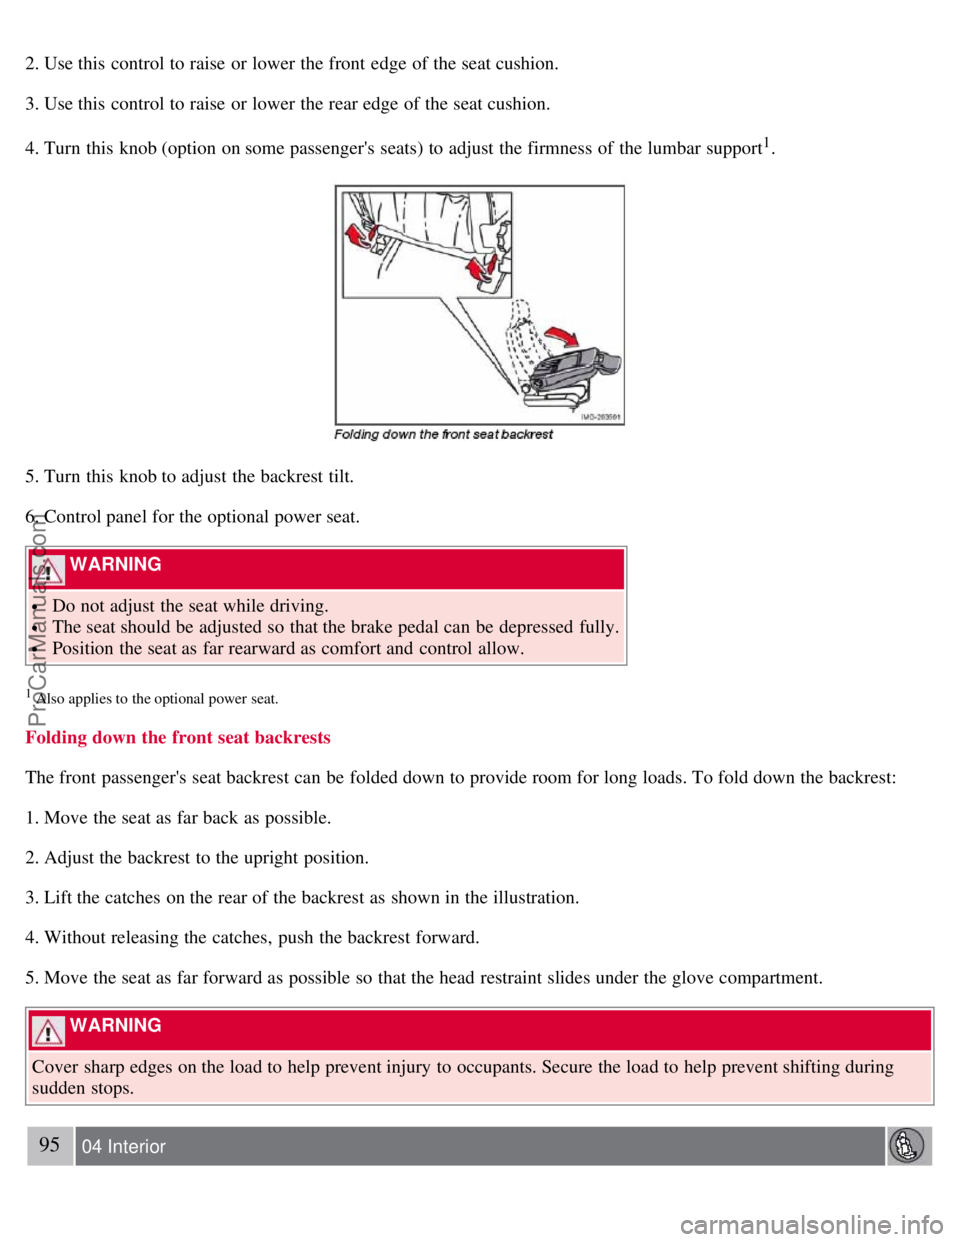
The front passenger's seat backrest can be folded down to provide room for long loads. To fold down the backrest:
1. Move the seat as far back as possible.
2. Adjust the backrest to the upright position.
3. Lift the catches on the rear of the backrest as shown in the illustration.
4. Without releasing the catches, push the backrest forward.
5. Move the seat as far forward as possible so that the head restraint slides under the glove compartment.
WARNING
Cover sharp edges on the load to help prevent injury to occupants. Secure the load to help prevent shifting during
sudden stops.
95 04 Interior
ProCarManuals.com