2007 VOLKSWAGEN GOLF PLUS wiper blades
[x] Cancel search: wiper bladesPage 129 of 541
In this section you'll find information on th e lowing:
Indicator light . . . . . . . . . . . . . . . . . . . . . . . . . . . . . . 128
func tions . . . . . . . . . . . . . . . . . . . . . . . . . . . . .
w iper service pos itio n . . . . . . . . . . . .
Rain sensor . . . . . . . . . . . . . . . . . . . . . . . . . . . . . . . . . 131
and refilling wind shi eld washer fluid 132
More information :
Air condition er air rec irculation mode page 226
Preparatio ns for working in the engin e page 242
Exte rior care and cleaning=> pag e 262
washer fluid without enough frost can freeze on the windshield and duce visibility.
Never use the wind shield wipers/washers when it is freezing without first defrosting the windshield. The washer solution may freeze on the windshie ld and reduce visibility.
sonal injury.
Always replac e wiper blades that are worn,
damaged, or do not kee p the windshield clear.
Note
To help prevent damage to the wiper blades and the wiper motor when it is cold outside, always make sure that blades are not frozen to the shi eld before operating the wipers. When parking the vehicle in freezing weather, it can be he lpful to
plac e th e windshield wipers in the so they do not fr eeze to the windshie ld
Plea se first read and note th e imrodu cto ry informati on and hee d the on page 128.
Light s up Possibl e ca use
was her and re ar windo w
was he r fluid leve l too low.
the ignition is switc h ed Note
Failure to heed warning ligh ts or text can resu lt in ve hicl e damage
Page 132 of 541
lifting and folding the wiper blades away from
th e
windshield
Move the wiper arm s th e serv ice position
Do not handle the wiper b lades; h andle the
wipe r arms o nl y at the a uachment above the w iper blades.
Rai n sens or
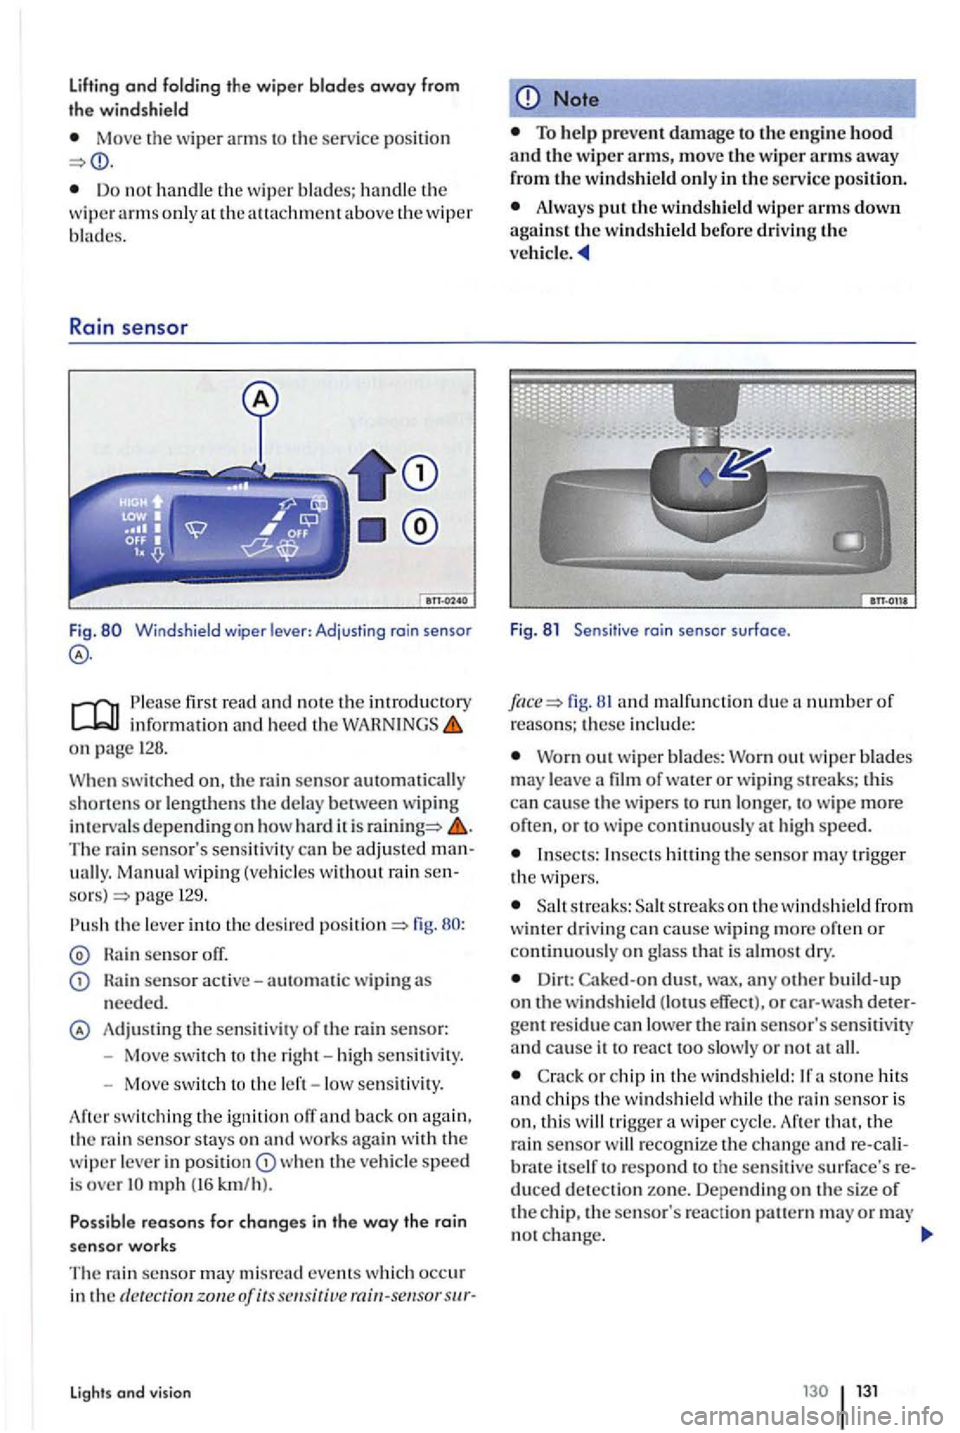
Fig. Windshield wiper lever : Adjusting rain senso r
first read and note the introductory information and heed th e WARNINGS on page 128.
When
swit ched on. the rain sensor automatically
shorte n s or le ngthens the de lay betwee n wiping in tervals depend in g on how hard it is The rain sensor's sensiti vity can be adjusted manuall y. Manual wiping (vehicle s w ith out rain sensors) page 129.
Rain sensor off.
sensor active-automatic wiping needed.
Adju stin g the sensit iv it y of the rain sensor:
- Move switc h t o the right -hi gh sen siti vity.
- Move sw itch to the left - low se nsitivity.
swit ch in g th e ignition off an d back on again ,
t h e ra in sensor stays o n and works agai n with the wiper leve r in w he n the vehicle speed is over
events which occur in the dete ction zone of its
Lights and vision
Note
Always the windshield wiper arms down against the windshield before driving the ve hicle.
Fig . 8 1 Sensit ive rai n sensor surface .
fig. 81 an d malfu nction due number of reasons; these in clu de:
Worn out w ip er blades: Wo rn out w iper blades m ay lea ve a film of water or w ipi ng streaks; thi s can cause the wipers run longe r, to wip e more often , o r to w ipe continu ously at h ig h speed.
Insects: Insects the sensor may tri gger the w ipers .
s tr eaks: streaks o n th e w indsh ie ld from
w inter drivin g can cause wiping more often or continu ously on g lass that is almos t dry.
Dirt: Caked-on dust, wax, any build- up on the windshield (lotus effect), or car -w ash detergent residue can lower the rain sensor's sen siti vity and cause it to react too slowly or n o t all.
C ra ck or chip in the wind shi eld :
th at, th e
rai n sensor will recog nize the c ha nge re -cal iitself to respond to the sensit ive su rface's reduced detection zone. Depending on th e s ize of the chip, the sensor's reaction ern may or may no t change.
Page 261 of 541
To he lp prev ent paint damage to the engine
hood , place wiper blades against th e winds hie ld
after they have dried . Do not le t them snap back
in to p lace.
Washing with a power washer
first r ead and note the introdu ctory information and heed the on pagc262.
A lways follow the instr u ctions
th ere is enoug h dis tan ce to soft ma te
ria ls s uch as rubb er h ose s or insulatin g material as
well a s th e s en so rs of the Dis tance Co ntrol
sys te m . Th e
Never usc conce ntrated jet nozz les or dirt bla sters
Imp rope r usc of power washers can cause se
rious invisibl e permanent d a m age leading to
ti re failur e and loss of ve hicle cont rol. This can cause accide nts and se riou s person al injury.
Keep sufficient di stance b e tween wate r je t
and tir es. Never wash tir es with a no zzle that sprays th e wa ter out in a direct stream re g ard
l ess of th e di stance to the tir e and even for a very
short time .
Neve r u sc b lasters ." to clean tires. Even
a relatively long spraying dista nce and very
s hort applicatio n tim e can do visi ble or inv is ibl e damage to tire s.
Core, maintenance
Lock the hatc h to prevent unintentional ope ning in the car
the ve hicl e has been wash ed , th e wet
b ra kes or, in winter, brake discs or pads coated
w ith icc, rea ct slowe r and need l onger stopping
dista nces.
A lways dry the brakes and clean off any ic e
coa ting s with a few care ful applicatio ns of th e
bra ke. Make sure no t to endan ge r ot11er motor
i sts or c yclists or disobey legal requi rements.
Note
Wate r temperature should not be m ore tha n
To he lp prevent damag e to paint, do not was h th e ve hicl e in dir ect sunli ght.
In order for and Assis t to work correctly, the sensors in the rear bumper must b e kept clean and clear of snow and ice. When using a pow er was her or steam clean er,
onl y spray the se n so rs directly for a short peri od
o f tim e and always keep the nozzle at l eas t4
in ch es em) from the sensor.
D o not clea n icy or snow- covere d w indow s
w ith
When washin g or rinsin g the vehicle in cold
weather, do no t let wate r ge t into the lock cylin
d
ers or po int the hose at gaps around th e doo rs ,
hood or rea r hatcl1. The w ate r could freeze on t11c
locks and sea ls and mak e it difficu lt to open th e
Page 263 of 541
first r ead and not e th e introdu cto ry in fo rmati on and heed th e on page 262.
wip er b lades have a g raphit e
coating. Th e gra phit e coating le ts th e w ip er b la d es
g lid e smoothl y over the w ind shi eld.lfthis coating
i s worn or d am age d, the w ipers m ay grab or squ eak.
wip er bla d es regularly. Wiper blades that grab and squeak m ust b e re placed if worn or
Replace wo m or damaged wip er b lades ate ly. R ep lac em ent may be purch ased fro m
a ny authorize d Se rv ic e Faci lity
Lifting and windshield wiper arms
W he n lift in g o r re plac ing a w iper b la d e o n grip it onl y b y its m ounting and not by
th e blad e itself.
For windshi eld wipe rs p lease note: M ove the
w ip er a rm s in to th e serv ice pos ition prior to lifting
th em awa y fro m the page 128.
Cleaning th e wiper blades
Lift and the wip er arm(s) awa y from the
w ind shi eld I rea r w indow.
Usin g a soft cloth, care full y re m ove dust a nd dirt fro m th e wiper bla d es.
clean th em
w ith a sp onge or
Changing the w ip er blades on th e windshi eld
Lift and th e wipe r arm(s ) awa y from th e
w in dsh ie ld I re a r w ind ow .
maintenanc e
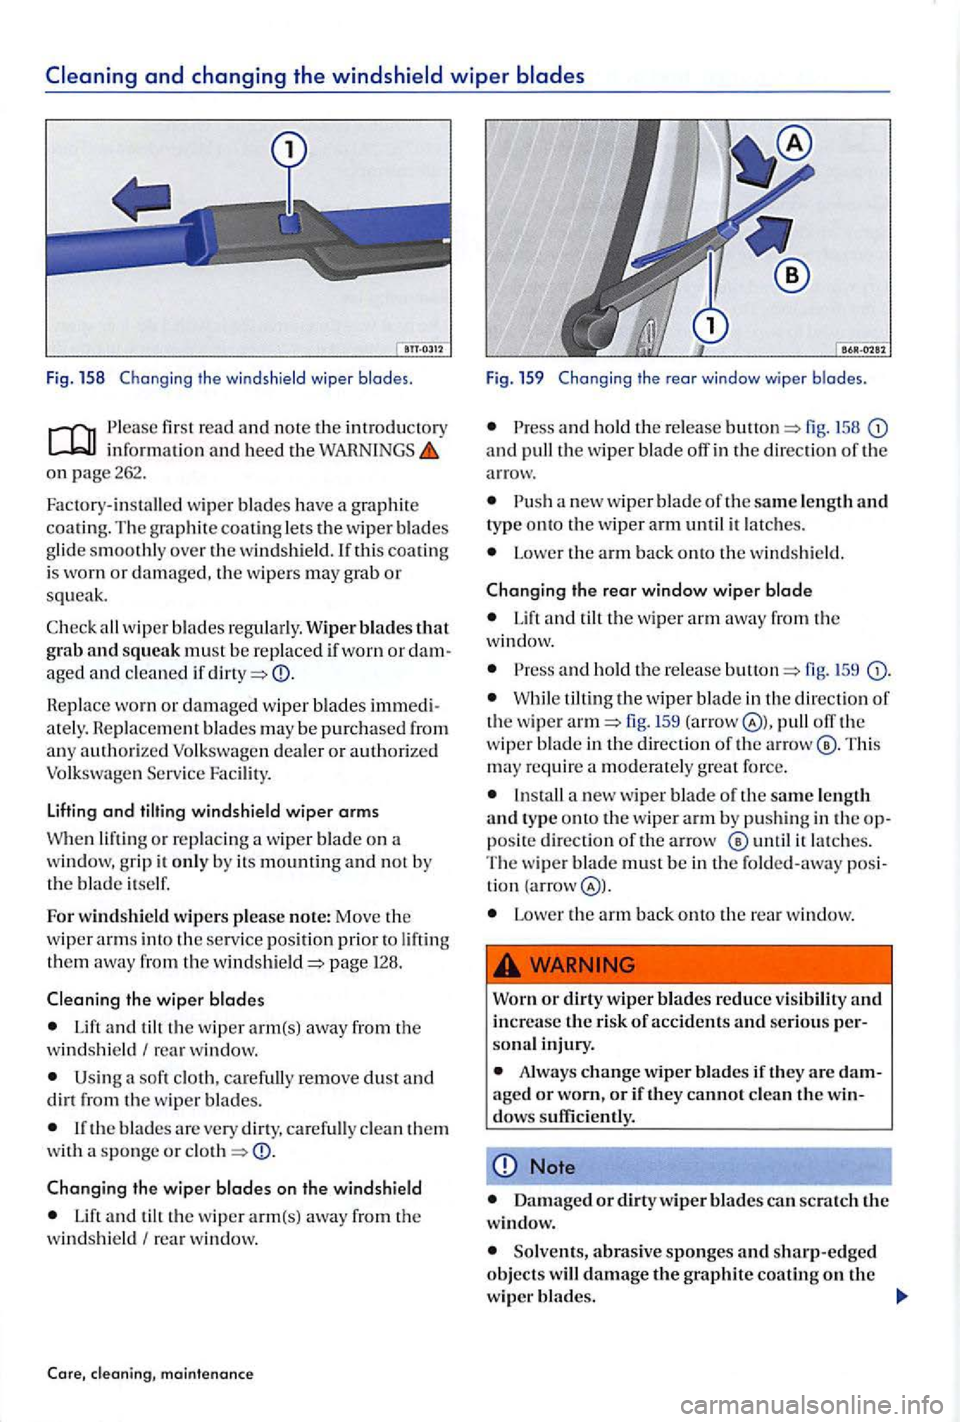
Fig. 159 Changing the rear windo w wip e r b lades.
and h o ld th e re le a se 15 8 and th e w iper blade off in the direc tio n of th e
a rro w.
a
Lo we r th e arm b ack onto the w in d shield .
Changing the rear window w iper
Lift and tilt th e w iper a rm aw ay fro m the
w ind ow.
and ho ld t he re lease 1 5 9
W hile th e w iper b lade in the direc tio n of th e w ip e r !59 (arro w off th e
wip er blade in the dir ection of th e This
m ay require moderat ely
a new wiper bl ade o f th e same length and type onto th e w ip er a rm b y pu shin g in the pos ite dir ectio n of th e arrow ® until it l atc h es.
Th e w ip e r b lade must b e in the fo ld ed -aw ay
Low er th e arm bac k onto the rea r w indow.
Worn
or d ir ty wiper blades reduce visibilit y and increase the ri sk of accidents and se riou s so n al in jury.
Always change wip er blades if th ey are or if they cannot clea n the
Note
Damag ed or dirty w ip er blades can sc ra tch the window.
graphit e coating on th e
wiper blades.
Page 522 of 541
N
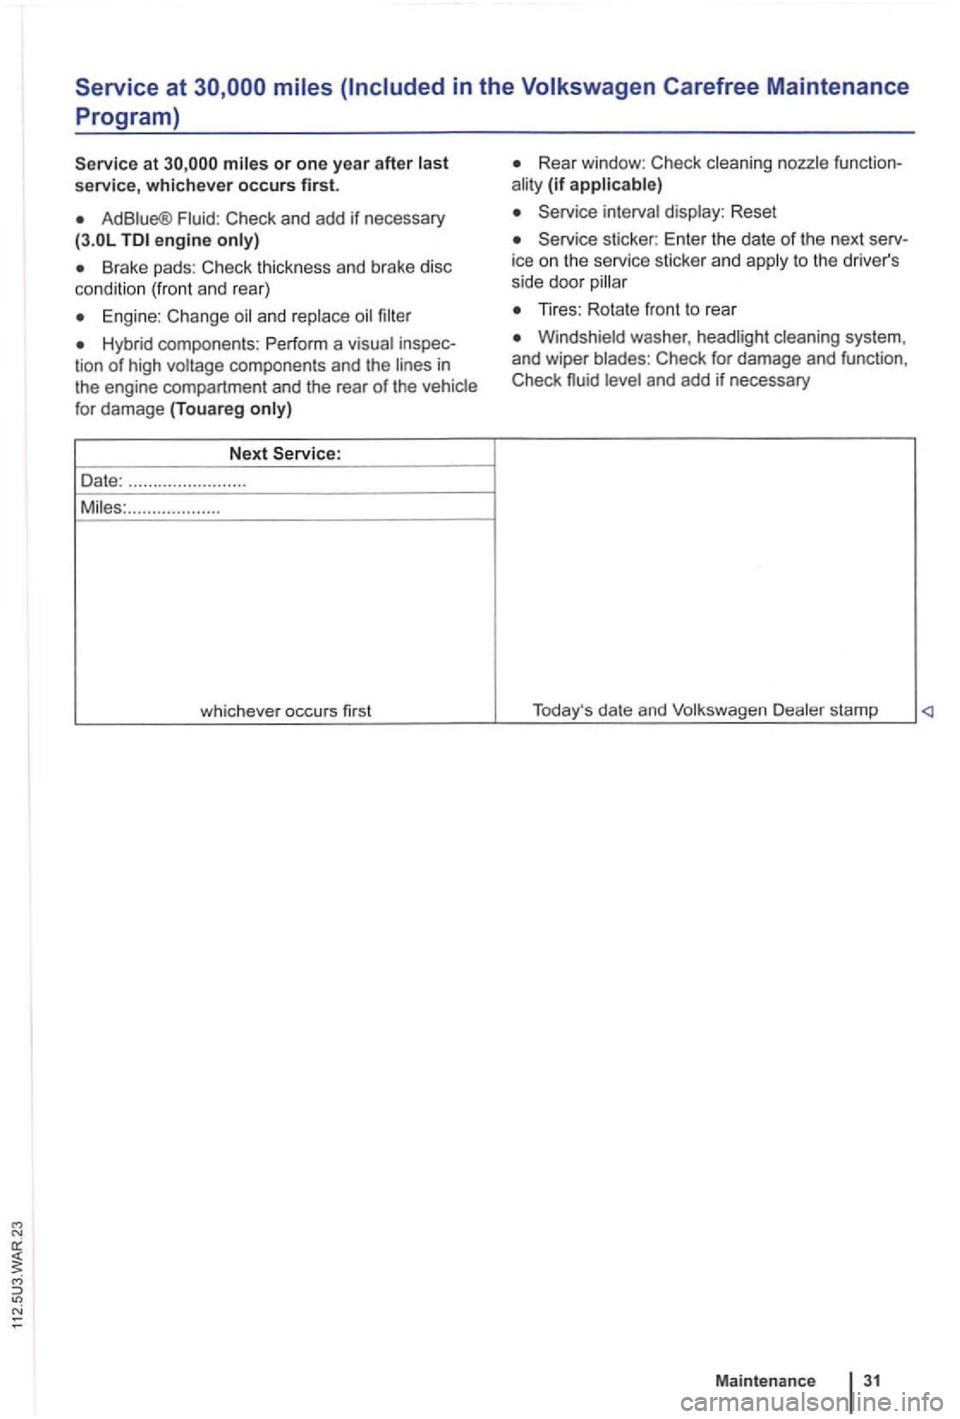
Service at
service, whichever occurs first.
Ad Fluid : Check and add if nec essary engine
Brake pads: C heck thick ness and brake disc
cond ition (front and rear)
Engine : Change
Hybrid components : P erform a visua l inspeccomponents and the engine compartment and the rear of the vehicle
for damage (Touareg
Rear window : C heck cleaning nozzle function(if applicable)
Service interval display: Reset
Service sticker: Enter the date of the next serv
ice on the service sticker and to the driver's
s ide door
Windshield washer , headlight cleaning system ,
and wiper blades : Check for damage and functi on,
Check
Maintenance
Page 532 of 541
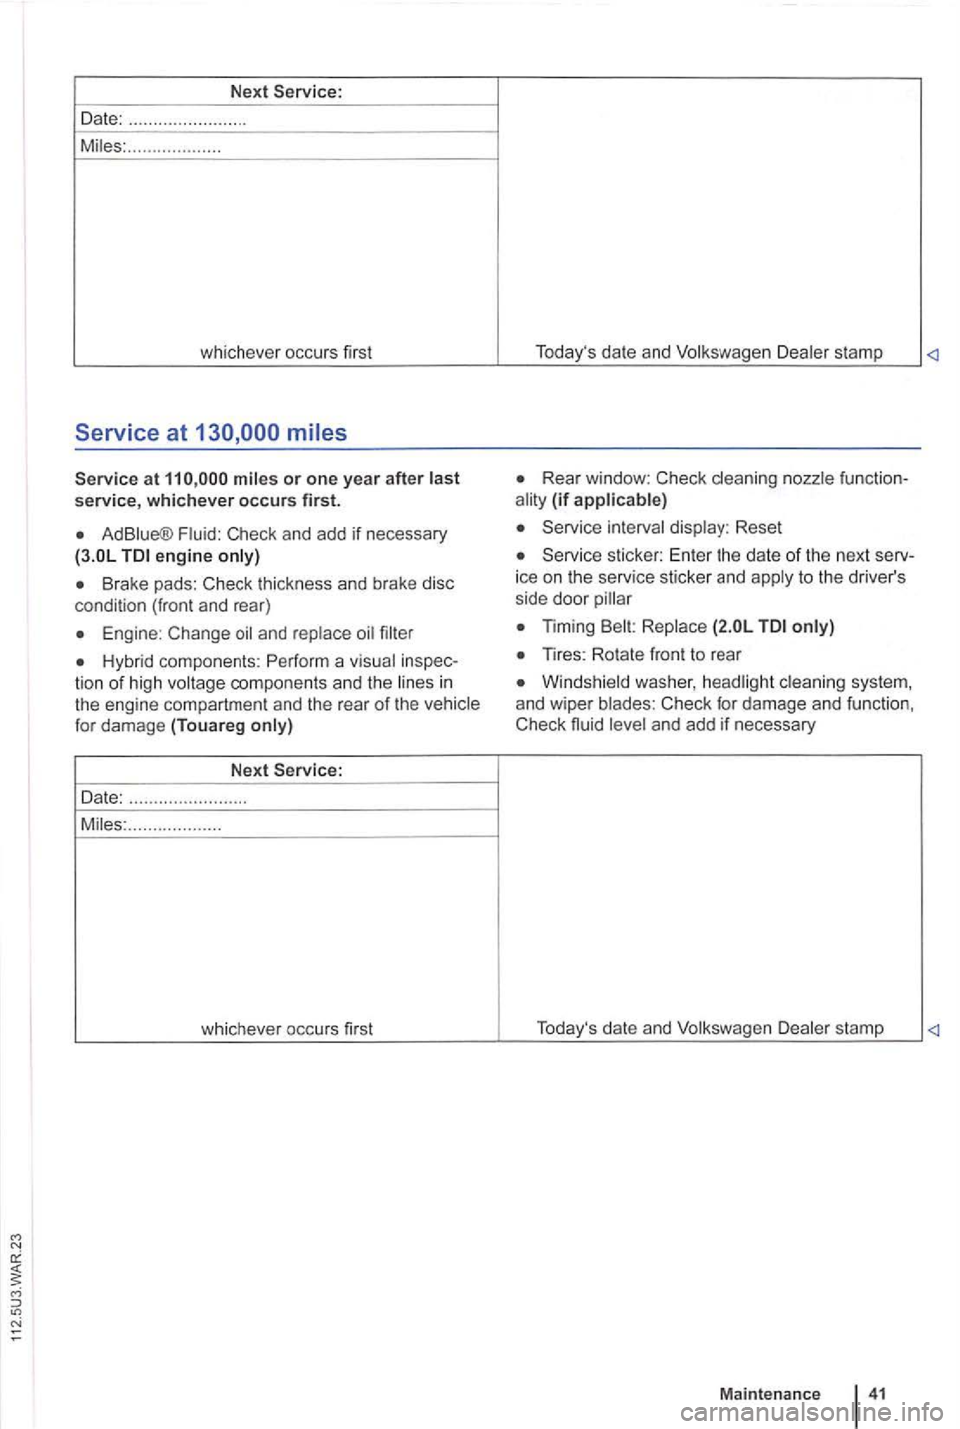
Next
Date: ....... ... .. ...... . ....
M iles: .......... .........
whichever occurs first
Service at
at
Ad Blue® Fluid: Check and add if necessary engine only)
tion of high voltage components and the li nes in the engine compartmen t and the rear of the vehicle
for damage (Touareg only)
Next
Date: ....................... .
Miles: ...
............... . T
oday's date and Volkswagen Dealer stamp
Rear win dow: Check cleaning nozz le ality (if applicable)
Service interval display : Reset
Service sticker: Enter the date of the next ice on the serv ice stic ker and apply to the driver's
side door
Windsh ie ld h eadl igh t clea ning and wiper blades: Check for damage and Check and add if necessary
Maintenanc e 4 1