2007 VOLKSWAGEN GOLF PLUS ignition
[x] Cancel search: ignitionPage 242 of 541
GeHing ready to work in the e ngine compartment
Please on page 242.
Checklist
Before any work in the engi ne companment, carry out the follo wing steps in the order in whi ch they are
Par k the ve hicl e on leve l surface in a safe place.
Hold the pedal down until the engin e is switched off.
page
S hift the tran smissio n into (automatic) or (manual page 179.
S top the engi ne and remove the key fro m the ignition pag e
Le t th e eng in e cool d ow n
Keep child re n and o th ers from the ve hicl e.
Make sure th e ve hicle cannot move unexpe ctedly.
Dis regardi ng the safe ty- re lated checkli st may
result in serious injuries.
Alwa ys review use common
Page 252 of 541
read and note the introductory
on page 252.
If th e coolant level drops too low, the engin e
coo lant level/ tempe ratur e warni ng ligh t lights up.
Park the ve hicl e on level ground.
Always let the engin e cool
th e engine hood
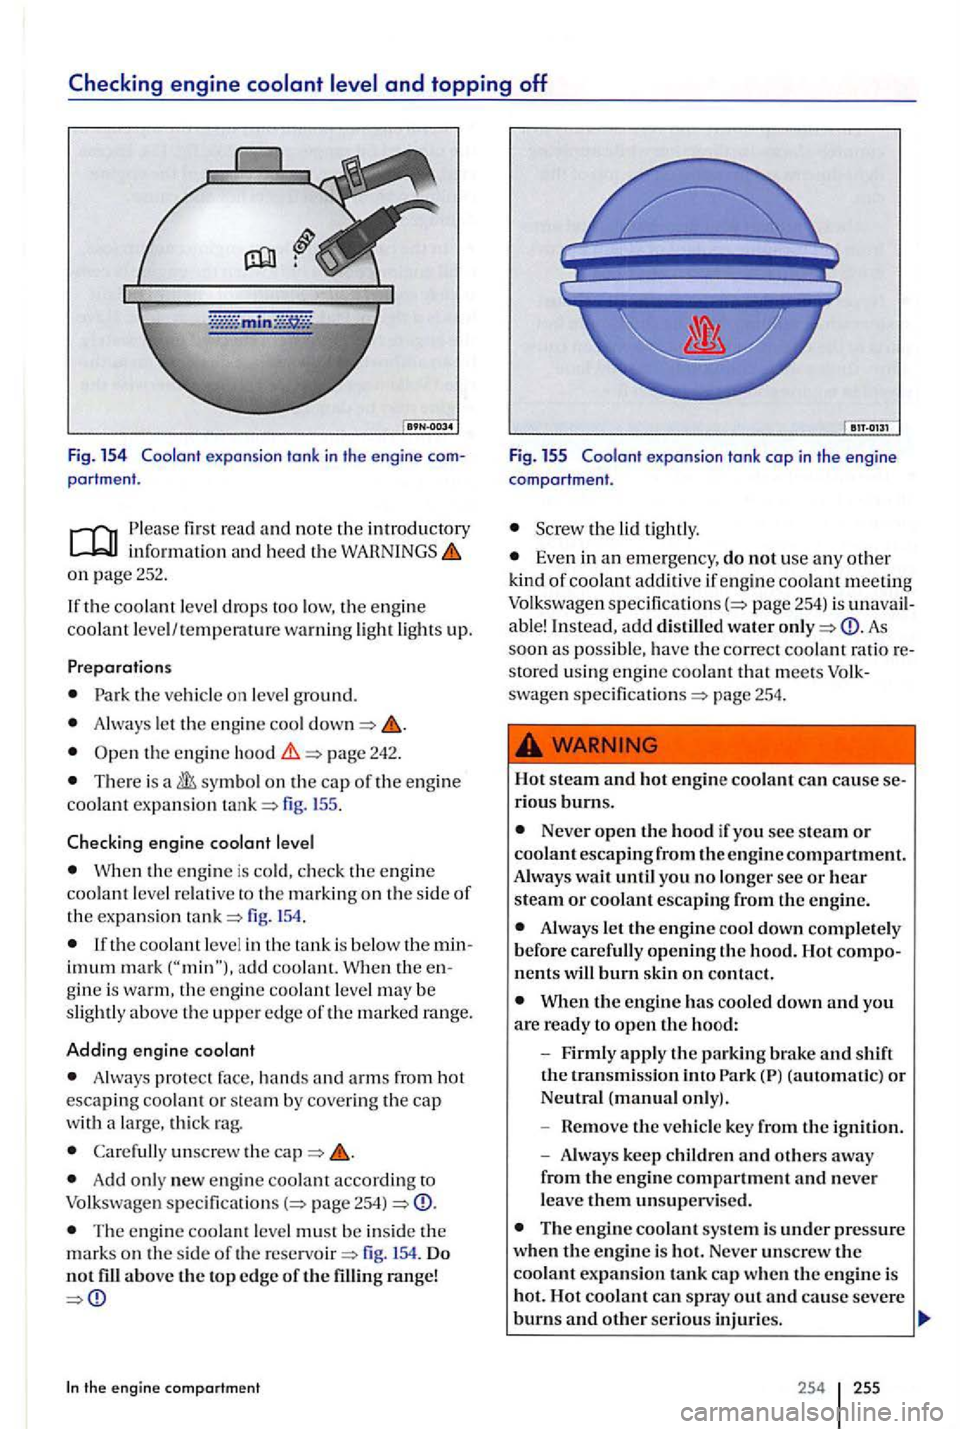
There is a fig.
When the eng in e is co ld, check the e ngine
coolant leve l relat ive to th e marking on th e sid e of th e expa nsio n tank fig. 154.
Always protec t face, hands and arms from h ot
escaping coo lant o r steam by cover ing the cap with a larg e, thi ck rag.
Carefully unsc rew the
Add new engine co olant ac co rding to Volkswagen specifications page 254)
Th e engi ne coo lant leve l must b e in sid e the mark s on the sid e of the 154. Do
not above top edge of the
the engine compartment
Fig. 155 Coolan t e xpans ion tank cap in the eng in e
compartment.
Screw the lid tightly.
Even in a n em erge ncy, do not use any other kind of coolant addi tive if eng ine coolant meeting
Volkswagen pa ge 254) is una v ail
able! Instead, add distilled water
page 254.
H
ot steam and hot engin e coo lant can cause se
rio us burns.
Never open the hood if yo u sec steam o r coolant esca ping from the engine compartment. Always wait until you no longer see or hear steam or coolant escapin g from the engine.
Always let the e ngin e cool down compl etel y
before carefully opening th e hood.
When the engin e has coo le d down and you are ready to open hood:
- F
irmly apply the parking brake and shift (automatic) o r Neutral (manual only).
- Hemov e
the vehicl e key from the ignition.
- Always keep c
hildren and others away from the en gin e compartment and never
leave them unsupervise d.
The engine coolant system is under pressure
w hen the engine is hot. Neve r unscrew the coolant expansion tank cap whe n the engine is hot. Hot coolant can spray out and ca use severe burns and other serious injuri es.
254 255
Page 254 of 541
th is sect io n yo u'll find inform ation on th e low ing:
Warning light . . . . . . . . . . . . . . . . . . . . . . . . . . . . . . . 258
Check ing . . . . . . . . . . 2 59
Charg ing, replacing, disconnect ing
and c o nn ecti ng the ve hicle boHery . . . . . . .. . . . . . . . . . . . . . . . . . . .
you are uncerta in in anyway , have the work do ne an aut ho rized Volk swage n dealer or au th orized
Volkswage n Service Serious personal
tery
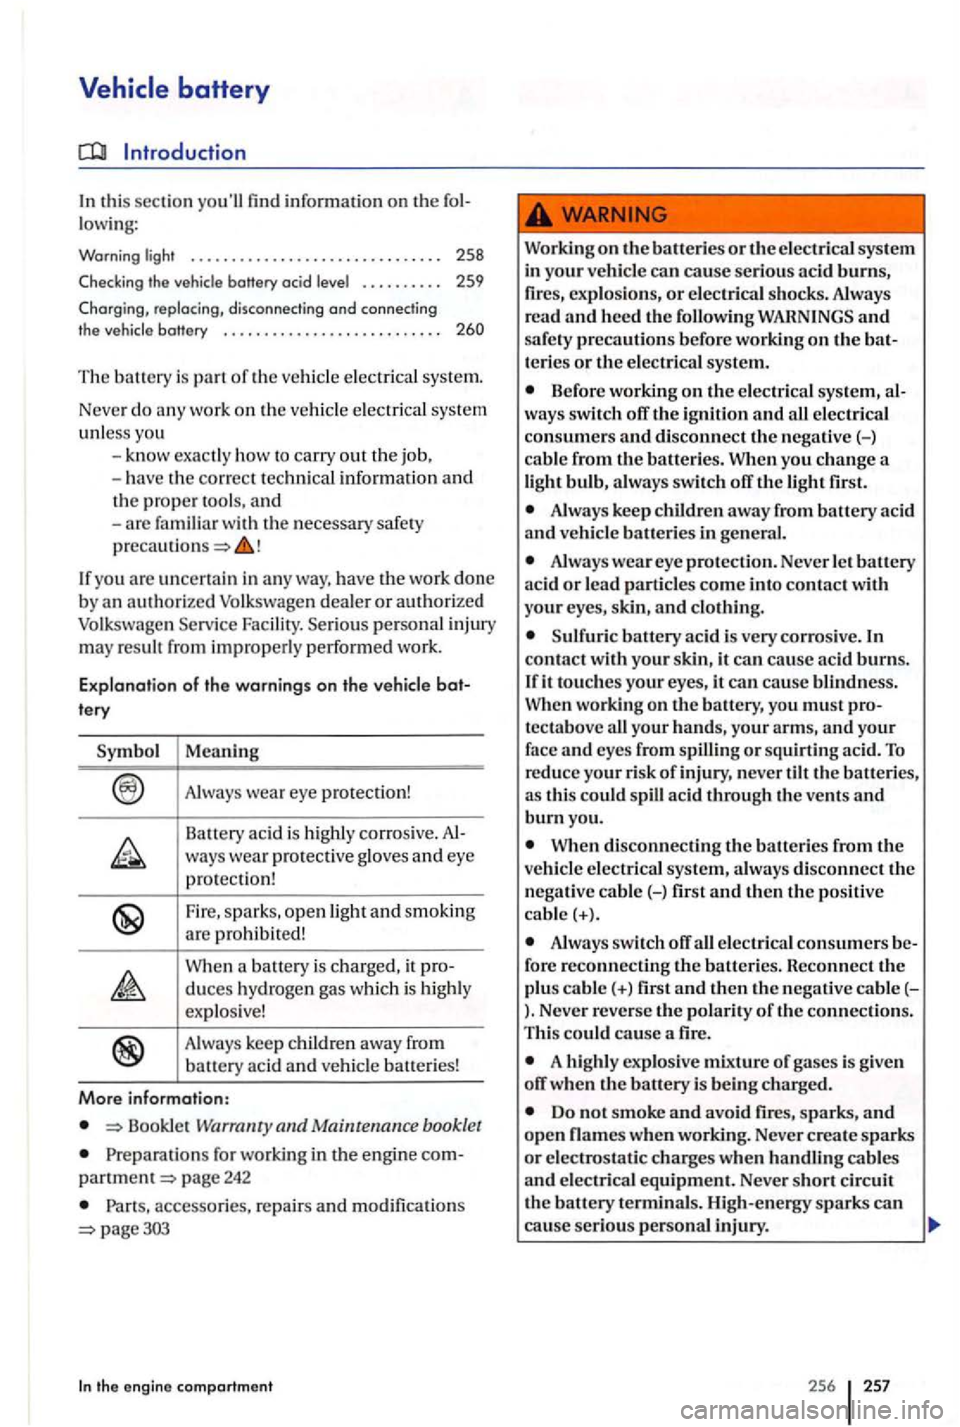
Symbol Meaning
Always wear eye protectio n!
B a tt ery
acid is hi ghl y co rro sive. ways wear protective gloves and eye protec tion !
Fire, sparks, op en light and sm okin g
a re pro hibit ed !
W hen a batt ery is c ha rge d, it
Bookle t Warranty and Main tena nce book let
fo r worki ng in th e eng ine page 242
Par ts, acce ssories , repai rs and m odifica tio ns
or the electrical sys te m
in your vehicl e can cause seriou s acid burns,
fir es, explo sion s, o r electri ca l s hock s. Alway s
re ad and heed the followin g and safety preca ution s befor e working on
Before working on the ele ctri cal s ystem, way s switch off the ignition and all ele ctrical
consumers and di sconnect the negative
Alwa ys ke ep children awa y from
Always wear eye prot ection . Never let ballery
ac id or lead particles come int o contact with
your eyes, skin , and clothing .
Sulfuric battery ac id is ve ry corros ive . In
contac t with your skin , it can cause acid burns.
If it to uches your e y es, it can cau se blindn ess.
your hands, your arms, and your face and eye s from spillin g or squirtin g acid. To reduce your risk of injury , n eve r tilt the batteri es ,
as thi s could acid throu gh th e vents and burn you.
batterie s from the
v e hicle electri cal sys tem, always disconnect the negative cable H fir st and then the positive cable(+ ).
Always swit ch ofT electri cal con sumers for e reconnec tin g th e batt eri es. Reconnect the plu s cabl e(+) first and then th e nega tive cable().Neve r rev erse the pol arity of the connection s.
Thi s could cause a fire.
A highly explos iv e mixture of ga ses is give n
ofT wh en th e battery is be in g c harged.
D o no t s moke and avoid fires, sparks , and open names when wo rkin g. Never create sparks or ele ctros tati c charges when handlin g ca ble s and elec trica l equipm ent. Nev er short cir cuit the b att ery te rminal s. Hig h -energy s parks can
ca use seriou s pers on al injury.
256 257
Page 258 of 541
Never charge a frozen or thawed battery. A
disch arged battery can freeze at temperatures around +32
Note
Never disconnect t11evehicle battery when the ignition is s witched on or the engine is running, as the electrica l system or electronic components can be damaged.
Note
Never connect power-generating equipment,
such as a solar panel or battery charger, to the 12-volt s ocket or the c igar ette light er in order to
charge the vehicle battery. This can damage the vehicle's electrical system.
Battery acid can pollute th e e nvironment. Operating mu st be collecte d and posed of properly, following all applicable
261
Page 320 of 541
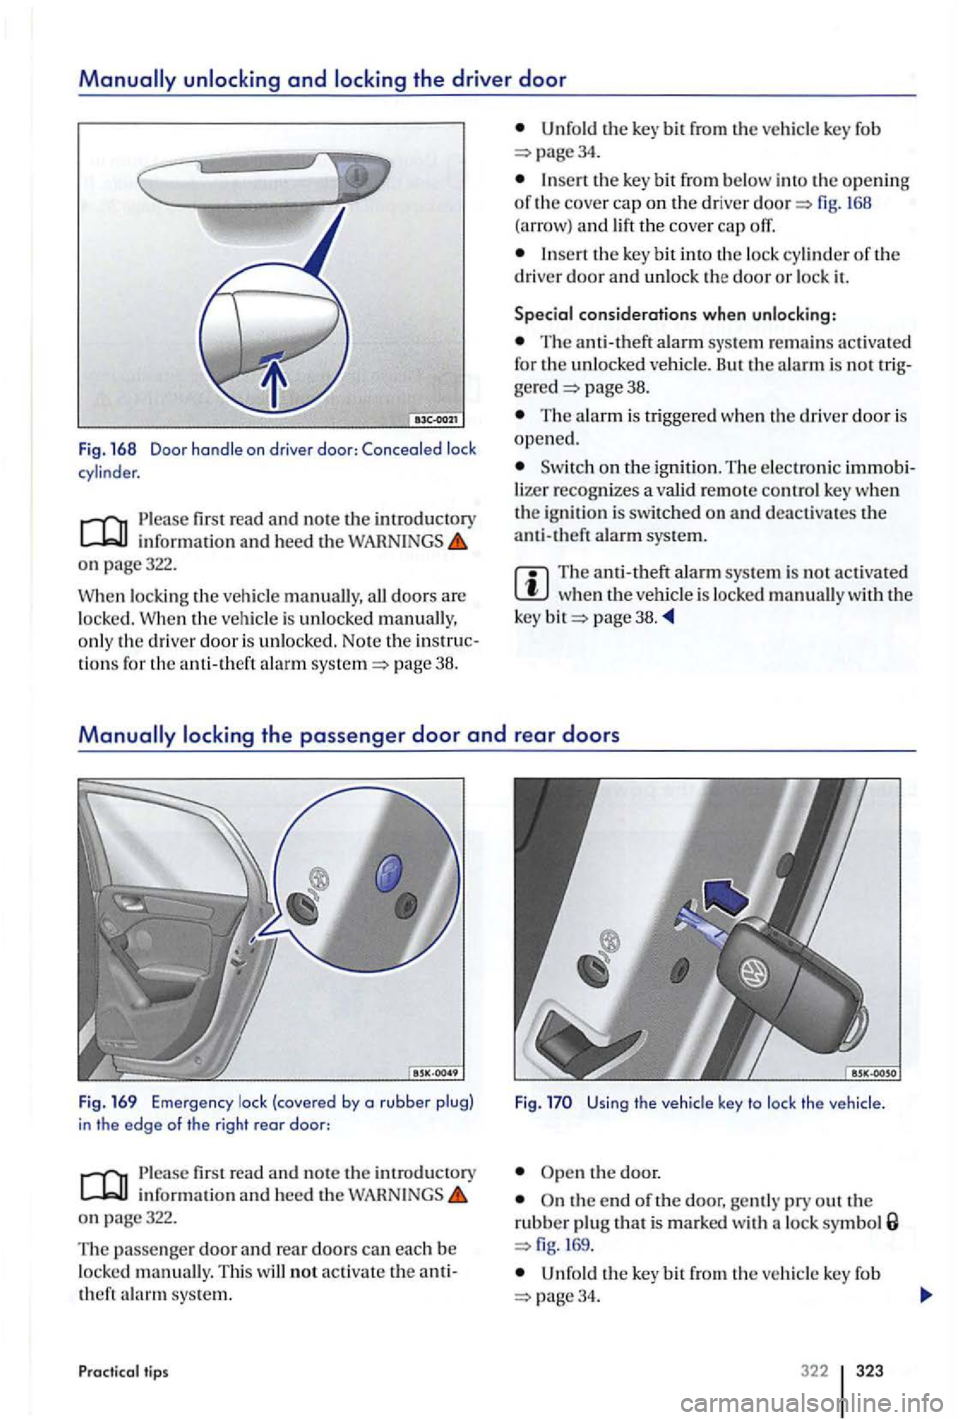
informatio n and heed the WAH N INGS o n page322.
W h
en lock ing the vehicl e all doo rs are
l ocke d. When th e vehicle is unlocke d o n ly th e drive r door is unlo cke d. Note the tions for the anti-th eft ala rm page 38.
Unfo ld the bit from ve hicle key fob page34.
th e key bit from be low into the o pening of the cove r cap on the driver and lift th e cover cap
the ke y bit int o th e lock cy linder of the
driver door and unl ock the door o r lock it.
Special considerations when unlocking:
The anti-theft alarm sys te m activated for the unlo cke d ve hicle. But the alarm is no t page 38.
The alarm is tri gge re d when the drive r door is open e d.
o n the ignition. The e lectron ic lize r recognizes a valid re mot e contro l key w hen
th e ig nit ion is switc hed on and deactivates the anti -theft alarm sys tem.
The anti-theft alarm sys te m is no t activa ted when veh icl e is loc ked manuall y w ith the
k ey page 3 8.
read and note the int roductory information and heed th e WAR N INGS on page322.
T he passe nge r d o
or and rear doors can eac h be loc ked manually. Thi s will not ac tiv ate theft sys te m .
Practic al tip s F
ig. the
vehicle key to lock the vehicle .
Ope n the door.
O n the end of the door, gently pry out th e rubber plug that is m arked with lock symbol 169.
the key bit from the ve hicle key fob 34.
322 323
Page 322 of 541
Turn the socke t wre nch in order to close the
power su nroof.
Install the cover again.
Have the power sunroof checked by an authorized Volkswagen dealer o r authorize d Volkswagen
Serv ice Facili ty. Emerg enc y clo sing may ca use the
power sun roo f and its pinc h protec tio n to
Emergency of the
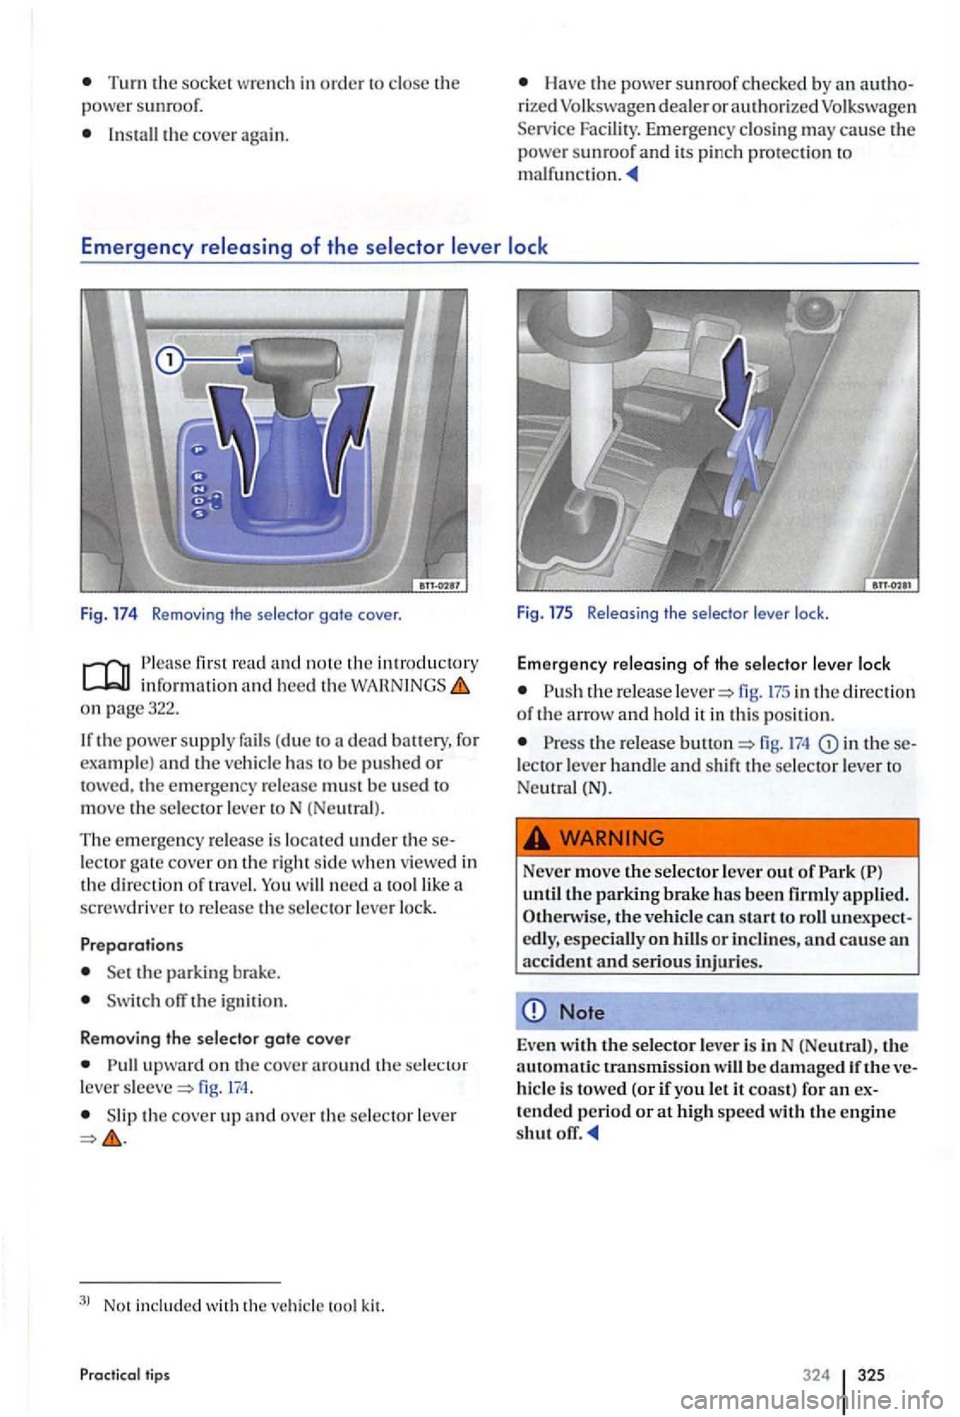
Fig. 17 4 Removing th e selector gate cover .
first read and no te th e in troducto ry info rmation and hee d the Wi\HN INGS on page322.
I f th e
powe r suppl y fails (due to a dead for
exa mple) and the ve hicl e has to be pushed or towed, the emerge ncy re lease must be u se d to
m ove the selec tor leve r toN (Neu tral) .
The e m ergency re le ase is located under these
lector ga te cove r on the rig ht sid e when viewed in
th e dir ection of trav el. You need tool like a
sc rewdriver to re lease the selector leve r lo ck.
Preparations
Se t the parkin g brake.
Switch off the ignition .
Removing the selector gate cover
up wa rd on the cover around th e se lecto r
l eve r fig. 174.
Slip the cover up and ove r th e selector leve r
3l Not included with the vehic le kit.
Practical t ips
F ig. 17 5 Releasing the selector lever lock.
Emergency releasing of the sele ctor lever lock
fig. 17 5 in the directi on of th e arrow and hold it in thi s position.
the re lease fig. in these
l ecto r lever handl e and shift the se lec tor lever to
Ne utral (N).
Neve r move the selector lever out of
unexpect especially on or inclin es, and cause a n
acc ident and seriou s injurie s.
Note
Even witl1 selector lever is in N (Ne utral) , th e
a ut omatic transmission will be damaged ve
hicl e is towe d (or if you let it coast) fo r an ex
t ended p eriod or at high speed with the engine shut
324 325
Page 338 of 541
Fuses
Introduction
thi s section yo u'll find information on the lowing:
342
343
Due to ongoing development of the ve hicl e, ment -d ependent allocation of fuse s an d th e bin ed fuse prote ction of multiple load s us ing one fuse, an up-to-date overview of th e fuse location per lo ad is no t pos sible at the time of printing. taile d info rma tion regarding fuse bo x layout is
availabl e from authori zed dea ler s Faciliti es.
In gen eral , one fuse ca n prot ect severa l l oad s. load can a ls o be protected by s evera l fuses.
R eplac e
fuses only if the ca use of th e malfuncti on
wa s corr ected. a newly re pla ced fuse blow s aga in
aft er a short time, th e ele ctri cal sys te m should be
c he cke d b y
an authorized deale r or an au thorize d Facility .
More information:
page 242
High voltage systems in the engine
Never touch ignition cables. Never touch other components of the hi gh voltag e elec tronic
ignition syste m.
Practi cal tips
Avoid short circuits in the electrical system.
tion in tJ1e circuit can cause fires and serious
Neve r replace a fuse with one that has a
higher amp ratin g. Replace a blown fuse only
with a fus e of the same amperage (same color and same imprint) and same overall size.
Never repair fuses.
Never
Note ---To help prevent damage to ele ctr ica l
system, swit ch off all lights and accessories,
switch off the ignition , and remove the key from the ign ition switch befo re replacing a fuse.
If a fuse is replaced with a fuse with higher
electrical system.
A sin gle load (a s ingle electr ical componen t) ma y be prot ected several fuses.
fuse m ay prote ct sev era l loads (several e le ctri ca l compone nts).
341
Page 352 of 541
Using jumper
4.
1.
2.
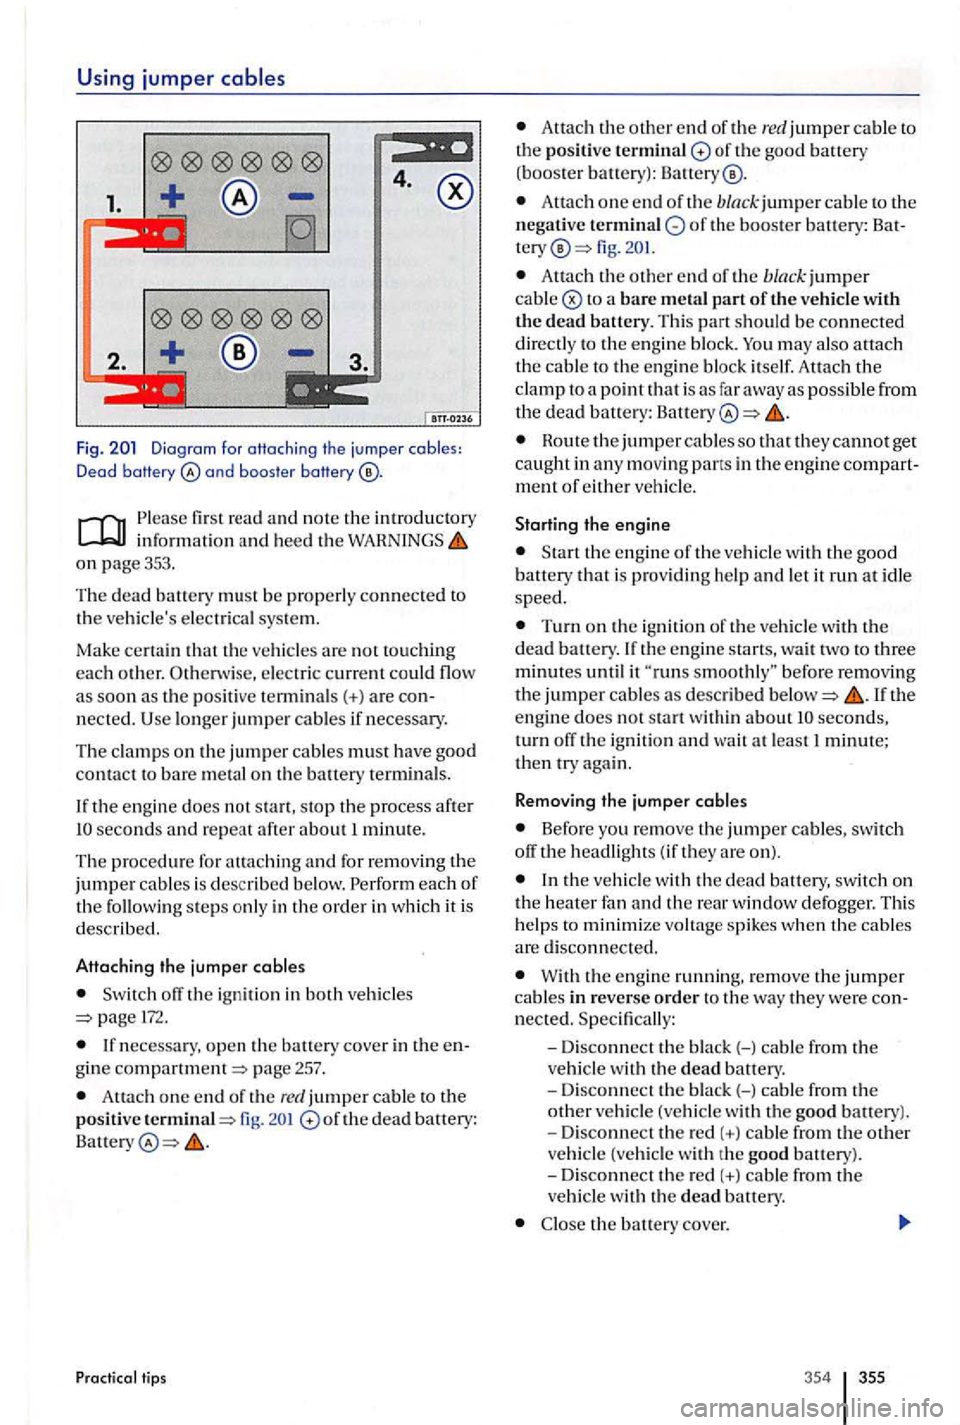
Fig. and boos te r baHery
informat ion and heed the on page 353.
Th e
dead battery must be properly connected to
th e ve hicle's electri cal sys tem.
Ma
ke certain
pos iti ve termin als(+) a re
the engine does not start, stop the process after seconds and repeat after about 1 minute.
Th e procedu re for attach ing
and for removing the jumper cables is desc ribed below.
off the ign ition in both vehicle s 172.
gine compartment=> page 257.
Attach one end o f th e red jumper cable to the positive termina l=> fig. of th e dead battery:
Pr actical tips
Atta ch the o ther end of the re d jumper cable to th e positive terminal of the good battery (booster battery):
Attach one e nd of the black jumper cable to th e
n egative of the booste r battery : fig.
Attac h the oth er e nd of the bla ck jumper cable
may also attach the cable to the e ng in e bl oc k itself. Attach the clamp to a poi nt that is as far away as possible from the dead battery: Battery
Route the jumper cable s so that they cannot get caught in a ny moving pans in th e engine ment of either vehicle.
Starting the engine
is prov idi ng h elp and let it run at i dle speed.
Turn on the ign ition of the ve hicle with the dead battery.
seconds, turn off th e ignition and wa it at least 1 minute; then try again.
Remo ving the jumper cables
Before yo u remove the jumper cables , switch
off the headligh ts ( if they are on).
the ve hicl e w ith the dead battery, switch on the heater fan and the rear window defogger. This
h elp s to minimize voltag e spikes when the cables are disconne cted.
With the engin e running. remove the jumper cable s in reverse order to the way they we re
the bauery cove r.
354 355