2007 VOLKSWAGEN GOLF change wheel
[x] Cancel search: change wheelPage 294 of 444
Booklet 3.2 Tip s and Advice
vehicl e handles diff ere ntl y wh en towin g a
tr ai ler because of the additional weigh t and weight distribution. Safe ty, pe rform ance and econo m y will greatl y depend on how carefull y
yo u load your trailer and op erat e your rig.
Before you actually to w your trail er, p ractic e
turning. stopping and b ack ing up in an area away from traffic until learn the feel of your vehicle and trail er unit.
Backing
up i s diffi cult and requi res practi ce.
Stee rin g whil e backing up is gen erall y opposite of that when backin g your vehicl e with out a
trailer.
Keep
more distance between your vehicl e and the one in front of yo u. will need more room to stop.
To compensate for the trail er. you will need a
larger than normal turning radius.
When passing, remember that you cannot erate as fast as you normally would because of the added load. Make sure yo u have enough
room to pass. After passing. allow plenty of room for you r trailer before c hanging lanes again.
Avoid je rk y s tart s, sharp turn s or rapid lan e changes.
Parking
After parking. always block th e wheels of both ve hicl e and trail er. Do not park with a traile r on a slope. If it cannot be a voided, do so only after doing th e follo wing:
Apply fo ot brake .
Have someone place chocks under both hicl e and trail er whee ls .
With the c hock s in place, s lo w ly re lease brak es until wheel blo cks absorb the load.
Turn w heels to curb (ve hicl e facing downhill)
o r to the stre et (when facing uphill).
Appl y parkin g brak e firmly.
automatic transmi ssion in
If you move the selecto r leve r of the automatic tran smission to
position.
Restarting
When restarting after parkin g on a slop e, reverse
the proc edure:
S tart the engine.
S hift transmission into gear.
le a se the parking brake and slowly move away from the wheel block s.
Stop and hav e someone re trie ve the wheel
b lock s.
Note
Neve r to w trailer during the break-in period of your vehicl e.
If yo u tow a trailer , yo ur Volksw age n m ay quire more frequent maimenance due to the
ext ra load.
Always check local reg ulations regardi ng
trailer to w in g.
Applies to vehicles: with anti-theft a larm system and a traile r towing set
Linking your trailer to the vehicle's anti-theft alarm system
The anti-theft alarm syste m will be triggere d as soon as the ele ctrical connec tion
between the trailer
and
or qualified
wo rkshop, if you want to inte grat e your trai le r to th e ve hicle's anti-theft a larm
Connecting your trailer to the anti-theft alarm syste m
If yo u ve hicle was built to include both the th eft al arm system and a trailer towin g th en t he trail er towing package (if available) is
in tegrated into the anti-theft alarm sys te m . Thi s
18 Driving and protecting the environment
Page 334 of 444
changea ble deco rat ive cove rs a re att ached to th e rim with s elf- locking sc rews . lfyou would ro re pla ce damaged wheel covers, contact your authorized Volkswa gen d eale r or
WARNING
New ti res or tires tha t are old, worn or aged cannot provide maximum control and braking ability.
New tires tend to be s lipp ery and must be broken in . To reduce the risk of losing co ntrol,
a co llisio n and serio us personal injuri es, drive with sp ecia l care for the first km).
(cont inued )
Driving with worn or damaged tire s can lead to lo ss of control, sudden tire failur e, cluding a blowou t and sudden deflation ,
c ras hes and seriou s personal injuries. Have wo rn or damaged tires rep laced imme di ate ly.
To redu ce the riskoflosingcontrol, crashes and s erio us personal injuries, never loose n
th e bolts on w heels with bolted rim rings.
more than 6 years old can onl y be used in an em erg en cy and then
w ith specia l care and at low speed.
Neve r m ount u se d tires on your ve hicle if
yo u are not sure of their used tires may have been damaged ev e n
t h oug h the damage cannot be seen th at can
lead to sudden tir e failure and loss of ve hicl e control.
hicl e pull s to one sid e when dri ving, always
s top as soo n as it is safe to do so and ch eck the
whee ls and tires for damage.
Accessory weight
Means the combined we ight ( in excess of those
sta ndard ite m s w hi ch may be repl aced) of mati c tran smission. power steering. po wer
bra kes, power windo ws. p owe r seats , radio, and heater, to th e ex te nt th at th ese item s are
or lowe r indica te
a short s id ewall for improved steering respo nse and better ove rall handling on dry pave ment.
Bead
Mean s the pa rt of the tire t hat is m ad e of stee l
wires , w rap ped or re inforce d by pl y cords and that is shap ed to fit t he rim.
Bead separation
Mean s a breakdow n of th e bond between
Means the strand s forming the in th e tire.
weight
Me ans th e weig ht of motor vehicl e w ith dard equ ipment including the m aximum pacity of fu el, oil. and coolant . a ir conditio nin g
a nd additional weight of opt io n al equipm ent.
E xtra load lire
M ea ns tire desi gn to operate at higher loads and at hi gher inflat ion pressure s th an th e corre -
s ponding sta ndard tire.
Page 339 of 444
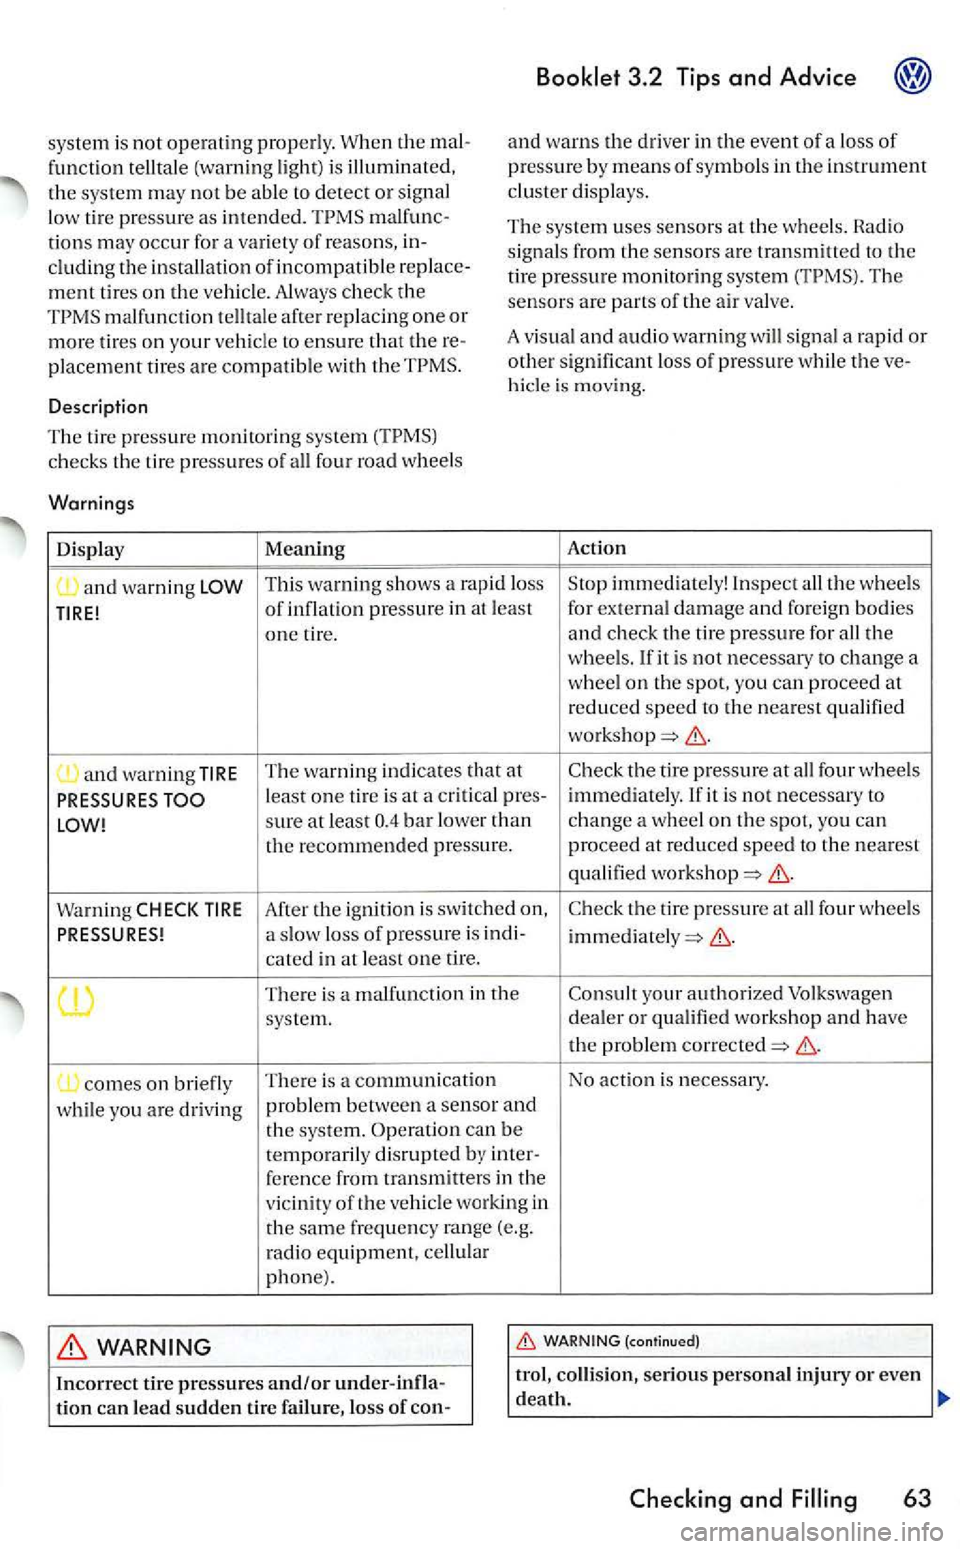
syste m is not operating properly. When the malfunct ion telltale (warning light) is illuminat ed, the system may not be able to detect or signal
low tire pressure as intended. malfunc
tions may occur for a var iety of reasons, including the installation of incompatible replacement tires on the vehicle. Always check the
and warns the driver in the event of a lo ss of pressu re by means of symbols in the instrument cluster dis plays.
Descri
ption
The system uses sensors at th e whee ls . Rad io
signals from the sensors are transmitted to the tire pressure monitoring system Th e sensors are parts of the air valve.
A visua l
and audio warning will signal a rapid or other significant loss of pressure while the ve
hicle is moving .
The tir e pressure monitorin g system
This warning shows a rapid loss Stop immediately! Inspect all the wheels
T
IRE! of i nflation pressure in at least for e
xt ernal damage and for eign bodies
one tire. and check the tire pressure for all the wheels. If it is not necessary to change a
w heel on th e spot, you can proceed at reduced speed the nearest qualified
and warnin g TIRE The warn ing indicates that at Chec
k the tire pressure at all fou r whee ls leas t one tire is at a criti ca l pres- immediately. If it is not necessary to sure at least
Warning CHECK TIRE After the ig n it ion is switched Check the tire pressure at all fou r wheels a slow loss of pressure is indi-
There is a malfunct ion in the Consult your a uthorized Volkswagen
system. dealer or qualified workshop and have
the p ro ble m corrected
comes on briefly There is a communica tion No action i
s necessaty.
while you are
driving problem between a sensor and the system. Operation can be temporarily di srupted by inter-
f ere nce from transmitters in the
v icinity of the vehicl e working in
t h e same frequency range (e.g.
rad io equipment, cell ula r phone).
WARNING
Checking and 63
Page 340 of 444
the instrument cluster, stop and insp ec t th e
tir es.
can also lead t o sudden tire failur e, in
cluding a blowout and sudden deflati on, causing loss of ve hicle control.
The driv er i s responsible for the correct tire pressures fo r all tire s on the vehicl e. Th e appli
cable pressure valu es are locat ed on a sticker on the driver' s sid e page 61, fig . 15 .
w hen all on the ve hicl e are filled
to the correct pressure, th e can work
corre ctly.
A lways inflat e tire s to the recomme nd ed
and correct tire pres sure before driving off.
in tread separa tion, sudden
Excess ive speed and/overloadin g can
ca use heat build-up , sudden tir e failur e and lo ss of control.
If th e tire is no t flat and you do not have to change a w hee l immediate ly , drive at reduce d
s peed to tJ1e neares t se rvic e statio n to ch ec k the tir e press ure and add air as req uired.
Whe n r epl acing tir es or wheel rim s on ve
hicles equipped with always read and heed the information and all repage 57, and
Note
M iss in g va lve stem caps can result in damage
to the valve and senso rs in the tire pressure
monitor ing sys tem. To preve nt thi s. a lways drive
wit h valve stem caps that are th e equiva le nt of
64
tho se installed
When switc hin g to diff erent tires, make cer
tain that the valves and the se nsors are not dam
ag ed .
For the sake of environment
Unde r-inflated tires will a lso in crease the fu el
consumption.
Tips
The tir e press ure mon itoring system ch ecks
th e tir es for the fac to ry recommend ed in flat ion pressures. The recommended val ues are on th e sticker on the o pen edge of th e driver's door
61, fig.
you are driving on tires other than those in
s talled at th e factory, have the inflati on pres
s ure s entered in the press ure monitor ing sys tem
by an authorized Vol kswage n dea ler or qua lified
works hop if they are different.
Th e tire pressure monitor ing system sh uts itself off if a set of tir es without whee l sensors is
mounted on th e veh icle and it cannot receive senso r sig nals. As soon as the syste m rece ives at
lea st one se nsor signa l, it switches itself on
again.
tir e pressures at regu lar int ervals, even
though you have the monitoring system. In spec t
th e
tires for damage (punctu res , cuts, t ea rs a nd
blis ter s). He move foreig n bodi es from the tir e
tread.
senso rs have to be rep laced, have the valves ch anged at th e sa me tim e.
Disc repancies may occur between the pres
sures read on the press ure ga uge when inflating the tires and th e pressures read by the tire pressu re sensors. The electro nic tire pressure monitoring system is m ore accurate.
When deter min es tha t the air pres
s u re in o ne or more tires is too low, ch eck the tire
pressure thoroughly using a pressu re Low pressure in a tire often cannot be determi ned by
looking at the tire. This applies especially for low
profile tires.
When there is a rap id or excessi ve loss of pressure while driving. you are immediately
g iven vis u a l and aud ible warn ing .
Page 342 of 444
3.2 Tips and Advice
Displays in the instrument
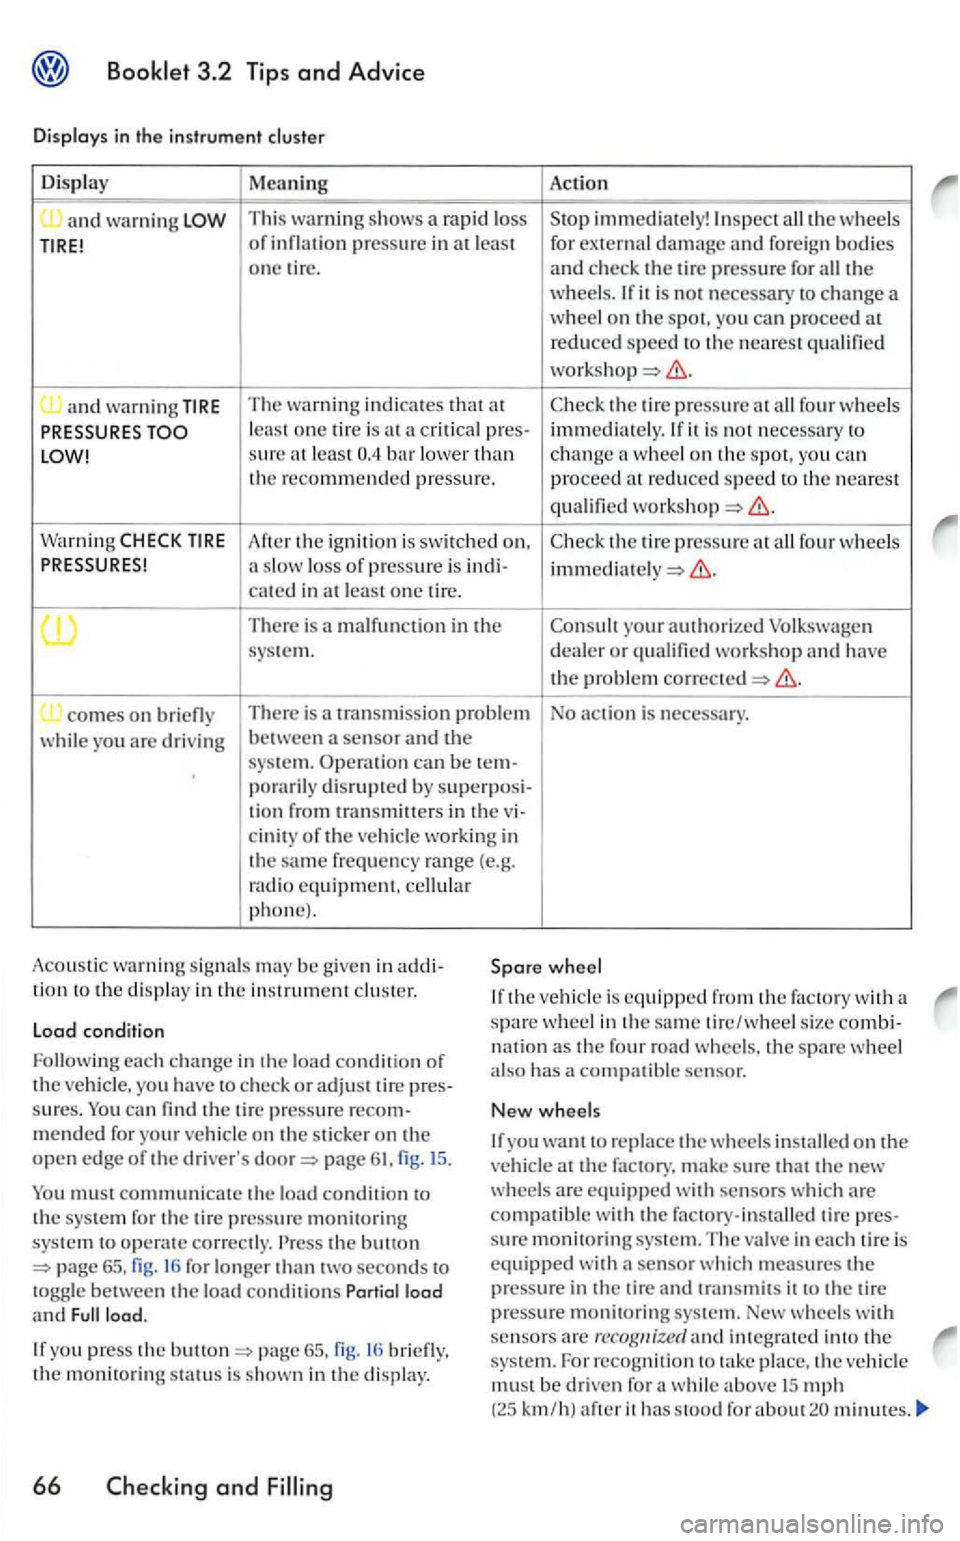
Display Meaning Act io n -and warni ng T hi s warning shows a rapid loss immediately! In spect the wheels of p ressure in least for external damage and for eign bodies
o ne tir e. and check th e tire pressure for th e wheels. If it is not necessary to change a wheel on the spot, you pro ceed at
reduced s p e ed to the nea re st
and warnin g TIRE The warning ind ic a tes that at Check th e tire pressure at four wheels
sure at least
Warn ing After the ignition is switched on. Check th e tire pressure at four wheels a slow loss of pressure is in di-ca tcd in at le a st one tire.
T here is a malfunction in the your authorized Volkswagen
sys tem. dealer o r
comes o n
disrupted by superposi-
tion from transmi tters in the
the same frequency range (e.g.
rad io equipment. phone).
Load condition
Followi ng
each change in th e load conditio n of
th e yo u have check or adjust tir e sure s. can
page
mus t communicate th e load condition to the sys te m for the tire pressure monitoring system to operat e correctly. the bullon 16 for lo nger th an two seconds to
If you press the bullon briefly. th e monitoring status is shown in the display.
66
wheel
If the vehicle is equipped the fac tory with a
spare wheel in th e same tire /wheel s ize
you re place the w heels o n the at the factory. make sure that the new
w heels are equipped with se nsors whic h are compatible with the factory-installe d tire sure monitoring sys te m. The val ve in each tire is equipped with
mus t be dri ven for a while above mph (25 km/h ) after it has s tood fo r about
Page 344 of 444
3.2 Tips and Advice
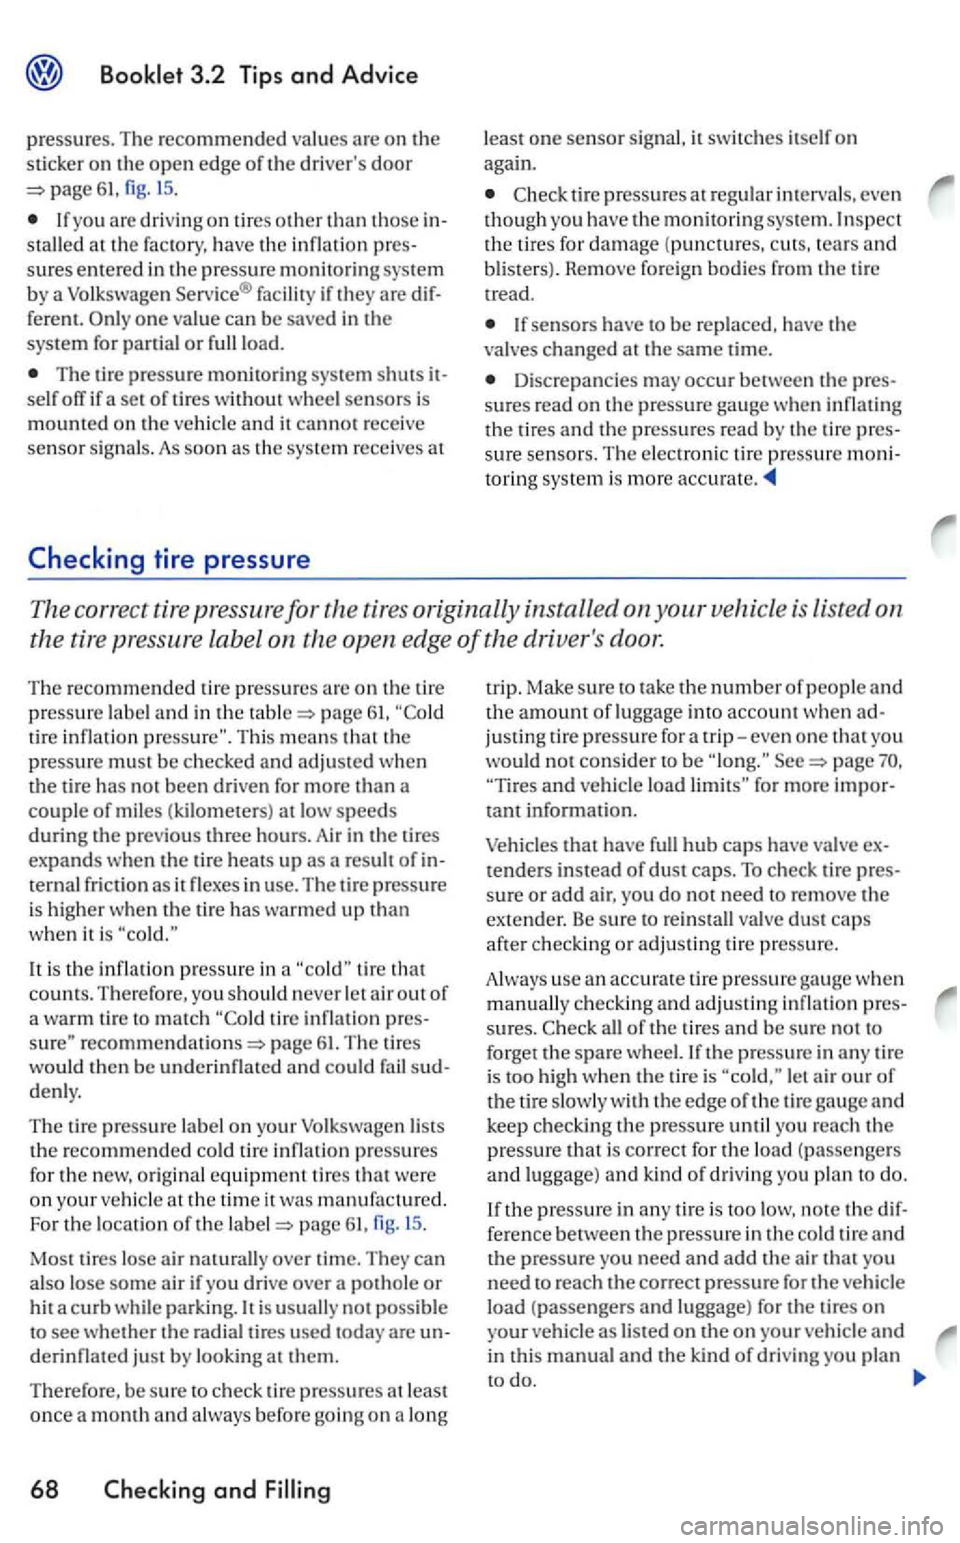
pressures. The recommended values are on the
s ticker on th e open edge of the driver's door 61, fig. 1 5 .
yo u are driving on tire s other than those in
s tall ed at the factory, have the inflation pres
sures entered in the pressure monito rin g sys te m by a Volk sw agen Serv ice® fac ilit y if they are dif
ferent . O nl y one va lue can be save d in the syste m for partial or full load.
The tire pressure monitoring sys te m shuts itself off if a se t of tire s w ithout wheel sensors is mounted on the vehicle and it cannot receive sensor s ignal s. As soon as th e sys te m recei ve s at
tir e press ures at regular interva ls. even though yo u have the monitoring sys te m. Inspect the tire s for damage (punctures. cuts. tears and blister s). Remove foreign bodies from the tire
tread .
sensors have to be repla ced. have the valve s changed at the same time.
Discre pancies may occur betwee n th e pres
sures read on the pressure gauge when inflating the tires and the pressure s read b y the tire pres
sure sensors. The e lectroni c tire pressu re moni
torin g sys te m is more accurate.
The corr ect tire pressure for the tires originally installed on your vehicle is Liste d on
th e tire pr
essure label on the open edge of the driver's door.
The recommended tire pressure s arc on the tire
pres sure lab el and in the page 6 1, T hi s means that the pressure must be c hecke d and adjusted w hen tire has not been driven for more t han a couple of miles (k ilometers ) at low speeds during the previo us three hours. Air in the tires
expands when the tire heat s up as a result of in
ternal friction as it flexes in use. The tire pressure is high er w he n the tir e has war med up than when it is
tir e that counts. There for e, you should nev er le t a ir out of
a warm tir e to matc h p a ge 61. The tire s
would the n be underinflatcd and could fail sud
denly.
The tir e pressure la b e l o n your Volkswagen lists the recommended co ld tire inflation pressures for the new, orig in al equipment tires we re on yo ur ve hicl e at the tim e it was m anufa ctured.
For the location of the page 61, fig . 15 .
Most tir
es lose air naturally over time. They can
also lose some air if you drive ove r a pothole or h it a c urb whil e pa rking. is usually not possible
t o see w hether the radia l tires u se d today are un
derinflated jus t b y looki ng at them.
Therefore, be sure to check tire pressur es at least once a month and always be for e goin g on a lo ng
68 Checking and
trip. Mak e sure to ta ke the numbe r of p eople and the amount of lu ggage into ac count whe n ad justing tire pressure for a trip -eve n one that you wou ld not consider to b e page and ve hicle load for more important information.
Vehicles that h ave full hub caps have va lve ex
t ende rs in stead of dust caps. To ch ec k tire pressure or add ai r. yo u do not need to remove the
extender. Be sure to re in stall v a lve dus t cap s
aft er checkin g or adjustin g tir e pressure.
A lways use an
accurate tire pressure gauge whe n manually c hecking and adju sting inflatio n pres -sures.
let air our of the tire slowly with the edge of the tir e and keep checkin g the pressure until you rea ch the pressure that is correct for the load (passenge rs
and lu gga ge) and kind of dri vin g yo u pla n to do.
th e pressure in an y tire is to o low, no te the dif
fere nce be tween the pressure in the co ld tir e and the pressure you need and add the air that yo u
need to r e ac h the correc t p res sure for the ve hicle
lo ad (passengers and luggage) for the tires on
your ve hicle as listed on the on your ve hicl e and in thi s manual and th e kind of dri vin g yo u plan
Page 357 of 444
WARNING
Improperly tighten ed wheel bo lts can become loose, causin g lo ss of cont rol, a colli sio n an d seriou s perso nal injury.
Never tigh ten the wheel bolts with a onal socke t in th e screw driver han dle beca use
yo u will not be abl e to tighte n the bo lts to the
req uired torque .
WARNING
Improper use of your vehicle jack can ca use seriou s perso na l i njury.
Spare
3.2 Tips and Advice
(continued)
Never use the factory su pplied
port th e veh icle .
Alway s properly secure the vehi cle jack and tool k it in th e lu ggage com pa rtm ent .
Loose ite m s in th e ve h icle can fly a round the in side of th e vehicl e during hard braki ng or in a c rash causin g serious pe rso na l inju ry.
in th e ve hicle" on page 85.
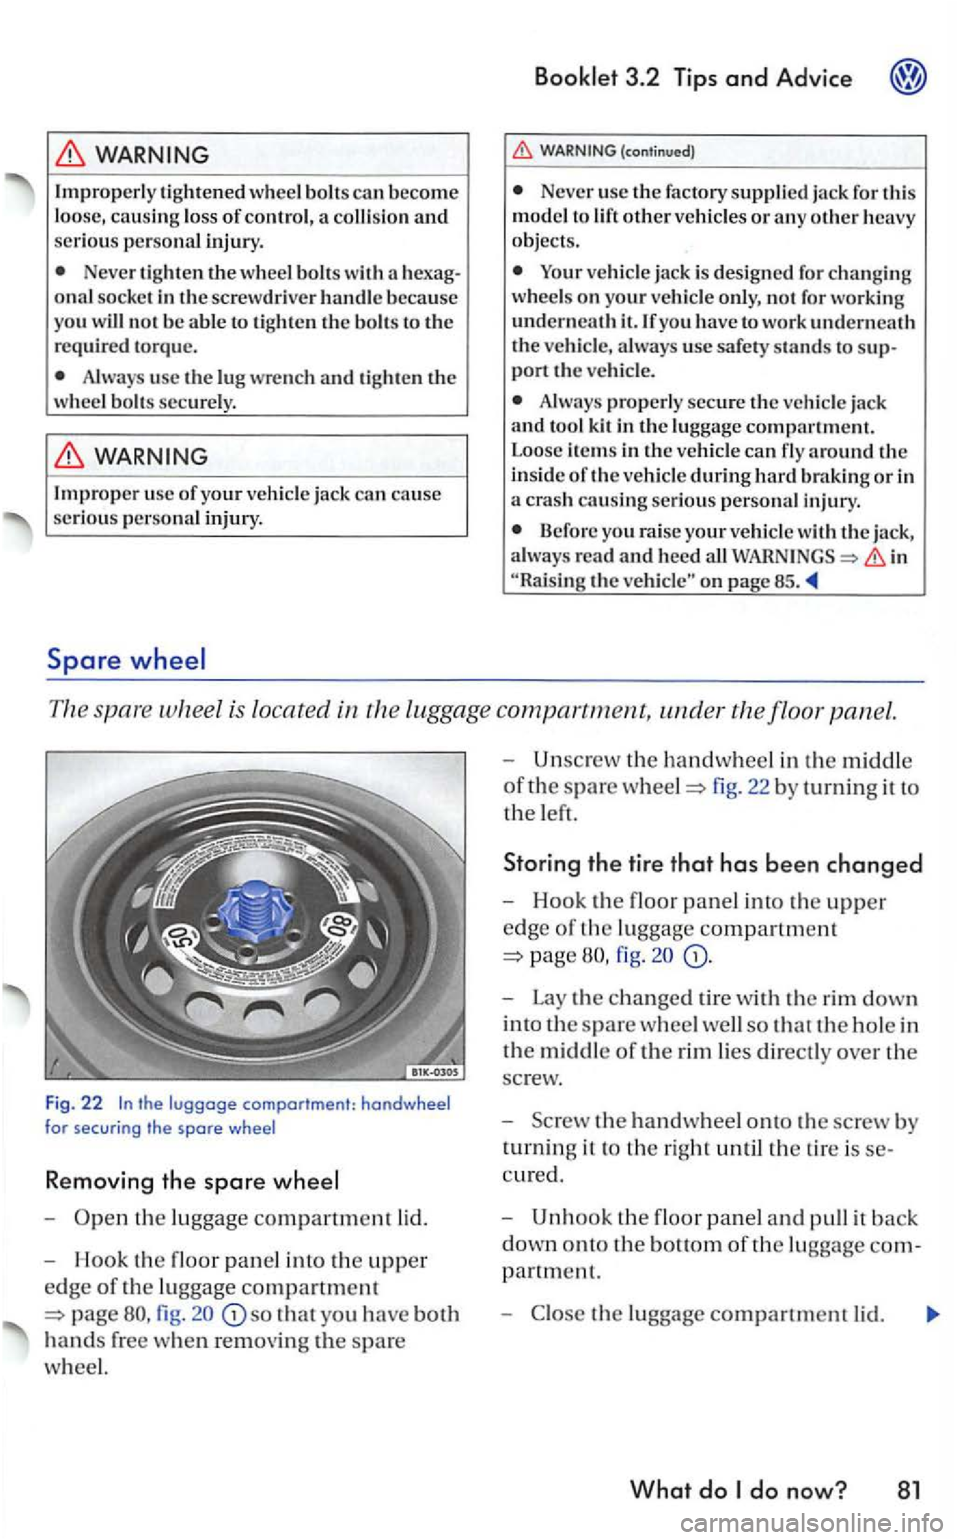
spare is located in t h e luggage compartment, the floor panel.
F ig. 22
-
fig. so that yo u h ave both
hands free when removin g the spare
w h
eel.
-Unscrew th e hanclwhee l in the m iddle
of the spare fig. 22 by turning it to
t h e left.
Storing the tire that has been changed
-Hook the floor panel into th e upper
edge of th e lu ggage compartment
page
-Lay the changed tire with th e rim down
i n to
the spare wheel well so that th e hole in
the middl e of th e rim lies directly over t h e
sc r
ew.
- Scr
ew the hand wheel onto th e screw b y
t
urni ng it to the right until the tire is
partment.
- C lose the luggage compartment lid.
What do do n ow? 81
Page 358 of 444
3.2 Tips and Advice
WARNING
The spare whee l may be smaller than the origina l tir e. The s maller spare wheel is identified with a sticker and the words
The spare whee l m ust be returned to the
spare whee l well so on as the standard road
wheel can be re pla ced.
Getting started
The spare wheel must always be secured
with the w hee l bolts provided by the factory .
After
r
vehicle in a safe place before changing a wheel.
If yo u have a flat tire or puncture, park
the vehicle as far away fro m the of
traffic as possib le on a firm, even surface
Turn off the e ngin e. Turn on the emer
gency flasher.
App ly the parkin g brake firm ly and e n
gage a
gear or put the selector in
If yo u are towin g a trailer, unhitch it
from yo
ur vehicle.
WARNING
Changin g a wheel, especially on
Alw ays stop the ve hicl e
to change the
Turn on th e e merge ncy fla sh er and se t up an o th er warning device ab o ut 27 ya rds (25 meters) beh ind the vehicl e to warn ap
proa ching traffic.
Always sure th at th e ground is leve l and firm, if necessary usc sturdy under the ja ck .
When one wh eel is lift ed off the ground putting the se lec to r l ever in
Always apply tl1e par k in g brake firmly and firmly engage gea r or put th e selec tor lever in