Page 282 of 458

282
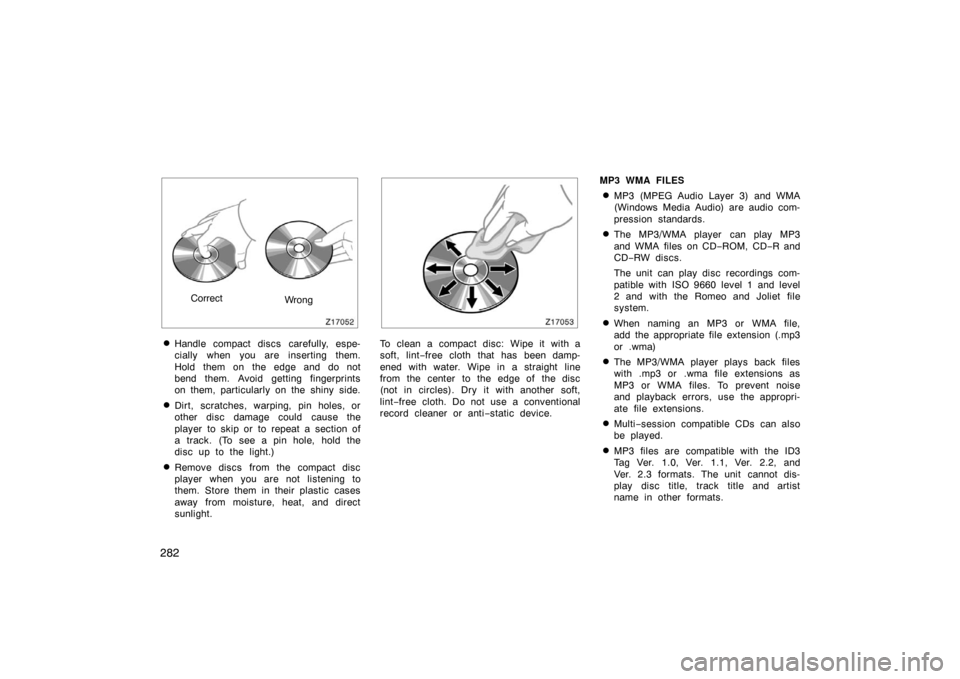
CorrectWrong
�Handle compact discs carefully, espe-
cially when you are inserting them.
Hold them on the edge and do not
bend them. Avoid getting fingerprints
on them, particularly on the shiny side.
�Dirt, scratches, warping, pin holes, or
other disc damage could cause the
player to skip or to repeat a section of
a track. (To see a pin hole, hold the
disc up to the light.)
�Remove discs from the compact disc
player when you are not listening to
them. Store them in their plastic cases
away from moisture, heat, and direct
sunlight.
To clean a compact disc: Wipe it with a
soft, lint−free cloth that has been damp-
ened with water. Wipe in a straight line
from the center to the edge of the disc
(not in circles). Dry it with another soft,
lint −free cloth. Do not use a conventional
record cleaner or anti −static device. MP3 WMA FILES
�MP3 (MPEG Audio Layer 3) and WMA
(Windows Media Audio) are audio com-
pression standards.
�The MP3/WMA player can play MP3
and WMA files on CD
−ROM, CD −R and
CD− RW discs.
The unit can play disc recordings com-
patible with ISO 9660 level 1 and level
2 and with the Romeo and Joliet file
system.
�When naming an MP3 or WMA file,
add the appropriate file extension (.mp3
or .wma)
�The MP3/WMA player plays back files
with .mp3 or .wma file extensions as
MP3 or WMA files. To prevent noise
and playback errors, use the appropri-
ate file extensions.
�Multi −session compatible CDs can also
be played.
�MP3 files are compatible with the ID3
Tag Ver. 1.0, Ver. 1.1, Ver. 2.2, and
Ver. 2.3 formats. The unit cannot dis-
play disc title, track title and artist
name in other formats.
Page 285 of 458
285
WMA—
WMA (Windows Media Audio) is an audio
compression format developed by Micro-
soft. It compresses files into a size small-
er than that of MP3 files. The decoding
formats for WMA files are Ver. 7, 8, and
9.
Page 288 of 458
288
1. Passenger compartment temperaturedisplay
2. Outside temperature display
3. Temperature control switches
4. Air flow control switches
5. Fan speed control switches
6. Automatic control switch
7. Air intake control switch
8. Rear window and outside rear view mirror defogger switch (See page 118
for details.)
9. Windshield air flow switch
10. Air conditioning on −off switch
11. Air conditioning operation screen dis- play button
12. “OFF” switch
In this manual, English version screens
are shown as an example.
Controls
� Ty p e 1
27p165a
Page 289 of 458
289
1. Passenger compartment temperaturedisplay
2. Outside temperature display
3. Temperature control switches
4. Air flow control switches
5. Fan speed control switches
6. Automatic control switch
7. Air intake control switch
8. Rear window and outside rear view mirror defogger switch (See page 118
for details.)
9. Windshield air flow switch
10. Air conditioning on −off switch
11. “OFF” switch
12. Air conditioning operation screen dis- play button
In this manual, English version screens
are shown as an example.
�
Ty p e 2
27p164a
Page 290 of 458
290
1. Outside temperature display
2. Passenger compartment temperaturedisplay
3. Air flow control switches
4. Fan speed control switches
5. Temperature control switches
6. “OFF” switch
7. Automatic control switch
8. Rear window and outside rear view mirror defogger switch (See page 118
for details.)
9. Windshield air flow switch
10. Air intake control switch 11. Air conditioning operation screen dis- play button
12. Air conditioning on −off switch
In this manual, English version screens
are shown as an example.
�
Ty p e 3
27p337
Page 296 of 458

296
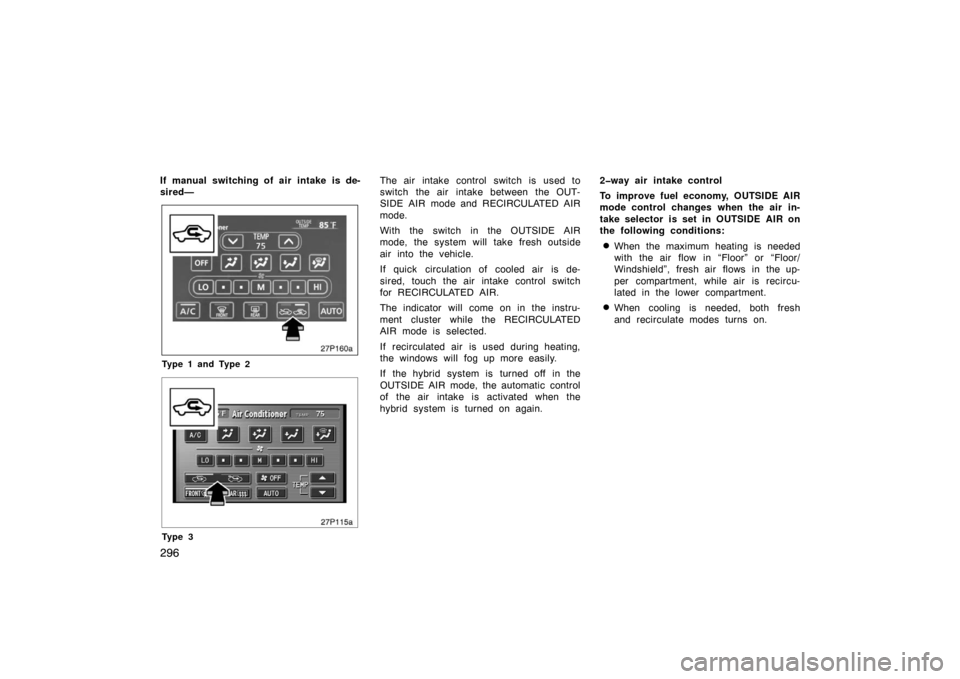
If manual switching of air intake is de-
sired—
27p160a
Type 1 and Type 2
27p115a
Ty p e 3
The air intake control switch is used to
switch the air intake between the OUT-
SIDE AIR mode and RECIRCULATED AIR
mode.
With the switch in the OUTSIDE AIR
mode, the system will take fresh outside
air into the vehicle.
If quick circulation of cooled air is de-
sired, touch the air intake control switch
for RECIRCULATED AIR.
The indicator will come on in the instru-
ment cluster while the RECIRCULATED
AIR mode is selected.
If recirculated air is used during heating,
the windows will fog up more easily.
If the hybrid system is turned off in the
OUTSIDE AIR mode, the automatic control
of the air intake is activated when the
hybrid system is turned on again.2�way air intake control
To improve fuel economy, OUTSIDE AIR
mode control changes when the air in-
take selector is set in OUTSIDE AIR on
the following conditions:
�When the maximum heating is needed
with the air flow in “Floor” or “Floor/
Windshield”, fresh air flows in the up-
per compartment, while air is recircu-
lated in the lower compartment.
�When cooling is needed, both fresh
and recirculate modes turns on.
Page 298 of 458

298
CAUTION
Do not use the windshield air flow
switch during cooled air operation in
extremely humid weather. The differ-
ence between the temperature of the
outside air and that of the windshield
could cause the outer surface of the
windshield to fog up blocking your
vision.
27p126
�The light sensor is located on the driv-
er ’s side edge of the instrument panel.
If you put anything on this area or
cover the area, the sensor function
may be adversely affected.
�To cool off your Toyota after it has
been parked in the hot sun, drive with
the windows open for a few minutes.
This vents the hot air, allowing the air
conditioning to cool the interior more
quickly.
�Make sure the air intake grilles in front
of the windshield are not blocked (by
leaves or snow, for example).
�On humid days, do not blow cold air
on the windshield. The windshield could
fog up because of the difference in air
temperature on the inside and outside
of the windshield.
�Keep the area under the front seats
clear to allow air to circulate through-
out the vehicle.
�On cold days, set the fan speed to
high for a minute to help clear the
intake ducts of snow or moisture. This
can reduce the amount of fogging on
the windows.
�When driving on dusty roads, close all
windows. If dust thrown up by the ve-
hicle is still drawn into the vehicle after
closing the windows, it is recommended
that the air intake selector be set to
OUTSIDE AIR and the fan speed se-
lector to any setting except “OFF”.
�If following another vehicle on a dusty
road, or driving in windy and dusty
conditions, it is recommended that the
air intake selector be temporarily set to
RECIRCULATE, which will close off the
outside passage and prevent outside
air and dust from entering the vehicle
interior.
(c) Operating tips
Page 299 of 458
299
27p104
The switches are installed on both sides
of the steering pad.
“A/C AUTO” switch: Use this switch to
turn on the automatic mode. (For details,
see page 292.) Pressing this switch in the
automatic control turns the blower off.
“
TEMP” switch: Use this switch to
set the desired temperature. (For details,
see page 293.)
“
” switch: Use this switch to change
the air intake mode. (For details, see
page 296.)
“
” switch: Use this switch to remove
interior fog on the windshield. (For details,
see page 297.) “
” switch:
Use this switch to turn on
or off the rear window and outside rear
view mirror defoggers. (For details, see
page 118.)
CAUTION
Operate the switches with due care
while you are driving to avoid acci-
dents.
27p006a
If air flow control is not satisfactory, check
the instrument panel vents. The instrument
panel vents may be opened or closed as
shown.
Climate remote control
(steering switches) Instrument panel vents