Page 44 of 374

30
TESTING THE SYSTEM1. Open all the windows.
2. Set the system as described above. The side doors and back door should
be locked with the key or wireless re-
mote control key. Be sure to wait until
the indicator light goes off or starts
flashing.
3. Unlock any side door or back door from the inside. The system should ac-
tivate the alarm.
4. Stop the alarm as described above.
5. Repeat this operation for the other doors, back door and hood. When test-
ing the hood, also check that the sys-
tem is activated when the battery ter-
minal is disconnected and then
reconnected.
If the system does not work properly,
have it checked by your Toyota dealer.
Fuel tank cap
12C503
This indicates that the fuel filler door
is on the left side of your vehicle.1. To open the fuel filler door, pull the lever.
When refueling, turn off the engine.
CAUTION
�Do not smoke, cause sparks or al-
low open flames when refueling.
The fumes are flammable.
�When opening the cap, do not re-
move the cap quickly. In hot weath-
er, fuel under pressure could cause
injury by spraying out of the filler
neck if the cap is suddenly re-
moved.
Page 89 of 374
75
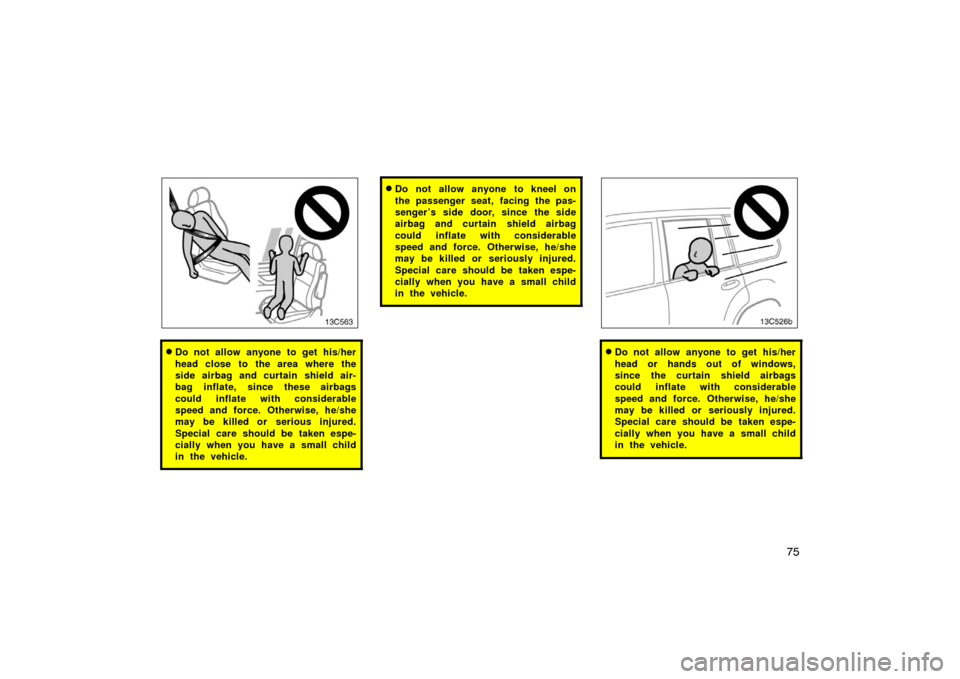
13c563
�Do not allow anyone to get his/her
head close to the area where the
side airbag and curtain shield air-
bag inflate, since these airbags
could inflate with considerable
speed and force. Otherwise, he/she
may be killed or serious injured.
Special care should be taken espe-
cially when you have a small child
in the vehicle.
�Do not allow anyone to kneel on
the passenger seat, facing the pas-
senger ’s side door, since the side
airbag and curtain shield airbag
could inflate with considerable
speed and force. Otherwise, he/she
may be killed or seriously injured.
Special care should be taken espe-
cially when you have a small child
in the vehicle.
�Do not allow anyone to get his/her
head or hands out of windows,
since the curtain shield airbags
could inflate with considerable
speed and force. Otherwise, he/she
may be killed or seriously injured.
Special care should be taken espe-
cially when you have a small child
in the vehicle.
Page 131 of 374

11 7
OPERATION OF INSTRUMENTS AND
CONTROLS
Lights, Wipers and Defogger
Headlight and turn signals11 8
. . . . . . . . . . . . . . . . . . . . . . . . . . . . . . . . . . .
Emergency flashers 120
. . . . . . . . . . . . . . . . . . . . . . . . . . . . . . . . . . . . \
. . . . .
Instrument panel light control 120
. . . . . . . . . . . . . . . . . . . . . . . . . . . . . . . .
Front fog lights 121
. . . . . . . . . . . . . . . . . . . . . . . . . . . . . . . . . . . . \
. . . . . . . . .
Interior lights 121
. . . . . . . . . . . . . . . . . . . . . . . . . . . . . . . . . . . . \
. . . . . . . . . . .
Personal lights 122
. . . . . . . . . . . . . . . . . . . . . . . . . . . . . . . . . . . . \
. . . . . . . . .
Ignition switch light 123
. . . . . . . . . . . . . . . . . . . . . . . . . . . . . . . . . . . . \
. . . . .
Windshield wipers and washer 123
. . . . . . . . . . . . . . . . . . . . . . . . . . . . . . .
Rear window wiper and washer 124
. . . . . . . . . . . . . . . . . . . . . . . . . . . . . .
Rear window defogger 125
. . . . . . . . . . . . . . . . . . . . . . . . . . . . . . . . . . . . \
. .
Outside rear view mirror heaters 125
. . . . . . . . . . . . . . . . . . . . . . . . . . . . . .
SECTION 1� 5
Page 138 of 374

124
To squirt washer fluid, pull the lever
toward you.
If the windshield wipers are off, they will
operate a couple of times after the washer
squirts.
For instructions on adding washer fluid,
see “Adding washer fluid” on page 343.
In freezing weather, warm the windshield
with the defroster before using the washer.
This will help prevent the washer fluid
from freezing on your windshield, which
can block your vision.
NOTICE
Do not operate the wipers if the wind-
shield is dry. It may scratch the
glass.
When waxing your vehicle, make sure that
the washer nozzles do not become
blocked. If a nozzle becomes blocked,
contact your Toyota dealer to have the
vehicle serviced.
NOTICE
If a nozzle becomes blocked, do not
try to clear it with a pin or other
object. The nozzle will be damaged.
Rear window wiper and washer
To turn on the rear window wiper, twist
the lever knob upward.
The key must be in the “ON” position.
There are 2 settings:1. “LO” position: Intermittent operation
2. “HI” position: Normal operation
To squirt washer fluid on the rear window,
twist the knob upward or downward as far
as it will go (position 3 or 4). The knob
automatically returns from these positions
after you release it.
For instructions on adding washer fluid,
see “Adding washer fluid” on page 343.
NOTICE
Do not operate the rear wiper if the
rear window is dry. It may scratch the
glass.
Page 139 of 374

125
Rear window defogger
To defog or defrost the rear window,
push the switch.
The key must be in the “ON” position.
The thin heater wires on the inside of the
rear window will quickly clear the surface.
An indicator light will illuminate to indicate
the defogger is operating.
Push the switch once again to turn the
defogger off.
The system will automatically shut off af-
ter the defogger has operated about 15
minutes.Make sure you turn the defogger off when
the surfaces are clear. Leaving the defog-
ger on for a long time could cause the
battery to discharge, especially during
stop
−and− go driving. The defogger is not
designed for drying rain water or for melt-
ing snow.
NOTICE
� When cleaning the inside of the
rear window, be careful not to
scratch or damage the heater wires
or connectors.
� To prevent the battery from being
discharged, turn the switch off
when the engine is not running.
Outside rear view mirror heaters
To defog or defrost the outside rear
view mirrors, push the switch.
The key must be in the “ON” position.
The heater panels in the outside rear view
mirrors will quickly clear the surfaces. An
indicator light will illuminate to indicate the
mirror heaters are operating.
Push the switch once again to turn the
defoggers off.
The system will automatically shut off af-
ter the mirror heaters have operated about
15 minutes.
Page 173 of 374

159
NOTICE
�Do not use liquid sealants for a flat
tire as tire pressure warning valve
and transmitter will be damaged.
� When the tires must be repaired or
replaced, have them repaired or re-
placed by the nearest Toyota dealer
or an authorized tire dealer. The
tire pressure warning valves and
transmitters will be affected by the
installation or removal of tires.
16C522a
IF THE TIRE PRESSURE WARNING
LIGHT BLINKS...
If the tire pressure warning light blinks
when the ignition switch is turned to
the “ON” position, the tire pressure
warning system is not working properly.
The system will be disabled in the follow-
ing conditions:
(When the condition becomes normal, the
system will work properly.)
�If tires not equipped with tire pressure
warning valves and transmitters are
used.
�If the ID code on the tire pressure
warning valves and transmitters is not
registered.
�If electronic devices or facilities using
similar radio wave frequencies are
nearby.
�If a radio set at similar frequencies is
in use in the vehicle.
�If a window tint that affects the radio
wave signals is installed.
�If the tire pressure warning select
switch is set to a different tire setting.
�If there is a lot of snow or ice on the
vehicle, in particular around the wheels
or wheel housings.
�If non −genuine Toyota wheels are used.
�If tire chains are used.
�If the spare tire is in a location subject
to poor radio wave signal reception.
�If the tire inflation pressure is 500 kpa
(5.1 kgf/cm2 or bar, 73 psi) or more
higher than the specified level.
If the tire pressure warning light blinks
frequently when the ignition switch is
turned to the “ON” position, have it
checked by your Toyota dealer.
Page 194 of 374

180
YOUR RADIO ANTENNA
Lowering the antenna
The antenna automatically extends when
the radio is on, and retracts when the
radio mode is off. However, even if you
turn off the radio when the radio on the
rear seat audio system is on, the antenna
does not retract. To lower a power anten-
na, push the “�” (down) switch. Also, the
antenna automatically goes down when the
radio mode is switched off to turn on the
cassette tape player or compact disc play-
er, turning off the audio system by push-
ing “PWR·VOL” or turning the ignition key
to “LOCK” position.NOTICE
� Retract the antenna when entering
or passing through low structures,
such as a garage or an automatic
car wash. Failure to do so may
damage the antenna.
� The antenna mast has to be ex-
tended higher than 100 mm (3.94
in.) length when the audio is on.
Extend the antenna mast when the
radio signal is weak.
� Putting a window tint (especially,
conductive or meta llic type) on the
right�hand rear quarter window may
affect the reception of radio or mo-
bile telephone. For the installation
of the window tint, consult with
your Toyota dealer.
Down Up
Adjusting the power antenna
To adjust the antenna height, push the
switch at either side, this may also be
performed during antenna extension. The
maximum extension length is 850 mm
(33.5 in.).
Every time you turn the radio on, the
antenna will extend to its previous posi-
tion.
Clean the antenna mast periodically with
a clean dry cloth.
Page 218 of 374

204
—Air flow selector settings
See “Instrument panel vents” on page 206.
—Operating tips
�To cool off your Toyota after it has
been parked in the hot sun, drive with
the windows open for a few minutes.
This vents the hot air, allowing the air
conditioning to cool the interior more
quickly.
�Make sure the air intake grilles in front
of the windshield are not blocked (by
leaves or snow, for example).
�On humid days, do not blow cold air
on the windshield. The windshield could
fog up because of the difference in air
temperature on the inside and outside
of the windshield.
�Keep the area under the front seats
clear to allow air to circulate through-
out the vehicle.
�On cold days, set the fan speed to
high for a minute to help clear the
intake ducts of snow or moisture. This
can reduce the amount of fogging on
the windows.
�When driving on dusty roads, close all
windows. If dust thrown up by the ve-
hicle is still drawn into the vehicle after
closing the windows, it is recommended
that the air intake control button be set
to FRESH and the fan speed control
button to any setting except “OFF”.
17C001a