Page 236 of 436
’07 HIGHLANDER HV_U (L/O 0608)
224
2007 HIGHLANDER HV from July ’06 Prod. (OM48685U)
CHANGING AUDIO LANGUAGE (DVD
video only)
Push the “Audio” switch on the screen
and then the changing audio language
screen will appear. You can also display
the screen by pushing the “AUDIO” button
on the controller.
Each time you push the “Audio” switch,
another language stored on the disc is
selected.
The selected audio language will appear
on the screen.
Push the “Back” switch to return to the
previous screen.
Page 237 of 436
’07 HIGHLANDER HV_U (L/O 0608)
225
2007 HIGHLANDER HV from July ’06 Prod. (OM48685U)
CHANGING AUDIO FORMAT (DVD audio
only)
Push the “Audio” switch on the screen or
the “AUDIO” button on the controller and
the changing audio format screen will ap-
pear.
Each time you push the “Audio” switch,
another audio format stored on the disc is
selected.
Push the “Back” switch to return to the
previous screen.
Page 238 of 436
’07 HIGHLANDER HV_U (L/O 0608)
226
2007 HIGHLANDER HV from July ’06 Prod. (OM48685U)
DVD video
DVD audio
CHANGING ANGLE SCREEN
Push the “Angle” switch on the screen,
and then the changing angle screen will
appear. You can also display the screen
by pushing the “ANGLE” button on the
controller.
The angle can be selected for discs that
are multi−angle compatible when the
“
” mark appears on the screen. Each
time you push the “Angle” switch, the
angle changes. The angle number which
you can select will appear on the screen.
Push the “Back” switch to return to the
previous screen.
Page 239 of 436
’07 HIGHLANDER HV_U (L/O 0608)
227
2007 HIGHLANDER HV from July ’06 Prod. (OM48685U)
DVD video
DVD audio
CHANGING THE INITIAL SETTING
Push the “Set Up” switch on the screen,
and then the initial setting screen will ap-
pear. You can also display the screen by
pushing the “SET UP” button on the con-
troller. You can change the initial setting.
After the setting is done, the player plays
from the beginning of the chapter or the
track.
Setup Menu 1 screen
Setup Menu 2 screen
Page 240 of 436

’07 HIGHLANDER HV_U (L/O 0608)
228
2007 HIGHLANDER HV from July ’06 Prod. (OM48685U)
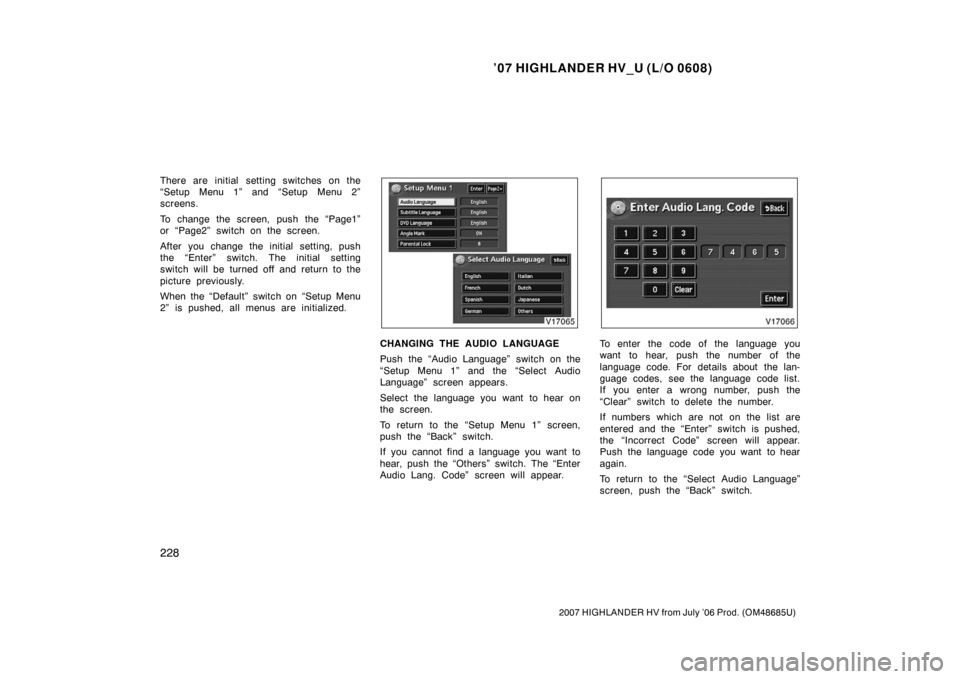
There are initial setting switches on the
“Setup Menu 1” and “Setup Menu 2”
screens.
To change the screen, push the “Page1”
or “Page2” switch on the screen.
After you change the initial setting, push
the “Enter” switch. The initial setting
switch will be turned off and return to the
picture previously.
When the “Default” switch on “Setup Menu
2” is pushed, all menus are initialized.
CHANGING THE AUDIO LANGUAGE
Push the “Audio Language” switch on the
“Setup Menu 1” and the “Select Audio
Language” screen appears.
Select the language you want to hear on
the screen.
To return to the “Setup Menu 1” screen,
push the “Back” switch.
If you cannot find a language you want to
hear, push the “Others” switch. The “Enter
Audio Lang. Code” screen will appear.To enter the code of the language you
want to hear, push the number of the
language code. For details about the lan-
guage codes, see the language code list.
If you enter a wrong number, push the
“Clear” switch to delete the number.
If numbers which are not on the list are
entered and the “Enter” switch is pushed,
the “Incorrect Code” screen will appear.
Push the language code you want to hear
again.
To return to the “Select Audio Language”
screen, push the “Back” switch.
Page 246 of 436
’07 HIGHLANDER HV_U (L/O 0608)
234
2007 HIGHLANDER HV from July ’06 Prod. (OM48685U)
2019Tsonga
2020Ta t a r
2023Tw i
2111Ukrainian
2118Urdu
2126Uzbek
2209Vietnamese
2215Volapük
2315Wolof
2408Xhosa
2515Yoruba
2621Zulu
SELECTING THE CHAPTER/TRACK
To select the chapter/track, push the “
”
or “
” side of the (TUNE/TRACK) button
on the controller until the number of the
chapter/track you want to select appears
on the screen.
DVD video
DVD audio
Page 247 of 436

’07 HIGHLANDER HV_U (L/O 0608)
235
2007 HIGHLANDER HV from July ’06 Prod. (OM48685U)
USING THE CONTROL SCREEN
When playing a disc, push the “DVD” but-
ton on the controller. The control screen
will appear on the screen.
Details of the specific switches, controls
and features are described below.1. “PICTURE” switch
Push the “PICTURE” switch to turn off
the control screen and return to the
picture previously displayed.
2. “RPT” switch (DVD audio only) Push the “RPT” switch while the track
is playing. When the track ends, it will
automatically replay. To turn off the re-
peat feature, push this switch again.
3. “RAND” switch (DVD audio only) Push the “RAND” switch. The player
will play the tracks on the disc in ran-
dom order. To turn off the random fea-
ture, push this switch again.
4. “SCAN” switch (DVD audio only) Push the “SCAN” switch. The player
will scan all the tracks on the disc you
are listening to. To stop scanning, push
this switch again. If the player has
scanned all the tracks on the disc, it
will stop scanning. 5. “” and “” switches
Push and hold the “
” or “” switch
to fast forward or reverse a disc. When
you release the switch, the DVD player
will resume playing.
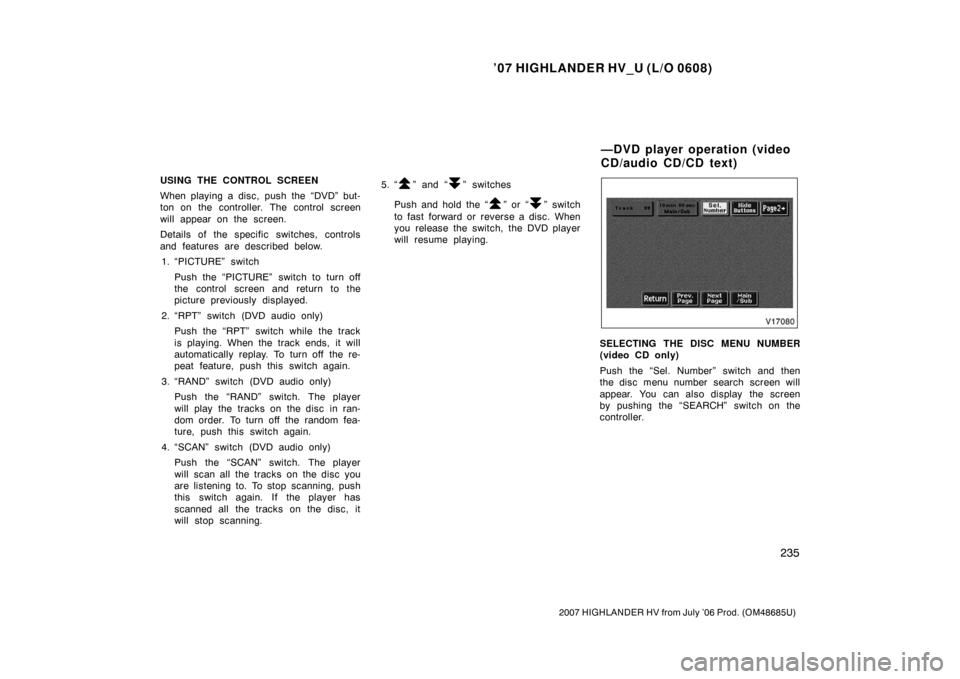
SELECTING THE DISC MENU NUMBER
(video CD only)
Push the “Sel. Number” switch and then
the disc menu number search screen will
appear. You can also display the screen
by pushing the “SEARCH” switch on the
controller.
—DVD player operation (video
CD/audio CD/CD text)
Page 250 of 436
’07 HIGHLANDER HV_U (L/O 0608)
238
2007 HIGHLANDER HV from July ’06 Prod. (OM48685U)
Video CD
Audio CD
CD Text
USING THE CONTROL SCREEN
When playing a disc, push the “DVD” but-
ton on the controller. The control screen
will appear on the screen.
CD text only—
The disc title and track title will appear on
the screen when pushing the “DVD” but-
ton.
Details of the specific switches, controls
and features are described below.1. “PICTURE” switch (video CD only) Push the “PICTURE” switch to turn off
the control screen and return to the
picture previously displayed.
2. “RPT” switch (audio CD and CD text) Push the “RPT” switch while the track
is playing. When the track ends, it will
automatically replay. To turn off the re-
peat feature, push this switch again.