Page 52 of 207

41 2. Touch “Enter”.
The system starts route search and displays
recommended routes.
If there is already a set destination, “Add to
” and “Replace ” are displayed.
“Add to
”: To add a destination.
“Replace
”: To delete the existing destina-
tions and set a new one.
“Route Preference”: To change the route
preference. (See page 42.)
“Info.”: If this button is displayed on the top
of the screen, touch it to view items such as
name, address, and phone number.
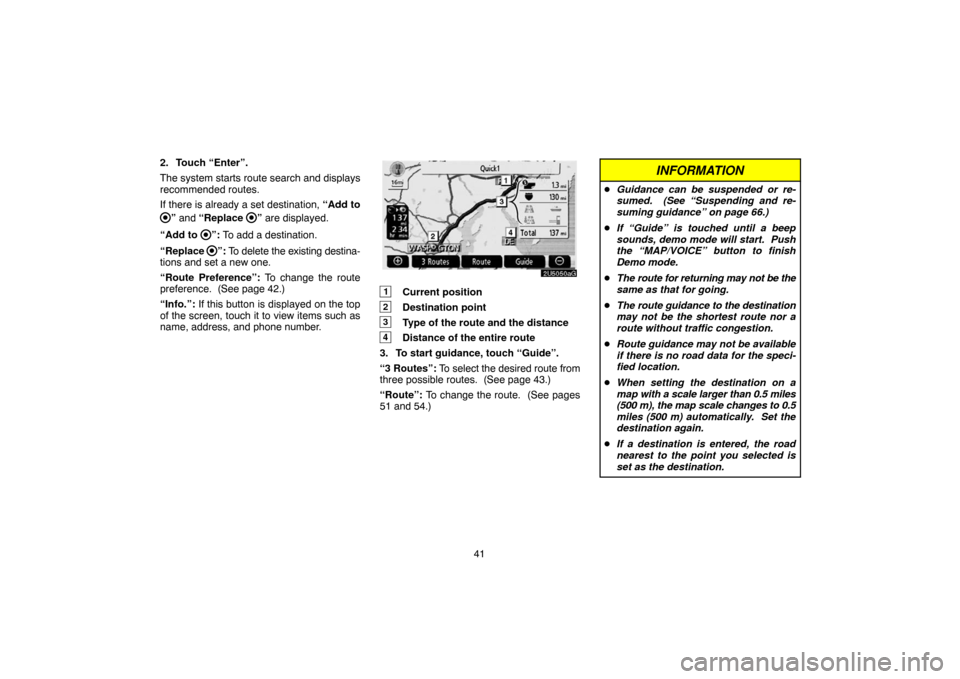
1Current position
2Destination point
3Type of the route and the distance
4Distance of the entire route
3. To start guidance, touch “Guide”.
“3 Routes”: To select the desired route from
three possible routes. (See page 43.)
“Route”: To change the route. (See pages
51 and 54.)
INFORMATION
�Guidance can be suspended or re-
sumed. (See “Suspending and re-
suming guidance” on page 66.)
�If “Guide” is touched until a beep
sounds, demo mode will start. Push
the “MAP/VOICE” button to finish
Demo mode.
�The route for returning may not be the
same as that for going.
�The route guidance to the destination
may not be the shortest route nor a
route without traffic congestion.
�Route guidance may not be available
if there is no road data for the speci-
fied location.
�When setting the destination on a
map with a scale larger than 0.5 miles
(500 m), the map scale changes to 0.5
miles (500 m) automatically. Set the
destination again.
�If a destination is entered, the road
nearest to the point you selected is
set as the destination.
Page 83 of 207
72
— Editing memory points
The icon, attribute, name, location and/or
telephone number of a registered memory
point can be edited.
1. Touch “Edit”.
2. Touch the desired memory point but-
ton.
3. Touch the button to be edited.
“Icon”: To select icons to be displayed on the
map. (See page 72.)
“Quick Access”: To set an attribute.
Memory points with a set attribute can be
used as a “Quick access” or “Home” button.
(See page 73.)
“Name”: To edit memory point names. The
names can be displayed on the map. (See
page 74.)
“Location”: To edit location information.
(See page 75.)
“Phone #”: To edit telephone numbers. (See
page 75.)
4. Touch “OK”.
�To change “Icon”
1. Touch “Icon” on the “Memory Point”
screen.
2. Touch the desired icon.
Turn the page by touching “Page 1”, “Page
2” or “with Sound”.
Page 86 of 207
75 DISPLAYING MEMORY POINT NAMES
The name of a memory point that may be dis-
played on the map can be set.
To show the name, touch “ON” on the
“Memory Point” screen. To not show it,
touch “OFF”.
�To change “Location”
1. Touch “Location” on the “Memory
Point” screen.
2. Touch the eight directional touch�
screen button to move the cursor to the
desired point on the map.
3. Touch “Enter”.
The previous screen will be displayed.
�To change “Phone #” (telephone num-
ber)
1. Touch “Phone #” on the “Memory
Point” screen.
2. Enter the number using number keys.
3. Touch “OK”.
The previous screen will be displayed.
Page 105 of 207
94
3. Touch the button to be edited.
“Dealer”: To enter the name of a dealer. (See
page 94.)
“Contact”: To enter the name of a dealer
member. (See page 94.)
“Location”: To set a location. (See page
94.)
“Phone #”: To set a telephone number. (See
page 95.)
“Delete Dealer”: To delete the dealer infor-
mation displayed on the screen.
“Enter
”: To set the displayed dealer as a
destination. (See “Starting route guidance”
on page 40.)
�To edit “Dealer” or “Contact”
1. Touch “Dealer” or “Contact” on the
“Edit Dealer” screen.
2. Enter the name using the alphanumeric
keys.
Up to 24 letters can be entered.
3. Touch “OK”.
The previous screen will be displayed.
�To edit “Location”
1. Touch “Location” on the “Edit Dealer”
screen.
2. Touch the eight directional touch�
screen button to move the cursor to the
desired point on the map.
3. Touch “Enter”.
The previous screen will be displayed.
Page 106 of 207
95
�To edit “Phone #” (telephone number)
1. Touch “Phone #” on the “Edit Dealer”
screen.
2. Enter the number using number keys.
3. Touch “OK”.
The previous screen will be displayed.
Calendar with memo —
It is possible to enter memos for particular
dates on the calendar. The system informs
you of the memo entry when the system is
turned on. (See page 3.)
Memos can also be used for route guidance
if the memo has been registered with location
information.
1. Push the “INFO” button.
2. Touch “Calendar”.
On this screen, the current date is highlighted
in yellow.
or : To change month.
or : To change year.
“Today”: To display the current month calen-
dar (if another month will be displayed).
“List”: To display the list of registered me-
mos. (See “ — Memo list” on page 98.)
Touching a date button on the “Calendar”
screen displays the “Memo” screen.
Page 110 of 207

99
Hands�free system
Hands�free system allows you to make or
receive a call without taking your hands
off the steering wheel by connecting your
cellular phone.
This system supports Bluetooth. Bluetooth is
a wireless data system by which you can call
without your cellular phone being connected
with a cable or placed on a cradle.
If your cellular phone does not support Blue-
tooth, this system can not function.
CAUTION
While driving, do not use a cellular
phone or connect the Bluetooth
phone.
NOTICE
Do not leave your cellular phone in the
car. The temperature indoor may be
high and damage the phone.
INFORMATION
In the following conditions, the system
may not function.
�The cellular phone is turned off.
�The current position is outside the
communication area.
�The cellular phone is not connected.
�The cellular phone has a low battery.
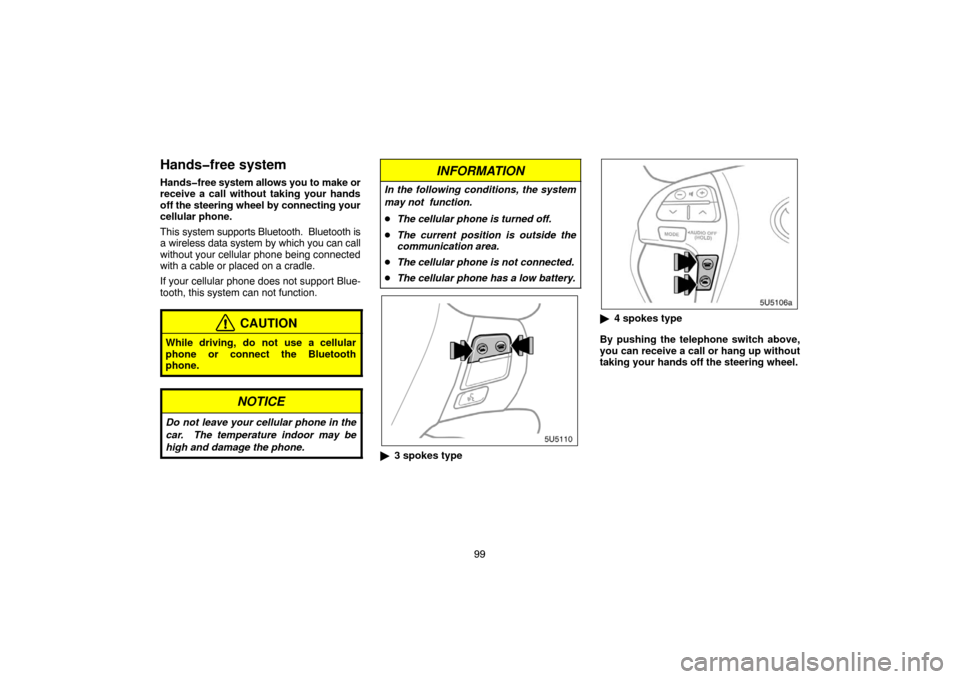
�3 spokes type
�4 spokes type
By pushing the telephone switch above,
you can receive a call or hang up without
taking your hands off the steering wheel.
Page 111 of 207

100
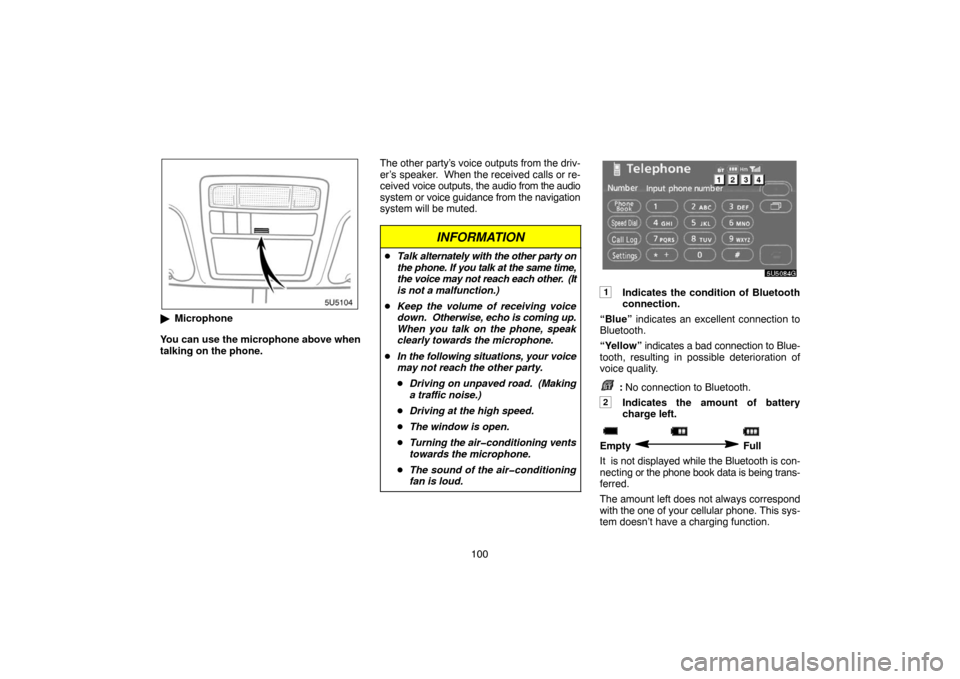
�Microphone
You can use the microphone above when
talking on the phone.The other party’s voice outputs from the driv-
er’s speaker. When the received calls or re-
ceived voice outputs, the audio from the audio
system or voice guidance from the navigation
system will be muted.
INFORMATION
�Talk alternately with the other party on
the phone. If you talk at the same time,
the voice may not reach each other. (It
is not a malfunction.)
�Keep the volume of receiving voice
down. Otherwise, echo is coming up.
When you talk on the phone, speak
clearly towards the microphone.
�In the following situations, your voice
may not reach the other party.
�Driving on unpaved road. (Making
a traffic noise.)
�Driving at the high speed.
�The window is open.
�Turning the air�conditioning vents
towards the microphone.
�The sound of the air�conditioning
fan is loud.
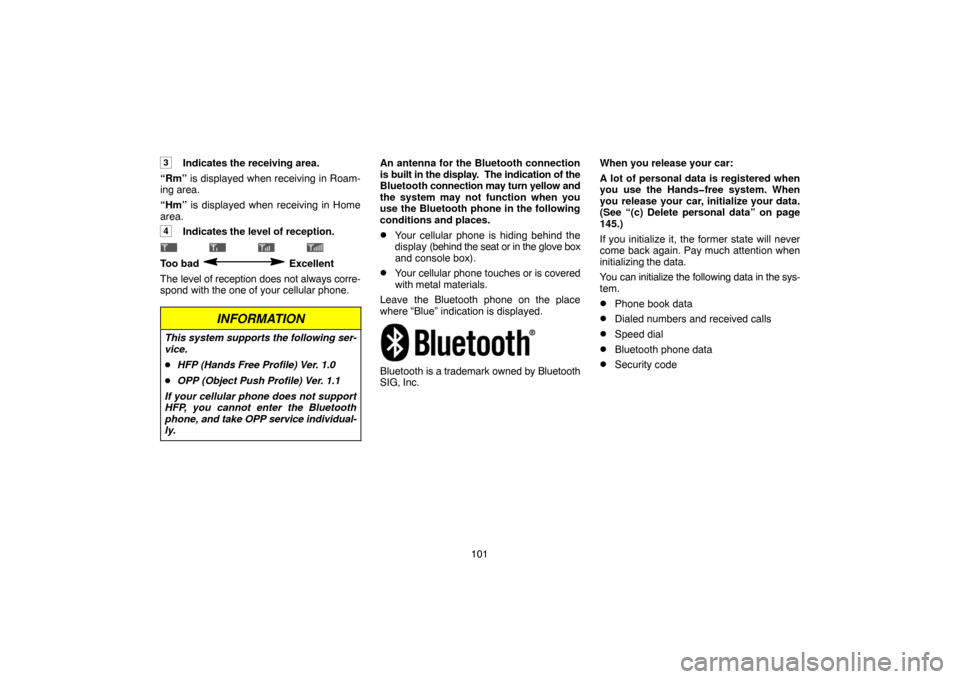
1Indicates the condition of Bluetooth
connection.
“Blue” indicates an excellent connection to
Bluetooth.
“Yellow” indicates a bad connection to Blue-
tooth, resulting in possible deterioration of
voice quality.
: No connection to Bluetooth.
2Indicates the amount of battery
charge left.
Empty Full
It is not displayed while the Bluetooth is con-
necting or the phone book data is being trans-
ferred.
The amount left does not always correspond
with the one of your cellular phone. This sys-
tem doesn’t have a charging function.
Page 112 of 207

101
3Indicates the receiving area.
“Rm” is displayed when receiving in Roam-
ing area.
“Hm” is displayed when receiving in Home
area.
4Indicates the level of reception.
Too bad Excellent
The level of reception does not always corre-
spond with the one of your cellular phone.
INFORMATION
This system supports the following ser-
vice.
�HFP (Hands Free Profile) Ver. 1.0
�OPP (Object Push Profile) Ver. 1.1
If your cellular phone does not support
HFP, you cannot enter the Bluetooth
phone, and take OPP service individual-
ly.
An antenna for the Bluetooth connection
is built in the display. The indication of the
Bluetooth connection may turn yellow and
the system may not function when you
use the Bluetooth phone in the following
conditions and places.
�Your cellular phone is hiding behind the
display (behind the seat or in the glove box
and console box).
�Your cellular phone touches or is covered
with metal materials.
Leave the Bluetooth phone on the place
where “Blue” indication is displayed.
Bluetooth is a trademark owned by Bluetooth
SIG, Inc.When you release your car:
A lot of personal data is registered when
you use the Hands�free system. When
you release your car, initialize your data.
(See “(c) Delete personal data” on page
145.)
If you initialize it, the former state will never
come back again. Pay much attention when
initializing the data.
You can initialize the following data in the sys-
tem.
�Phone book data
�Dialed numbers and received calls
�Speed dial
�Bluetooth phone data
�Security code