2007 SUZUKI GRAND VITARA operating
[x] Cancel search: operatingPage 73 of 211
Downloaded from www.Manualslib.com manuals search engine 4-11 INSTRUMENT PANEL
66J21-03E
(1): Neutral
(2): 4-wheel drive high range center differ-
ential lock mode
(2) & (3): 4-wheel drive low range center
differential lock mode
No indicators: 4-wheel drive high range
mode
For details, refer to “Using the Transfer
Switch” in the “OPERATING YOUR VEHI-
CLE” section.
If the indicators (all lights) continue to
blink, there is a problem in the transfer sys-
tem and you should have your vehicle
inspected by an authorized SUZUKI
dealer.
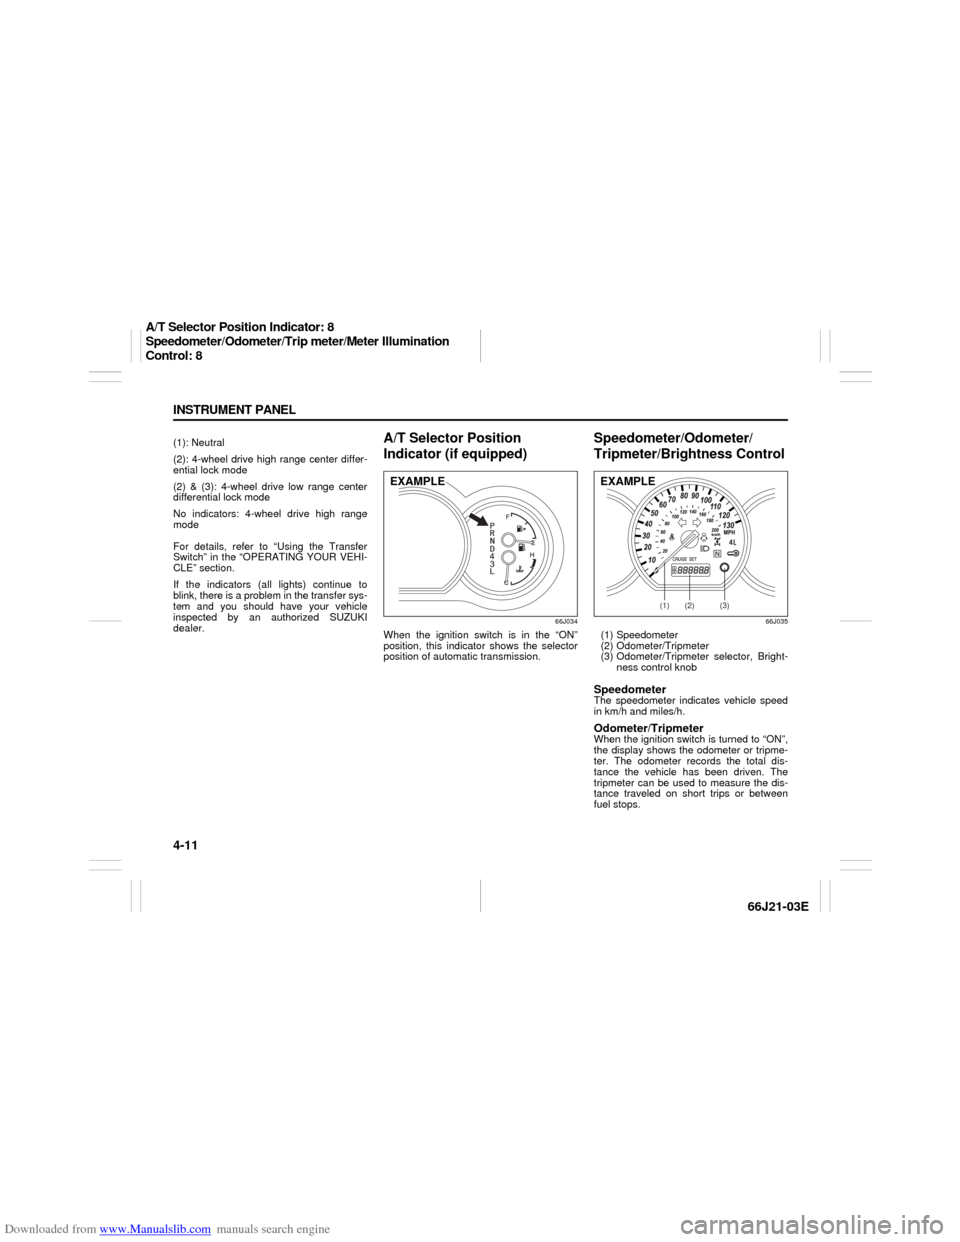
A/T Selector Position
Indicator (if equipped)
66J034
When the ignition switch is in the “ON”
position, this indicator shows the selector
position of automatic transmission.
Speedometer/Odometer/
Tripmeter/Brightness Control
66J035
(1) Speedometer
(2) Odometer/Tripmeter
(3) Odometer/Tripmeter selector, Bright-
ness control knobSpeedometerThe speedometer indicates vehicle speed
in km/h and miles/h.Odometer/TripmeterWhen the ignition switch is turned to “ON”,
the display shows the odometer or tripme-
ter. The odometer records the total dis-
tance the vehicle has been driven. The
tripmeter can be used to measure the dis-
tance traveled on short trips or between
fuel stops.
EXAMPLE
(1)
(2)
(3)
EXAMPLE
A/T Selector Position Indicator: 8
Speedometer/Odometer/Trip meter/Meter Illumination
Control: 8
Page 78 of 211

Downloaded from www.Manualslib.com manuals search engine 4-16 INSTRUMENT PANEL
66J21-03E
Front Fog Light Switch
(if equipped)
64J058
The front fog light comes on when the fog
light switch is pushed in with:
the lighting switch turned to the third
position and the beams set to the low
beam position, or
the auto-on headlight system on and the
beams set to the low beam position.
“ESP OFF” Switch
66J039
ESP
® is a registered trademark of
DaimlerChrysler AG.
The “ESP OFF” switch is located on the
center of the instrument panel. You can
turn the ESP
® systems (other than ABS)
on or off using this switch.
To turn off the ESP
® systems (other than
ABS), push and hold the “ESP OFF”
switch until the “ESP OFF” indicator light
comes on.
To turn on all of the ESP
® systems, push
the “ESP OFF” switch again. The “ESP
OFF” indicator light will go out.
NOTE:
If the vehicle speed is greater than
approximately 30 km/h (19 mph), theESP
® systems (other than ABS) will turn
on automatically.
If the transfer switch (if equipped) is
turned to the “4L LOCK” position, the
ESP® systems (other than ABS) will be
canceled automatically.
If the ESP
® systems operates continu-
ously, such as when driving on slippery
roads, the traction control functions of
the ESP
® systems may be canceled
temporarily to avoid overheating the
brake pads. After a short period of time,
the ESP® systems (other than ABS) will
turn on automatically and the “ESP OFF”
indicator light will go out.
For details of the ESP
® systems, refer to
“Electronic Stability Program (ESP
®)” in
the “OPERATING YOUR VEHICLE” sec-
tion.
Rear Window Defroster and Outside Rearview Mirrors Defroster Switch: 8Front Fog Light Switch: 8
“ESP OFF” Switch:
Page 79 of 211
Downloaded from www.Manualslib.com manuals search engine 4-17 INSTRUMENT PANEL
66J21-03E
Transfer Switch (if equipped)
66J168
The transfer switch is located on the center
of the instrument panel.
For details on how to use this switch, refer
to “Using the Transfer Switch” in the
“OPERATING YOUR VEHICLE” section.
Glove Box
64J065
To open the glove box, pull the latch lever.
To close it, push the lid until it latches
securely. If a lock is equipped on the latch
lever, lock the glove box by inserting the
key and turning it clockwise and unlock the
glove box by turning the key counterclock-
wise.
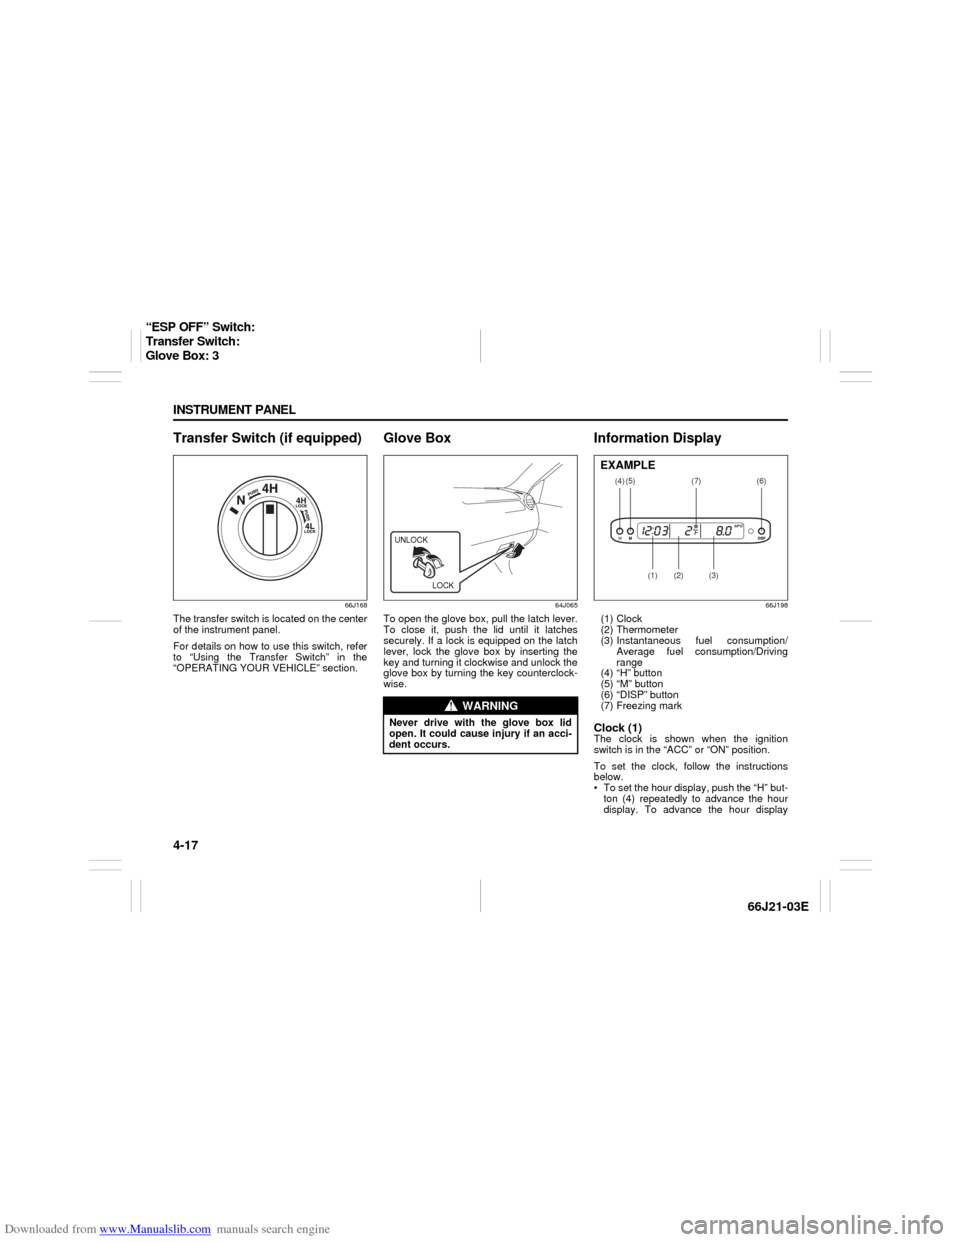
Information Display
66J198
(1) Clock
(2) Thermometer
(3) Instantaneous fuel consumption/
Average fuel consumption/Driving
range
(4) “H” button
(5) “M” button
(6) “DISP” button
(7) Freezing markClock (1)The clock is shown when the ignition
switch is in the “ACC” or “ON” position.
To set the clock, follow the instructions
below.
To set the hour display, push the “H” but-
ton (4) repeatedly to advance the hour
display. To advance the hour display
WARNING
Never drive with the glove box lid
open. It could cause injury if an acci-
dent occurs.UNLOCK
LOCK
(4)
(2)
(1)
(3)
(5)
(6)
(7)
EXAMPLE
“ESP OFF” Switch:
Transfer Switch:
Glove Box: 3
Page 86 of 211
Downloaded from www.Manualslib.com manuals search engine 4-24 INSTRUMENT PANEL
66J21-03E
System Operating InstructionsNatural ventilation
Select “VENTILATION” and “FRESH AIR”,
the temperature selector to the desired
temperature position, and the blower
speed selector to “OFF”. Fresh air will flow
through the vehicle during driving.
Forced ventilation
The control settings are the same as for
natural ventilation except you set the
blower speed selector to a position other
than “OFF”.
Normal heating (using outside air)
Select “HEAT” and “FRESH AIR”, the tem-
perature selector to the desired tempera-
ture position and the blower speed selector
to the desired blower speed position. Set-
ting the blower speed selector to a higher
blower speed position increases heating
efficiency.
Quick heating (using recirculated air)
The control settings are the same as for
normal heating except you select “RECIR-
CULATED AIR”. If you use this heating
method for an extended period of time, the
air in the vehicle can become contami-
nated and the windows can become misty.
Therefore, use this method only for quick
heating and change to the normal heating
method as soon as possible.
Head cooled/Feet warmed heating
Select “BI-LEVEL” and “FRESH AIR”, the
temperature selector to the desired tem-perature position, and the blower speed
selector to the desired blower speed posi-
tion. Unless the temperature selector is in
the fully COLD position or fully HOT posi-
tion, the air that comes out of the center
and side outlets will be cooler than the air
that comes out of the floor outlets.
Defrosting/Feet warmed heating
Select “HEAT & DEFROST” and “FRESH
AIR”, the temperature selector to the
desired temperature position, and the
blower speed selector to HIGH. When the
windshield has become clear, set the
blower speed selector to the desired
blower speed position.
Defrosting
Select “DEFROST” and “FRESH AIR”, the
temperature selector to the desired tem-
perature position (higher temperature pro-
vides more efficient defrosting), and the
blower speed selector to HIGH. When the
windshield has become clear, set the
blower speed selector to the desired
blower speed position.
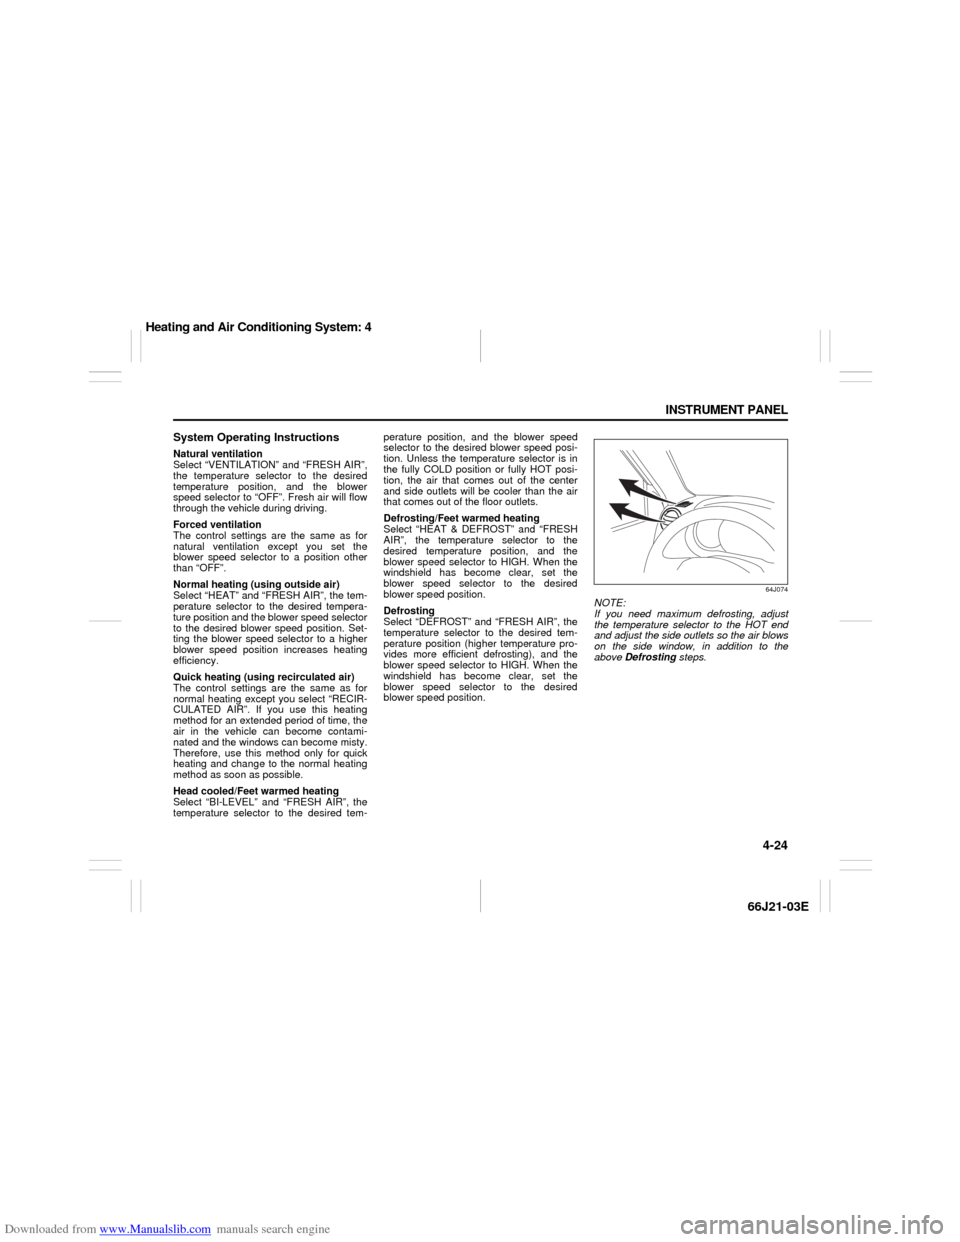
64J074
NOTE:
If you need maximum defrosting, adjust
the temperature selector to the HOT end
and adjust the side outlets so the air blows
on the side window, in addition to the
above Defrosting steps.
Heating and Air Conditioning System: 4
Page 89 of 211
Downloaded from www.Manualslib.com manuals search engine 4-27 INSTRUMENT PANEL
66J21-03E
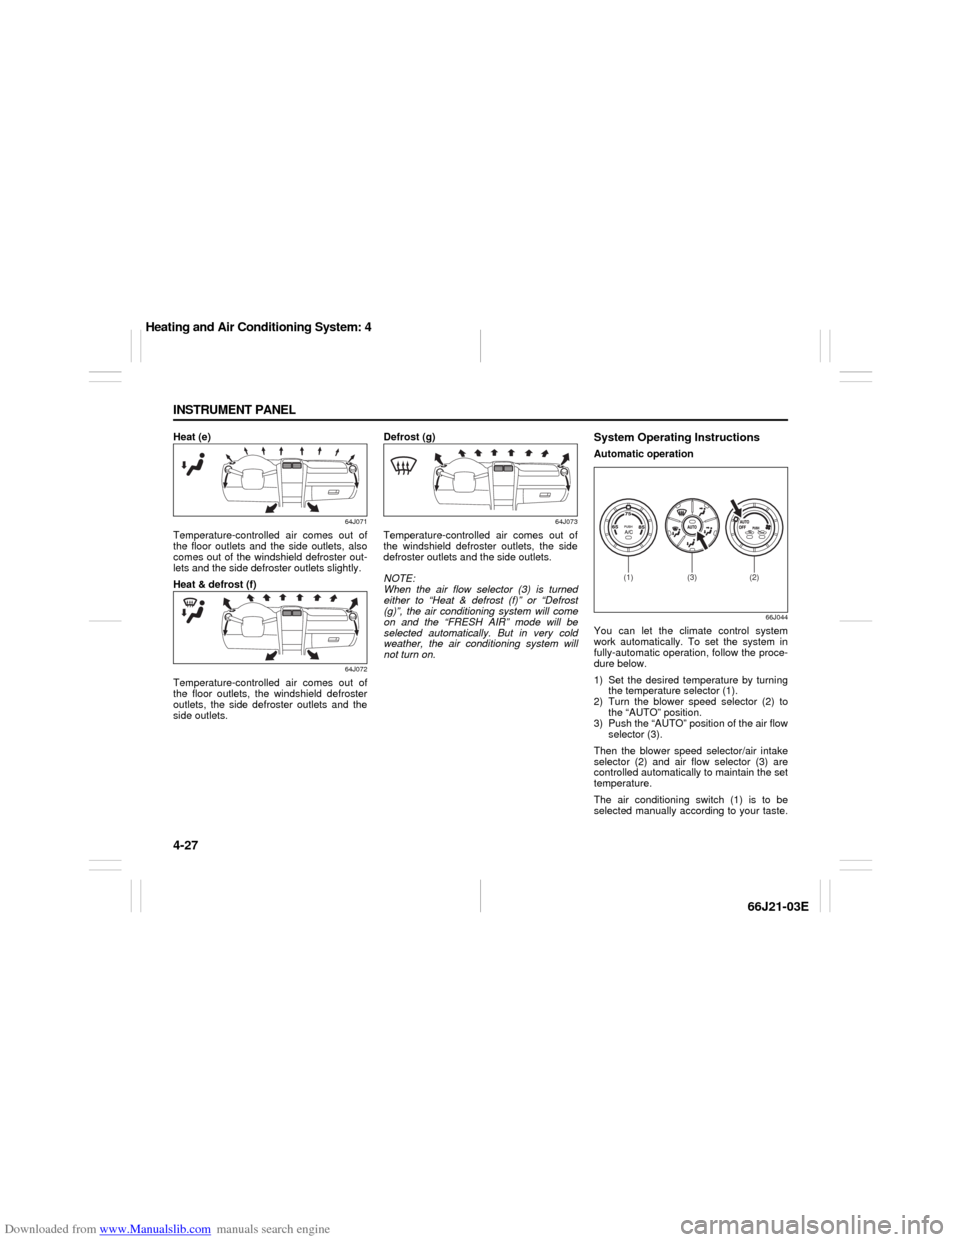
Heat (e)
64J071
Temperature-controlled air comes out of
the floor outlets and the side outlets, also
comes out of the windshield defroster out-
lets and the side defroster outlets slightly.
Heat & defrost (f)
64J072
Temperature-controlled air comes out of
the floor outlets, the windshield defroster
outlets, the side defroster outlets and the
side outlets.Defrost (g)
64J073
Temperature-controlled air comes out of
the windshield defroster outlets, the side
defroster outlets and the side outlets.
NOTE:
When the air flow selector (3) is turned
either to “Heat & defrost (f)” or “Defrost
(g)”, the air conditioning system will come
on and the “FRESH AIR” mode will be
selected automatically. But in very cold
weather, the air conditioning system will
not turn on.
System Operating InstructionsAutomatic operation
66J044
You can let the climate control system
work automatically. To set the system in
fully-automatic operation, follow the proce-
dure below.
1) Set the desired temperature by turning
the temperature selector (1).
2) Turn the blower speed selector (2) to
the “AUTO” position.
3) Push the “AUTO” position of the air flow
selector (3).
Then the blower speed selector/air intake
selector (2) and air flow selector (3) are
controlled automatically to maintain the set
temperature.
The air conditioning switch (1) is to be
selected manually according to your taste.
(2)
(1)
(3)
Heating and Air Conditioning System: 4
Page 93 of 211
Downloaded from www.Manualslib.com manuals search engine 4-31 INSTRUMENT PANEL
66J21-03E
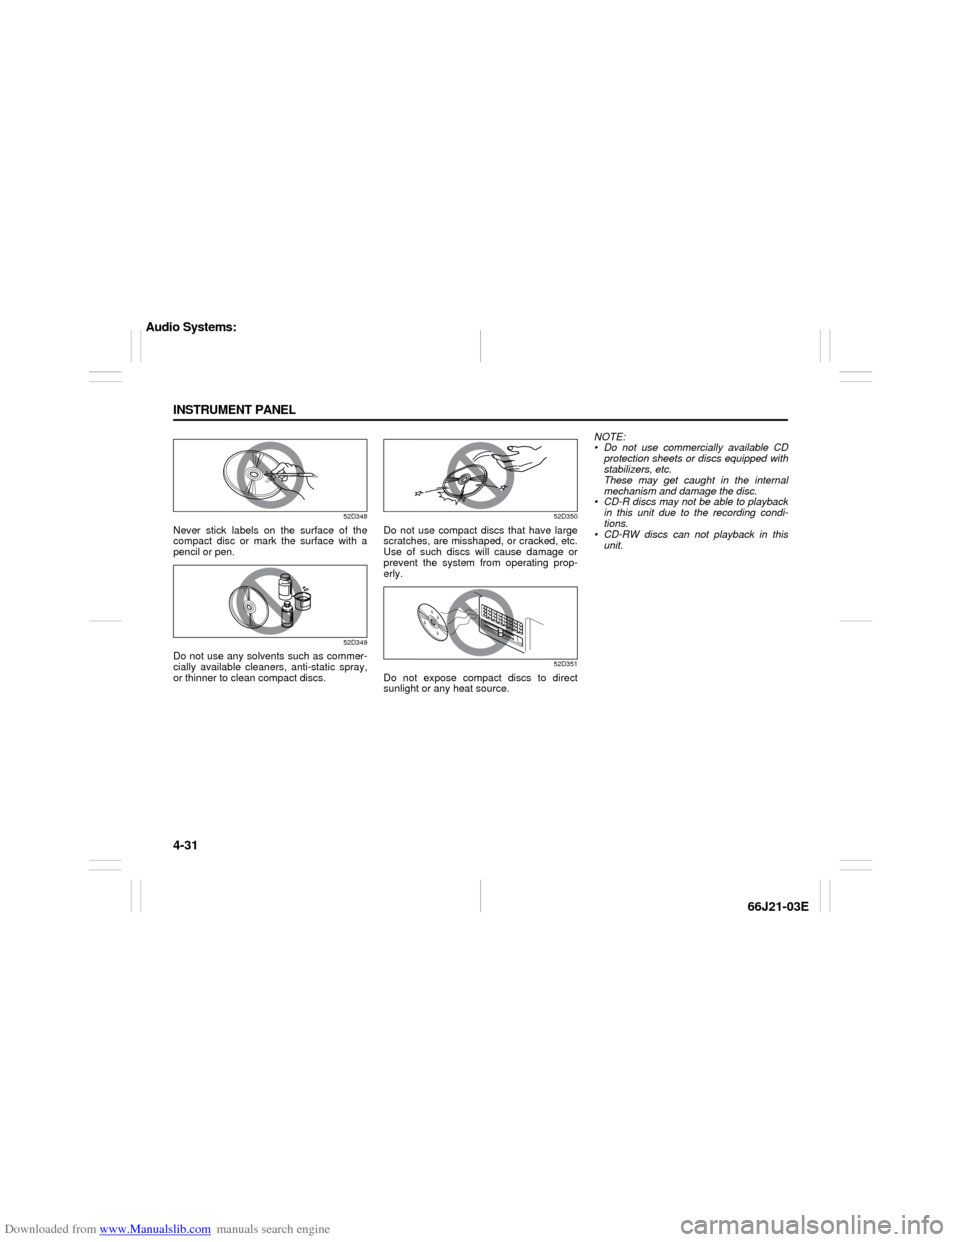
52D348
Never stick labels on the surface of the
compact disc or mark the surface with a
pencil or pen.
52D349
Do not use any solvents such as commer-
cially available cleaners, anti-static spray,
or thinner to clean compact discs.
52D350
Do not use compact discs that have large
scratches, are misshaped, or cracked, etc.
Use of such discs will cause damage or
prevent the system from operating prop-
erly.
52D351
Do not expose compact discs to direct
sunlight or any heat source.NOTE:
Do not use commercially available CD
protection sheets or discs equipped with
stabilizers, etc.
These may get caught in the internal
mechanism and damage the disc.
CD-R discs may not be able to playback
in this unit due to the recording condi-
tions.
CD-RW discs can not playback in this
unit.
Audio Systems:
Page 113 of 211
Downloaded from www.Manualslib.com manuals search engine 4-51 INSTRUMENT PANEL
66J21-03E
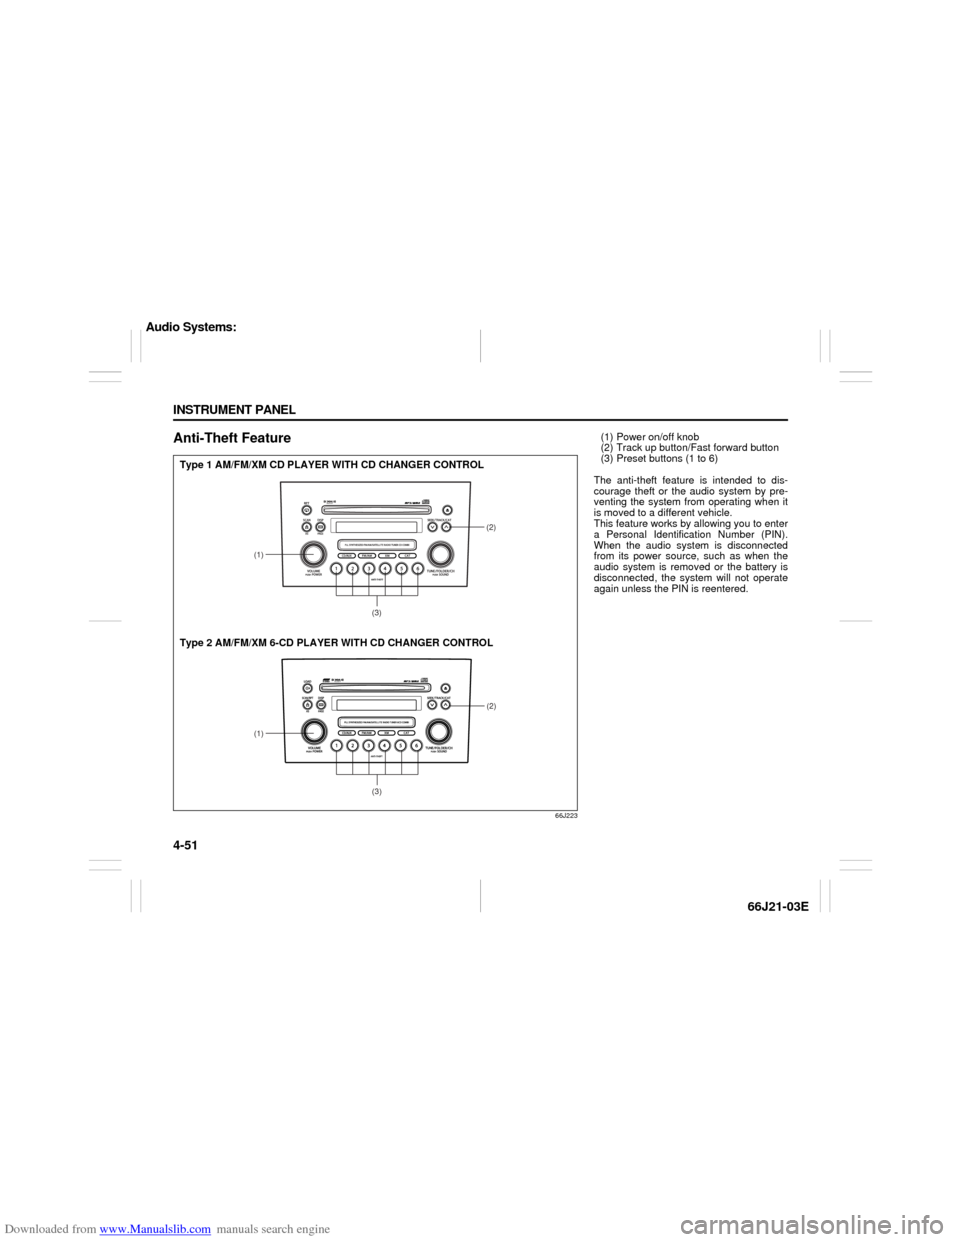
Anti-Theft Feature
66J223
(1)
(2)
(3)
(1)
(2)
(3)
Type 1 AM/FM/XM CD PLAYER WITH CD CHANGER CONTROL
Type 2 AM/FM/XM 6-CD PLAYER WITH CD CHANGER CONTROL
(1) Power on/off knob
(2) Track up button/Fast forward button
(3) Preset buttons (1 to 6)
The anti-theft feature is intended to dis-
courage theft or the audio system by pre-
venting the system from operating when it
is moved to a different vehicle.
This feature works by allowing you to enter
a Personal Identification Number (PIN).
When the audio system is disconnected
from its power source, such as when the
audio system is removed or the battery is
disconnected, the system will not operate
again unless the PIN is reentered.
Audio Systems:
Page 121 of 211

Downloaded from www.Manualslib.com manuals search engine 7-3 DRIVING TIPS
66J21-03E
Don’t Make Sharp Turns
As mentioned before, small multipurpose
vehicles have specific design characteris-
tics that allow them to perform in a wide
variety of applications. These characteris-
tics also change the cornering behavior
relative to conventional passenger cars.
Remember, small multipurpose vehicles
have more responsive steering and a
higher center of gravity than conventional
passenger cars. If at all possible, avoid
making sharp turns in your vehicle.
Slow Down on Curves
Learn to approach curves cautiously and
at a conservative speed. Do not attempt to
take curves at the same speeds that you
would in a vehicle with a lower center of
gravity. Just as you would not drive a
sports car on a trail, you should not
attempt to drive your vehicle around curves
like a sports car.
Slow Down and Use Caution on Slip-
pery Roads
Under wet road conditions you should
drive at a lower speed than on dry roads
due to possible slippage of tires during
braking. When driving on icy, snowcovered
or muddy roads, reduce your speed and
avoid sudden acceleration, abrupt braking
or sharp steering movements. Use 4-wheel
drive high range (4H) (if equipped) for bet-
ter traction.NOTE:
Avoid operating your vehicle in “4H LOCK”
or “4L LOCK” on wet pavement as much
as possible. Operating your vehicle in “4H
LOCK” or “4L LOCK” on wet pavement
may cause severe damage to the drive
train.
NOTE:
Operating your vehicle in “4H” on dry and
tight corner may cause some vibration on
your vehicle. This is not caused by the
vehicle malfunction, but caused by working
of the limited slip differential gear in the
center differential.
CAUTION
Do not operate your vehicle in “4H
LOCK” or “4L LOCK” on dry, hard
surfaces. Operating your vehicle in
“4H LOCK” or “4L LOCK” on dry,
hard surfaces puts severe stress to
the drive train, especially during tight
cornering, and can damage it. Also,
you may have some difficulty steer-
ing.
CAUTION
Unevenly worn tires can cause prob-
lems in the operation of the transfer
switch. Be sure to rotate the tires
according to the maintenance sched-
ule. Refer to “Tires” and “Mainte-
nance Schedule” in the
“INSPECTION AND MAINTENANCE”
section for proper tire rotation proce-
dures.
On-Pavement Driving: NO
Off-Road Driving: NO