2007 SUZUKI FORENZA warning
[x] Cancel search: warningPage 79 of 225
3-3 INSTRUMENT PANEL
85Z03-03E
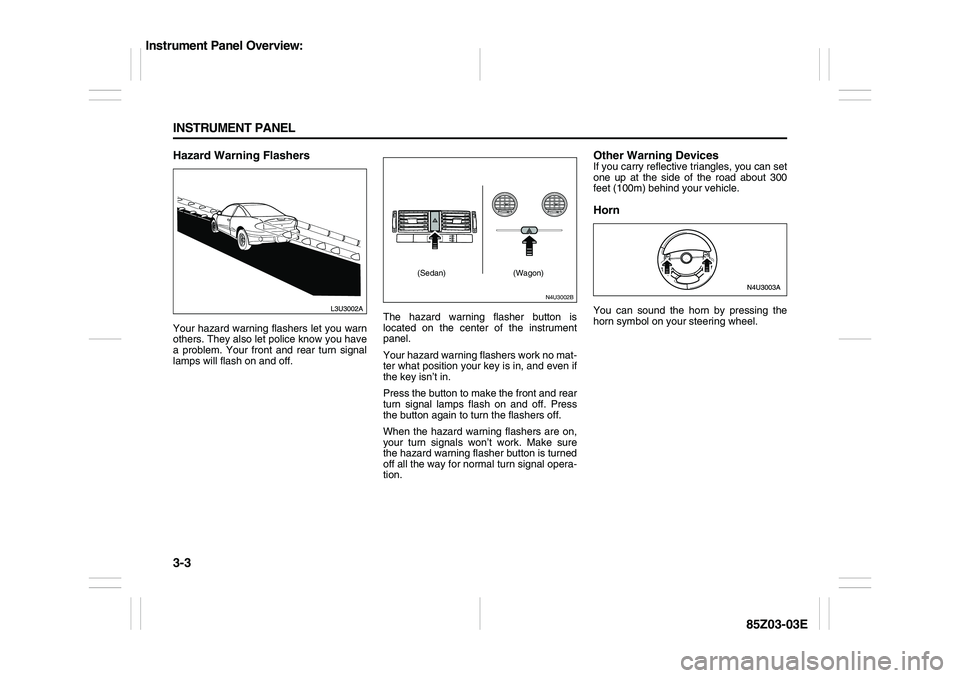
Hazard Warning FlashersYour hazard warning flashers let you warn
others. They also let police know you have
a problem. Your front and rear turn signal
lamps will flash on and off.The hazard warning flasher button is
located on the center of the instrument
panel.
Your hazard warning flashers work no mat-
ter what position your key is in, and even if
the key isn’t in.
Press the button to make the front and rear
turn signal lamps flash on and off. Press
the button again to turn the flashers off.
When the hazard warning flashers are on,
your turn signals won’t work. Make sure
the hazard warning flasher button is turned
off all the way for normal turn signal opera-
tion.
Other Warning DevicesIf you carry reflective triangles, you can set
one up at the side of the road about 300
feet (100m) behind your vehicle.HornYou can sound the horn by pressing the
horn symbol on your steering wheel.
N4U3002B
(Sedan) (Wagon)
Instrument Panel Overview:
Page 80 of 225
3-4 INSTRUMENT PANEL
85Z03-03E
Tilt WheelYour vehicle has a tilt wheel which allows
you to adjust the steering wheel before you
drive. You can raise it to the highest level to
give your legs more room when you exit
and enter the vehicle.
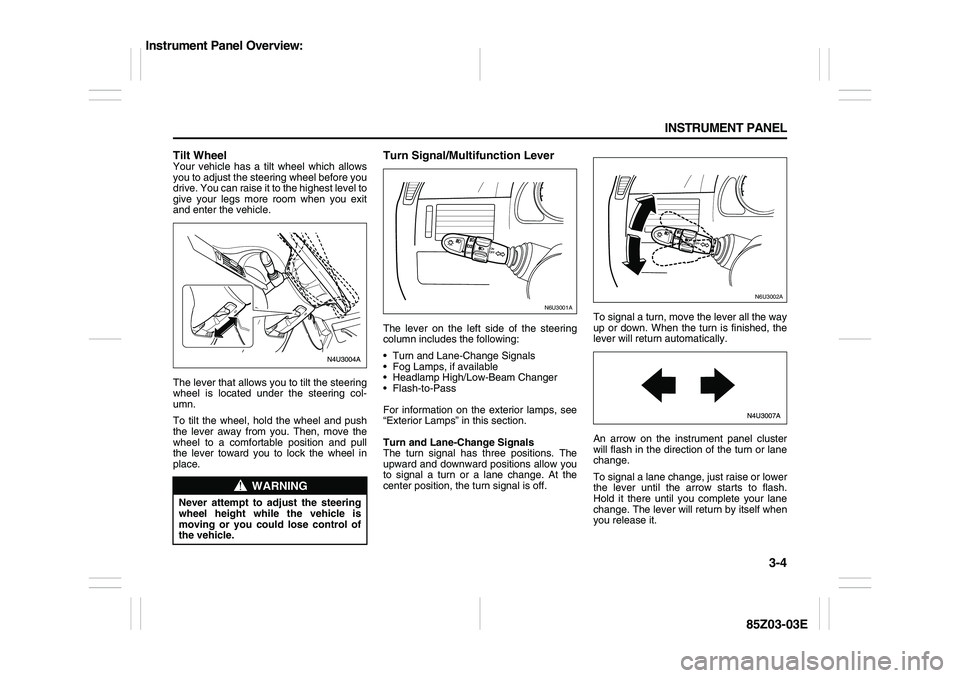
The lever that allows you to tilt the steering
wheel is located under the steering col-
umn.
To tilt the wheel, hold the wheel and push
the lever away from you. Then, move the
wheel to a comfortable position and pull
the lever toward you to lock the wheel in
place.
Turn Signal/Multifunction LeverThe lever on the left side of the steering
column includes the following:
Turn and Lane-Change Signals
Fog Lamps, if available
Headlamp High/Low-Beam Changer
Flash-to-Pass
For information on the exterior lamps, see
“Exterior Lamps” in this section.
Turn and Lane-Change Signals
The turn signal has three positions. The
upward and downward positions allow you
to signal a turn or a lane change. At the
center position, the turn signal is off.To signal a turn, move the lever all the way
up or down. When the turn is finished, the
lever will return automatically.
An arrow on the instrument panel cluster
will flash in the direction of the turn or lane
change.
To signal a lane change, just raise or lower
the lever until the arrow starts to flash.
Hold it there until you complete your lane
change. The lever will return by itself when
you release it.
WARNING
Never attempt to adjust the steering
wheel height while the vehicle is
moving or you could lose control of
the vehicle.
N6U3001A
N6U3002A
Instrument Panel Overview:
Page 82 of 225
3-6 INSTRUMENT PANEL
85Z03-03E
between wipes. The wiper speed can only
be adjusted when the lever is in the INT
position.
OFF (Off):
Move the lever to this position to turn off
the windshield wipers.
Misting Function
Move the lever toward, but not completely
in, the INT position for a single wiping
cycle. Hold it there until the windshield wip-
ers start; then let go. The windshield wip-
ers will stop after one cycle. If you want
more wipes, hold the lever toward the INT
position longer.
Remember that damaged wiper blades
may prevent you from seeing well enough
to drive safely. To avoid damage, be sure to
clear ice and snow from the wiper blades
before using them.
If they’re frozen to the windshield, carefully
loosen or thaw them. If your blades do
become damaged, get new blades or
blade inserts.
Heavy snow or ice can overload the wiper
motor. A circuit breaker will stop the motor
until it cools. Clear away snow or ice to
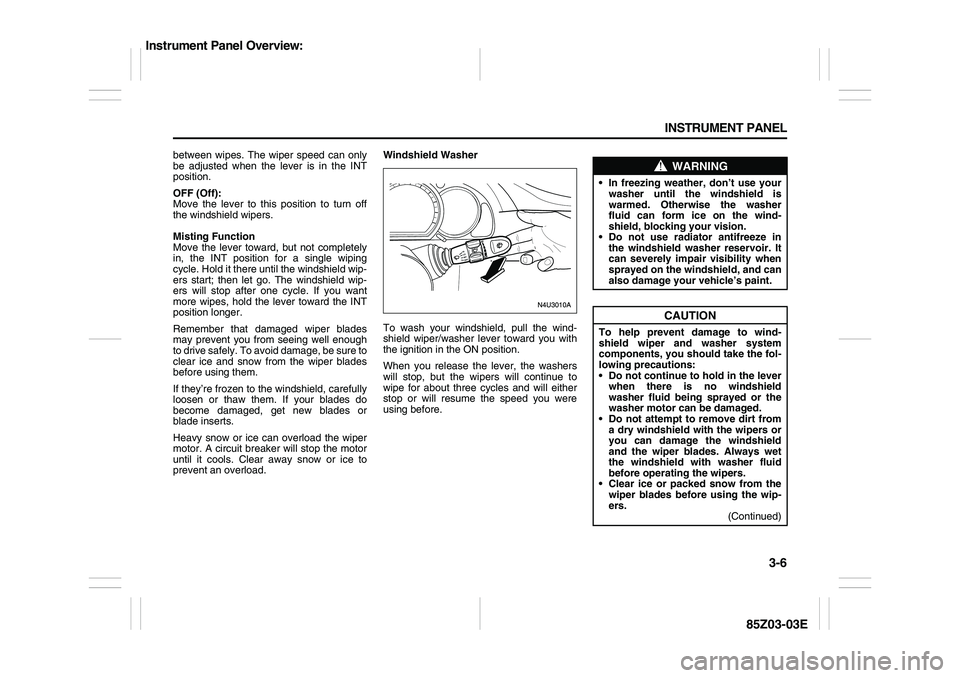
prevent an overload.Windshield Washer
To wash your windshield, pull the wind-
shield wiper/washer lever toward you with
the ignition in the ON position.
When you release the lever, the washers
will stop, but the wipers will continue to
wipe for about three cycles and will either
stop or will resume the speed you were
using before.
WARNING
In freezing weather, don’t use your
washer until the windshield is
warmed. Otherwise the washer
fluid can form ice on the wind-
shield, blocking your vision.
Do not use radiator antifreeze in
the windshield washer reservoir. It
can severely impair visibility when
sprayed on the windshield, and can
also damage your vehicle’s paint.
CAUTION
To help prevent damage to wind-
shield wiper and washer system
components, you should take the fol-
lowing precautions:
Do not continue to hold in the lever
when there is no windshield
washer fluid being sprayed or the
washer motor can be damaged.
Do not attempt to remove dirt from
a dry windshield with the wipers or
you can damage the windshield
and the wiper blades. Always wet
the windshield with washer fluid
before operating the wipers.
Clear ice or packed snow from the
wiper blades before using the wip-
ers.
(Continued)
Instrument Panel Overview:
Page 83 of 225
3-7 INSTRUMENT PANEL
85Z03-03E
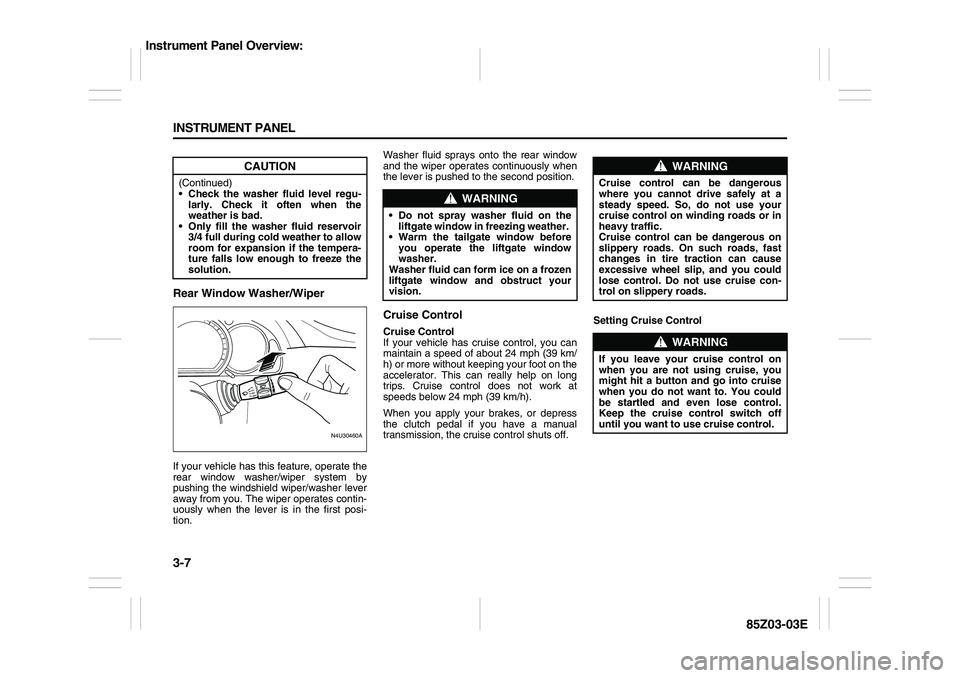
Rear Window Washer/WiperIf your vehicle has this feature, operate the
rear window washer/wiper system by
pushing the windshield wiper/washer lever
away from you. The wiper operates contin-
uously when the lever is in the first posi-
tion.Washer fluid sprays onto the rear window
and the wiper operates continuously when
the lever is pushed to the second position.
Cruise ControlCruise Control
If your vehicle has cruise control, you can
maintain a speed of about 24 mph (39 km/
h) or more without keeping your foot on the
accelerator. This can really help on long
trips. Cruise control does not work at
speeds below 24 mph (39 km/h).
When you apply your brakes, or depress
the clutch pedal if you have a manual
transmission, the cruise control shuts off.Setting Cruise Control
CAUTION
(Continued)
Check the washer fluid level regu-
larly. Check it often when the
weather is bad.
Only fill the washer fluid reservoir
3/4 full during cold weather to allow
room for expansion if the tempera-
ture falls low enough to freeze the
solution.
N4U30460A
FASTSLOW
WARNING
Do not spray washer fluid on the
liftgate window in freezing weather.
Warm the tailgate window before
you operate the liftgate window
washer.
Washer fluid can form ice on a frozen
liftgate window and obstruct your
vision.
WARNING
Cruise control can be dangerous
where you cannot drive safely at a
steady speed. So, do not use your
cruise control on winding roads or in
heavy traffic.
Cruise control can be dangerous on
slippery roads. On such roads, fast
changes in tire traction can cause
excessive wheel slip, and you could
lose control. Do not use cruise con-
trol on slippery roads.
WARNING
If you leave your cruise control on
when you are not using cruise, you
might hit a button and go into cruise
when you do not want to. You could
be startled and even lose control.
Keep the cruise control switch off
until you want to use cruise control.
Instrument Panel Overview:
Page 85 of 225

3-9 INSTRUMENT PANEL
85Z03-03E
Erasing Speed Memory
When you turn off the cruise control or the
ignition, your cruise control set speed
memory is erased.Exterior LampsThe lever on the left side of the steering
column operates the exterior lamps.
The exterior lamp band has three posi-
tions:
(Headlamps):
Turn the band to this position to turn on the
headlamps, together with the following:
Tail Lamps
License Plate Lamp
Instrument Panel Lights
The headlamps will turn off automatically
when the ignition switch is turned to LOCK
or ACC. (Parking Lamps):
Turn the band to this position to turn on the
parking lamps, together with the previously
listed lamps and lights.
OFF (Off):
Turn the band to this position to turn all
lamps off except the Daytime Running
Lamps (DRL).
Lamps On Reminder
You will hear a warning chime when the
exterior lamp band is in the or
position and driver’s door is open.
Daytime Running Lamps (DRL)
Daytime Running Lamps (DRL) can make
it easier for others to see the front of your
vehicle during the day. DRL can be helpful
in many different driving conditions, but
they can be especially helpful in the short
periods after dawn and before sunset.
The DRL system will make your low-beam
headlamps come on in daylight when the
following conditions are met:
The ignition is on, and
the exterior lamp band is in OFF or in the
parking lamp position, and
the parking brake is released.
When the DRL system is on, the tail lamps,
side marker lamps, parking lamps and
instrument panel lights will not be illumi-
nated unless you have turned the exterior
lamps control to the parking lamp position.An indicator light on the secondary infor-
mation center will come on when the DRL
system is on. See “Daytime Running
Lamps Indicator Light” in this section.
The DRL system will turn off under the fol-
lowing conditions:
The ignition is off, or
the parking brakes are on, or
the high-beam headlamps are on, or
the low-beam headlamps are on, or
flash-to-pass is used.
As with any vehicle, you should turn on the
regular headlamp system when you need
it.
Fog Lamps
If your vehicle has this feature, use your
fog lamps for better visibility in foggy or
misty conditions.
The control for your front fog lamps is
located on the middle of the turn signal/
multifunction lever. To turn on front fog
lamps, turn the fog lamp band to ON. To
turn off the front fog lamps, turn the fog
lamp band to OFF.
N6U3004A
Instrument Panel Overview:
Page 88 of 225

3-12 INSTRUMENT PANEL
85Z03-03E
The cigarette lighter is located to the right
of the front ashtray.
To use it, turn the ignition to ACC or ON,
push the cigarette lighter in all the way and
let go. When it’s ready, it will pop back out
by itself.
ClockThe time is displayed in the digital clock
when the ignition is on. The clock is
located in the center of the instrument
panel. There are three adjusting buttons
for the digital clock:
H (Hour):
To go forward one hour, press the “H” but-
ton once, with the ignition on. To go for-
ward more than one hour, press and hold
the button until the correct hour is reached.M (Minute):
To go forward one minute, press the “M”
button once, with the ignition on. To go for-
ward more than one minute, press and
hold the button until the correct minute is
reached.
S (Set):
To reset the time to the nearest hour, press
the “S” button.
For example, if this button is pressed while
the time is between 8:00 and 8:29, the dis-
play is set to 8:00. If this button is pressed
while the time is between 8:30 and 8:59,
the display is set to 9:00.
After disconnecting the battery or after
replacing the fuse, reset the clock.
WARNING
Don’t put papers or other flammable
items into your ashtrays. Hot ciga-
rettes or other smoking materials
could ignite them, causing a damag-
ing fire.
CAUTION
Don’t hold a cigarette lighter in with
your hand while it is heating. If you
do, it won’t be able to back away from
the heating element when it’s ready.
That can make it overheat, damaging
the lighter and the heating element.
Instrument Panel Overview:
Climate Controls:
Page 94 of 225
3-18 INSTRUMENT PANEL
85Z03-03E
3) Remove the old passenger compart-
ment air filter.
4) Then reverse the steps to install the
new air filter.
Ensure that the new filter is inserted in
the proper orientation.
Warning Lights, Gauges and
IndicatorsThis section describes the warning lights
and gauges that may be on your vehicle.
The pictures will help you locate them.
Warning lights and gauges can signal that
something is wrong before it becomes seri-
ous enough to cause an expensive repair
or replacement. Paying attention to your
warning lights and gauges could also save
you or others from injury.
Warning lights come on when there may
be or is a problem with one of your vehi-
cle’s functions. As you will see in the
details on the next few pages, some warn-
ing lights come on briefly when you start
the engine just to let you know they’re
working. If you are familiar with this sec-
tion, you should not be alarmed when this
happens.
Gauges can indicate when there may be or
is a problem with one of your vehicle’s
functions. Often gauges and warning lights
work together to let you know when there’s
a problem with your vehicle.
When one of the warning lights comes on
and stays on when you are driving, or
when one of the gauges shows there may
be a problem, check the gauge that tells
you what to do about it. Please follow this
manual’s advice. Waiting to do repairs can
be costly – and even dangerous. So pleaseget to know your warning lights and
gauges. They’re a big help.
Instrument Panel ClusterYour instrument panel cluster is designed
to let you know at a glance how your vehi-
cle is running. You’ll know how fast you’re
going, how much fuel you’re using and
many other things you’ll need to drive
safely and economically.
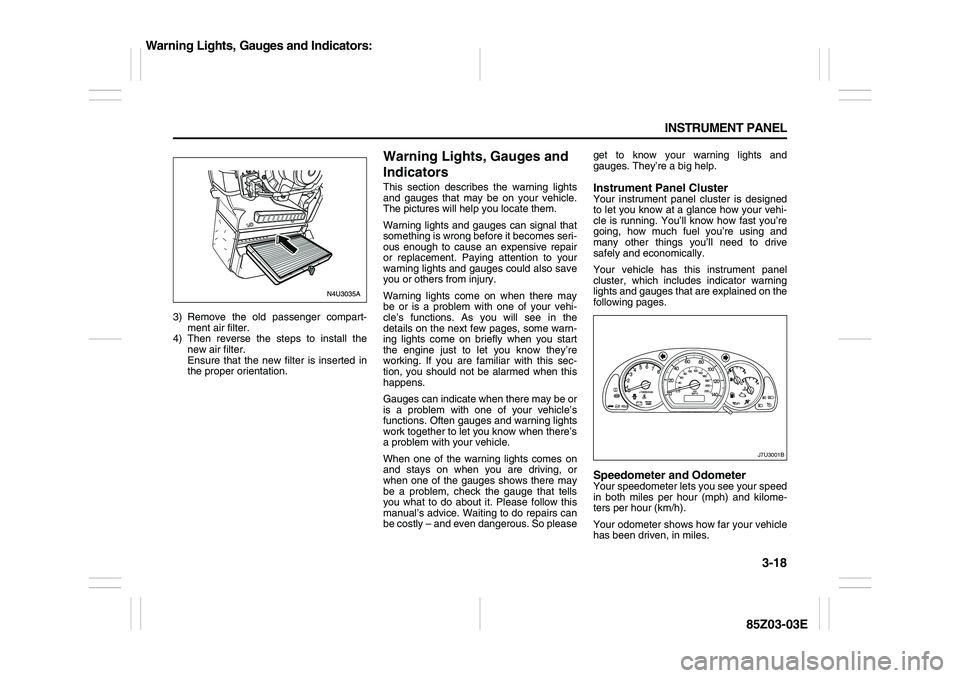
Your vehicle has this instrument panel
cluster, which includes indicator warning
lights and gauges that are explained on the
following pages.Speedometer and OdometerYour speedometer lets you see your speed
in both miles per hour (mph) and kilome-
ters per hour (km/h).
Your odometer shows how far your vehicle
has been driven, in miles.
J7U3001B
Warning Lights, Gauges and Indicators:
Page 95 of 225

3-19 INSTRUMENT PANEL
85Z03-03E
Trip OdometerThe trip odometer can record the number
of kilometers or miles traveled for up to two
trips.
The trip odometer button is located in the
lower right area of the speedometer.
There are two independent trip odometers,
which measure the distances your vehicle
has traveled since you last reset this func-
tion.
You can switch the trip odometer display
between Trip A and Trip B by pressing the
trip odometer button.
To reset each trip meter to zero, press and
hold the trip odometer button until it resets.
TachometerThe tachometer shows your engine speed
in revolutions per minute (rpm).
Safety Belt Reminder LightWhen the key is turned to ON, a chime will
come on for several seconds to remind
people to fasten their safety belts, unless
the driver’s safety belt is already buckled.
The safety belt light will also come on and
stay on until the driver’s safety belt is buck-
led.
If the driver’s belt is already buckled, nei-
ther the chime nor the light will come on.Safety Belt Reminder ToneIf your vehicle has this feature, a tone
(instead of a chime) will sound for several
seconds when the ignition is ON to remind
people to fasten their safety belts. The tone
will not sound if the driver’s safety belt is
fastened.
CAUTION
Keep track of your odometer reading
and check the maintenance schedule
regularly for required services.
Increased wear or damage to certain
parts can result from failure to per-
form required services at the proper
mileage intervals.
CAUTION
Do not operate the engine with the
tachometer in the red area, or engine
damage may occur. The damage
would not be covered by your war-
ranty.
Warning Lights, Gauges and Indicators: