2007 SUZUKI FORENZA ECU
[x] Cancel search: ECUPage 59 of 225

2-11 FEATURES AND CONTROLS
85Z03-03E
How to Turn Off the System Alarm
If the system alarm is active, it can be
deactivated using the following methods:
Press the Lock or Unlock button on the
remote keyless entry transmitter.
Unlock the driver’s or passenger’s front
door using the key.
Otherwise, the alarm will automatically
stop after 30 seconds. The system will
then lock the doors and reactivate the
theft-deterrent system.
How to Detect a Tamper Condition
If the hazard lamps flash once when the
Lock or Unlock button on your transmitter
is pressed, that means the theft-security
system alarm was triggered while you
were away.
Daily Inspection ChecklistBefore Driving1) Make sure that windows, mirrors, lights
and reflectors are clean and unob-
structed.
2) Visually check the tires for the following
points:
– the depth of the tread groove
– abnormal wear, cracks and damage
– loose wheel nuts
– existence of foreign material such as
nails, stones, etc.
Refer to “Tires” in the “SERVICE AND
APPEARANCE CARE” section for details.
3) Look for oil or other fluid leaks.
NOTE:
It is normal for water to drip from the air
conditioning system after use.
4) Make sure the hood is fully closed and
latched.
5) Check the headlights, turn signal lights,
brake lights and horn for proper opera-
tion.
6) Lock all doors.
7) Adjust the seat and adjustable head
restraints (if equipped).
8) Check the brake pedal.
9) Adjust the mirrors.
10)Make sure that you and all passengers
have properly fastened your safety
belts.11)Make sure that all warning lights come
on as the key is turned to the “ON” or
“START” position.
12)Check all gauges.
13)Make sure that the BRAKE light turns
off when the parking brake is released.
Once a week, or each time you fill your fuel
tank, perform the following under-hood
checks:
1) Engine oil level
2) Coolant level
3) Brake fluid level
4) Power steering (if equipped) fluid level
5) Windshield washer fluid level
6) Hood latch operation
Pull the hood release handle inside the
vehicle. Make sure that you cannot
open the hood all the way without
releasing the secondary latch. Be sure
to close the hood securely after check-
ing for proper latch operation. See the
item “Lubricate Locks, Hinges & Hood
Latch” under “Chassis and Body” in the
“MAINTENANCE SCHEDULE” section
for the lubrication schedule.
WARNING
Make sure the hood is fully closed
and latched before driving. If it is not,
it can fly up unexpectedly during
driving, obstructing your view and
resulting in an accident.
Theft-Deterrent Systems:
Daily Inspection Checklist:
Page 71 of 225
2-23 FEATURES AND CONTROLS
85Z03-03E
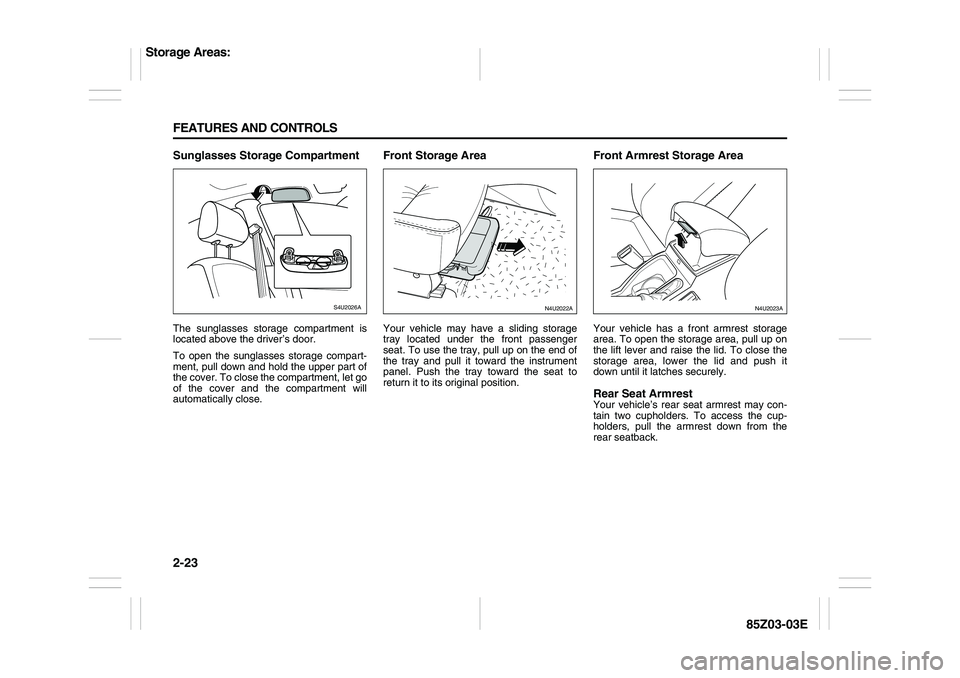
Sunglasses Storage CompartmentThe sunglasses storage compartment is
located above the driver’s door.
To open the sunglasses storage compart-
ment, pull down and hold the upper part of
the cover. To close the compartment, let go
of the cover and the compartment will
automatically close.
Front Storage AreaYour vehicle may have a sliding storage
tray located under the front passenger
seat. To use the tray, pull up on the end of
the tray and pull it toward the instrument
panel. Push the tray toward the seat to
return it to its original position.
Front Armrest Storage AreaYour vehicle has a front armrest storage
area. To open the storage area, pull up on
the lift lever and raise the lid. To close the
storage area, lower the lid and push it
down until it latches securely.Rear Seat ArmrestYour vehicle’s rear seat armrest may con-
tain two cupholders. To access the cup-
holders, pull the armrest down from the
rear seatback.
S4U2026A
N4U2022A
N4U2023A
Storage Areas:
Page 137 of 225
4-13 DRIVING YOUR VEHICLE
85Z03-03E
As you go over the top of a hill, be alert.
There could be something in your lane,
like a stalled car or an accident.
You may see highway signs on moun-
tains that warn of special problems.
Examples are long grades, passing or
no-passing zones, a falling rocks area or
winding roads. Be alert to these and take
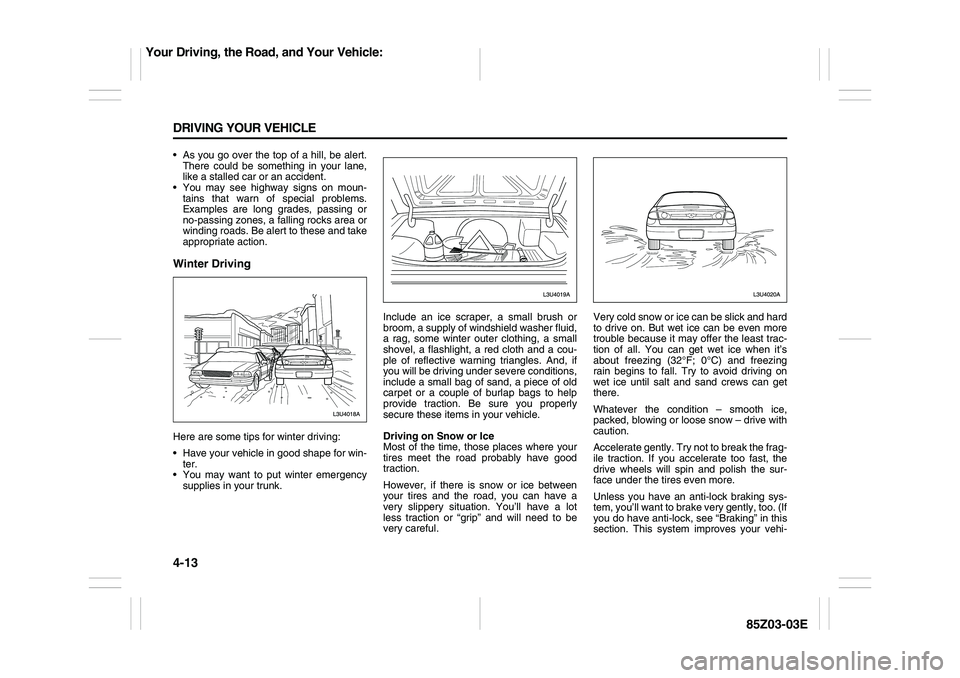
appropriate action.Winter DrivingHere are some tips for winter driving:
Have your vehicle in good shape for win-
ter.
You may want to put winter emergency
supplies in your trunk.Include an ice scraper, a small brush or
broom, a supply of windshield washer fluid,
a rag, some winter outer clothing, a small
shovel, a flashlight, a red cloth and a cou-
ple of reflective warning triangles. And, if
you will be driving under severe conditions,
include a small bag of sand, a piece of old
carpet or a couple of burlap bags to help
provide traction. Be sure you properly
secure these items in your vehicle.
Driving on Snow or Ice
Most of the time, those places where your
tires meet the road probably have good
traction.
However, if there is snow or ice between
your tires and the road, you can have a
very slippery situation. You’ll have a lot
less traction or “grip” and will need to be
very careful.Very cold snow or ice can be slick and hard
to drive on. But wet ice can be even more
trouble because it may offer the least trac-
tion of all. You can get wet ice when it’s
about freezing (32°F; 0°C) and freezing
rain begins to fall. Try to avoid driving on
wet ice until salt and sand crews can get
there.
Whatever the condition – smooth ice,
packed, blowing or loose snow – drive with
caution.
Accelerate gently. Try not to break the frag-
ile traction. If you accelerate too fast, the
drive wheels will spin and polish the sur-
face under the tires even more.
Unless you have an anti-lock braking sys-
tem, you’ll want to brake very gently, too. (If
you do have anti-lock, see “Braking” in this
section. This system improves your vehi-
Your Driving, the Road, and Your Vehicle:
Page 143 of 225
4-19 DRIVING YOUR VEHICLE
85Z03-03E
Determining Compatibility of Tire and
Vehicle Load Limits
The tires on your vehicle, when they are
inflated to the recommended tire inflation
pressure, have a load-carrying capacity
that is greater than the load that will be onthe tires when the vehicle is at its GVWR
or GAWR limit. Never use replacement
tires that have a load-carrying capacity
less than the original tires on your vehicle.
Tire load-carrying capacity information is
molded into the tire sidewall typically
shown as “Max. Load”. Use of replacement
tires with a lower load-carrying capacity
than the original tires, or failure to keep the
tires inflated to recommended tire pres-
sure, may reduce the GVWR or GAWR
limit of your vehicle.
NOTE:
Use of replacement tires with a higher
load-carrying capacity than the original
tires, or using a tire inflation pressure
higher than the recommended tire inflation
pressure, will not increase the GVWR or
GAWR limit of your vehicle.
Towing a TrailerDo not use your vehicle to tow a trailer. The
vehicle is not designed or intended for
such use. Towing a trailer can adversely
affect handling, durability and fuel econ-
omy.
WARNING
Things you put inside your vehicle
can strike and injure people in a sud-
den stop or turn, or in a crash.
Put things in the trunk or rear area
of your vehicle. In a trunk, put them
as far forward as you can. Try to
spread the weight evenly. If you
have fold-down rear seats, you’ll
find four anchors on the back wall
of your trunk. You can use these
anchors to tie down lighter loads.
They’re not strong enough for
heavy things, however, so put them
as far forward as you can in the
trunk or rear area.
Never stack heavier things, like
suitcases, inside the vehicle so that
some of them are above the tops of
the seats.
Don’t leave an unsecured child
restraint in your vehicle.
When you carry something inside
the vehicle, secure it whenever you
can.
Don’t leave a seat folded down
unless you need to.
L3U4030A
Towing:
Page 155 of 225
5-11 SERVICE AND APPEARANCE CARE
85Z03-03E
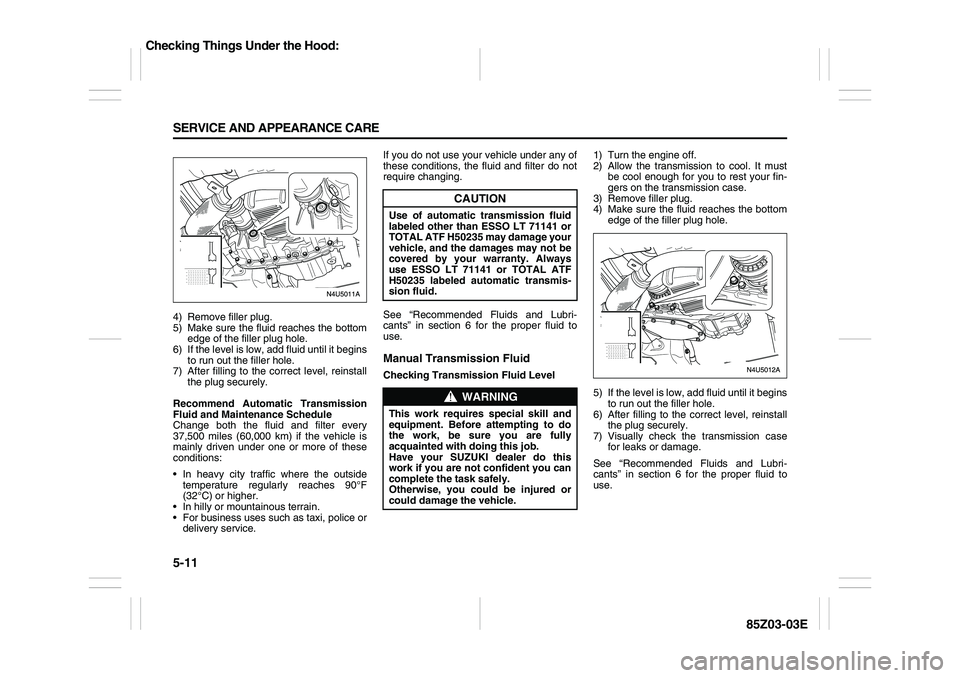
4) Remove filler plug.
5) Make sure the fluid reaches the bottom
edge of the filler plug hole.
6) If the level is low, add fluid until it begins
to run out the filler hole.
7) After filling to the correct level, reinstall
the plug securely.
Recommend Automatic Transmission
Fluid and Maintenance Schedule
Change both the fluid and filter every
37,500 miles (60,000 km) if the vehicle is
mainly driven under one or more of these
conditions:
In heavy city traffic where the outside
temperature regularly reaches 90°F
(32°C) or higher.
In hilly or mountainous terrain.
For business uses such as taxi, police or
delivery service.If you do not use your vehicle under any of
these conditions, the fluid and filter do not
require changing.
See “Recommended Fluids and Lubri-
cants” in section 6 for the proper fluid to
use.
Manual Transmission FluidChecking Transmission Fluid Level1) Turn the engine off.
2) Allow the transmission to cool. It must
be cool enough for you to rest your fin-
gers on the transmission case.
3) Remove filler plug.
4) Make sure the fluid reaches the bottom
edge of the filler plug hole.
5) If the level is low, add fluid until it begins
to run out the filler hole.
6) After filling to the correct level, reinstall
the plug securely.
7) Visually check the transmission case
for leaks or damage.
See “Recommended Fluids and Lubri-
cants” in section 6 for the proper fluid to
use.
CAUTION
Use of automatic transmission fluid
labeled other than ESSO LT 71141 or
TOTAL ATF H50235 may damage your
vehicle, and the damages may not be
covered by your warranty. Always
use ESSO LT 71141 or TOTAL ATF
H50235 labeled automatic transmis-
sion fluid.
WARNING
This work requires special skill and
equipment. Before attempting to do
the work, be sure you are fully
acquainted with doing this job.
Have your SUZUKI dealer do this
work if you are not confident you can
complete the task safely.
Otherwise, you could be injured or
could damage the vehicle.
Checking Things Under the Hood:
Page 170 of 225
5-26 SERVICE AND APPEARANCE CARE
85Z03-03E
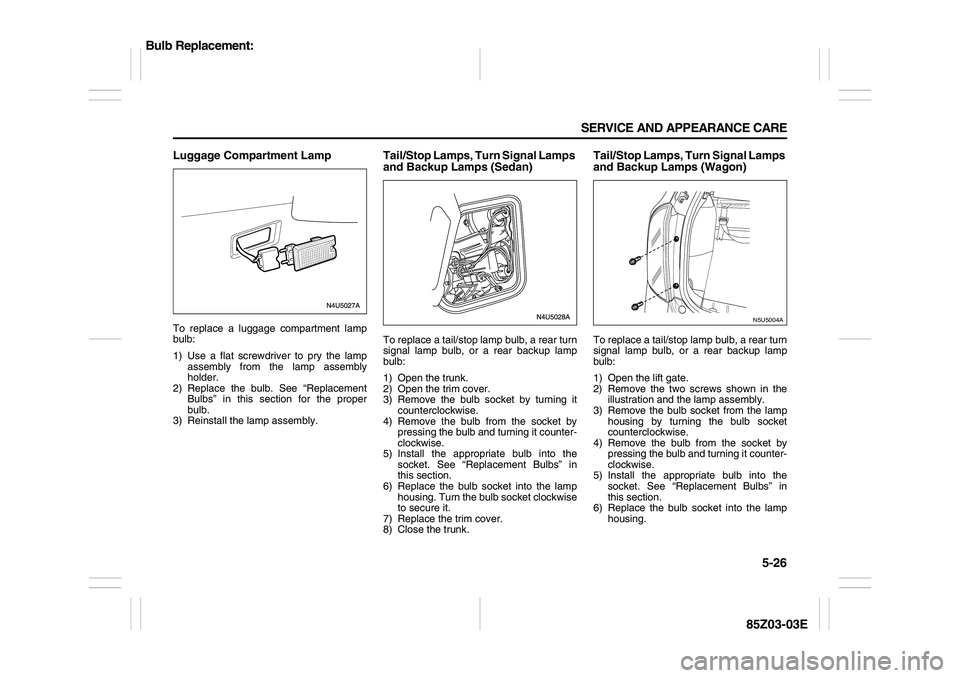
Luggage Compartment LampTo replace a luggage compartment lamp
bulb:
1) Use a flat screwdriver to pry the lamp
assembly from the lamp assembly
holder.
2) Replace the bulb. See “Replacement
Bulbs” in this section for the proper
bulb.
3) Reinstall the lamp assembly.
Tail/Stop Lamps, Turn Signal Lamps
and Backup Lamps (Sedan)To replace a tail/stop lamp bulb, a rear turn
signal lamp bulb, or a rear backup lamp
bulb:
1) Open the trunk.
2) Open the trim cover.
3) Remove the bulb socket by turning it
counterclockwise.
4) Remove the bulb from the socket by
pressing the bulb and turning it counter-
clockwise.
5) Install the appropriate bulb into the
socket. See “Replacement Bulbs” in
this section.
6) Replace the bulb socket into the lamp
housing. Turn the bulb socket clockwise
to secure it.
7) Replace the trim cover.
8) Close the trunk.
Tail/Stop Lamps, Turn Signal Lamps
and Backup Lamps (Wagon)To replace a tail/stop lamp bulb, a rear turn
signal lamp bulb, or a rear backup lamp
bulb:
1) Open the lift gate.
2) Remove the two screws shown in the
illustration and the lamp assembly.
3) Remove the bulb socket from the lamp
housing by turning the bulb socket
counterclockwise.
4) Remove the bulb from the socket by
pressing the bulb and turning it counter-
clockwise.
5) Install the appropriate bulb into the
socket. See “Replacement Bulbs” in
this section.
6) Replace the bulb socket into the lamp
housing.
N5U5004A
Bulb Replacement:
Page 183 of 225
5-39 SERVICE AND APPEARANCE CARE
85Z03-03E
See “Changing a Flat Tire” in this section
for more information.
Used Replacement Wheels
Tire Chains
If a Tire Goes FlatIt’s a unusual for a tire to “blowout” while
you’re driving, especially if you maintain
your tire properly. If air goes out of a tire,
it’s much more likely to leak out slowly. But
if you should ever have a “blowout”, here
are a few tips about what to expect and
what to do:
If a front tire fails, the flat tire will create a
drag that pulls the vehicle toward that side.
Take your foot off the accelerator pedal
and grip the steering wheel firmly. Steer to
maintain lane position, and then gently
brake to a stop well out of the traffic lane.A rear blowout, particularly on a curve,
acts much like a skid and may require the
same correction you’d use in a skid. In any
rear blowout, remove your foot from the
accelerator pedal. Get the vehicle under
control by steering the way you want the
vehicle to go. It may be very bumpy and
noisy, but you can still steer. Gently brake
to a stop, well off the road if possible.
If a tire goes flat, the next part shows how
to use your jacking equipment to change a
flat tire safely.
Changing a Flat TireIf a tire goes flat, avoid further tire and
wheel damage by driving slowly to a level
place. Turn on your hazard warning flash-
ers.
CAUTION
The wrong wheel can also cause
problems with bearing life, brake
cooling, speedometer or odometer
calibration, headlamp aim, bumper
height, vehicle ground clearance and
tire or tire chain clearance to the
body and chassis.
WARNING
Putting a used wheel on your vehicle
is dangerous. You can’t know how it’s
been used or how far it’s been driven.
It could fail suddenly and cause a
crash. If you have to replace a wheel,
use a new SUZUKI original equip-
ment wheel.
CAUTION
Use tire chains only where legal and
only when you must. Use only SAE
class “S” type chains that are the
proper size for your tires. Install them
on the front tires and tighten them as
tightly as possible with the ends
securely fastened. Drive slowly and
follow the chain manufacturer’s
instructions. If you can hear the
chains contacting your vehicle, stop
and retighten them. If the contact
continues, slow down until it stops.
Driving too fast or spinning the
wheels with chains on will damage
your vehicle.
WARNING
Lifting a vehicle and getting under it
to do maintenance or repairs is dan-
gerous without the appropriate safety
equipment and training. The jack pro-
vided with your vehicle is designed
only for changing a flat tire. If it is
used for anything else, you or others
could be badly injured or killed if the
vehicle slips off the jack. Use the jack
provided with your vehicle only for
changing a flat tire.
Tires:
Page 187 of 225

5-43 SERVICE AND APPEARANCE CARE
85Z03-03E
Don’t try to put a wheel cover on your com-
pact spare tire. It won’t fit. Store the wheel
cover in the trunk until you have the flat tire
repaired or replaced.Storing the Flat Tire and Tools
Store the flat tire in the compact spare tire
compartment. Place the tire in the com-
partment, then secure the retainer. Store
the jack in its housing in the cargo area.
Secure the jack by turning the retainer
clockwise. Store the tools securely in the
foam tray and place the tray on top of the
tire. Replace the trim cover.
Storing the Spare Tire and Tools
The compact spare tire is for temporary
use only. Replace the compact spare tire
with a full-size tire as soon as you can. See
“Compact Spare Tire” in this section.
WARNING
Incorrect wheel nuts or improperly
tightened wheel nuts can cause the
wheel to come loose and even come
off. This could lead to an accident. Be
sure to use the correct wheel nuts. If
you have to replace them, be sure to
get new SUZUKI original equipment
wheel nuts. Stop somewhere as soon
as you can and have the nuts tight-
ened with a torque wrench to the
proper torque specification. See
“Capacities and Specifications” in
the Index for the wheel nut torque
specification.
CAUTION
Improperly tightened wheel nuts can
lead to brake pulsation and rotor
damage. To avoid expensive brake
repairs, evenly tighten the wheel nuts
in the proper sequence and to the
proper torque specification. See
“Capacities and Specifications” in
the index for the wheel nut torque
specification.
CAUTION
If you install a full-size tire rather than
your compact spare tire, reinstall the
wheel cover as follows:
1) Put the wheel cover on the full-
size tire.
2) Fasten the 4 plastic caps snugly
by hand.
3) Tighten the caps by turning them
an additional 90° with the wheel
wrench.
– The proper tightening torque is a
maximum of 5.9 lb-ft (8 N·m).
– Tightening to the improper
torque can cause damage to the
plastic caps.
CAUTION
Wheel covers will not fit on your com-
pact spare. If you try to put a wheel
cover on the compact spare, you
could damage the cover or the spare.
WARNING
Improperly storing a jack, a tire, or
other equipment in the passenger
compartment of the vehicle could
cause injury. In a sudden stop or col-
lision, loose equipment could strike
someone. Store all these items in the
proper place.
WARNING
Storing a jack, a tire, or other equip-
ment in the passenger compartment
of the vehicle could cause injury. In a
sudden stop or collision, loose
equipment could strike someone.
Store all these in the proper place.
Appearance Care: