2007 SUZUKI FORENZA stop start
[x] Cancel search: stop startPage 82 of 225
3-6 INSTRUMENT PANEL
85Z03-03E
between wipes. The wiper speed can only
be adjusted when the lever is in the INT
position.
OFF (Off):
Move the lever to this position to turn off
the windshield wipers.
Misting Function
Move the lever toward, but not completely
in, the INT position for a single wiping
cycle. Hold it there until the windshield wip-
ers start; then let go. The windshield wip-
ers will stop after one cycle. If you want
more wipes, hold the lever toward the INT
position longer.
Remember that damaged wiper blades
may prevent you from seeing well enough
to drive safely. To avoid damage, be sure to
clear ice and snow from the wiper blades
before using them.
If they’re frozen to the windshield, carefully
loosen or thaw them. If your blades do
become damaged, get new blades or
blade inserts.
Heavy snow or ice can overload the wiper
motor. A circuit breaker will stop the motor
until it cools. Clear away snow or ice to
prevent an overload.Windshield Washer
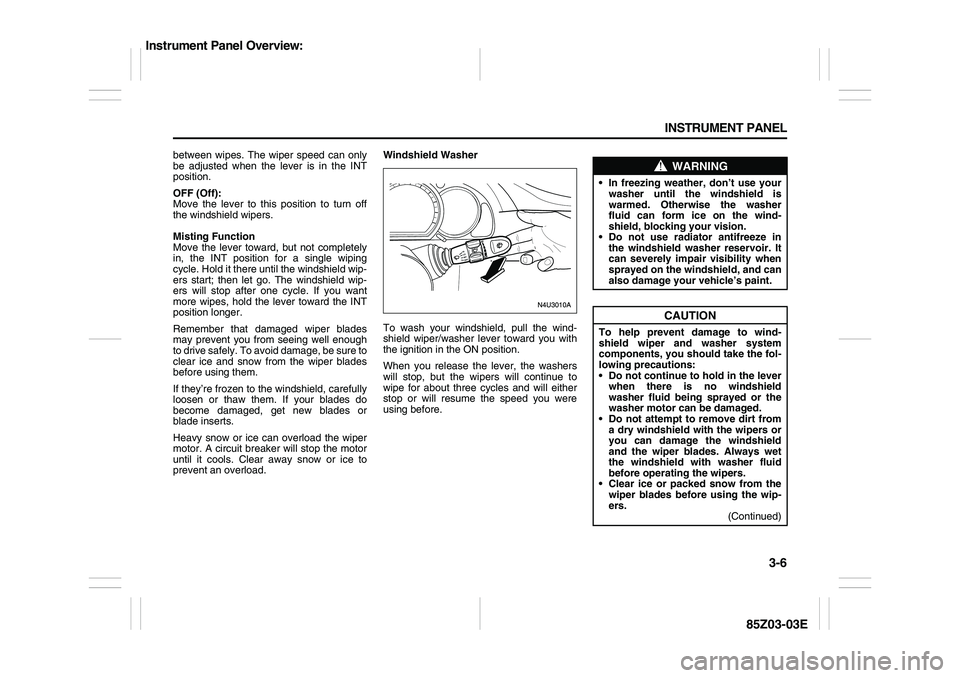
To wash your windshield, pull the wind-
shield wiper/washer lever toward you with
the ignition in the ON position.
When you release the lever, the washers
will stop, but the wipers will continue to
wipe for about three cycles and will either
stop or will resume the speed you were
using before.
WARNING
In freezing weather, don’t use your
washer until the windshield is
warmed. Otherwise the washer
fluid can form ice on the wind-
shield, blocking your vision.
Do not use radiator antifreeze in
the windshield washer reservoir. It
can severely impair visibility when
sprayed on the windshield, and can
also damage your vehicle’s paint.
CAUTION
To help prevent damage to wind-
shield wiper and washer system
components, you should take the fol-
lowing precautions:
Do not continue to hold in the lever
when there is no windshield
washer fluid being sprayed or the
washer motor can be damaged.
Do not attempt to remove dirt from
a dry windshield with the wipers or
you can damage the windshield
and the wiper blades. Always wet
the windshield with washer fluid
before operating the wipers.
Clear ice or packed snow from the
wiper blades before using the wip-
ers.
(Continued)
Instrument Panel Overview:
Page 97 of 225
3-21 INSTRUMENT PANEL
85Z03-03E
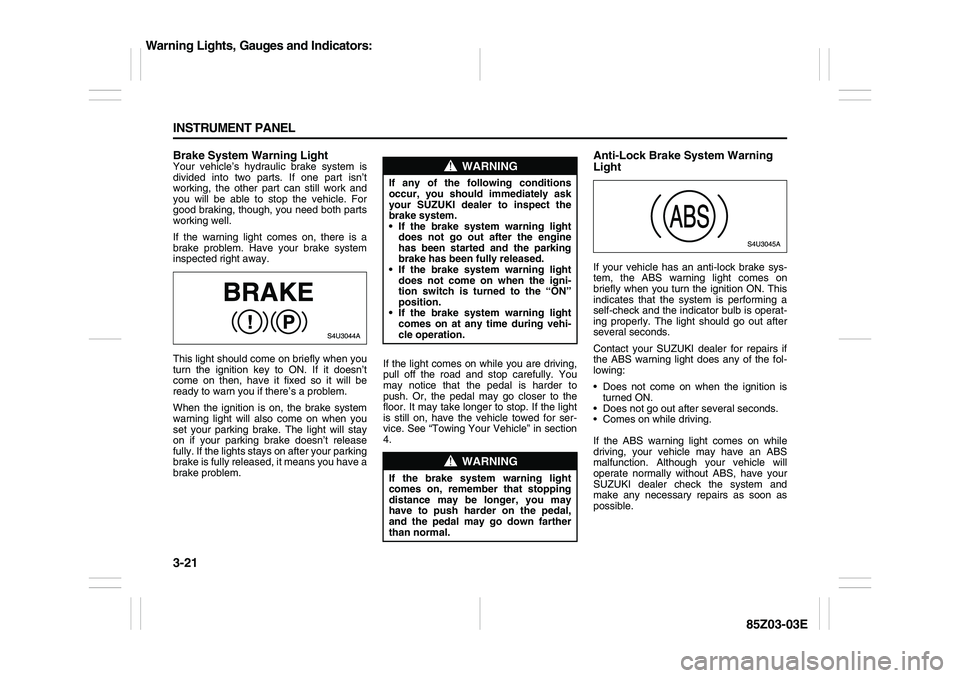
Brake System Warning LightYour vehicle’s hydraulic brake system is
divided into two parts. If one part isn’t
working, the other part can still work and
you will be able to stop the vehicle. For
good braking, though, you need both parts
working well.
If the warning light comes on, there is a
brake problem. Have your brake system
inspected right away.
This light should come on briefly when you
turn the ignition key to ON. If it doesn’t
come on then, have it fixed so it will be
ready to warn you if there’s a problem.
When the ignition is on, the brake system
warning light will also come on when you
set your parking brake. The light will stay
on if your parking brake doesn’t release
fully. If the lights stays on after your parking
brake is fully released, it means you have a
brake problem.If the light comes on while you are driving,
pull off the road and stop carefully. You
may notice that the pedal is harder to
push. Or, the pedal may go closer to the
floor. It may take longer to stop. If the light
is still on, have the vehicle towed for ser-
vice. See “Towing Your Vehicle” in section
4.
Anti-Lock Brake System Warning
LightIf your vehicle has an anti-lock brake sys-
tem, the ABS warning light comes on
briefly when you turn the ignition ON. This
indicates that the system is performing a
self-check and the indicator bulb is operat-
ing properly. The light should go out after
several seconds.
Contact your SUZUKI dealer for repairs if
the ABS warning light does any of the fol-
lowing:
Does not come on when the ignition is
turned ON.
Does not go out after several seconds.
Comes on while driving.
If the ABS warning light comes on while
driving, your vehicle may have an ABS
malfunction. Although your vehicle will
operate normally without ABS, have your
SUZUKI dealer check the system and
make any necessary repairs as soon as
possible.
WARNING
If any of the following conditions
occur, you should immediately ask
your SUZUKI dealer to inspect the
brake system.
If the brake system warning light
does not go out after the engine
has been started and the parking
brake has been fully released.
If the brake system warning light
does not come on when the igni-
tion switch is turned to the “ON”
position.
If the brake system warning light
comes on at any time during vehi-
cle operation.
WARNING
If the brake system warning light
comes on, remember that stopping
distance may be longer, you may
have to push harder on the pedal,
and the pedal may go down farther
than normal.
Warning Lights, Gauges and Indicators:
Page 99 of 225

3-23 INSTRUMENT PANEL
85Z03-03E
cated by the system before any problem is
apparent. This may prevent more serious
damage to your vehicle. This system is
also designed to assist your service techni-
cian in correctly diagnosing any malfunc-
tion.
When the ignition is on, this light should
come on and should go out after a few sec-
onds as a check to show you it is working.
If the light doesn’t come on, have it
repaired.This light will also come on during a mal-
function in one of two ways:
Light Flashing
A misfire condition has been detected. A
misfire increases vehicle emissions and
may damage the emission control sys-
tem on your vehicle. Diagnosis and ser-
vice may be required.
Light On Steady
An emission control system malfunction
has been detected on your vehicle. Diag-
nosis and service may be required.
If the Light Is Flashing
The following may prevent more serious
damage to your vehicle:
Reducing vehicle speed.
Avoiding hard accelerations.
Avoiding steep uphill grades.
If the light stops flashing and remains on
steady, see “If the Light Is On Steady” fol-
lowing.
If the light continues to flash, when it is
safe to do so, stop the vehicle. Find a safe
place to park your vehicle. Turn the key off,
wait at least 10 seconds and restart the
engine. If the light remains on steady, see
“If the Light Is On Steady” following. If the
light is still flashing, see your SUZUKI
dealer for service as soon as possible. Fol-
low the driving guidelines described above.If the Light Is On Steady
You also may be able to correct the emis-
sion system malfunction by considering the
following:
Did you recently put fuel into your vehicle?
If so, reinstall the fuel cap, making sure to
fully install the cap. See “Filling Your Tank”
in section 5. The diagnostic system can
determine if the fuel cap has been left off
or is improperly installed. A loose or miss-
ing fuel cap will allow fuel to evaporate into
the atmosphere. A few driving trips with the
cap properly installed should turn the light
off.
Did you just drive through a deep puddle of
water?
If so, your electrical system may be wet.
The condition will usually be corrected
when the electrical system dries out. A few
driving trips should turn the light off.
Have you recently changed brands of fuel?
If so, be sure to fuel your vehicle with qual-
ity fuel. See “Gasoline Octane” in section
5. Poor fuel quality will cause your engine
not to run as efficiently as designed. You
may notice stalling after start-up, stalling
when you put the vehicle into gear, misfir-
ing, hesitation on acceleration or stumbling
on acceleration. (These conditions may go
away once the engine is warmed up.) This
will be detected by the system and cause
the light to turn on.
CAUTION
If you keep driving your vehicle with
this light on, your emission controls
may not work as well, your fuel econ-
omy may not be as good, and your
engine may not run as smoothly. This
could lead to costly repairs that may
not be covered by your warranty.
CAUTION
Modifications made to the engine,
transmission, exhaust or intake or
fuel system of your vehicle can affect
your vehicle’s emission controls and
may cause this light to come on.
Modifications to these systems could
lead to costly repairs not covered by
your warranty. This may also result in
a failure to pass a required Emission
Inspection/Maintenance test.
Warning Lights, Gauges and Indicators:
Page 100 of 225

3-24 INSTRUMENT PANEL
85Z03-03E
If you experience one or more of these
conditions, change the fuel brand you use.
It will require at least one full tank of the
proper fuel to turn the light off.
If none of the above steps have made the
light turn off, your SUZUKI dealer can
check the vehicle. Your SUZUKI dealer has
the proper test equipment and diagnostic
tools to fix any mechanical or electrical
problems that may have developed.
Emissions Inspection and Maintenance
Programs
Some state/provincial and local govern-
ments have or may begin programs to
inspect the emission control equipment on
your vehicle. Failure to pass this inspection
could prevent you from getting a vehicle
registration.
Here are some things you need to know to
help your vehicle pass an inspection:
Your vehicle will not pass this inspection if
the Check Engine light is on or is not work-
ing properly.
Your vehicle will not pass this inspection if
the OBD (on-board diagnostic) system
determines that critical emission control
systems have not been completely diag-
nosed by the system. The vehicle would be
considered not ready for inspection. This
can happen if you have recently replaced
your battery or if your battery has run
down. The diagnostic system is designed
to evaluate critical emission control sys-tems during normal driving. This may take
several days of routine driving. If you have
done this and your vehicle still does not
pass the inspection for lack of OBD system
readiness, your SUZUKI dealer can pre-
pare the vehicle for inspection.
Oil Pressure LightIf you have a low engine oil pressure prob-
lem, this light will stay on after you start
your engine, or come on when you are
driving. This indicates that your engine is
not receiving enough oil.
The engine could be low on oil, or could
have some other oil problem. Have it fixed
immediately.
The oil light could also come on in three
other situations:
When the ignition is on but the engine is
not running, the light will come on as a
check to show you it is working. The light
will go out after you start the engine. If it
doesn’t come on with the ignition on, you
may have a problem with the fuse or
bulb. Have it fixed right away. If you’re idling at a stop sign, the light
may blink on and then off.
If you make a hard stop, the light may
come on for a moment. This is normal.
Fog Lamp LightIf your vehicle has this feature, the fog
lamps indicator light will come on when the
fog lamps are in use.
The light will go out when the fog lamps
are turned off.
WARNING
Don’t keep driving if the oil pressure
is low. If you do, your engine can
become so hot that it catches fire.
You or others could be burned. Check
your oil as soon as possible and have
your vehicle serviced.
CAUTION
Operating your engine with the low
oil pressure light on can result in
severe engine damage which is not
covered by your warranty.
Warning Lights, Gauges and Indicators:
Page 103 of 225

3-27 INSTRUMENT PANEL
85Z03-03E
tire pressure monitoring system is func-
tioning properly.
Your vehicle has also been equipped with
a TPMS malfunction indictor to indicate
when the system is not operating properly.
The TPMS malfunction indicator is com-
bined with the low tire pressure telltale.
When the system detects a malfunction,
the telltale will flash for approximately one
minute and then remain continuously illu-
minated. This sequence will continue upon
subsequent vehicle start-ups as long as
the malfunction exists.In this situation, please have the system
inspected by an authorized service facility.
If you replace one or more tires and the
TPMS warning light goes off during driv-
ing, there is no problem. However, if the
warning light does not go off, or if it flashes
again when the vehicle is driven, have the
vehicle inspected by an authorized service
facility.
WARNING
Each tire, including the spare (if pro-
vided), should be checked monthly
when cold and inflated to the inflation
pressure recommended by the vehi-
cle manufacturer on the vehicle plac-
ard or tire inflation pressure label and
this manual. (If your vehicle has tires
of a different size than the size indi-
cated on the vehicle label or tire infla-
tion pressure label, you should
determine the proper tire inflation
pressure for those tires.)
As an added safety feature, your
vehicle has been equipped with a tire
pressure monitoring system (TPMS)
that illuminates a low tire pressure
telltale when one or more of your
tires is significantly under-inflated.
Accordingly, when the low tire pres-
sure telltale illuminates, you should
stop and check your tires as soon as
possible and inflate them to the
proper pressure. Driving on a signifi-
cantly under-inflated tire causes the
tire to overheat and can lead to tire
failure.
Under-inflation also reduces fuel effi-
ciency and tire tread life and may
affect the vehicle’s handling and
stopping ability.
(Continued)
WARNING
(Continued)
Please note that the TPMS is not a
substitute for proper tire mainte-
nance, and it is the driver’s responsi-
bility to maintain correct tire
pressure, even if under-inflation has
not reached the level to trigger illumi-
nation of the TPMS low tire pressure
telltale.
WARNING
If the tire pressure monitoring system
warning light does not illuminate
when the ignition key is turned to the
“ON” position, have the system
inspected by an authorized service
facility. If the warning light flashes
while driving, check to see whether
the warning light goes off after a few
minutes of driving.
WARNING
When the malfunction indicator is
illuminated, the system may not be
able to detect or signal low tire pres-
sure as intended. TPMS malfunctions
may occur for a variety of reasons,
including the installation of replace-
ment or alternate tires or wheels on
the vehicle that prevent the TPMS
from functioning properly. Always
check the TPMS malfunction telltale
after replacing one or more tires or
wheels on your vehicle to ensure that
the replacement or alternate tires and
wheels allow the TPMS to continue to
function properly.
Audio System:
Page 108 of 225
3-32 INSTRUMENT PANEL
85Z03-03E
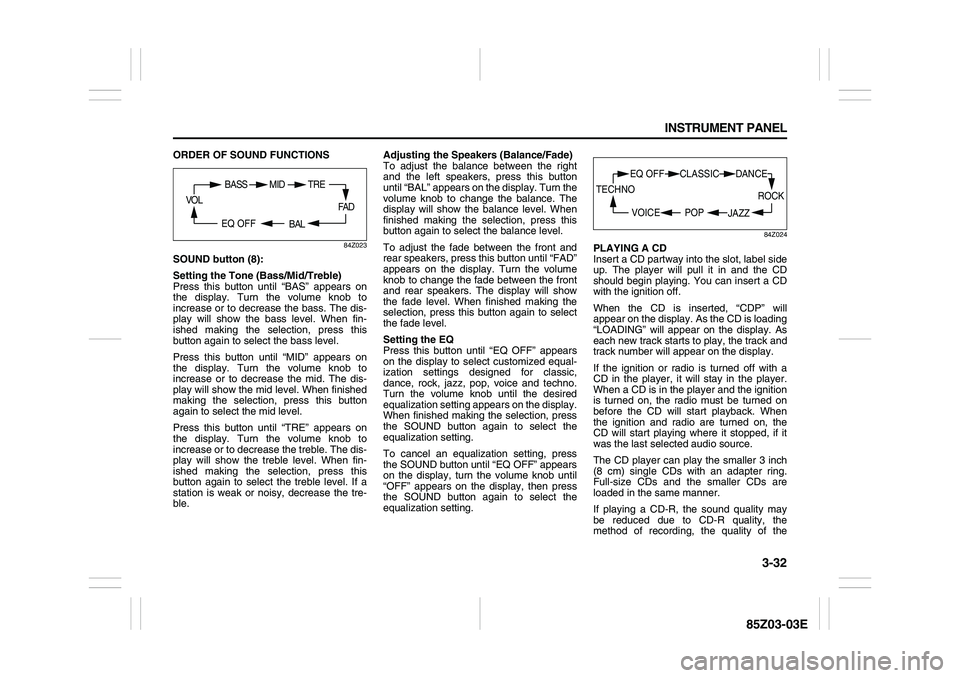
ORDER OF SOUND FUNCTIONS
84Z023
SOUND button (8):
Setting the Tone (Bass/Mid/Treble)
Press this button until “BAS” appears on
the display. Turn the volume knob to
increase or to decrease the bass. The dis-
play will show the bass level. When fin-
ished making the selection, press this
button again to select the bass level.
Press this button until “MID” appears on
the display. Turn the volume knob to
increase or to decrease the mid. The dis-
play will show the mid level. When finished
making the selection, press this button
again to select the mid level.
Press this button until “TRE” appears on
the display. Turn the volume knob to
increase or to decrease the treble. The dis-
play will show the treble level. When fin-
ished making the selection, press this
button again to select the treble level. If a
station is weak or noisy, decrease the tre-
ble. Adjusting the Speakers (Balance/Fade)
To adjust the balance between the right
and the left speakers, press this button
until “BAL” appears on the display. Turn the
volume knob to change the balance. The
display will show the balance level. When
finished making the selection, press this
button again to select the balance level.
To adjust the fade between the front and
rear speakers, press this button until “FAD”
appears on the display. Turn the volume
knob to change the fade between the front
and rear speakers. The display will show
the fade level. When finished making the
selection, press this button again to select
the fade level.
Setting the EQ
Press this button until “EQ OFF” appears
on the display to select customized equal-
ization settings designed for classic,
dance, rock, jazz, pop, voice and techno.
Turn the volume knob until the desired
equalization setting appears on the display.
When finished making the selection, press
the SOUND button again to select the
equalization setting.
To cancel an equalization setting, press
the SOUND button until “EQ OFF” appears
on the display, turn the volume knob until
“OFF” appears on the display, then press
the SOUND button again to select the
equalization setting.
84Z024
PLAYING A CD
Insert a CD partway into the slot, label side
up. The player will pull it in and the CD
should begin playing. You can insert a CD
with the ignition off.
When the CD is inserted, “CDP” will
appear on the display. As the CD is loading
“LOADING” will appear on the display. As
each new track starts to play, the track and
track number will appear on the display.
If the ignition or radio is turned off with a
CD in the player, it will stay in the player.
When a CD is in the player and the ignition
is turned on, the radio must be turned on
before the CD will start playback. When
the ignition and radio are turned on, the
CD will start playing where it stopped, if it
was the last selected audio source.
The CD player can play the smaller 3 inch
(8 cm) single CDs with an adapter ring.
Full-size CDs and the smaller CDs are
loaded in the same manner.
If playing a CD-R, the sound quality may
be reduced due to CD-R quality, the
method of recording, the quality of the
FA D
BAL
BASS MID
EQ OFF VOL
TRE
ROCK
JAZZ
EQ OFF CLASSIC
POP VOICE TECHNO
DANCE
Page 109 of 225
3-33 INSTRUMENT PANEL
85Z03-03E
music that has been recorded, and the way
the CD-R has been handled. There may be
an increase in skipping, difficulty in finding
tracks, and/or difficulty in loading and
ejecting. If these problems occur, check
the bottom surface of the CD. If the surface
of the CD is damaged, such as cracked,
broken, or scratched, the CD will not play
properly. If there is no apparent damage,
try a known good CD.
Do not add any label to a CD, it could get
caught in the CD player. If a CD is
recorded on a personal computer and a
description label is needed, try labeling the
top of the recorded CD with a marking pen
instead.
If an error appears on the display, see “CD
Messages” later in this section.
RPT (Repeat) button (7):
Press this button to repeat the current
track. RPT will appear on the display.
Press this button again to turn off repeat
play.
RDM (Random) button (7):
Press this button to hear the tracks in ran-
dom, rather than sequential, order. “RDM”
will appear on the display. Press this button
again to turn off random play.
INT (Scan) button (7):
Press this button to listen to the first few
seconds of each track on each loaded CD.
“INTRO” will appear on the display. To stopscanning, press this button again. The cur-
rent track will begin to play.
TUNE (Previous/Next Track) button (4):
Press the down arrows to go to the start of
the current track or press the up arrows to
go to the next track. The track number will
appear on the display. The player will con-
tinue moving backward or forward through
the CD with each press of the up or down
arrows.
AM button (2):
Press this button to listen to the radio when
a CD is playing. The inactive CD will
remain safely inside the radio for future lis-
tening.
FM button (3):
Press this button to listen to the radio when
a CD is playing. The inactive CD will
remain safely inside the radio for future lis-
tening.
CD/AUX button (9):
Press this button to play a CD when listen-
ing to the radio. “CDP” will appear on the
display when the CD player has been
selected. The CD symbol will appear on
the display when a CD is loaded.
Press this button while a CD is playing to
pause the CD. “PAUSE” will flash on the
display. Press this button again to resume
playing the CD.
Press this button to play a CD when listen-
ing to the audio contents from other device
(AUX mode). “CDP” will appear on the dis-play when the CD player has been
selected. The CD symbol will appear on
the display when a CD is loaded.
EJECT button (10):
Press this button to eject a CD. The only
way a CD can be ejected from the player is
by pressing the eject button. The CD will
not eject when the ignition or the radio is
turned off.
Using an MP3/WMA CD
MP3/WMA Format
If you burn your own MP3/WMA disc on a
personal computer:
Make sure the MP3/WMA files are
recorded on a CD-R disc.
Make sure to finalize the disc when burn-
ing an MP3/WMA disc, using multiple
sessions. It is usually better to burn the
disc all at once.
Files can be recorded with a variety of
fixed or variable bit rates. Song title, art-
ist name, and album will be available for
display by the radio when recorded using
ID3 tags version 1 and 2.
Do not mix standard audio and MP3/
WMA files on one disc.
Make sure each MP3/WMA file has a
“.mp3” or “.wma” extension, other file
extensions may not work.
The player will be able to read and play a
maximum of 50 folders, 5 sessions, and
999 files. Long file names and folder
names may use more disc memory space
Page 110 of 225
3-34 INSTRUMENT PANEL
85Z03-03E
than necessary. To conserve space on the
disc, minimize the length of the file, and
folder names. You can also play an MP3/
WMA CD that was recorded using no file
folders. The system can support up to 8
folders in depth, but, keep the depth of the
folders to a minimum in order to keep down
the complexity and confusion in trying to
locate a particular folder during playback. If
a CD contains more than the maximum of
50 folders, 5 sessions, and 999 files the
player will let you access and navigate up
to the maximum, but all items over the
maximum will be ignored.
Root Directory
The root directory will be treated as a
folder. If the root directory has compressed
audio files, the directory will be displayed
as “ROOT”. All files contained directly
under the root directory will be accessed
prior to any other directory.
Empty Directory or Folder
If a root directory or a folder exists some-
where in the file structure that contains
only folders/subfolders and no compressed
files directly beneath them, the player will
advance to the next folder in the file struc-
ture that contains compressed audio files
and the empty folder will not be displayed
or numbered.
No Folder
When the CD contains only compressed
files, the files will be located under the root
folder. The next and previous folder func-tions will have no function on a CD that
was recorded without folders or playlists.
When displaying the name of the folder the
radio will display “ROOT”.
When the CD contains only compressed
audio files, but no folders, all files will be
located under the root folder. When the
radio displays the name of the folder the
radio will display “ROOT”.
Order of Play
Tracks will be played in the following order:
Play will begin from the first track under the
root directory. When all tracks from the root
directory have been played, play will con-
tinue from files according to their numerical
listing. After playing the last track from the
last folder, the player will begin playing
again at the first track of the first folder or
root directory.
File System and Naming
The song name in the ID3 tag will be dis-
played. If the song name is not present in
the ID3 tag, then the radio will display the
file name without the extension (such as
MP3/WMA) instead.
Track names longer than 32 characters or
4 pages will be shortened. The display will
not show parts of words on the last page of
text and the extension of the filename will
not be displayed.Playing an MP3/WMA
With the ignition on, insert a CD partway
into the slot, label side up. The player will
pull it in, then “LOADING”, and then “MP3”
or “WMA” will appear on the display. The
CD should begin playing. You can’t insert a
CD with the acc off. As each new track
starts to play, the track number, and the
song name will appear on the display.
If the ignition or radio is turned off with a
CD in the player, it will stay in the player.
When a CD is in the player and the ignition
is turned on, the radio must be turned on
before the CD will start playback. When
the ignition and radio are turned on, the
CD will start playing where it stopped, if it
was the last selected audio source.
The CD player can play the smaller 3 inch
(8 cm) single CDs with an adapter ring.
Full-size CDs and the smaller CDs are
loaded in the same manner.
If playing a CD-R, the sound quality may
be reduced due to CD-R quality, the
method of recording, the quality of the
music that has been recorded, and the way
the CD-R has been handled. There may be
an increase in skipping, difficulty in finding
tracks, and/or difficulty in loading and
ejecting. If these problems occur, check
the bottom surface of the CD. If the surface
of the CD is damaged, such as cracked,
broken, or scratched, the CD will not play
properly.