2007 SUZUKI FORENZA CD changer
[x] Cancel search: CD changerPage 80 of 225
3-4 INSTRUMENT PANEL
85Z03-03E
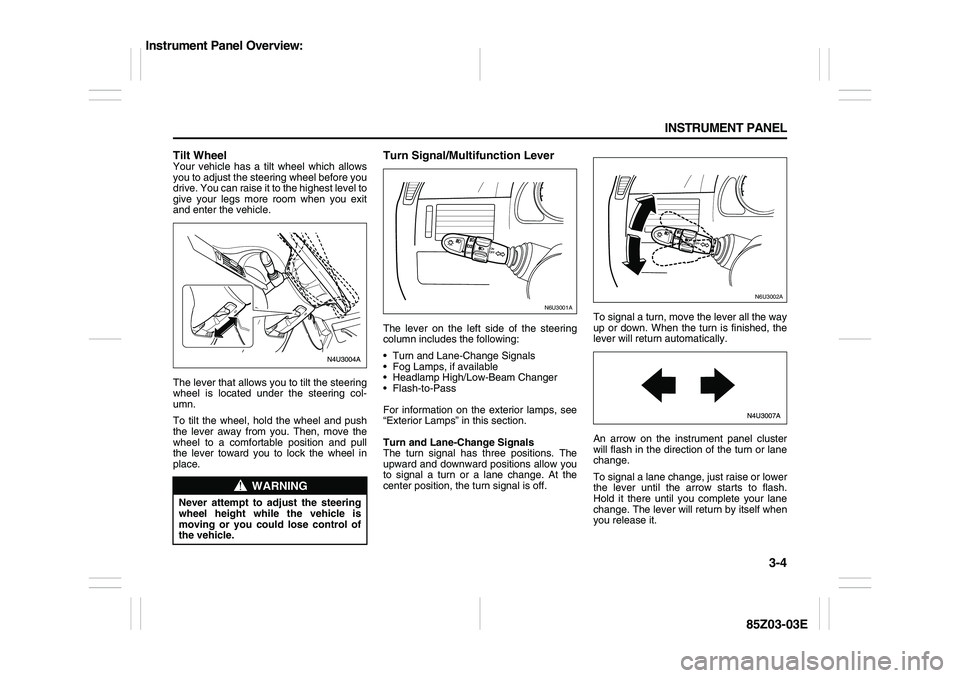
Tilt WheelYour vehicle has a tilt wheel which allows
you to adjust the steering wheel before you
drive. You can raise it to the highest level to
give your legs more room when you exit
and enter the vehicle.
The lever that allows you to tilt the steering
wheel is located under the steering col-
umn.
To tilt the wheel, hold the wheel and push
the lever away from you. Then, move the
wheel to a comfortable position and pull
the lever toward you to lock the wheel in
place.
Turn Signal/Multifunction LeverThe lever on the left side of the steering
column includes the following:
Turn and Lane-Change Signals
Fog Lamps, if available
Headlamp High/Low-Beam Changer
Flash-to-Pass
For information on the exterior lamps, see
“Exterior Lamps” in this section.
Turn and Lane-Change Signals
The turn signal has three positions. The
upward and downward positions allow you
to signal a turn or a lane change. At the
center position, the turn signal is off.To signal a turn, move the lever all the way
up or down. When the turn is finished, the
lever will return automatically.
An arrow on the instrument panel cluster
will flash in the direction of the turn or lane
change.
To signal a lane change, just raise or lower
the lever until the arrow starts to flash.
Hold it there until you complete your lane
change. The lever will return by itself when
you release it.
WARNING
Never attempt to adjust the steering
wheel height while the vehicle is
moving or you could lose control of
the vehicle.
N6U3001A
N6U3002A
Instrument Panel Overview:
Page 81 of 225
3-5 INSTRUMENT PANEL
85Z03-03E
As you signal a turn or a lane change, if
the arrows flash rapidly, a signal bulb may
be burned out and other drivers won’t see
your turn signal.
If a bulb is burned out, replace it to help
avoid an accident. If the arrows don’t go on
at all when you signal a turn, check for
burned-out bulbs and then check the fuse.
See “Fuses and Circuit Breakers” in sec-
tion 5.
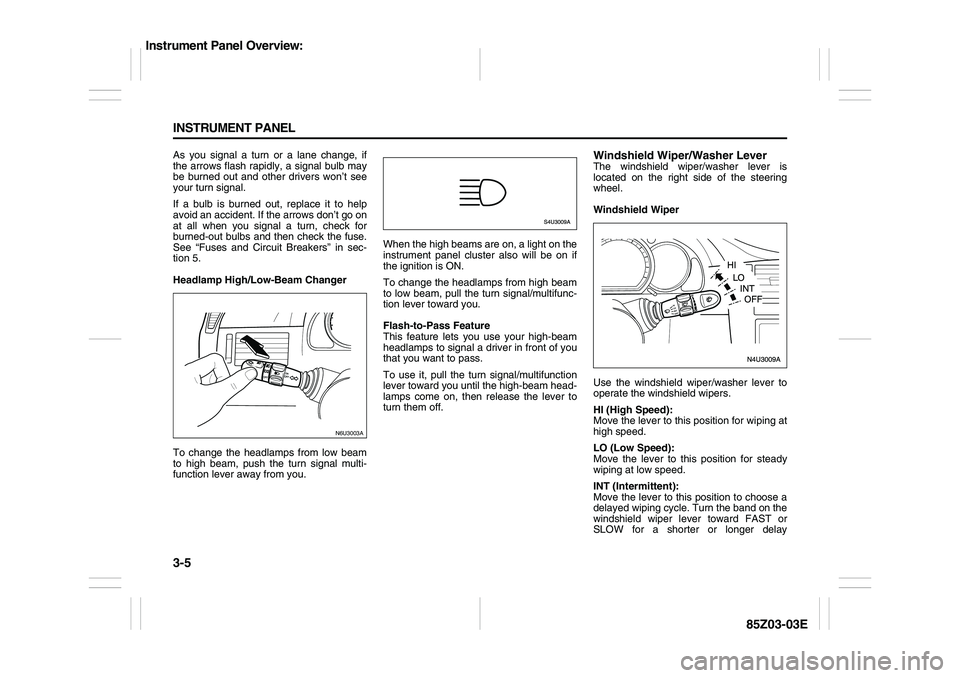
Headlamp High/Low-Beam Changer
To change the headlamps from low beam
to high beam, push the turn signal multi-
function lever away from you.When the high beams are on, a light on the
instrument panel cluster also will be on if
the ignition is ON.
To change the headlamps from high beam
to low beam, pull the turn signal/multifunc-
tion lever toward you.
Flash-to-Pass Feature
This feature lets you use your high-beam
headlamps to signal a driver in front of you
that you want to pass.
To use it, pull the turn signal/multifunction
lever toward you until the high-beam head-
lamps come on, then release the lever to
turn them off.
Windshield Wiper/Washer LeverThe windshield wiper/washer lever is
located on the right side of the steering
wheel.
Windshield Wiper
Use the windshield wiper/washer lever to
operate the windshield wipers.
HI (High Speed):
Move the lever to this position for wiping at
high speed.
LO (Low Speed):
Move the lever to this position for steady
wiping at low speed.
INT (Intermittent):
Move the lever to this position to choose a
delayed wiping cycle. Turn the band on the
windshield wiper lever toward FAST or
SLOW for a shorter or longer delay
N6U3003A
Instrument Panel Overview:
Page 101 of 225

3-25 INSTRUMENT PANEL
85Z03-03E
See “Fog Lamps” under Exterior Lamps in
this section for more information.Cruise Control LightIf your vehicle has this feature, this light will
come on briefly when the ignition is turned
on.
The CRUISE light comes on whenever the
cruise control is set. See “Cruise Control”
in this section. The light will turn off when
the cruise control is turned off.High beam On LightThis light comes on whenever the high-
beam headlamps are on.
See “Headlamp High/Low-Beam Changer”
under “Turn Signal/Multifunction Lever” in
this section for additional information.
Fuel GaugeYour fuel gauge tells you approximately
how much fuel you have left, when the igni-
tion is on. When the indicator nears empty,
the low fuel warning light will come on. You
still have a little fuel left, but you should get
more soon. See “Low Fuel Warning Light”
in this section for more information.
Here are four things that some owners ask
about. None of these show a problem with
your fuel gauge:
At the service station, the gas pump
shuts off before the gauge reads full.
It takes a little more or less fuel to fill up
than the gauge indicated. For example,
the gauge may have indicated the tank
was half full, but it actually took a little
more or less than half the tank’s capacity
to fill the tank. The indicator moves a little when you
turn a corner or speed up.
The gauge goes back to empty when
you turn off the ignition.
For your fuel tank capacity, see “Capacities
and Specifications” in section 5.
Low Fuel Warning LightThis light will come on when the fuel tank is
low on fuel.
To turn it off, add fuel to the fuel tank. See
“Filling Your Tank” in section 5.
N5U3004A
Warning Lights, Gauges and Indicators:
Page 112 of 225
3-36 INSTRUMENT PANEL
85Z03-03E
AUX Mode
Press this button to listen to the audio con-
tents from other devices; Walkman, Porta-
ble CD Player, Portable MP3 Player, i-pod,
XM receiver, etc.
1) Connect the output port of the device to
the aux jack of the head unit with an
aux connector.
2) Turn the device on.
3) Press this button.
If you want to control the volume level, use
the volume buttons of the head unit or the
device.
Using the Auxiliary Input Jack
Your radio system has an auxiliary input
jack located on the lower right side of the
faceplate. This is not an audio output; do
not plug a headphone set into the front
auxiliary input jack. You can however, con-
nect an external audio device such as an
iPod, laptop computer, MP3 player, CD
changer, or cassette tape player, etc. to the
auxiliary input jack for use as another
source for audio listening.
The auxiliary input jack will also accept cell
phone connectors. Plug the cell phone
connector into the auxiliary input jack to
hear the other side of a cell phone’s con-
versation through the vehicle sound sys-
tem.
Drivers are encouraged to set up their por-
table audio player while the vehicle isparked. See Defensive Driving for more
information on driver distraction.
To use a portable audio player, connect a
3.5 mm (1/8 inch) cable to the radio’s front
auxiliary input jack. When a device is con-
nected, press the radio CD/AUX button as
needed to begin playing audio from the
device over the car speakers.
CD/AUX (CD/Auxiliary) button (9):
Press this button once to play a CD while a
portable audio device is playing. Press this
button a second time and the system will
begin playing audio from the connected
portable audio player. Once in this mode,
“Auxinput” will appear on the display. If the
auxiliary jack does not detect the presence
of an output jack, the aux mode will be pre-
vented from coming up.
Power/Volume knob (1):
Turn this knob clockwise or counterclock-
wise to increase or decrease the volume of
the portable player. You may need to make
additional volume adjustments from the
portable device if the volume does not go
loud or soft enough.
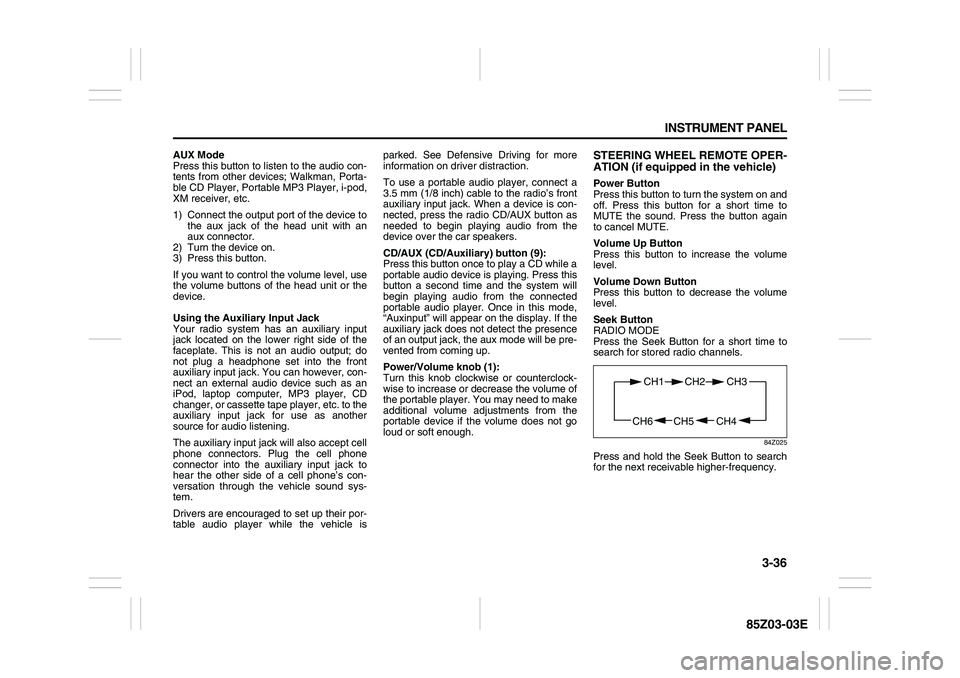
STEERING WHEEL REMOTE OPER-
ATION (if equipped in the vehicle)Power Button
Press this button to turn the system on and
off. Press this button for a short time to
MUTE the sound. Press the button again
to cancel MUTE.
Volume Up Button
Press this button to increase the volume
level.
Volume Down Button
Press this button to decrease the volume
level.
Seek Button
RADIO MODE
Press the Seek Button for a short time to
search for stored radio channels.
84Z025
Press and hold the Seek Button to search
for the next receivable higher-frequency.
CH4 CH5
CH1 CH2
CH6
CH3
Page 119 of 225
3-43 INSTRUMENT PANEL
85Z03-03E
CD Messages
CHECK CD:
If this message appears on the display
and/or the CD comes out, it could be for
one of the following reasons:
It is very hot. When the temperature
returns to normal, the CD will play.
You are driving on a very rough road.
When the road becomes smoother, the
CD will play.
The CD is dirty, scratched, wet, or
upside down.
The air is very humid. If so, wait about an
hour and try again.
The format of the CD may not be com-
patible. See “MP3/WMA Format” earlier
in this section.
There may have been a problem while
burning the CD.
The label may be caught in the CD
player.
If the CD is not playing correctly, for any
other reason, try a known good CD.
If any error occurs repeatedly or if an error
cannot be corrected, contact your SUZUKI
dealer. If the radio displays an error mes-
sage, write it down and provide it to your
SUZUKI dealer when reporting the prob-
lem.AUX Mode
Press this button to listen to the audio con-
tents from other devices; Walkman, Porta-
ble CD Player, Portable MP3 Player, i-pod,
XM receiver, etc.
1) Connect the output port of the device to
the aux jack of the head unit with an
aux connector.
2) Turn the device on.
3) Press this button.
If you want to control the volume level, use
the volume buttons of the head unit or the
device.
Using the Auxiliary Input Jack
Your radio system has an auxiliary input
jack located on the lower right side of the
faceplate. This is not an audio output; do
not plug a headphone set into the front
auxiliary input jack. You can however, con-
nect an external audio device such as an
iPod, laptop computer, MP3 player, CD
changer, or cassette tape player, etc. to the
auxiliary input jack for use as another
source for audio listening.
The auxiliary input jack will also accept cell
phone connectors. Plug the cell phone
connector into the auxiliary input jack to
hear the other side of a cell phone’s con-
versation through the vehicle sound sys-
tem.
Drivers are encouraged to set up their por-
table audio player while the vehicle isparked. See Defensive Driving for more
information on driver distraction.
To use a portable audio player, connect a
3.5 mm (1/8 inch) cable to the radio’s front
auxiliary input jack. When a device is con-
nected, press the radio CD/AUX button as
needed to begin playing audio from the
device over the car speakers.
CD/AUX (CD/Auxiliary) button (9):
Press this button once to play a CD while a
portable audio device is playing. Press this
button a second time and the system will
begin playing audio from the connected
portable audio player. Once in this mode,
“Auxinput” will appear on the display. If the
auxiliary jack does not detect the presence
of an output jack, the aux mode will be pre-
vented from coming up.
Power/Volume knob (1):
Turn this knob clockwise or counterclock-
wise to increase or decrease the volume of
the portable player. You may need to make
additional volume adjustments from the
portable device if the volume does not go
loud or soft enough.
Page 120 of 225
3-44 INSTRUMENT PANEL
85Z03-03E
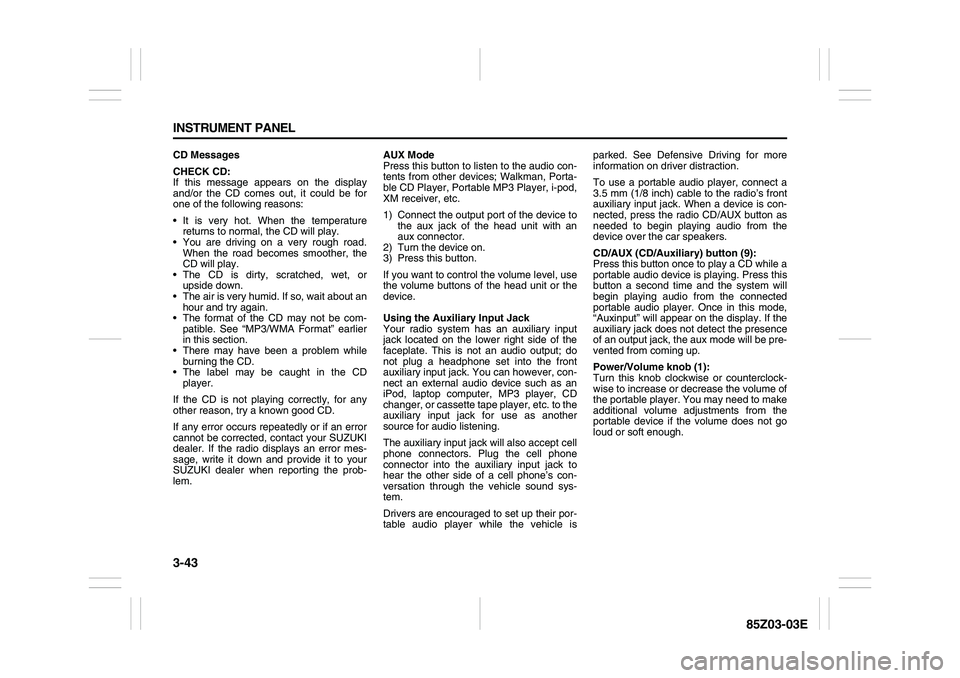
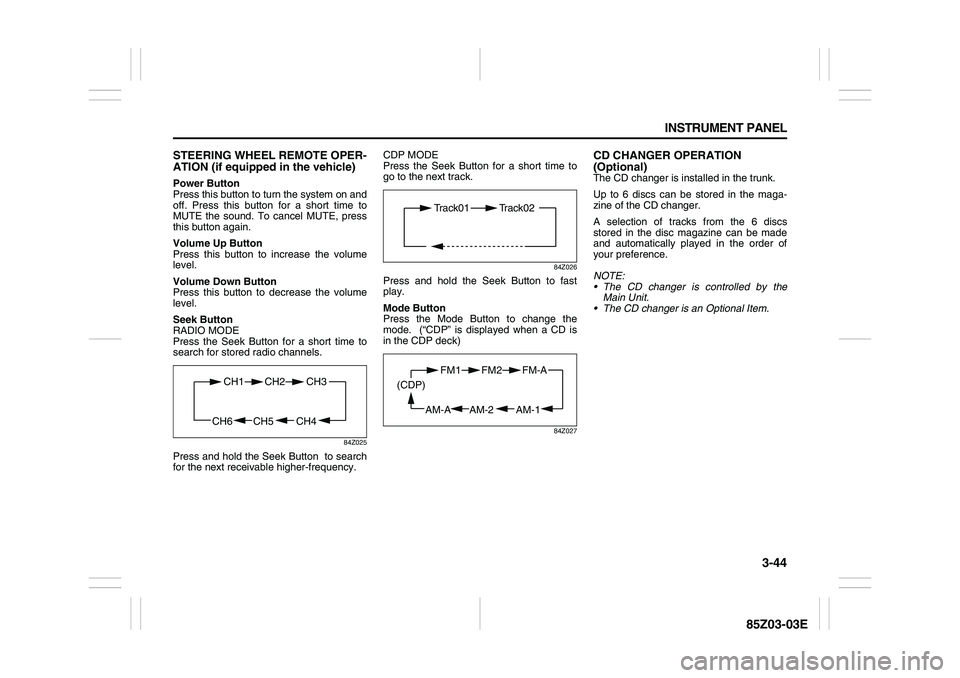
STEERING WHEEL REMOTE OPER-
ATION (if equipped in the vehicle)Power Button
Press this button to turn the system on and
off. Press this button for a short time to
MUTE the sound. To cancel MUTE, press
this button again.
Volume Up Button
Press this button to increase the volume
level.
Volume Down Button
Press this button to decrease the volume
level.
Seek Button
RADIO MODE
Press the Seek Button for a short time to
search for stored radio channels.
84Z025
Press and hold the Seek Button to search
for the next receivable higher-frequency.CDP MODE
Press the Seek Button for a short time to
go to the next track.
84Z026
Press and hold the Seek Button to fast
play.
Mode Button
Press the Mode Button to change the
mode. (“CDP” is displayed when a CD is
in the CDP deck)
84Z027
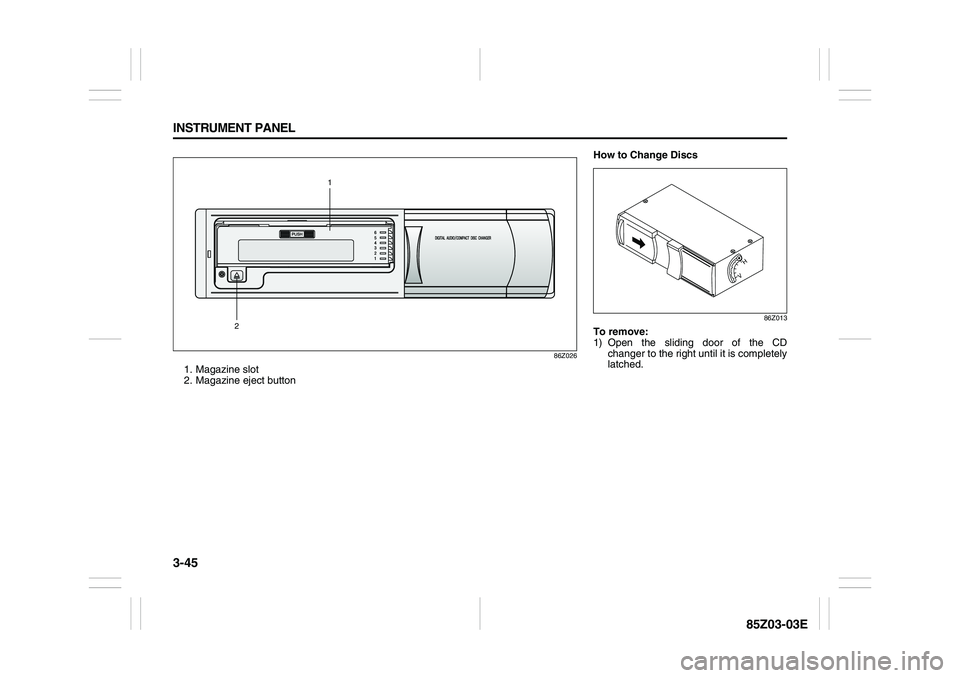
CD CHANGER OPERATION
(Optional)The CD changer is installed in the trunk.
Up to 6 discs can be stored in the maga-
zine of the CD changer.
A selection of tracks from the 6 discs
stored in the disc magazine can be made
and automatically played in the order of
your preference.
NOTE:
The CD changer is controlled by the
Main Unit.
The CD changer is an Optional Item.
CH4 CH5
CH1 CH2
CH6
CH3
Track01 Track02
AM-1 AM-2
FM1 FM2
AM-A (CDP)
FM-A
Page 121 of 225
3-45 INSTRUMENT PANEL
85Z03-03E
86Z026
1. Magazine slot
2. Magazine eject button
21
How to Change Discs
86Z013
To remove:
1) Open the sliding door of the CD
changer to the right until it is completely
latched.
Page 122 of 225
3-46 INSTRUMENT PANEL
85Z03-03E
86Z014
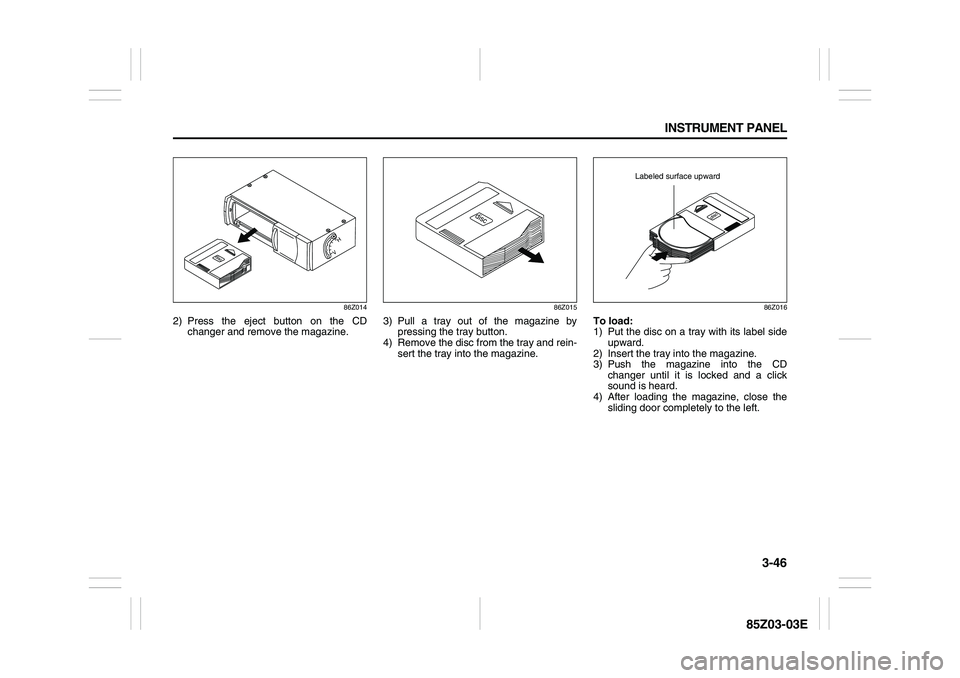
2) Press the eject button on the CD
changer and remove the magazine.
86Z015
3) Pull a tray out of the magazine by
pressing the tray button.
4) Remove the disc from the tray and rein-
sert the tray into the magazine.
86Z016
To load:
1) Put the disc on a tray with its label side
upward.
2) Insert the tray into the magazine.
3) Push the magazine into the CD
changer until it is locked and a click
sound is heard.
4) After loading the magazine, close the
sliding door completely to the left.
Labeled surface upward