Page 18 of 139

Downloaded from www.Manualslib.com manuals search engine 1976G-74E
BEFORE DRIVING
3-6
w ww w
w WARNING
76G-03-009A
Always make sure that the rearend
door is closed and latched securely.
Closing the door completely helps to
prevent exhaust gases from entering
the vehicle. Completely closing the
rearend door also helps prevent
occupants from being thrown from the
vehicle in the event of an accident.TYPE-2 (ALTO K10)
WINDOWSRaise or lower the door windows by turning
the handle located on the door panel.
76G-03-011
Electric window controls (if equipped)
The driver’s door has switches 1 & 2 to
operate the driver’s window and front
passenger’s window respectively.
The passenger’s door only has a switch 3
to operate the passenger’s window. The
electric windows can only be operated when
the ignition switch is in the “ON” position.
To open a window with the driver's door
switches, push the top part of the switch
and to close the window lift up the top part
of the switch.
76G-03-012
Page 20 of 139
Downloaded from www.Manualslib.com manuals search engine 2176G-74E
BEFORE DRIVING
3-8
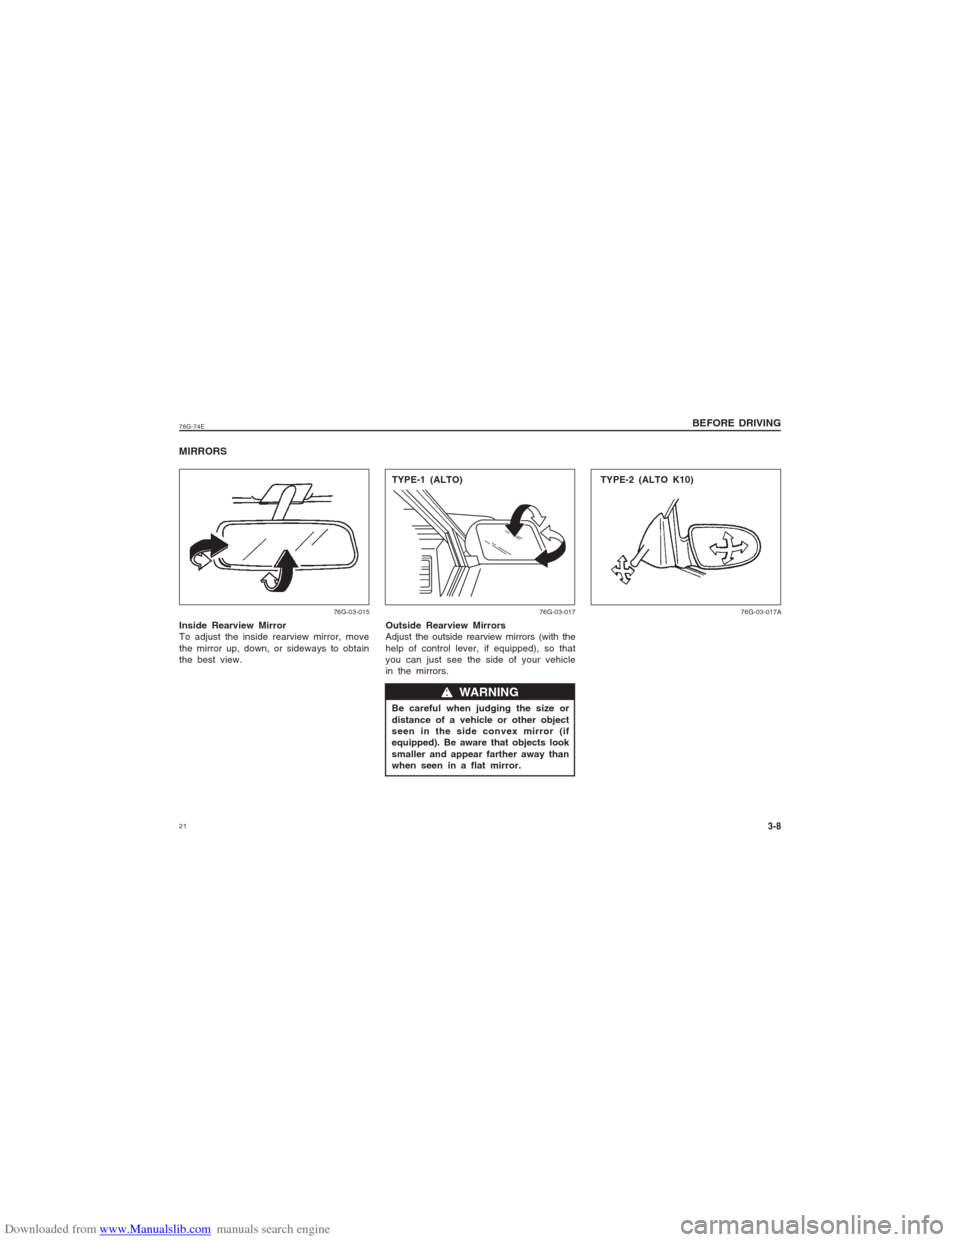
MIRRORSInside Rearview Mirror
To adjust the inside rearview mirror, move
the mirror up, down, or sideways to obtain
the best view.
76G-03-015
Outside Rearview Mirrors
Adjust the outside rearview mirrors (with the
help of control lever, if equipped), so that
you can just see the side of your vehicle
in the mirrors.
Be careful when judging the size or
distance of a vehicle or other object
seen in the side convex mirror (if
equipped). Be aware that objects look
smaller and appear farther away than
when seen in a flat mirror.
w ww w
w WARNING
76G-03-017
76G-03-017A
TYPE-1 (ALTO)
TYPE-2 (ALTO K10)
Page 21 of 139
Downloaded from www.Manualslib.com manuals search engine 22
76G-74E
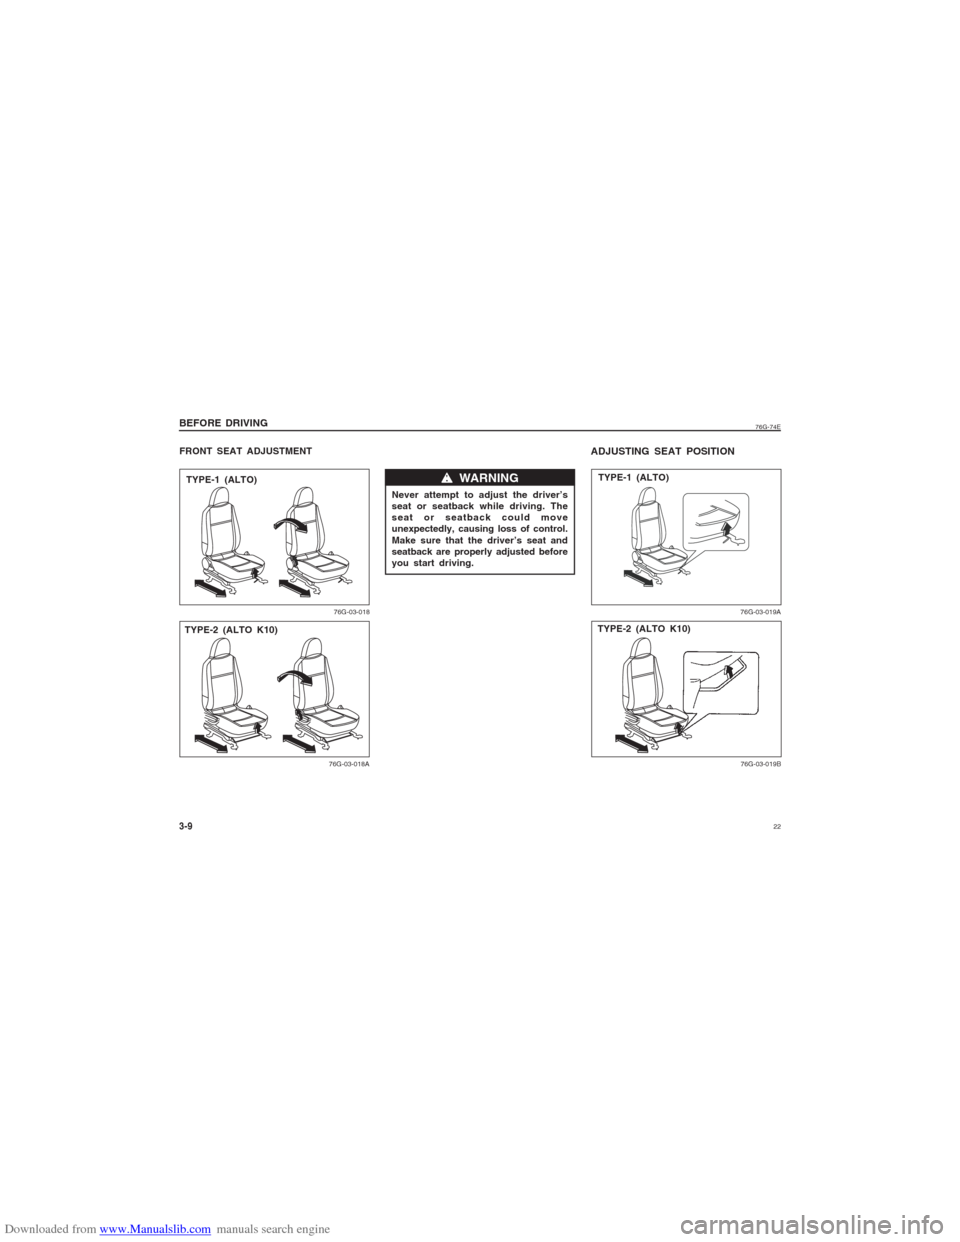
3-9BEFORE DRIVINGFRONT SEAT ADJUSTMENT
76G-03-018
TYPE-1 (ALTO)
76G-03-018A
TYPE-2 (ALTO K10)
ADJUSTING SEAT POSITION
76G-03-019A76G-03-019B
TYPE-1 (ALTO)TYPE-2 (ALTO K10) Never attempt to adjust the driver’s
seat or seatback while driving. The
seat or seatback could move
unexpectedly, causing loss of control.
Make sure that the driver’s seat and
seatback are properly adjusted before
you start driving.
w ww w
w WARNING
Page 22 of 139
Downloaded from www.Manualslib.com manuals search engine 2376G-74E
BEFORE DRIVING
3-10
The adjustment lever for each front seat is
located under the front of the seat. To
adjust the seat position, pull up on the
adjustment lever and slide the seat forward
or rearward. After adjustment, try to move
the seat forward and rearward to ensure
that it is securely latched.
w ww w
w WARNING
To avoid excessive seat belt slack,
which reduces the effectiveness of the
seat belts as a safety device, make
sure that the seats are adjusted
before the seat belts are fastened.
Seatbacks should always be in an
upright position when driving, or seat
belt effectiveness may be reduced.
Seat belts are designed to offer
maximum protection when seatbacks
are in the fully upright position.
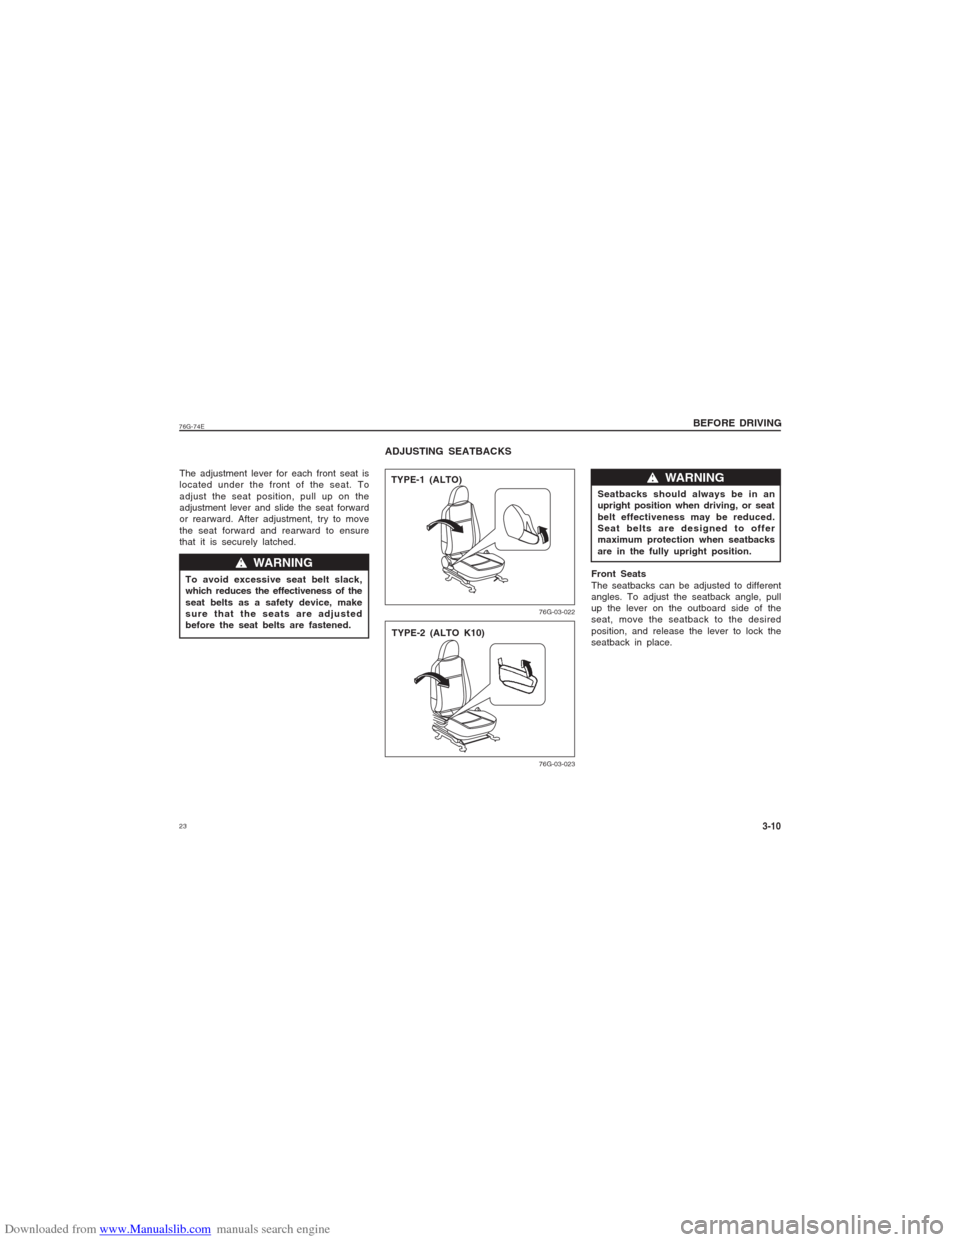
Front Seats
The seatbacks can be adjusted to different
angles. To adjust the seatback angle, pull
up the lever on the outboard side of the
seat, move the seatback to the desired
position, and release the lever to lock the
seatback in place.
w ww w
w WARNING
76G-03-022
76G-03-023
TYPE-1 (ALTO)
TYPE-2 (ALTO K10)ADJUSTING SEATBACKS
Page 30 of 139
Downloaded from www.Manualslib.com manuals search engine 3176G-74E
Do not use the starter motor for
more than 15 seconds at a time. If
the engine does not start; wait 15
seconds before trying again. If the
engine does not start after several
attempts, check the fuel and ignition
systems or consult your MARUTI
SUZUKI dealer.
Do not leave the ignition switch in
the “ON” position if the engine is
not running as the battery will
discharge.
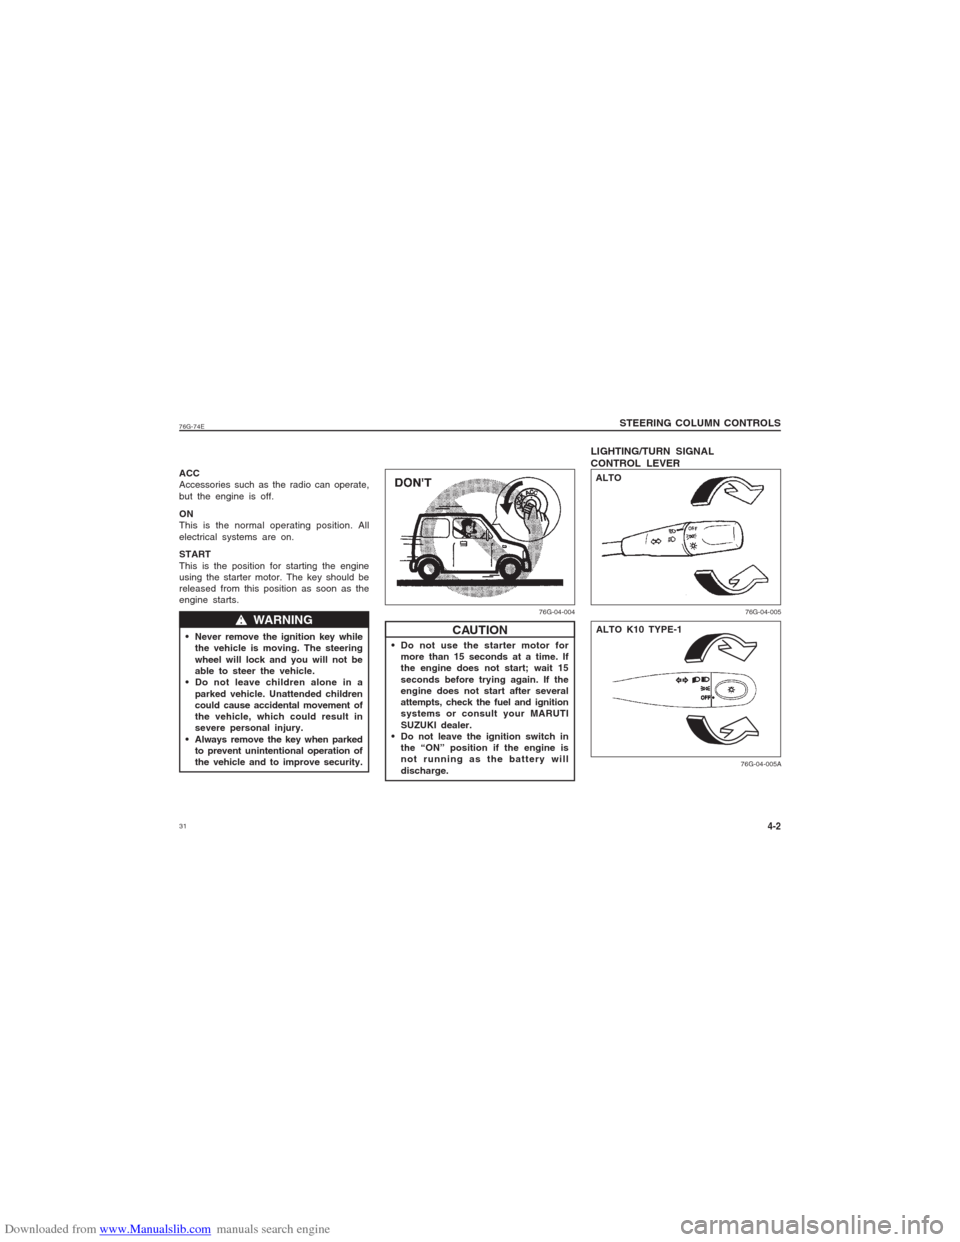
LIGHTING/TURN SIGNAL
CONTROL LEVERSTEERING COLUMN CONTROLS
ACC
Accessories such as the radio can operate,
but the engine is off.
ON
This is the normal operating position. All
electrical systems are on.
START
This is the position for starting the engine
using the starter motor. The key should be
released from this position as soon as the
engine starts.
Never remove the ignition key while
the vehicle is moving. The steering
wheel will lock and you will not be
able to steer the vehicle.
Do not leave children alone in a
parked vehicle. Unattended children
could cause accidental movement of
the vehicle, which could result in
severe personal injury.
Always remove the key when parked
to prevent unintentional operation of
the vehicle and to improve security.
w ww w
w WARNING
CAUTION
4-2
76G-04-005 76G-04-004
ALTO
76G-04-005A
ALTO K10 TYPE-1
Page 31 of 139

Downloaded from www.Manualslib.com manuals search engine 32
76G-74E
STEERING COLUMN CONTROLS4-3
76G-04-005B
With the headlights on, push the lever
forward to switch to the high beams (main
beams) or pull the lever toward you to
switch to the low beams. When the high
beams (main beams) are on, a light on the
instrument panel will come on. To flash the
high beams (main beams) pull the lever
slightly towards you and release it.
76G-04-006
ALTO K10 TYPE-2
76G-04-006A
76G-04-006B
ALTO K10 TYPE-1ALTO K10 TYPE-2
ALTO
This control lever is located on the outboard
side of the steering column. Operate the
lever as described below.
Lighting Operation
To turn the lights on or off, twist the knob
on the end of the lever. There are three
positions: in the “OFF” position all lights are
off; in the middle position the front parking
lights, tail-lights, registration plate light, and
instrument lights are on, but the headlights
are off; in the third position the headlights
come on in addition to the other lights.
Page 32 of 139
Downloaded from www.Manualslib.com manuals search engine 3376G-74E
STEERING COLUMN CONTROLS
Turn Signal Operation
With the ignition switch in the “ON” position,
move the lever up or down to activate the
left or right turn signals.
Normal Turn Signal
Move the lever clockwise until it clicks to
signal a right turn or anticlockwise to signal
a left turn. When the turn is completed, the
signal will cancel and the lever will return
to its normal position.
4-4
76G-04-008 76G-04-007
76G-04-007A
76G-04-007B
ALTO K10 TYPE-1ALTO K10 TYPE-2
ALTOALTO
76G-04-008A
ALTO K10 TYPE-1
Page 33 of 139

Downloaded from www.Manualslib.com manuals search engine 34
76G-74E
STEERING COLUMN CONTROLS
WINDSCREEN WIPER AND
WASHER LEVER
Windscreen Wipers
To turn the windscreen wipers on, move the
lever down to one of the three operating
positions. In the “INT” position, (if equipped)
the wipers operate intermittently. The “INT”
position is very convenient for driving in mist
or light rain. In the “LO” position the wipers
operate at a steady low speed. In the “HI”
position, the wipers operate at a steady high
speed. To turn off the wipers, move the
lever back to the “OFF” position.
4-5
HAZARD WARNING SWITCHPush in the marked part of the hazard
warning switch to activate the hazard
warning lights. All four turn signal lights and
both turn signal indicators will flash
simultaneously. To turn off the lights, push
the switch once again.
Use the hazard warning lights to warn other
traffic during emergency parking or when
your vehicle could otherwise become a
traffic hazard.
76G-04-009 76G-04-010
76G-04-008B
ALTO K10 TYPE-2Lane Change Signal
Some times, such as when changing lanes,
the steering wheel is not turned far enough
to cancel the turn signal. For convenience,
you can flash the turn signal by moving the
lever part way and holding it there. The
lever will return to its normal position when
you release it.