Page 113 of 232
Downloaded from www.Manualslib.com manuals search engine 4-48 INSTRUMENT PANEL
54G27-03E
Error Display
An error message may not be displayed quickly depending on the degree of scratches or dirt on the CD.
If sound is not output for a while after a CD is inserted, there may be scratches or dirt on the CD. Eject it, and insert another CD.
Error code Mode Description
E01CD, CD changer Focus error (TOC information cannot be read.)
E02CD, CD changerData cannot be read due to scratches, dirt etc.
A CD-ROM is inserted.
E03CD, CD changer Loading error, eject error or pickup position error.
E HOTCD, CD changerThe high temperature protection function is activated. (Wait until the temperature
decrease.)
NO DISC– No disc is present in the unit.
ECD, CD changer Power supply system error, internal communication error or another error.
Audio Systems:
Page 114 of 232
Downloaded from www.Manualslib.com manuals search engine 4-49 INSTRUMENT PANEL
54G27-03E
MEMO
Page 115 of 232

Downloaded from www.Manualslib.com manuals search engine OTHER CONTROLS AND EQUIPMENT
5
54G27-03E
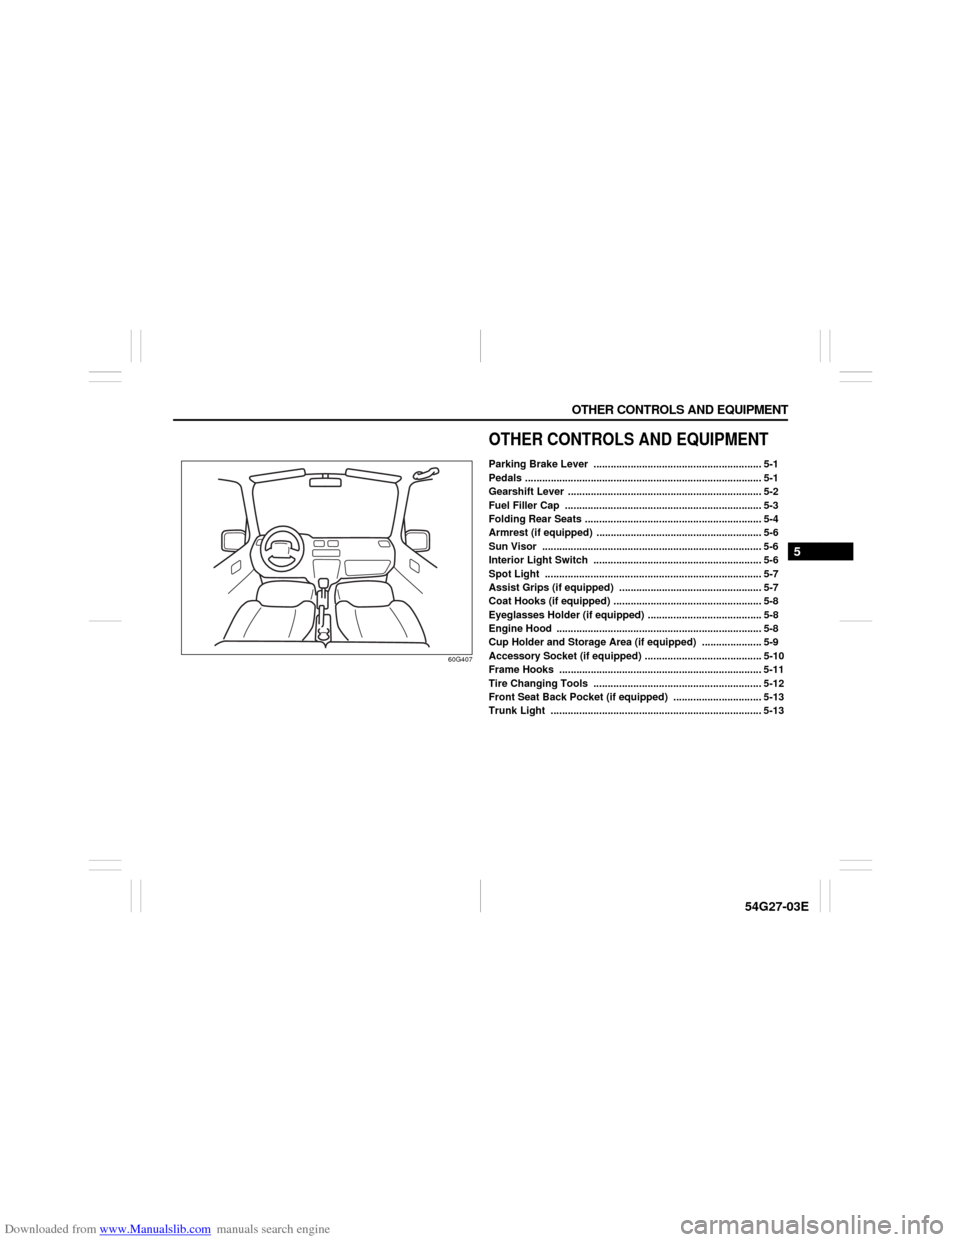
60G407
OTHER CONTROLS AND EQUIPMENTParking Brake Lever ........................................................... 5-1
Pedals ................................................................................... 5-1
Gearshift Lever .................................................................... 5-2
Fuel Filler Cap ..................................................................... 5-3
Folding Rear Seats .............................................................. 5-4
Armrest (if equipped) .......................................................... 5-6
Sun Visor ............................................................................. 5-6
Interior Light Switch ........................................................... 5-6
Spot Light ............................................................................ 5-7
Assist Grips (if equipped) .................................................. 5-7
Coat Hooks (if equipped) .................................................... 5-8
Eyeglasses Holder (if equipped) ........................................ 5-8
Engine Hood ........................................................................ 5-8
Cup Holder and Storage Area (if equipped) ..................... 5-9
Accessory Socket (if equipped) ......................................... 5-10
Frame Hooks ....................................................................... 5-11
Tire Changing Tools ........................................................... 5-12
Front Seat Back Pocket (if equipped) ............................... 5-13
Trunk Light .......................................................................... 5-13
Page 116 of 232

Downloaded from www.Manualslib.com manuals search engine 5-1 OTHER CONTROLS AND EQUIPMENT
54G27-03E
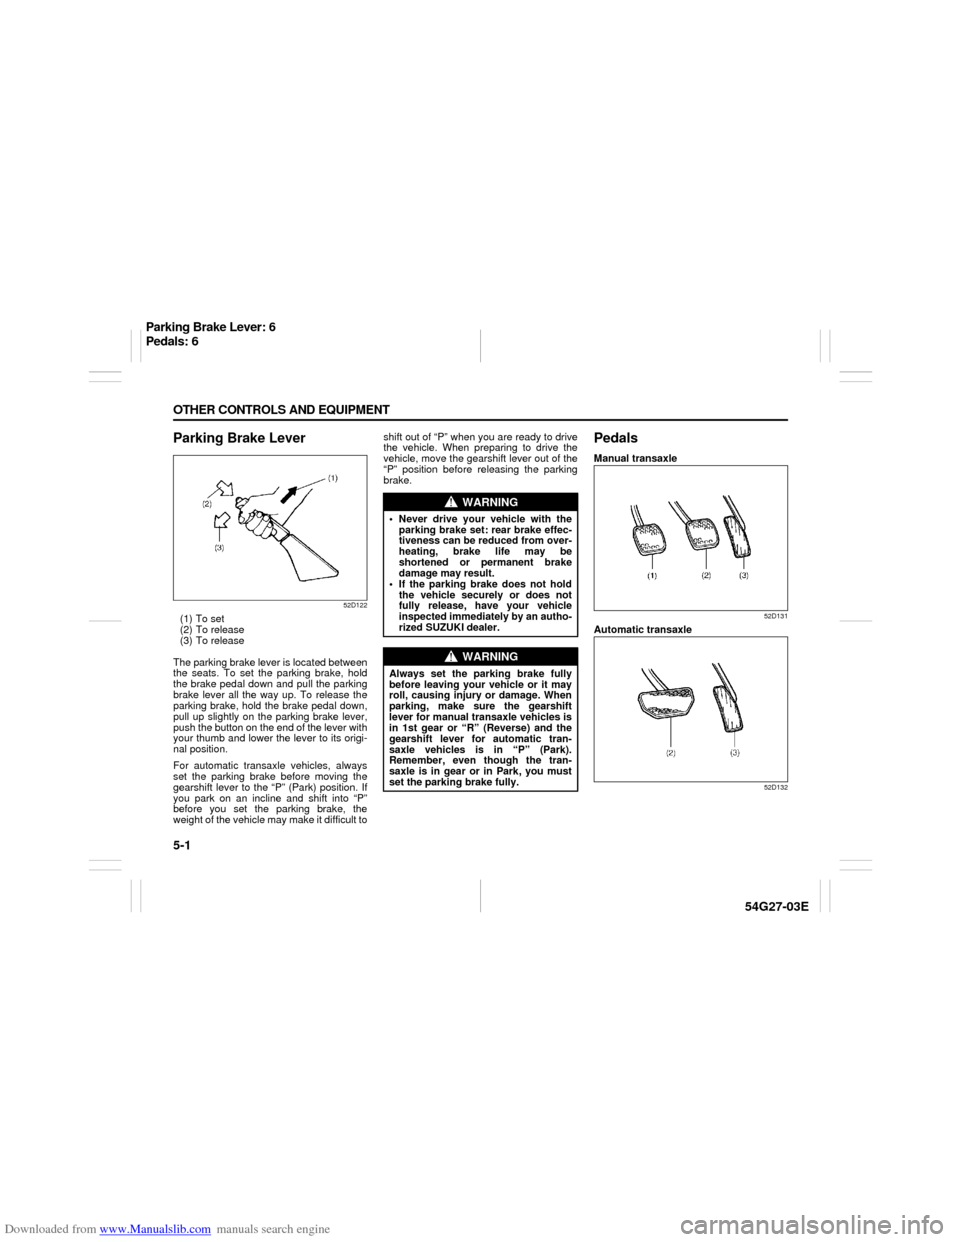
Parking Brake Lever
52D122
(1) To set
(2) To release
(3) To release
The parking brake lever is located between
the seats. To set the parking brake, hold
the brake pedal down and pull the parking
brake lever all the way up. To release the
parking brake, hold the brake pedal down,
pull up slightly on the parking brake lever,
push the button on the end of the lever with
your thumb and lower the lever to its origi-
nal position.
For automatic transaxle vehicles, always
set the parking brake before moving the
gearshift lever to the “P” (Park) position. If
you park on an incline and shift into “P”
before you set the parking brake, the
weight of the vehicle may make it difficult toshift out of “P” when you are ready to drive
the vehicle. When preparing to drive the
vehicle, move the gearshift lever out of the
“P” position before releasing the parking
brake.
PedalsManual transaxle
52D131
Automatic transaxle
52D132
WARNING
Never drive your vehicle with the
parking brake set: rear brake effec-
tiveness can be reduced from over-
heating, brake life may be
shortened or permanent brake
damage may result.
If the parking brake does not hold
the vehicle securely or does not
fully release, have your vehicle
inspected immediately by an autho-
rized SUZUKI dealer.
WARNING
Always set the parking brake fully
before leaving your vehicle or it may
roll, causing injury or damage. When
parking, make sure the gearshift
lever for manual transaxle vehicles is
in 1st gear or “R” (Reverse) and the
gearshift lever for automatic tran-
saxle vehicles is in “P” (Park).
Remember, even though the tran-
saxle is in gear or in Park, you must
set the parking brake fully.
Parking Brake Lever: 6
Pedals: 6
Page 117 of 232

Downloaded from www.Manualslib.com manuals search engine 5-2 OTHER CONTROLS AND EQUIPMENT
54G27-03E
Clutch Pedal (1)(For manual transaxle)
The clutch pedal is used to disengage the
drive to the wheels when starting the
engine, stopping or shifting the gearshift
lever. Depressing the pedal disengages
the clutch.Brake Pedal (2)Your SUZUKI vehicle is equipped with front
disc brakes and rear drum brakes.
Depressing the brake pedal applies both
sets of brakes.
You may hear occasional brake squeal
when you apply the brakes. This is a nor-
mal condition caused by environmental
factors such as cold, wet, snow, etc.
Accelerator Pedal (3)This pedal controls the speed of the
engine. Depressing the accelerator pedal
increases power output and speed.
Gearshift LeverManual transaxle
60B095
4-speed automatic transaxle
54G465
CAUTION
Do not drive with your foot resting on
the clutch pedal. It could result in
excessive clutch wear or clutch dam-
age.
WARNING
If brake squeal is excessive and
occurs each time the brakes are
applied, you should have the brakes
checked by your SUZUKI dealer.
WARNING
Do not “ride” the brakes by applying
them continuously or resting your
foot on the pedal. This will result in
overheating of the brakes which
could cause unpredictable braking
action, longer stopping distances or
permanent brake damage.
EXAMPLEEXAMPLE
Pedals: 6
Gearshift Lever: 10
Page 118 of 232
Downloaded from www.Manualslib.com manuals search engine 5-3 OTHER CONTROLS AND EQUIPMENT
54G27-03E
Your vehicle is equipped with either a man-
ual transaxle or automatic transaxle. The
gearshift lever for each transaxle type is
shown in the illustrations. For details on
how to use the transaxle, refer to the
“Using the Transaxle” in “OPERATING
YOUR VEHICLE” section.
Fuel Filler Cap
54G581
The fuel filler cap is located on the left rear
side of the vehicle. The fuel filler door can
simply be opened by hand.
60G069
To remove the fuel filler cap:
1) Open the fuel filler door.
2) Remove the cap by turning it counter-
clockwise.
To reinstall the fuel filler cap:
1) Turn the cap clockwise until you hear
several clicks.
2) Close the fuel filler door.
EXAMPLE
WARNING
Remove the fuel filler cap slowly. The
fuel may be under pressure and may
spray out, causing injury.Open Close
Gearshift Lever: 10
Fuel Filler Cap: 5
Page 119 of 232

Downloaded from www.Manualslib.com manuals search engine 5-4 OTHER CONTROLS AND EQUIPMENT
54G27-03E
Folding Rear SeatsTo fold the rear seatback(s) forward:
54G372
1) Unlatch the detachable connector
before folding the rear right seatback.
To unlatch, insert the ignition key into
the slot of the connector and allow the
belt to retract.
54G373
2) Once the belt has completely retracted,
secure the latch plate as shown in the
illustration.
WARNING
Gasoline is extremely flammable. Do
not smoke when refueling, and make
sure there are no open flames or
sparks in the area.
WARNING
If you need to replace the fuel cap,
use a genuine SUZUKI cap or its
equivalent. Use of an improper cap
can result in a malfunction of the fuel
system or emission control system. It
may also result in fuel leakage in the
event of an accident.
CAUTION
When you fold a rear right seatback,
be sure to unlatch the detachable
connector. This helps prevent dam-
age to the belt webbing.
Fuel Filler Cap: 5
Folding Rear Seats: 3
Page 120 of 232

Downloaded from www.Manualslib.com manuals search engine 5-5 OTHER CONTROLS AND EQUIPMENT
54G27-03E
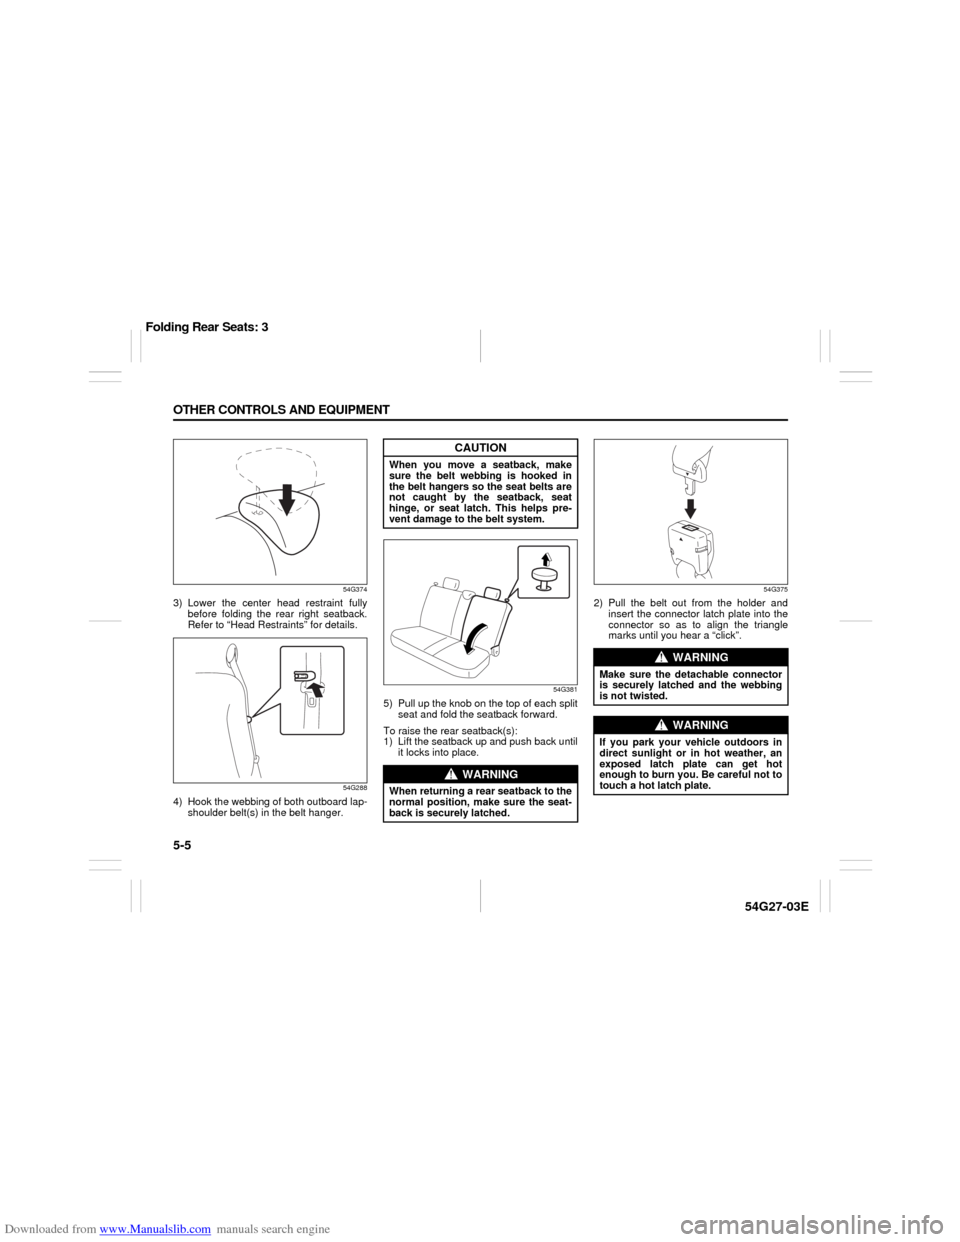
54G374
3) Lower the center head restraint fully
before folding the rear right seatback.
Refer to “Head Restraints” for details.
54G288
4) Hook the webbing of both outboard lap-
shoulder belt(s) in the belt hanger.
54G381
5) Pull up the knob on the top of each split
seat and fold the seatback forward.
To raise the rear seatback(s):
1) Lift the seatback up and push back until
it locks into place.
54G375
2) Pull the belt out from the holder and
insert the connector latch plate into the
connector so as to align the triangle
marks until you hear a “click”.
CAUTION
When you move a seatback, make
sure the belt webbing is hooked in
the belt hangers so the seat belts are
not caught by the seatback, seat
hinge, or seat latch. This helps pre-
vent damage to the belt system.
WARNING
When returning a rear seatback to the
normal position, make sure the seat-
back is securely latched.
WARNING
Make sure the detachable connector
is securely latched and the webbing
is not twisted.
WARNING
If you park your vehicle outdoors in
direct sunlight or in hot weather, an
exposed latch plate can get hot
enough to burn you. Be careful not to
touch a hot latch plate.
Folding Rear Seats: 3