2007 SUBARU OUTBACK Defrost
[x] Cancel search: DefrostPage 6 of 442

Vehicle symbols
There are some of the symbols you may
see on your vehicle.Mark Name
WARNING
CAUTION
Passengers ’windows lock
Fuel
Front fog lights
Parking lights
Hazard warning flasher
Seat heater
Child restraint lower an- chorages Mark Name
Child restraint top tether an- chorages
Horn
Windshield wiper deicer
Wiper intermittent
Windshield wiper and washer
Rear window wiper and washer
Lights
Parking lights, tail lights, li-
cense plate lights and instru-
ment panel illumination
Headlights
Turn signal
orDaytime running lightsMark Name
Illumination brightness
Engine hood
Trunk lid (Sedan)
Fan speed
Instrument panel outlets
Instrument panel outlets and
foot outlets
Foot outlets
Windshield defroster and foot outlets
Windshield defroster
Rear window defogger/Out-
side mirror defogger
Air recirculation3
– CONTINUED –
Page 164 of 442
Wiper and washer
WARNING
In freezing weather, do not use the
windshield washer until the wind-
shield is sufficiently warmed by the
defroster.
Otherwise the washer fluid can
freeze on the windshield, blocking
your view.
CAUTION
. Do not operate the washer con-
tinuously for more than ten sec-
onds, or when the washer fluid
tank is empty. This may cause
overheating of the washer motor.
Check the washer fluid level
frequently, such as at fuel stops.
. Do not operate the wipers when
the windshield or rear window is
dry. This may scratch the glass,
damage the wiper blades and
cause the wiper motor to burn
out. Before operating the wiper
on a dry windshield or rear
window, always use the wind-
shield washer. .
In freezing weather, be sure that
the wiper blades are not frozen to
the windshield or rear window
before switching on the wipers.
Attempting to operate the wiper
with the blades frozen to the
window glass could cause not
only the wiper blades to be
damaged but also the wiper mo-
tor to burn out. If the wiper
blades are frozen to the window
glass, be sure to operate the
defroster, wiper deicer (if
equipped) or rear window defog-
ger before turning on the wiper.
. If the wipers stop during opera-
tion because of ice or some other
obstruction on the window, the
wiper motor could burn out even
if the wiper switch is turned off. If
this occurs, promptly stop the
vehicle in a safe place, turn the
ignition switch to the “LOCK ”
position and clean the window
glass to allow proper wiper op-eration.
. Use clean water if windshield
washer fluid is unavailable. In
areas where water freezes in
winter, use SUBARU Windshield
Washer Fluid or the equivalent.(See “Windshield washer fluid ”section in chapter 11.)
Also, when driving the vehicle
when there are freezing tempera-
tures, use non-freezing type wi-
per blades.
. Do not clean the wiper blades
with gasoline or a solvent, such
as paint thinner or benzene. This
will cause deterioration of the
wiper blades.
NOTE . The front wiper motor is protected
against overloads by a circuit breaker.
If the motor operates continuously
under an unusually heavy load, the
circuit breaker may trip to stop the
motor temporarily. If this happens, park
your vehicle in a safe place, turn off the
wiper switch, and wait for approxi-
mately 10 minutes. The circuit breaker
will reset itself, and the wipers will
again operate normally.. Clean your wiper blades and win-
dow glass periodically with a washer
solution to prevent streaking, and to
remove accumulations of road salt or
road film. Keep the washer button
depressed at least for 1 second so that
washer solution will be sprinkled all
over the windshield or rear window. Instruments and controls
3-43
– CONTINUED –
Page 168 of 442
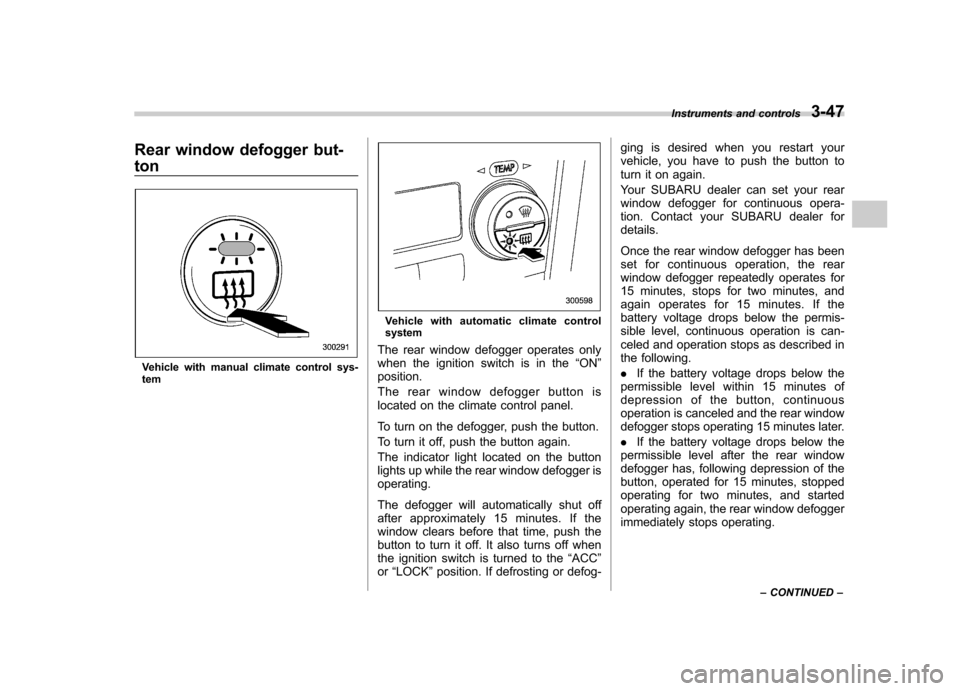
Rear window defogger but- ton
Vehicle with manual climate control sys- tem
Vehicle with automatic climate control system
The rear window defogger operates only
when the ignition switch is in the “ON ”
position.
The rear window defogger button is
located on the climate control panel.
To turn on the defogger, push the button.
To turn it off, push the button again.
The indicator light located on the button
lights up while the rear window defogger isoperating.
The defogger will automatically shut off
after approximately 15 minutes. If the
window clears before that time, push the
button to turn it off. It also turns off when
the ignition switch is turned to the “ACC ”
or “LOCK ”position. If defrosting or defog- ging is desired when you restart your
vehicle, you have to push the button to
turn it on again.
Your SUBARU dealer can set your rear
window defogger for continuous opera-
tion. Contact your SUBARU dealer fordetails.
Once the rear window defogger has been
set for continuous operation, the rear
window defogger repeatedly operates for
15 minutes, stops for two minutes, and
again operates for 15 minutes. If the
battery voltage drops below the permis-
sible level, continuous operation is can-
celed and operation stops as described in
the following. .
If the battery voltage drops below the
permissible level within 15 minutes of
depression of the button, continuous
operation is canceled and the rear window
defogger stops operating 15 minutes later. . If the battery voltage drops below the
permissible level after the rear window
defogger has, following depression of the
button, operated for 15 minutes, stopped
operating for two minutes, and started
operating again, the rear window defogger
immediately stops operating. Instruments and controls
3-47
– CONTINUED –
Page 172 of 442
or“LOCK ”position. If defrosting or defog-
ging is desired when you restart your
vehicle, you have to push the button to
turn it on again.
NOTE . While the outside mirror defogger is
operating, the rear window defogger
also operates.. When the rear window defogger has
been set for continuous operation, the
outside mirror defogger also operates
continuously. Refer to the “Rear win-
dow defogger button ”section in this
chapter.
CAUTION
To prevent the battery from being
discharged, do not operate the de-
fogger continuously for any longer
than necessary. Tilt steering wheel
WARNING
Do not adjust the steering wheel tilt
position while driving. This may
cause loss of vehicle control and
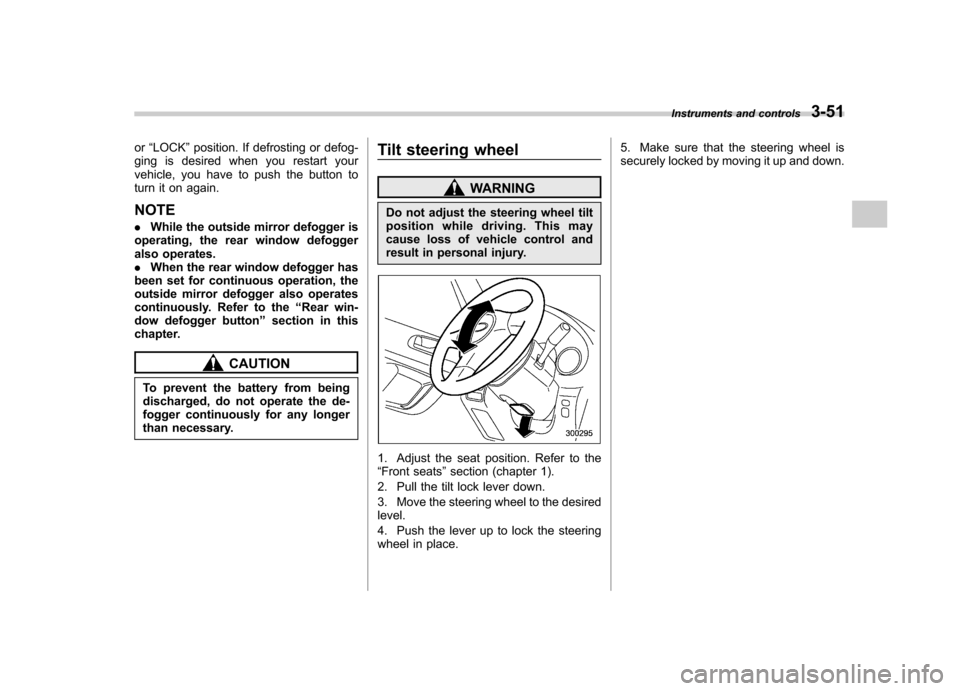
result in personal injury.
1. Adjust the seat position. Refer to the “ Front seats ”section (chapter 1).
2. Pull the tilt lock lever down.
3. Move the steering wheel to the desired level.
4. Push the lever up to lock the steering
wheel in place. 5. Make sure that the steering wheel is
securely locked by moving it up and down.
Instruments and controls
3-51
Page 177 of 442
4-4Climate control
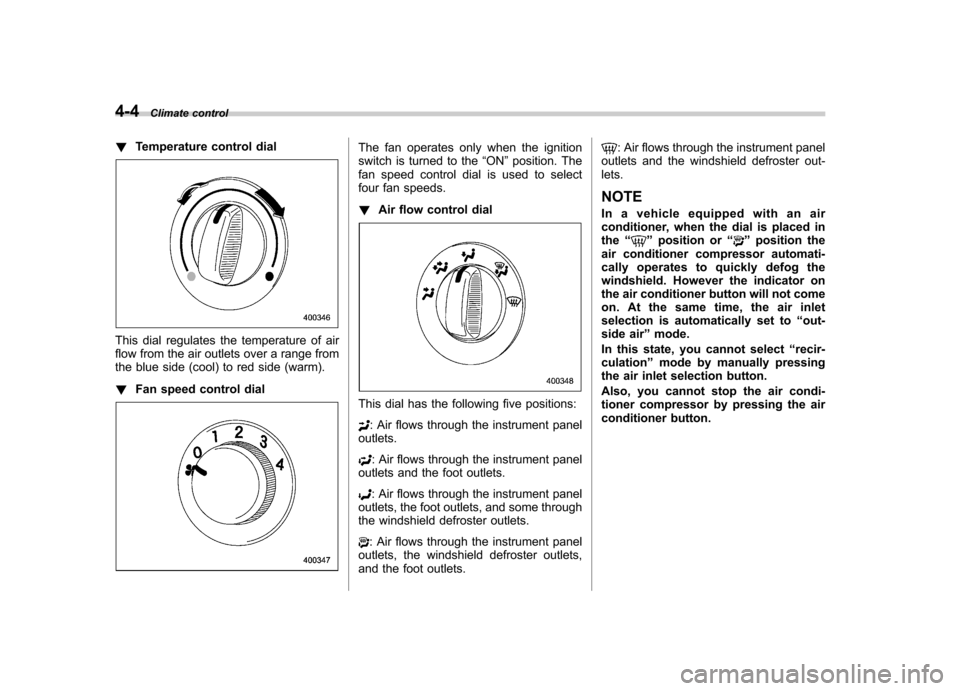
! Temperature control dial
This dial regulates the temperature of air
flow from the air outlets over a range from
the blue side (cool) to red side (warm). !Fan speed control dial
The fan operates only when the ignition
switch is turned to the “ON ”position. The
fan speed control dial is used to select
four fan speeds. ! Air flow control dial
This dial has the following five positions:
: Air flows through the instrument panel
outlets.
: Air flows through the instrument panel
outlets and the foot outlets.
: Air flows through the instrument panel
outlets, the foot outlets, and some through
the windshield defroster outlets.
: Air flows through the instrument panel
outlets, the windshield defroster outlets,
and the foot outlets.
: Air flows through the instrument panel
outlets and the windshield defroster out- lets. NOTE
In a vehicle equipped with an air
conditioner, when the dial is placed in the “
”position or “”position the
air conditioner compressor automati-
cally operates to quickly defog the
windshield. However the indicator on
the air conditioner button will not come
on. At the same time, the air inlet
selection is automatically set to “out-
side air ”mode.
In this state, you cannot select “recir-
culation ”mode by manually pressing
the air inlet selection button.
Also, you cannot stop the air condi-
tioner compressor by pressing the air
conditioner button.
Page 178 of 442
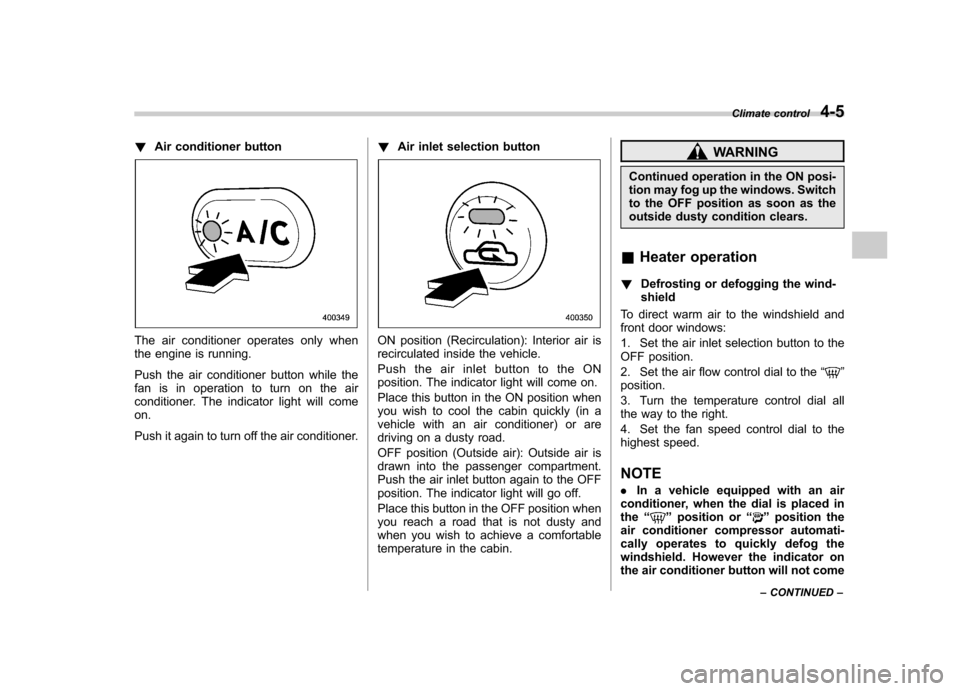
!Air conditioner button
The air conditioner operates only when
the engine is running.
Push the air conditioner button while the
fan is in operation to turn on the air
conditioner. The indicator light will comeon.
Push it again to turn off the air conditioner. !
Air inlet selection buttonON position (Recirculation): Interior air is
recirculated inside the vehicle.
Push the air inlet button to the ON
position. The indicator light will come on.
Place this button in the ON position when
you wish to cool the cabin quickly (in a
vehicle with an air conditioner) or are
driving on a dusty road.
OFF position (Outside air): Outside air is
drawn into the passenger compartment.
Push the air inlet button again to the OFF
position. The indicator light will go off.
Place this button in the OFF position when
you reach a road that is not dusty and
when you wish to achieve a comfortable
temperature in the cabin.
WARNING
Continued operation in the ON posi-
tion may fog up the windows. Switch
to the OFF position as soon as the
outside dusty condition clears.
& Heater operation
! Defrosting or defogging the wind-shield
To direct warm air to the windshield and
front door windows:
1. Set the air inlet selection button to the
OFF position.
2. Set the air flow control dial to the “
”
position.
3. Turn the temperature control dial all
the way to the right.
4. Set the fan speed control dial to the
highest speed.
NOTE . In a vehicle equipped with an air
conditioner, when the dial is placed in the “
”position or “”position the
air conditioner compressor automati-
cally operates to quickly defog the
windshield. However the indicator on
the air conditioner button will not come Climate control
4-5
– CONTINUED –
Page 179 of 442

4-6Climate control
on. At the same time, the air inlet
selection is automatically set to “out-
side air ”mode.
In this state, you cannot select “recir-
culation ”mode by manually pressing
the air inlet selection button.
Also, you cannot stop the air condi-
tioner compressor by pressing the air
conditioner button.. Warm air also comes out from the
right and left air outlets. To stop warm
air flow from these outlets, turn the
corresponding wheel to the “
”posi-
tion. ! Heating and defrosting
To direct warm air toward the floor and the windshield:
1. Set the air inlet selection lever to the “ OFF ”position.
2. Set the air flow control dial to the “
”
position.
3. Set the temperature control dial to the
most comfortable level.
4. Set the fan speed control dial to the
desired speed.
NOTE . In a vehicle equipped with an air
conditioner, when the dial is placed in the “
”position or “”position the air conditioner compressor automati-
cally operates to quickly defog the
windshield. However the indicator on
the air conditioner button will not come
on. At the same time, the air inlet
selection is automatically set to
“out-
side air ”mode.
In this state, you cannot select “recir-
culation ”mode by manually pressing
the air inlet selection button.
Also, you cannot stop the air condi-
tioner compressor by pressing the air
conditioner button.. Warm air also comes out from the
right and left air outlets. To stop warm
air flow from these outlets, turn the
corresponding wheel to the “
”posi-
tion. ! Heating
To direct warm air toward the floor:
1. Set the air inlet selection button to the
OFF position.
2. Set the air flow control dial to the “
”
position.
3. Set the temperature control dial to the
most comfortable level.
4. Set the fan speed control dial to the
desired speed. NOTE
Warm air also comes out from the right
and left air outlets. To stop warm air
flow from these outlets, turn the corre-
sponding wheel to the
“
”position.
! Bi-level heating
This setting allows you to direct air of
different temperatures from the instrument
panel and foot outlets. The air from the
foot outlets is slightly warmer than from
the instrument panel outlets.
1. Set the air inlet selection button to the
OFF position.
2. Set the air flow control dial to the “
”
position.
3. Set the temperature control dial to the
desired temperature level.
4. Set the fan speed control dial to the
desired speed.
Setting the temperature control dial fully
turned to the red area or blue area
decreases the temperature difference
between the air from the instrument panel
outlets and the air from the foot outlets. ! Ventilation
To force outside air through the instrument
panel outlets:
1. Set the air inlet selection button to the
OFF position.
Page 180 of 442
2. Set the air flow control dial to the“”
position.
3. Set the temperature control dial all the
way left.
4. Set the fan speed control dial to the
desired speed.
When driving on a dusty road, set the air
inlet control button to the ON position.
WARNING
Continued operation in the ON posi-
tion may fog up the windows. Switch
to the OFF position as soon as the
outside dusty condition clears.
& Air conditioner operation
! Cooling or dehumidifying
For cooling and dehumidification of the
passenger compartment, air flows through
the instrument panel outlets:
1. Set the air inlet selection button to the
OFF position.
2. Set the air flow control dial to the “
”
position.
3. Set the air conditioner button to the “ ON ”position. 4. Set the temperature control dial to the
blue side.
5. Set the fan speed control dial at the
desired speed. !
Defrosting or defogging
To direct warm air to the windshield and
front door windows:
1. Set the air outlet control dial to the “
” position.
2. Set the temperature control dial to the
red side.
3. Set the fan speed control dial at the
highest speed. NOTE
In a vehicle equipped with an air
conditioner, when the dial is placed inthe “
”position or “”position the
air conditioner compressor automati-
cally operates to quickly defog the
windshield. However the indicator on
the air conditioner button will not come
on. At the same time, the air inlet
selection is automatically set to “out-
side air ”mode.
In this state, you cannot select “recir-
culation ”mode by manually pressing
the air inlet selection button.
Also, you cannot stop the air condi-
tioner compressor by pressing the air conditioner button.
Climate control
4-7