2007 SUBARU IMPREZA WRX battery
[x] Cancel search: batteryPage 171 of 364

!Display illumination dimness cance-
lation (BRIGHT)
The brightness of the radio display dims
when the light switch is in the “
”or
“” position. If this makes the display
difficult to read, press the volume dial for
more than 2 seconds to return the display
to original brightness. Subsequently
pressing the volume dial again for more
than 2 seconds or if you can safely do so,
turning the light switch to the OFF position
and back to the “
”or “”position
makes the radio display dim again. ! FM/AM selection button (FM/AM)
Push the “FM/AM ”button (2) when the
radio is on to select FM1, FM2 or AM
reception. Each time this button is
pressed, the band will change in the
following order:
The display indicates which one is cur-
rently selected. ! Stereo indicator
The stereo indicator “ST ”will come on
when an FM stereo broadcast is received. !
Manual tuning (TUNE)
Turn the tuning dial (5) clockwise to
increase the tuning frequency and turn
the dial counterclockwise to decrease it.
Each click the dial is turned, the frequency
changes 10 kHz in the AM waveband and
0.2 MHz in the FM waveband. ! Seek tuning
When the “
”side of the “SEEK/TRACK/
CAT ”button (3) is depressed, the radio will
begin to automatically seek up for recei-
vable frequencies and will stop at the first
one found. For the “
”side, the radio will
begin to automatically seek down. This
function may not be available, however,
when radio signals are weak. In such a
situation, perform manual tuning to select
the desired station. ! Automatic tuning (SCAN)
Press the “SCAN ”button (4) to change the
radio to the SCAN mode. In this mode, the
radio scans through the radio band until a
station is found. The radio will stop at a
receivable station for 5 seconds while
displaying the frequency by blinking, after
which scanning will continue until the
entire band has been scanned from the
low end to the high end. Press the “SCAN ”
button again to cancel the SCAN mode
and to stop on any displayed frequency.
When the “SCAN ”button is pressed for automatic tuning, stations are scanned in
the direction of low frequencies to high
frequencies only. Automatic tuning may
not function properly if the station recep-
tion is weakened by distance from the
station or proximity to tall buildings andhills. !
Selecting preset stations
Presetting a station with a preset button
(6) allows you to select that station in a
single operation. Up to six AM, FM1 and
FM2 stations each may be preset. ! How to preset stations
1. Press the “FM/AM ”button (2) to select
AM, FM1 or FM2 reception.
2. Press the “SCAN ”button (4) or tune
the radio manually until the desired station
frequency is displayed.
3. Press one of the preset buttons (6) for
at least 2 seconds to store the frequency.
The frequency of the station will flash once
on the display at this time. NOTE . If the connection between the radio
and battery is broken for any reason
such as vehicle maintenance or radio
removal, all stations stored in the
preset buttons are cleared. If this
occurs, it is necessary to reset the Audio
5-13
– CONTINUED –
Page 186 of 364

6-2Interior equipment
Interior lights
When leaving your vehicle, make sure the
light goes out to avoid battery discharge. &Dome light
The dome light switch has three positions: ON: The light stays on continuously.
DOOR (middle position): The light
comes on when any of the doors (or the
rear gate on wagon) is opened. The light
remains on for several seconds and
gradually goes out after all doors (and
the rear gate on the wagon) are closed or
if the key is turned to the “ON ”position.
The light also can be turned on by use of
the remote keyless entry transmitter. Seethe “Remote keyless entry system ”sec- tion in chapter 2 for detailed information. OFF:
The light stays off.
& Cargo area light (if equipped)
DOOR: The light comes on only when the
rear gate is opened. OFF: The light stays off. Map light (if equipped)
Vehicle with moonroof
Vehicle without moonroof
To turn on the map light, push the switch.
To turn it off, push the switch again.
Page 187 of 364

When leaving the vehicle, make sure the
light is turned off to avoid battery dis-charge.Sun visors
To block out glare, swing down the visors.
To use the sun visor at a side window,
swing it down and move it sideways.&
Vanity mirror (if equipped)
CAUTION
Keep the vanity mirror cover closed
while the car is being driven to avoiddazzle.
To use the vanity mirror, swing down the
sun visor and open the vanity mirror cover. Interior equipment
6-3
Page 190 of 364

6-6Interior equipment
&Rear passenger ’s cup holder
(if equipped)
CAUTION
When not in use, always keep the
cup holder stored while driving to
reduce the risk of injury in the event
of a sudden stop or an accident.
A dual cup holder is located at the back of
the center console. To use the cup holder,
open the lid by pulling its upper edge. Accessory power outlets
Power outlet beside front pocket
Power outlet in cargo area (if equipped)
Accessory power outlets are provided
beside the front pocket and in the cargo area. Electrical power (12V DC) from the
battery is available at any of the outlets
when the ignition switch is in either the“
Acc ”or “ON ”position.
You can use an in-car electrical appliance
by connecting it to an outlet.
The maximum power rating of an appli-
ance that can be connected varies among
outlets as shown in the following. Do not
use an appliance which exceeds the
indicated wattage for each outlet.
Outlet beside front pocket: 80W or less
Outlets in cargo area: 120W or less
When using appliances connected to two
outlets simultaneously, the total power
consumed by them must not exceed
120W.
CAUTION
. Do not attempt to use a cigarette
lighter in the cargo area power outlet.
. Do not place any foreign objects,
especially metal ones such as
coins or aluminum foil, into the
accessory power outlet. That
could cause a short circuit. Al-
ways put the cap on the acces-
sory power outlet when it is not
in use.
. Use only electrical appliances
Page 191 of 364

which are designed for 12V DC.
The maximum power rating of an
appliance that can be connected
varies among outlets as shown in
the following. Do not use an
appliance which exceeds the in-
dicated wattage for each outlet.
Outlet beside front pocket: 80W
or less
Outlet in cargo area: 120W or less
When using appliances con-
nected to two outlets simulta-
neously, the total power con-
sumed by them must not exceed
120W. Overloading the accessory
power outlet can cause a short
circuit. Do not use dual adapters
or more than one electrical appli-ance.
. If the plug on your electric appli-
ance is either too loose or too
tight for the accessory power
outlet, this can result in a poor
contact or cause the plug to get
stuck. Only use plugs that fit
properly.
. Use of an electric appliance in the
accessory power outlet for a long
period of time while the engine is
not running can cause battery discharge.
. Before driving your vehicle, make
sure that the plug and the cord
on your electrical appliance will
not interfere with your shifting
gears and operating the accel-
erator and brake pedals. If they
do, do not use the electrical
appliance while driving.
& Use with a cigarette lighter
(Canada only, if equipped)
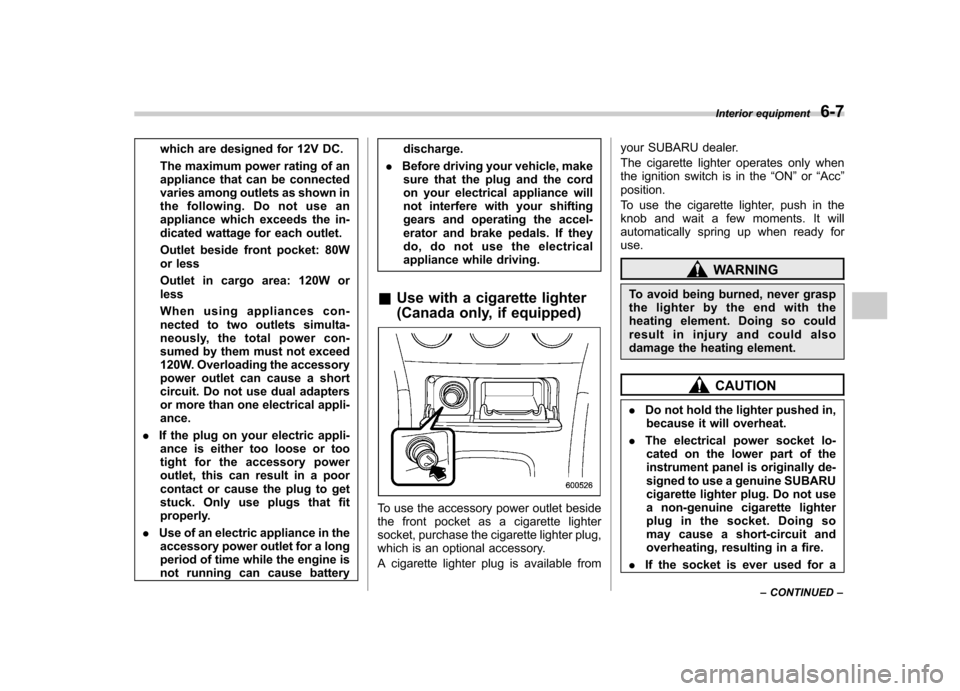
To use the accessory power outlet beside
the front pocket as a cigarette lighter
socket, purchase the cigarette lighter plug,
which is an optional accessory.
A cigarette lighter plug is available from your SUBARU dealer.
The cigarette lighter operates only when
the ignition switch is in the
“ON ”or “Acc ”
position.
To use the cigarette lighter, push in the
knob and wait a few moments. It will
automatically spring up when ready foruse.
WARNING
To avoid being burned, never grasp
the lighter by the end with the
heating element. Doing so could
result in injury and could also
damage the heating element.
CAUTION
. Do not hold the lighter pushed in,
because it will overheat.
. The electrical power socket lo-
cated on the lower part of the
instrument panel is originally de-
signed to use a genuine SUBARU
cigarette lighter plug. Do not use
a non-genuine cigarette lighter
plug in the socket. Doing so
may cause a short-circuit and
overheating, resulting in a fire.
. If the socket is ever used for a Interior equipment
6-7
– CONTINUED –
Page 204 of 364

Starting the engine
CAUTION
Do not operate the starter motor
continuously for more than 10 sec-
onds. If the engine fails to start after
operating the starter for 5 to 10
seconds, wait for 10 seconds or
more before trying again.
& Manual transmission vehicle
1. Apply the parking brake.
2. Turn off unnecessary lights and ac- cessories.
3. Press the clutch pedal to the floor and
shift the shift lever into neutral. Hold the
clutch pedal to the floor while starting theengine.
The starter motor will only operate when
the clutch pedal is pressed fully to the
floor.
4. Turn the ignition switch to the “ON ”
position and check the operation of the
warning and indicator lights. Refer to the“ Warning and indicator lights ”section
(chapter 3).
5. Turn the ignition switch to the “START ”
position without depressing the accelera-
tor pedal. Release the key immediately after the engine has started.
If the engine does not start, try the following.
(1) Turn the ignition switch to the“OFF ”position and wait for at least
10 seconds. After checking that the
parking brake is firmly set, turn the
ignition switch to the “START ”position
while depressing the accelerator pedal
slightly (approximately a quarter of the
full stroke). Release the accelerator
pedal as soon as the engine starts.
(2) If this fails to start the engine, turn
the ignition switch back to the “OFF ”
position and wait for at least 10
seconds. Then fully depress the accel-
erator pedal and turn the ignition
switch to the “START ”position. If the
engine starts, quickly release the
accelerator pedal.
(3) If this fails to start the engine, turn
the ignition switch again to the “OFF ”
position. After waiting for 10 seconds
or longer, turn the ignition switch to the“ START ”position without depressing
the accelerator pedal.
(4) If the engine still refuses to start,
contact your nearest SUBARU dealer
for assistance.
6. Confirm that all warning and indicator
lights have gone off after the engine has
started. The fuel injection system auto- matically lowers the idle speed as the
engine warms up.
NOTE
The engine may be difficult to start
when the battery has been discon-
nected and reconnected (for mainte-
nance or other purposes). This diffi-
culty is caused by the electronically
controlled throttle ’s self-diagnosis
function. To overcome it, keep the
ignition switch in the “ON ”position
for approximately 10 seconds before
starting the engine. & Automatic transmission ve- hicle
1. Apply the parking brake.
2. Turn off unnecessary lights and ac- cessories.
3. Shift the selector lever to the “P ”or “N ”
position (preferably “P ”position).
The starter motor will only operate when
the selector lever is at the “P ” or “N ”
position.
4. Turn the ignition switch to the “ON ”
position and check the operation of the
warning and indicator lights. Refer to the“ Warning and indicator lights ”section
(chapter 3).
5. Turn the ignition switch to the “START ”
Starting and operating
7-7
– CONTINUED –
Page 205 of 364

7-8Starting and operating
position without depressing the accelera-
tor pedal. Release the key immediately
after the engine has started.
If the engine does not start, try the following.
(1) Turn the ignition switch to the“OFF ”position and wait for at least
10 seconds. After checking that the
parking brake is firmly set, turn the
ignition switch to the “START ”position
while depressing the accelerator pedal
slightly (approximately a quarter of the
full stroke). Release the accelerator
pedal as soon as the engine starts.
(2) If this fails to start the engine, turn
the ignition switch back to the “OFF ”
position and wait for at least 10
seconds. Then fully depress the accel-
erator pedal and turn the ignition
switch to the “START ”position. If the
engine starts, quickly release the
accelerator pedal.
(3) If this fails to start the engine, turn
the ignition switch again to the “OFF ”
position. After waiting for 10 seconds
or longer, turn the ignition switch to the“ START ”position without depressing
the accelerator pedal.
(4) If the engine still refuses to start,
contact your nearest SUBARU dealer
for assistance. 6. Confirm that all warning and indicator
lights have gone out after the engine has
started. The fuel injection system auto-
matically lowers the idle speed as the
engine warms up.
While the engine is warming up, make
sure that the selector lever is at the
“P ”or
“ N ”position and that the parking brake is
applied.
NOTE
The engine may be difficult to start
when the battery has been discon-
nected and reconnected (for mainte-
nance or other purposes). This diffi-
culty is caused by the electronically
controlled throttle ’s self-diagnosis
function. To overcome it, keep the
ignition switch in the “ON ”position
for approximately 10 seconds before
starting the engine.
CAUTION
If you restart the engine while the
vehicle is moving, shift the selector
lever into the “N ” position. Do not
attempt to place the selector lever of
a moving vehicle into the “P ” posi-
tion. Stopping the engine
The ignition switch should be turned off
only when the vehicle is stopped and the
engine is idling.
WARNING
Do not stop the engine when the
vehicle is moving. This will cause
loss of power to the power steering
and the brake booster, making steer-
ing and braking more difficult. It
could also result in accidental acti-
vation of the “LOCK ”position on the
ignition switch, causing the steering
wheel to lock.
Page 213 of 364

7-16Starting and operating
WARNING
Do not shift from the “P ” or “N ”
position into the “D ”, “3 ”, “2 ”, “1 ” or
“ R ” position while depressing the
accelerator pedal. This may cause
the vehicle to jump forward or back-ward.
CAUTION
. Shift into the “P ” or “R ” position
only after the vehicle is comple-
tely stopped. Shifting while the
vehicle is moving may cause
damage to the transmission.
. Do not race the engine for more
than 5 seconds in any position
except the “N ” or “P ” position
when the brake is set or when
chocks are used in the wheels.
This may cause the automatic
transmission fluid to overheat.
. Avoid shifting from one of the
forward driving positions into the“ R ” position or vice versa until
the vehicle has completely
stopped. Such shifting may
cause damage to the transmis-sion.
. When parking the vehicle, first securely apply the parking brake
and then place the selector lever
in the
“P ” position. Avoid parking
for a long time with the selector
lever in any other position as
doing so could result in a dead
battery.
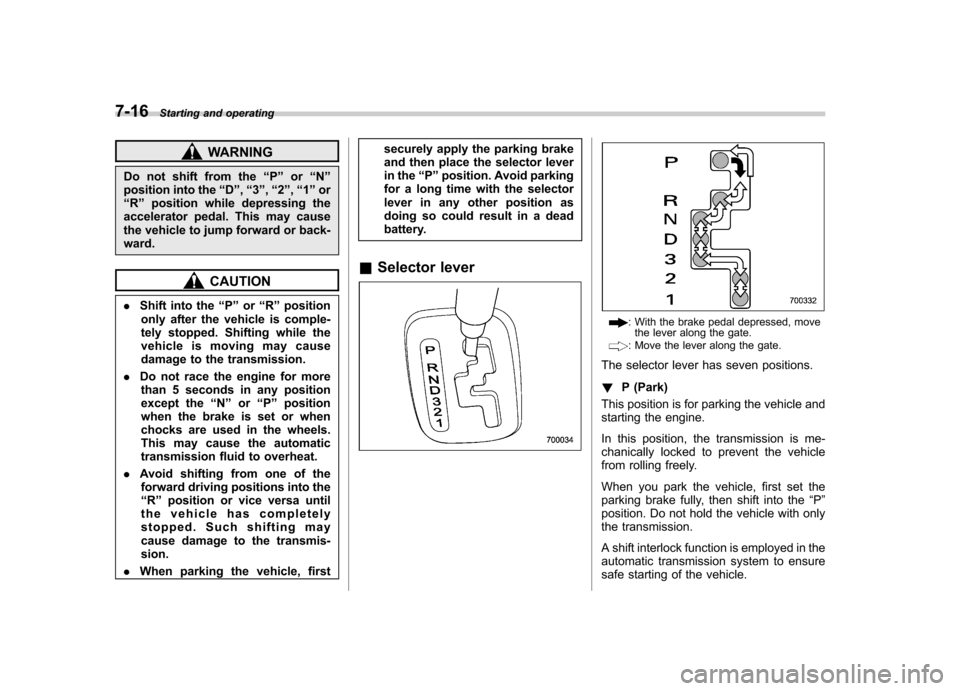
& Selector lever
: With the brake pedal depressed, move
the lever along the gate.
: Move the lever along the gate.
The selector lever has seven positions. ! P (Park)
This position is for parking the vehicle and
starting the engine.
In this position, the transmission is me-
chanically locked to prevent the vehicle
from rolling freely.
When you park the vehicle, first set the
parking brake fully, then shift into the “P ”
position. Do not hold the vehicle with only
the transmission.
A shift interlock function is employed in the
automatic transmission system to ensure
safe starting of the vehicle.