2007 SUBARU IMPREZA warning
[x] Cancel search: warningPage 77 of 364

1-52Seat, seatbelt and SRS airbags
event of the SRS side airbag deploy-
ment, they could be propelled dan-
gerously toward the vehicle ’s occu-
pants and cause injuries.
WARNING
Do not put any kind of cover or
clothes or other objects over either
front seatback and do not attach
labels or stickers to the front seat
surface on or near the SRS side
airbag. They could prevent proper
deployment of the SRS side airbag,
reducing protection available to the
front seat ’s occupant. !
Operation
1) SRS side airbag deploys as soon as a
collision occurs.
2) SRS side airbag protects the front passenger ’s head and chest.
3) After deployment, SRS side airbag starts to deflate immediately. The SRS side airbag can function only
when the ignition switch is in the
“ON ”
position.
The driver ’s and front passenger ’s SRS
side airbags deploy independently of each
other since each has its own impact
sensor. Also, the SRS side airbag deploys
independently of the frontal airbags in the
steering wheel and instrument panel.
An impact sensor is incorporated into
each of the vehicle ’s center pillars. If
either sensor detects a certain predeter-
mined amount of force during a side
impact collision, the control module sends
a signal to the side airbag module on the
impacted side of the vehicle, instructing it
to inflate the SRS side airbag. Then the
side airbag module produces gas, which
instantly inflates the SRS side airbag.
After deployment, the SRS side airbag
will deflate in a few seconds.
The SRS side airbag deploys even when
no one occupies the seat on the side on
which an impact is applied.
When the SRS side airbag deploys, a
sudden, fairly loud inflation noise will be
heard and some smoke will be released.
These occurrences are normal result of
the deployment. This smoke does not
indicate a fire in the vehicle.
Page 80 of 364

!Examples of the types of accidents
in which the SRS side airbag will
basically not deploy.
1) The vehicle is involved in a frontal
collision with another vehicle (moving or stationary).
2) The vehicle is struck from behind. The SRS side airbag is basically not
designed to deploy if the vehicle is
involved in a frontal collision or is struck
from behind. Examples of such accidents
are illustrated.
1) First impact
2) Second impact
In an accident where the vehicle is struck
from the side more than once, the SRS
side airbag deploys only once on the firstimpact.
Example: In the case of a double side
impact collision, first with one vehicle and
immediately followed by another from the
same direction, once the SRS side airbag
is activated on the first impact, it will not be
activated on the second. &
SRS airbag system monitors
A diagnostic system continually monitors
the readiness of the SRS airbag system
(including front seatbelt pretensioners)
while the vehicle is being driven. The
SRS airbag system warning light “AIR-
BAG ”will show normal system operation
by lighting for approximately 6 seconds
when the ignition switch is turned to the“ ON ”position.
The following components are monitored
by the indicator: . Front sub sensor (Right-hand side)
. Front sub sensor (Left-hand side)
. Airbag control module (including im-
pact sensors). Frontal airbag module (Driver ’s side)
. Frontal airbag module (Front passen-Seat, seatbelt and SRS airbags
1-55
– CONTINUED –
Page 81 of 364
1-56Seat, seatbelt and SRS airbags
ger’s side)
. Side airbag sensor (Center pillar right-
hand side) . Side airbag sensor (Center pillar left-
hand side). Side airbag module (Driver ’s side)
. Side airbag module (Front passenger ’s
side). Seatbelt pretensioner (Driver ’s side)
. Seatbelt pretensioner (Front passen-
ger ’s side)
. Seatbelt buckle switch (Driver ’s side)
. Seatbelt buckle switch (Front passen-
ger ’s side)
. Driver ’s seat position sensor
. Front passenger ’s seatbelt tension
sensor. Front passenger ’s occupant detection
system weight sensor. Front passenger ’s occupant detection
control module. Front passenger ’s frontal airbag ON
and OFF indicator. All related wiring
WARNING
If the warning light exhibits any of
the following conditions, there may
be a malfunction in the seatbelt
pretensioners and/or SRS airbag system. Immediately take your vehi-
cle to your nearest SUBARU dealer
to have the system checked. Unless
checked and properly repaired, the
seatbelt pretensioners and/or SRS
airbag will not operate properly in
the event of a collision, which may
increase the risk of injury. .
Flashing or flickering of the warn-
ing light
. No illumination of the warning
light when the ignition switch is
first turned to the “ON ”position
. Continuous illumination of the
warning light
. Illumination of the warning light
while driving
& SRS airbag system servicing
WARNING
. When discarding an airbag mod-
ule or scrapping the entire vehi-
cle damaged by a collision, con-
sult your SUBARU dealer.
. The SRS airbag has no user-
serviceable parts. Do not use
electrical test equipment on any
circuit related to the SRS airbag system. For required servicing of
the SRS airbag, see your nearest
SUBARU dealer. Tampering with
or disconnecting the system
’s
wiring could result in accidental
inflation of the SRS airbag or
could make the system inopera-
tive, which may result in serious
injury. The wiring harnesses of
the SRS airbag system are cov-
ered with yellow insulation and
system connectors are yellow for
easy identification.
CAUTION
If you need service or repair in areas
listed in the following, have an
authorized SUBARU dealer perform
the work. The SRS airbag control
module, impact sensors and airbag
modules are stored in these areas. . Under the center console
. Inside each front fender
. Steering wheel and column and
nearby areas
. Top of the dashboard on front
passenger ’s side and nearby
areas
. Each front seat and nearby area
Page 82 of 364
.Inside each center pillar
In the event that the SRS airbag is
deployed, replacement of the system
should be performed only by an author-
ized SUBARU dealer. When the compo-
nents of the SRS airbag system are
replaced, use only genuine SUBARUparts.
To ensure their long-term reliability, the
SRS airbags must be inspected by a
SUBARU dealer ten years after the date
of manufacture, which is shown on the
certification plate attached to the driver ’s
doorjamb. NOTE
In the following cases, contact your
SUBARU dealer as soon as possible. . The front part of the vehicle was
involved in an accident in which only
the driver ’s SRS frontal airbag or both
driver ’s and front passenger ’sSRS
frontal airbags did not deploy.. The pad section of the steering
wheel or front passenger ’s frontal air-
bag cover is scratched, cracked, or
otherwise damaged.
In addition, if your vehicle is equipped
with SRS side airbags, contact your
SUBARU dealer as soon as possible in the following cases. .
Either center pillar or a nearby area
of the vehicle was involved in an
accident in which the SRS side airbag
did not deploy.. The fabric or leather of either front
seatback is cut, frayed, or otherwisedamaged.
& Precautions against vehicle modification
WARNING
. To avoid accidental activation of
the system or rendering the sys-
tem inoperative, which may re-
sult in serious injury, no modifi-
cations should be made to any
components or wiring of the SRS
airbag system.
This includes following modifica- tions: . Installation of custom steering
wheels
. Attachment of additional trim
materials to the dashboard
. Installation of custom seats
. Replacement of seat fabric or
leather .
Installation of additional fabric
or leather on the front seat
. Installation of additional elec-
trical/electronic equipment
such as a mobile two-way
radioonorneartheSRS
airbag system components
and/or wiring is not advisable.
This could interfere with prop-
er operation of the SRS airbagsystem.CAUTION
Do not perform any of the following
modifications. Such modifications
can interfere with proper operation
of the SRS airbag system. . Attachment of any equipment
(bush bar, winches, snow plow,
skid plate, etc.) other than genu-
ine SUBARU accessory parts to
the front end.
. Modification of the suspension
system or front end structure.
. Installation of a tire of different
size and construction from the
tires specified on the vehicle
placard attached to the driver ’s
door pillar or specified for indivi-
dual vehicle models in this Own-
Seat, seatbelt and SRS airbags
1-57
– CONTINUED –
Page 88 of 364
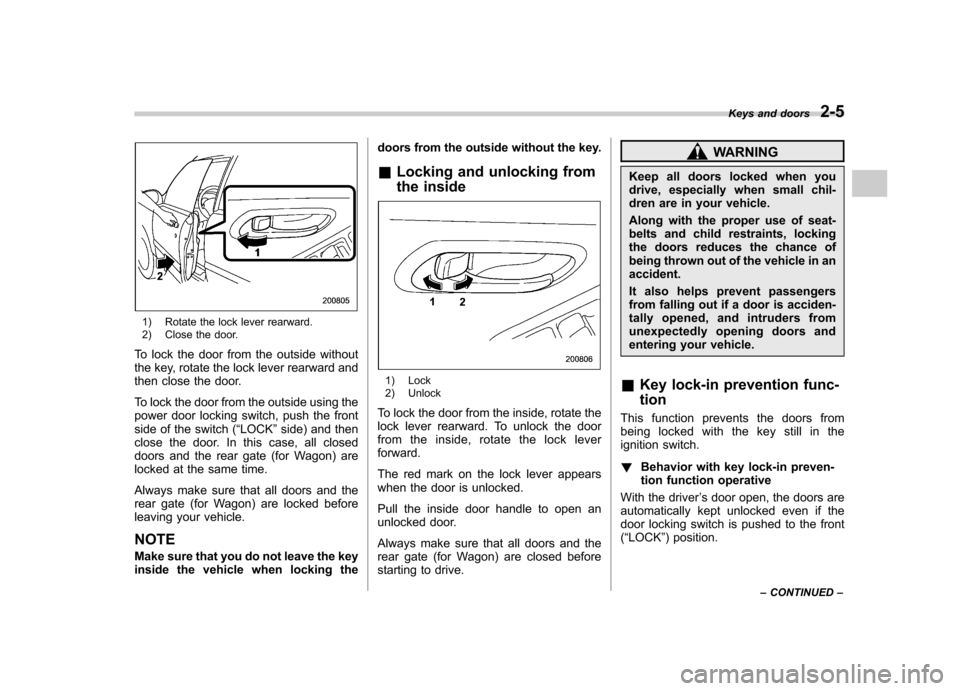
1) Rotate the lock lever rearward.
2) Close the door.
To lock the door from the outside without
the key, rotate the lock lever rearward and
then close the door.
To lock the door from the outside using the
power door locking switch, push the front
side of the switch ( “LOCK ”side) and then
close the door. In this case, all closed
doors and the rear gate (for Wagon) are
locked at the same time.
Always make sure that all doors and the
rear gate (for Wagon) are locked before
leaving your vehicle. NOTE
Make sure that you do not leave the key
inside the vehicle when locking the doors from the outside without the key.
& Locking and unlocking from
the inside
1) Lock
2) Unlock
To lock the door from the inside, rotate the
lock lever rearward. To unlock the door
from the inside, rotate the lock leverforward.
The red mark on the lock lever appears
when the door is unlocked.
Pull the inside door handle to open an
unlocked door.
Always make sure that all doors and the
rear gate (for Wagon) are closed before
starting to drive.
WARNING
Keep all doors locked when you
drive, especially when small chil-
dren are in your vehicle.
Along with the proper use of seat-
belts and child restraints, locking
the doors reduces the chance of
being thrown out of the vehicle in anaccident.
It also helps prevent passengers
from falling out if a door is acciden-
tally opened, and intruders from
unexpectedly opening doors and
entering your vehicle.
& Key lock-in prevention func- tion
This function prevents the doors from
being locked with the key still in the
ignition switch. ! Behavior with key lock-in preven-
tion function operative
With the driver ’s door open, the doors are
automatically kept unlocked even if the
door locking switch is pushed to the front( “ LOCK ”) position. Keys and doors
2-5
– CONTINUED –
Page 101 of 364
2-18Keys and doors
Example:
Vibration from construction site
Vibration in multistory car park
Vibration from trains
. You can have the sensitivity of the
shock sensors adjusted to your pre-
ference by your SUBARU dealer. Child safety locks
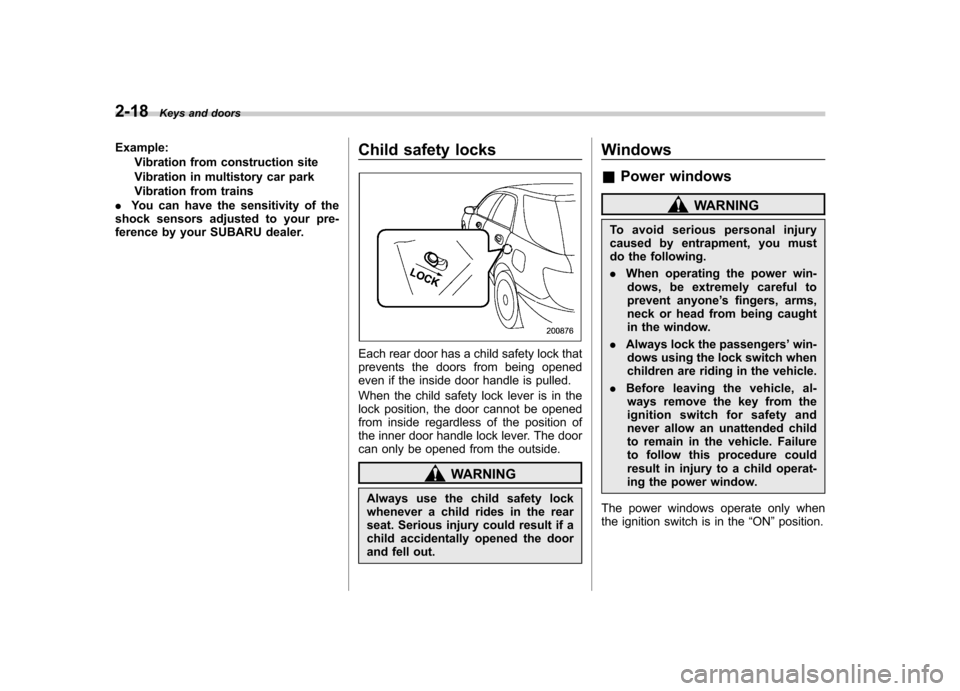
Each rear door has a child safety lock that
prevents the doors from being opened
even if the inside door handle is pulled.
When the child safety lock lever is in the
lock position, the door cannot be opened
from inside regardless of the position of
the inner door handle lock lever. The door
can only be opened from the outside.
WARNING
Always use the child safety lock
whenever a child rides in the rear
seat. Serious injury could result if a
child accidentally opened the door
and fell out. Windows &
Power windows
WARNING
To avoid serious personal injury
caused by entrapment, you must
do the following. . When operating the power win-
dows, be extremely careful to
prevent anyone ’s fingers, arms,
neck or head from being caught
in the window.
. Always lock the passengers ’win-
dows using the lock switch when
children are riding in the vehicle.
. Before leaving the vehicle, al-
ways remove the key from the
ignition switch for safety and
never allow an unattended child
to remain in the vehicle. Failure
to follow this procedure could
result in injury to a child operat-
ing the power window.
The power windows operate only when
the ignition switch is in the “ON ”position.
Page 103 of 364
2-20Keys and doors
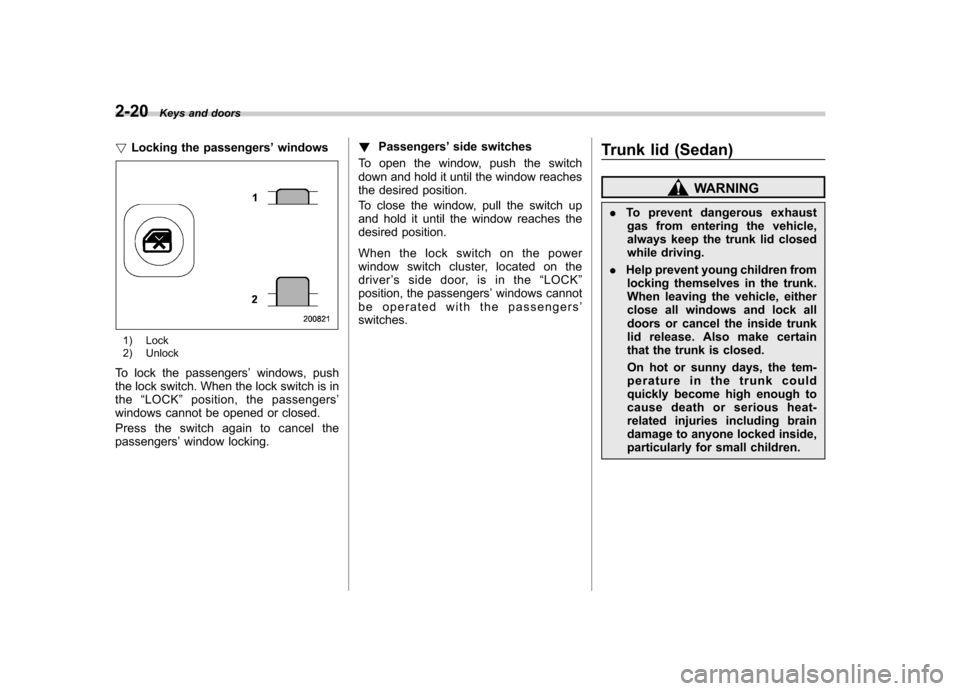
!Locking the passengers ’windows
1) Lock
2) Unlock
To lock the passengers ’windows, push
the lock switch. When the lock switch is in the “LOCK ”position, the passengers ’
windows cannot be opened or closed.
Press the switch again to cancel the passengers ’window locking. !
Passengers ’side switches
To open the window, push the switch
down and hold it until the window reaches
the desired position.
To close the window, pull the switch up
and hold it until the window reaches the
desired position.
When the lock switch on the power
window switch cluster, located on the
driver ’s side door, is in the “LOCK ”
position, the passengers ’windows cannot
be operated with the passengers ’
switches. Trunk lid (Sedan)
WARNING
. To prevent dangerous exhaust
gas from entering the vehicle,
always keep the trunk lid closed
while driving.
. Help prevent young children from
locking themselves in the trunk.
When leaving the vehicle, either
close all windows and lock all
doors or cancel the inside trunk
lid release. Also make certain
that the trunk is closed.
On hot or sunny days, the tem-
perature in the trunk could
quickly become high enough to
cause death or serious heat-
related injuries including brain
damage to anyone locked inside,
particularly for small children.
Page 105 of 364
2-22Keys and doors
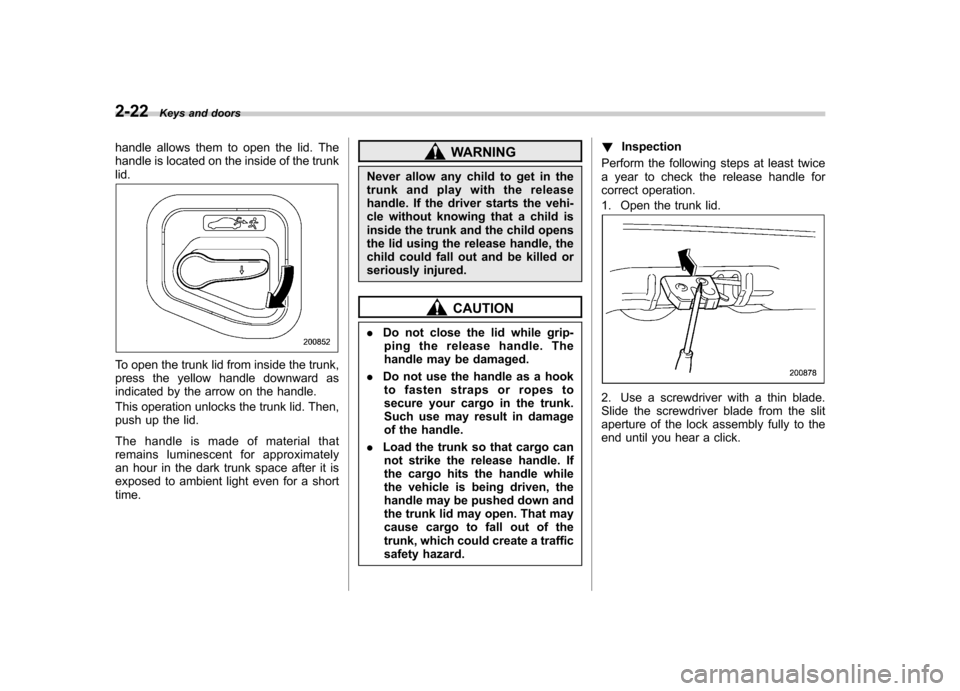
handle allows them to open the lid. The
handle is located on the inside of the trunklid.
To open the trunk lid from inside the trunk,
press the yellow handle downward as
indicated by the arrow on the handle.
This operation unlocks the trunk lid. Then,
push up the lid.
The handle is made of material that
remains luminescent for approximately
an hour in the dark trunk space after it is
exposed to ambient light even for a shorttime.
WARNING
Never allow any child to get in the
trunk and play with the release
handle. If the driver starts the vehi-
cle without knowing that a child is
inside the trunk and the child opens
the lid using the release handle, the
child could fall out and be killed or
seriously injured.
CAUTION
. Do not close the lid while grip-
ping the release handle. The
handle may be damaged.
. Do not use the handle as a hook
to fasten straps or ropes to
secure your cargo in the trunk.
Such use may result in damage
of the handle.
. Load the trunk so that cargo can
not strike the release handle. If
the cargo hits the handle while
the vehicle is being driven, the
handle may be pushed down and
the trunk lid may open. That may
cause cargo to fall out of the
trunk, which could create a traffic
safety hazard. !
Inspection
Perform the following steps at least twice
a year to check the release handle for
correct operation.
1. Open the trunk lid.
2. Use a screwdriver with a thin blade.
Slide the screwdriver blade from the slit
aperture of the lock assembly fully to the
end until you hear a click.