2007 SUBARU IMPREZA wheel
[x] Cancel search: wheelPage 112 of 364
Ignition switch
WARNING
. Never turn the ignition switch to
“ LOCK ”while the vehicle is
being driven or towed because
that will lock the steering wheel,
preventing steering control. And
when the engine is turned off, it
takes a much greater effort than
usual to steer.
. Before leaving the vehicle, al-
ways remove the key from the
ignition switch for safety and
never allow an unattended child
to remain in the vehicle. Failure
to follow this procedure could
result in injury to a child or
others. Children could operate
the power windows, the moon-
roof or other controls or even
make the vehicle move.
CAUTION
Do not attach a large key holder or
key case to either key. If it banged
against your knees or hands while
you are driving, it could turn the
ignition switch from the “ON ”posi- tion to the
“Acc ”or “LOCK ”posi-
tion, thereby stopping the engine.
Also, if the key is attached to a
keyholder or to a large bunch of
other keys, centrifugal force may act
on it as the vehicle moves, resulting
in unwanted turning of the ignitionswitch.
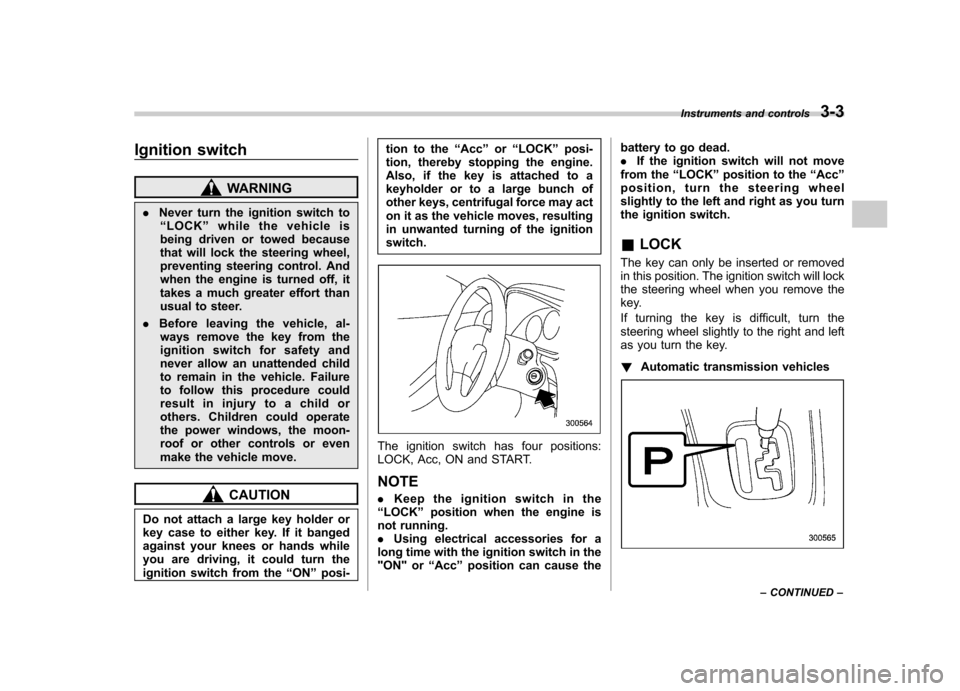
The ignition switch has four positions:
LOCK, Acc, ON and START. NOTE . Keep the ignition switch in the
“ LOCK ”position when the engine is
not running. . Using electrical accessories for a
long time with the ignition switch in the
"ON" or “Acc ”position can cause the battery to go dead..
If the ignition switch will not move
from the “LOCK ”position to the “Acc ”
position, turn the steering wheel
slightly to the left and right as you turn
the ignition switch. & LOCK
The key can only be inserted or removed
in this position. The ignition switch will lock
the steering wheel when you remove the
key.
If turning the key is difficult, turn the
steering wheel slightly to the right and left
as you turn the key. ! Automatic transmission vehicles
Instruments and controls 3-3
– CONTINUED –
Page 123 of 364

3-14Instruments and controls
Warning and indicator lights
Several of the warning and indicator lights
come on momentarily and then go out
when the ignition switch is initially turned
to the“ON ”position. This permits check-
ing the operation of the bulbs.
Apply the parking brake and turn the
ignition switch to the “ON ”position. The
following lights come on: . Seatbelt warning light
. SRS airbag system warning light
. Front passenger ’s frontal airbag ON
indicator light. Front passenger ’s frontal airbag OFF
indicator light. CHECK ENGINE warning light/Mal-
function indicator lamp. Charge warning light
. Oil pressure warning light
. AT OIL temperature warning light (AT
vehicles). ABS warning light
. Brake system warning light
. All-Wheel Drive warning light (AWD AT
vehicles). Cruise control indicator light
. Cruise control set indicator light
If any lights fail to come on, it indicates a
burned-out bulb or a malfunction of the corresponding system.
Consult your authorized SUBARU dealer
for repair. &
Seatbelt warning light
and chime
Your vehicle is equipped with a seatbelt
warning device at the driver ’s seat, as
required by current safety standards.
There is a seatbelt warning light in the
combination meter.
If the driver has not yet fastened the
seatbelt when the ignition switch is turned
to the “ON ”position, the seatbelt warning
light will flash for 6 seconds, to warn that
the seatbelt is unfastened. If the driver ’s
seatbelt is not fastened, a chime will also
sound simultaneously.
If the driver ’s seatbelt is still not fastened 6
seconds later, the warning light will remain
lit for 15 seconds. If the driver ’s seatbelt is
still not fastened even 15 seconds later
(21 seconds after turning ON the ignition
switch), the warning lights will alternate
between flashing and steady illumination
at 15-second intervals, and the chime will
sound while the warning light is flashing.
Alternate flashing and steady illumination
of the warning lights and sounding of the
chime will continue until the driver fastens
the seatbelt. NOTE .
If the driver unfastens the seatbelt
after fastening, the seatbelt warning
device operates as follows according
to the vehicle speed.
.At speeds lower than approxi-
mately 9 mph (15 km/h)
The warning light will alternate
between flashing and steady illumi-
nation at 15-second intervals. The
chime will not sound. . At speeds higher than approxi-
mately 9 mph (15 km/h)
The warning light will alternate
between flashing and steady illumi-
nation at 15-second intervals and
the chime will sound while the
warning light is flashing.
. It is possible to cancel the warning
operation that follows the 6-second
warning after turning ON the ignition
switch. When the ignition switch is
turned ON next time, however, the
complete sequence of the warning
operation resumes. For further details
about canceling the warning operation,
please contact your SUBARU dealer. & SRS airbag system
warning light
When the ignition switch is turned to the
Page 128 of 364

illuminates if a malfunction occurs in the
EBD system. In that event, it comes on
together with the ABS warning light.
The EBD system may be malfunctioning if
the brake system warning light and ABS
warning light illuminate simultaneously
during driving.
Even if the EBD system fails, the conven-
tional braking system will still function.
However, the rear wheels will be more
prone to locking when the brakes are
applied harder than usual and the vehi-cle’s motion may therefore become some-
what harder to control.
If the brake system warning light and ABS
warning light illuminate simultaneously,
take the following steps:
1. Stop the vehicle in the nearest safe,
flat place.
2. Shut down the engine, apply the
parking brake and then restart it.
3. Release the parking brake. If both
warning lights go out, the EBD system
may be faulty. Drive carefully to the
nearest SUBARU dealer and have the
system inspected.
4. If both warning lights come on again
and stay illuminated after the engine has
been restarted, shut down the engine
again, apply the parking brake, and check
the brake fluid level. 5. If the brake fluid level is not below the“
MIN ”mark, the EBD system may be
faulty. Drive carefully to the nearest
SUBARU dealer and have the systeminspected.
6. If the brake fluid level is below the “ MIN ”mark, DO NOT drive the vehicle.
Instead, have the vehicle towed to the
nearest SUBARU dealer for repair.
& Door open warning light
The door open warning light comes on if
any door or the rear gate is not fullyclosed.
Always make sure this light is out before
you start to drive. &All-Wheel Drive warn-
ing light (AWD AT vehicles –if equipped)
The All-Wheel Drive warning light comes
on when the ignition switch is turned to the“ON ”position and goes out after the
engine has started.
This light comes on when All-Wheel Drive
is disengaged and the drive mechanism is
switched to Front Wheel Drive for main-
tenance or similar purposes (Non-turbo vehicles). It flashes if the vehicle is driven with tires
of differing diameters fitted on the wheels
or with an excessively low air pressure in
any of the tires.
CAUTION
Continuing to drive with the AWD
warning light flashing can damage
the powertrain. If the AWD warning
light starts to flash, promptly park in
a safe place and check whether the
tires have differing diameters and
whether any of the tires has an
excessively low inflation pressure.
& Intercooler water spray
warning light (WRX-STI)
This light comes on when the water level
in the intercooler water spray tank falls to
the lower limit (approximately 0.4 US qt,
0.4 liter, 0.4 Imp qt). Instruments and controls
3-19
– CONTINUED –
Page 144 of 364
Tilt steering wheel
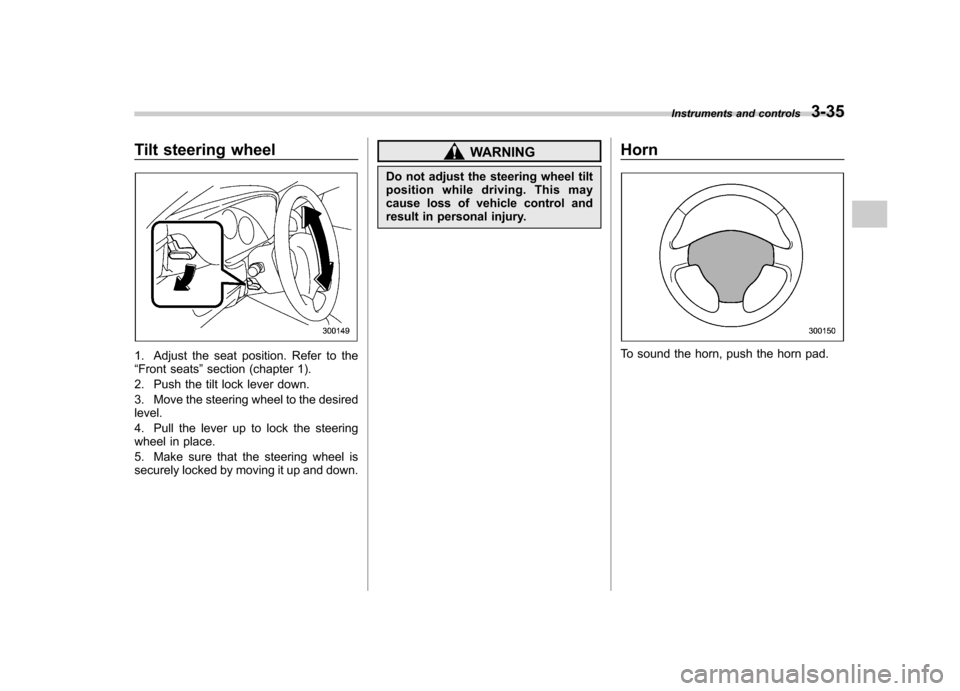
1. Adjust the seat position. Refer to the “Front seats ”section (chapter 1).
2. Push the tilt lock lever down.
3. Move the steering wheel to the desired level.
4. Pull the lever up to lock the steering
wheel in place.
5. Make sure that the steering wheel is
securely locked by moving it up and down.
WARNING
Do not adjust the steering wheel tilt
position while driving. This may
cause loss of vehicle control and
result in personal injury. Horn
To sound the horn, push the horn pad.Instruments and controls
3-35
Page 202 of 364
the tank whenever the low fuel warning
light comes on. Engine misfires as a
result of an empty tank could cause
damage to the engine.
CAUTION
. Never add any cleaning agents to
the fuel tank. The addition of a
cleaning agent may cause da-
mage to the fuel system.
. Make sure that the cap is tigh-
tened until it clicks to prevent
fuel spillage in the event of anaccident.
. Do not let fuel spill on the exterior
surfaces of the vehicle.
Fuels may cause paint damage,
which is not covered under the
SUBARU Limited Warranty.
. Always use a genuine SUBARU
fuel filler cap. If you use the
wrong cap, it may not fit or have
proper venting, and your fuel
tank and emission control sys-
tem might be damaged. State emission testing (U.S. only)
At state inspection time, remember to
tell your inspection or service station in
advance not to place your Subaru AWD
vehicle on a two-wheel dynamometer.
Otherwise, serious transmission da-
mage will result.
Some states have started using dynam-
ometers in their state inspection programs
in order to meet their obligation under
federal law to implement stricter vehicle
emission standards to reduce air pollution
from vehicles. A dynamometer is a tread-
mill or roller-like testing device that allows
your vehicle
’s wheels to turn while the
vehicle remains in one place. Depending
on the severity of a state ’s air pollution
problems, the states must adopt either a“ basic ”or “enhanced ”vehicle emission
inspection test. Normally, a portion of the
basic emission test consists of an emis-
sion inspector inserting an analyzer probe
into the exhaust pipe of an idling vehicle
for a short period of time. States with more
severe air pollution problems are required
to adopt an enhanced vehicle emission
test. This test simulates actual driving
conditions on a dynamometer and permits
more accurate measurement of tailpipe
emitted pollution than the basic emission test.
The U.S. Environmental Protection
Agency (EPA) and states using two-wheel
dynamometers in their emission testing
programs have
EXEMPTEDSubaru AWD
vehicles from the portion of the testing
program that involves a two-wheel dy-
namometer.
There are some states that use four-wheel
dynamometers in their testing programs.
When properly used, that equipment will
not damage an AWD Subaru vehicle.
Under no circumstances should the rear
wheels be jacked off the ground, nor
should the driveshaft be disconnected for
state emission testing.
WARNING
Testing of an All-Wheel Drive vehicle
must NEVER be performed on a
single two-wheel dynamometer. At-
tempting to do so will result in
uncontrolled vehicle movement and
may cause an accident or injuries to
persons nearby. Starting and operating
7-5
– CONTINUED –
Page 205 of 364
7-8Starting and operating
position without depressing the accelera-
tor pedal. Release the key immediately
after the engine has started.
If the engine does not start, try the following.
(1) Turn the ignition switch to the“OFF ”position and wait for at least
10 seconds. After checking that the
parking brake is firmly set, turn the
ignition switch to the “START ”position
while depressing the accelerator pedal
slightly (approximately a quarter of the
full stroke). Release the accelerator
pedal as soon as the engine starts.
(2) If this fails to start the engine, turn
the ignition switch back to the “OFF ”
position and wait for at least 10
seconds. Then fully depress the accel-
erator pedal and turn the ignition
switch to the “START ”position. If the
engine starts, quickly release the
accelerator pedal.
(3) If this fails to start the engine, turn
the ignition switch again to the “OFF ”
position. After waiting for 10 seconds
or longer, turn the ignition switch to the“ START ”position without depressing
the accelerator pedal.
(4) If the engine still refuses to start,
contact your nearest SUBARU dealer
for assistance. 6. Confirm that all warning and indicator
lights have gone out after the engine has
started. The fuel injection system auto-
matically lowers the idle speed as the
engine warms up.
While the engine is warming up, make
sure that the selector lever is at the
“P ”or
“ N ”position and that the parking brake is
applied.
NOTE
The engine may be difficult to start
when the battery has been discon-
nected and reconnected (for mainte-
nance or other purposes). This diffi-
culty is caused by the electronically
controlled throttle ’s self-diagnosis
function. To overcome it, keep the
ignition switch in the “ON ”position
for approximately 10 seconds before
starting the engine.
CAUTION
If you restart the engine while the
vehicle is moving, shift the selector
lever into the “N ” position. Do not
attempt to place the selector lever of
a moving vehicle into the “P ” posi-
tion. Stopping the engine
The ignition switch should be turned off
only when the vehicle is stopped and the
engine is idling.
WARNING
Do not stop the engine when the
vehicle is moving. This will cause
loss of power to the power steering
and the brake booster, making steer-
ing and braking more difficult. It
could also result in accidental acti-
vation of the “LOCK ”position on the
ignition switch, causing the steering
wheel to lock.
Page 207 of 364
7-10Starting and operating
!Maximum allowable speeds
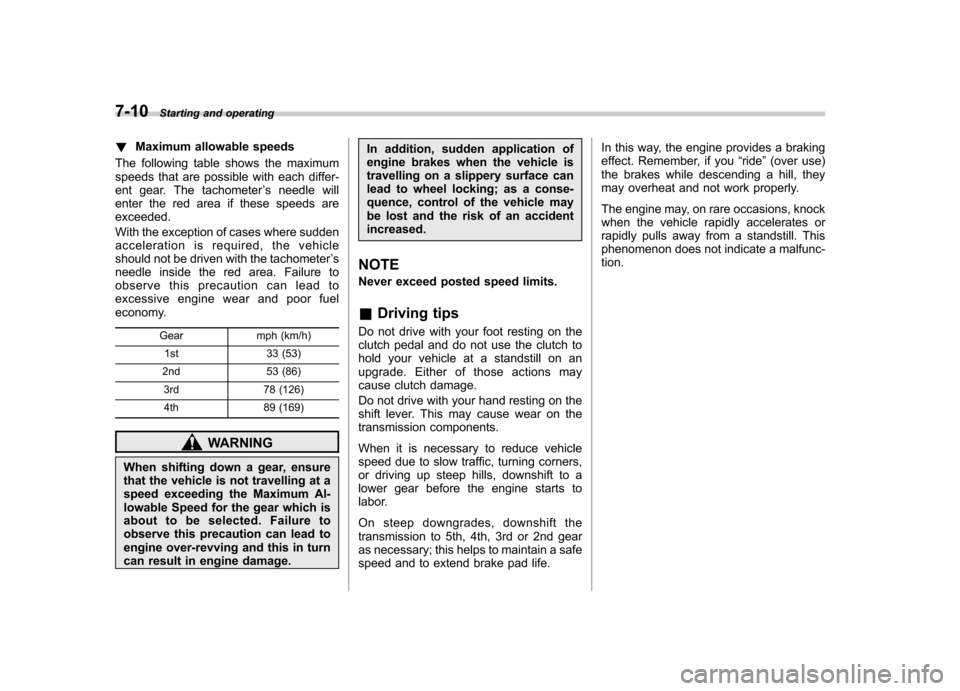
The following table shows the maximum
speeds that are possible with each differ-
ent gear. The tachometer ’s needle will
enter the red area if these speeds areexceeded.
With the exception of cases where sudden
acceleration is required, the vehicle
should not be driven with the tachometer ’s
needle inside the red area. Failure to
observe this precaution can lead to
excessive engine wear and poor fuel
economy.
Gear mph (km/h)1st 33 (53)
2nd 53 (86) 3rd 78 (126)
4th 89 (169)
WARNING
When shifting down a gear, ensure
that the vehicle is not travelling at a
speed exceeding the Maximum Al-
lowable Speed for the gear which is
about to be selected. Failure to
observe this precaution can lead to
engine over-revving and this in turn
can result in engine damage. In addition, sudden application of
engine brakes when the vehicle is
travelling on a slippery surface can
lead to wheel locking; as a conse-
quence, control of the vehicle may
be lost and the risk of an accidentincreased.
NOTE
Never exceed posted speed limits. & Driving tips
Do not drive with your foot resting on the
clutch pedal and do not use the clutch to
hold your vehicle at a standstill on an
upgrade. Either of those actions may
cause clutch damage.
Do not drive with your hand resting on the
shift lever. This may cause wear on the
transmission components.
When it is necessary to reduce vehicle
speed due to slow traffic, turning corners,
or driving up steep hills, downshift to a
lower gear before the engine starts to
labor.
On steep downgrades, downshift the
transmission to 5th, 4th, 3rd or 2nd gear
as necessary; this helps to maintain a safe
speed and to extend brake pad life. In this way, the engine provides a braking
effect. Remember, if you
“ride ”(over use)
the brakes while descending a hill, they
may overheat and not work properly.
The engine may, on rare occasions, knock
when the vehicle rapidly accelerates or
rapidly pulls away from a standstill. This
phenomenon does not indicate a malfunc-tion.
Page 209 of 364
7-12Starting and operating
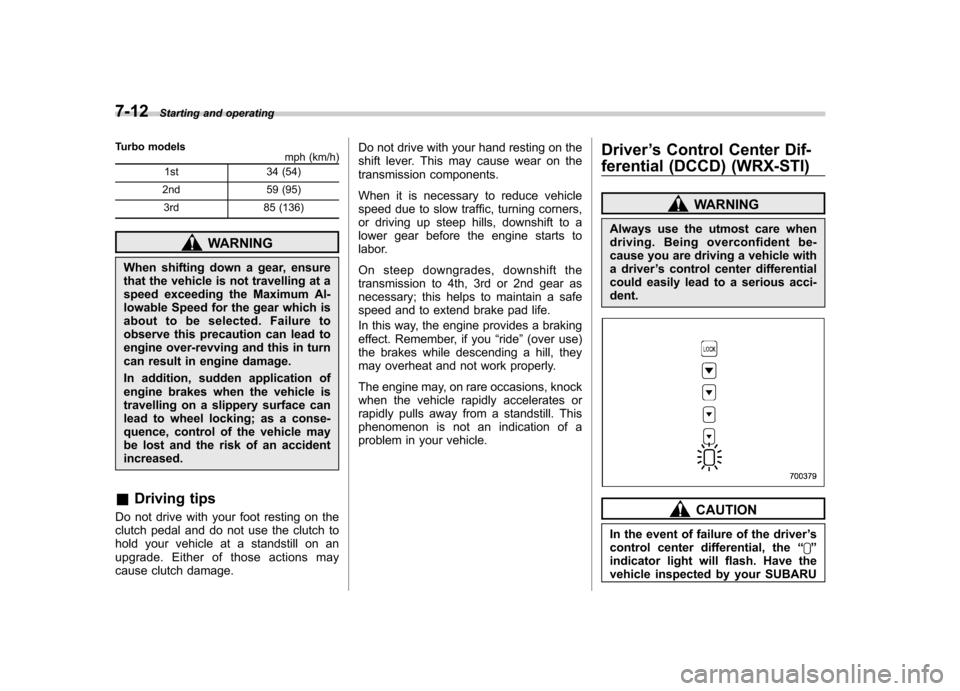
Turbo models
mph (km/h)
1st 34 (54)
2nd 59 (95) 3rd 85 (136)
WARNING
When shifting down a gear, ensure
that the vehicle is not travelling at a
speed exceeding the Maximum Al-
lowable Speed for the gear which is
about to be selected. Failure to
observe this precaution can lead to
engine over-revving and this in turn
can result in engine damage.
In addition, sudden application of
engine brakes when the vehicle is
travelling on a slippery surface can
lead to wheel locking; as a conse-
quence, control of the vehicle may
be lost and the risk of an accidentincreased.
& Driving tips
Do not drive with your foot resting on the
clutch pedal and do not use the clutch to
hold your vehicle at a standstill on an
upgrade. Either of those actions may
cause clutch damage. Do not drive with your hand resting on the
shift lever. This may cause wear on the
transmission components.
When it is necessary to reduce vehicle
speed due to slow traffic, turning corners,
or driving up steep hills, downshift to a
lower gear before the engine starts to
labor.
On steep downgrades, downshift the
transmission to 4th, 3rd or 2nd gear as
necessary; this helps to maintain a safe
speed and to extend brake pad life.
In this way, the engine provides a braking
effect. Remember, if you
“ride ”(over use)
the brakes while descending a hill, they
may overheat and not work properly.
The engine may, on rare occasions, knock
when the vehicle rapidly accelerates or
rapidly pulls away from a standstill. This
phenomenon is not an indication of a
problem in your vehicle. Driver
’s Control Center Dif-
ferential (DCCD) (WRX-STI)
WARNING
Always use the utmost care when
driving. Being overconfident be-
cause you are driving a vehicle with
a driver ’s control center differential
could easily lead to a serious acci-dent.
CAUTION
In the event of failure of the driver ’s
control center differential, the “
”
indicator light will flash. Have the
vehicle inspected by your SUBARU