Page 311 of 364

recommends replacing all four tires at the
same time.
WARNING
. All four tires must be the same in
terms of manufacturer, brand
(tread pattern), construction, de-
gree of wear, speed symbol, load
index and size. Mixing tires of
different types, sizes or degrees
of wear can result in damage tovehicle ’s powertrain. Use of dif-
ferent types or sizes of tires can
also dangerously reduce con-
trollability and braking perfor-
mance and can lead to an acci- dent.
. Use only radial tires. Do not use
radial tires together with belted
bias tires and/or bias-ply tires.
Doing so can dangerously re-
duce controllability, resulting in
an accident.
& Wheel replacement
When replacing wheels due, for example,
to damage, make sure the replacement
wheels match the specifications of the
wheels that are fitted as standard equip-
ment. Replacement wheels are available from SUBARU dealers.WARNING
Use only those wheels that are
specified for your vehicle. Wheels
not meeting specifications could
interfere with brake caliper opera-
tion and may cause the tires to rub
against the wheel well housing dur-
ing turns. The resulting loss of
vehicle control could lead to anaccident.
NOTE
When any of the wheels are removed
and replaced for tire rotation or to
change a flat tire, always check the
tightness of the wheel nuts after driv-
ing approximately 600 miles (1,000 km).
If any nut is loose, tighten it to the
specified torque. Aluminum wheels
Aluminum wheels can be scratched and
damaged easily. Handle them carefully to
maintain their appearance, performance,
and safety. .
When any of the wheels are removed
and replaced for tire rotation or to change
a flat tire, always check the tightness of
the wheel nuts after driving approximately
600 miles (1,000 km). If any nut is loose,
tighten it to the specified torque. . Never apply oil to the threaded parts,
wheel nuts, or tapered surface of the wheel. . Never let the wheel rub against sharp
protrusions or curbs.. Be sure to fit tire chains on uniformly
and completely around the tire, otherwise
the chains may scratch the wheel. . When wheel nuts, balance weights, or
the center cap is replaced, be sure to
replace them with genuine SUBARU parts
designed for aluminum wheels. Maintenance and service
11-35
Page 312 of 364
11-36Maintenance and service
Intercooler water spray (WRX-STI)
Add water to the intercooler water spray
tank when the intercooler water spray
warning light in the combination meter
comes on. The warning light comes on
when the water in the tank has decreased
to approximately 0.4 liters (0.4 US qt, 0.4
Imp qt).
The tank is located on the right-hand side
of the trunk. NOTE .Use only pure water for refilling.
. In cold weather (when you do not
use the intercooler water spray), keep
the tank half-empty in case the water
freezes. A larger amount of water could
break the tank if it froze. Windshield washer fluid
If you spray washer fluid on the windshield
but the supply of washer fluid appears to
diminish, check the level of washer fluid in
the tank.
Page 317 of 364

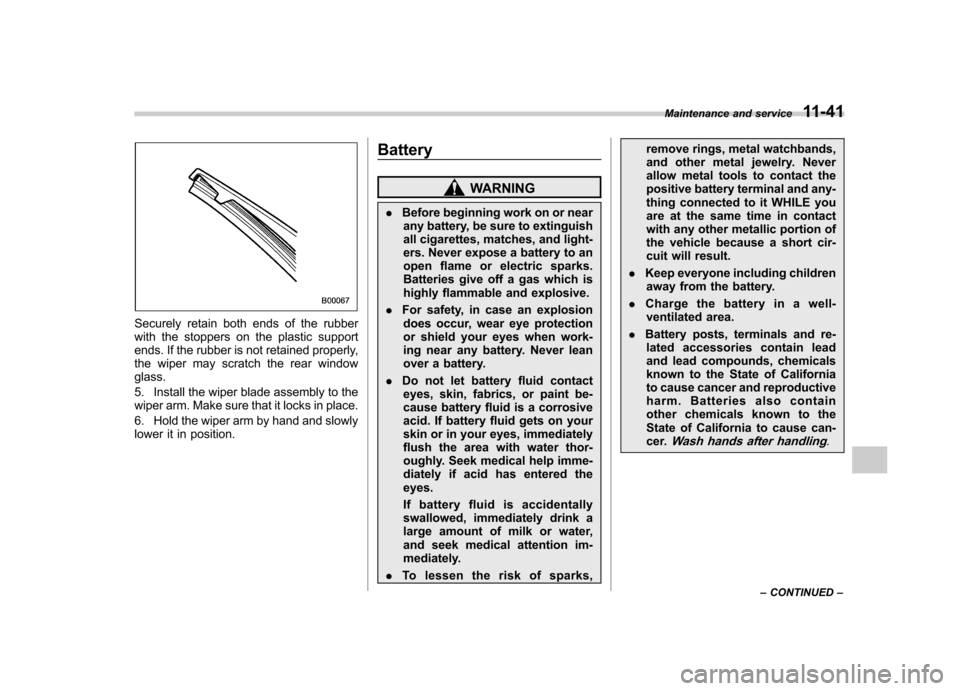
Securely retain both ends of the rubber
with the stoppers on the plastic support
ends. If the rubber is not retained properly,
the wiper may scratch the rear windowglass.
5. Install the wiper blade assembly to the
wiper arm. Make sure that it locks in place.
6. Hold the wiper arm by hand and slowly
lower it in position.Battery
WARNING
. Before beginning work on or near
any battery, be sure to extinguish
all cigarettes, matches, and light-
ers. Never expose a battery to an
open flame or electric sparks.
Batteries give off a gas which is
highly flammable and explosive.
. For safety, in case an explosion
does occur, wear eye protection
or shield your eyes when work-
ing near any battery. Never lean
over a battery.
. Do not let battery fluid contact
eyes, skin, fabrics, or paint be-
cause battery fluid is a corrosive
acid. If battery fluid gets on your
skin or in your eyes, immediately
flush the area with water thor-
oughly. Seek medical help imme-
diately if acid has entered theeyes.
If battery fluid is accidentally
swallowed, immediately drink a
large amount of milk or water,
and seek medical attention im-
mediately.
. To lessen the risk of sparks, remove rings, metal watchbands,
and other metal jewelry. Never
allow metal tools to contact the
positive battery terminal and any-
thing connected to it WHILE you
are at the same time in contact
with any other metallic portion of
the vehicle because a short cir-
cuit will result.
. Keep everyone including children
away from the battery.
. Charge the battery in a well-
ventilated area.
. Battery posts, terminals and re-
lated accessories contain lead
and lead compounds, chemicals
known to the State of California
to cause cancer and reproductive
harm. Batteries also contain
other chemicals known to the
State of California to cause can-
cer.
Wash hands after handling.
Maintenance and service
11-41
– CONTINUED –
Page 322 of 364

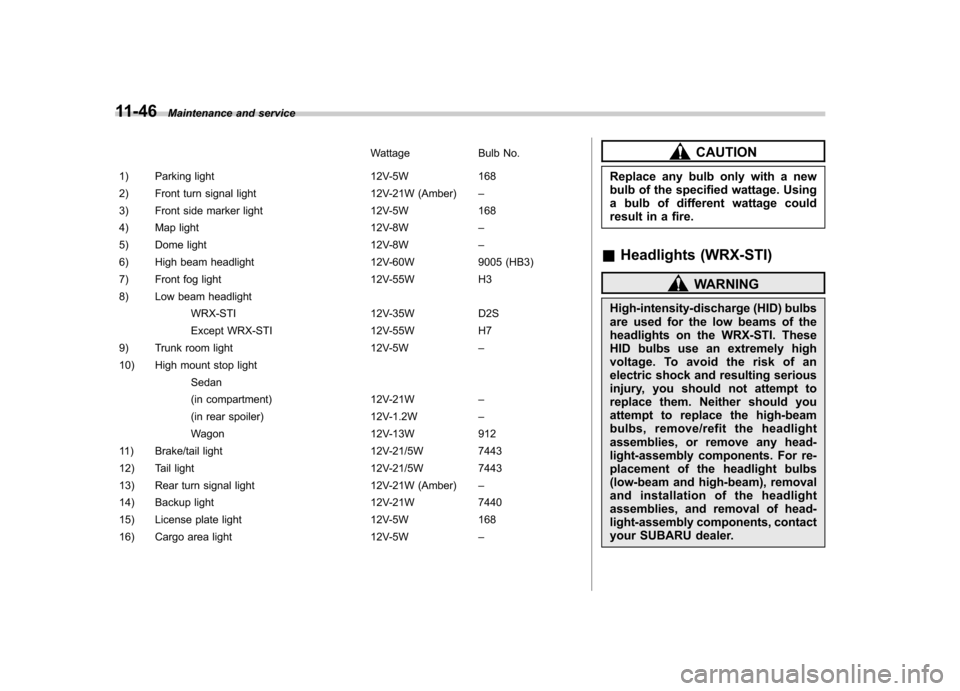
11-46Maintenance and service
Wattage Bulb No.
1) Parking light 12V-5W 168
2) Front turn signal light 12V-21W (Amber) –
3) Front side marker light 12V-5W 168
4) Map light 12V-8W –
5) Dome light 12V-8W –
6) High beam headlight 12V-60W 9005 (HB3)
7) Front fog light 12V-55W H3
8) Low beam headlight WRX-STI 12V-35W D2S
Except WRX-STI 12V-55W H7
9) Trunk room light 12V-5W –
10) High mount stop light
Sedan
(in compartment) 12V-21W –
(in rear spoiler) 12V-1.2W –
Wagon 12V-13W 912
11) Brake/tail light 12V-21/5W 7443
12) Tail light 12V-21/5W 7443
13) Rear turn signal light 12V-21W (Amber) –
14) Backup light 12V-21W 7440
15) License plate light 12V-5W 168
16) Cargo area light 12V-5W –CAUTION
Replace any bulb only with a new
bulb of the specified wattage. Using
a bulb of different wattage could
result in a fire.
& Headlights (WRX-STI)
WARNING
High-intensity-discharge (HID) bulbs
are used for the low beams of the
headlights on the WRX-STI. These
HID bulbs use an extremely high
voltage. To avoid the risk of an
electric shock and resulting serious
injury, you should not attempt to
replace them. Neither should you
attempt to replace the high-beam
bulbs, remove/refit the headlight
assemblies, or remove any head-
light-assembly components. For re-
placement of the headlight bulbs
(low-beam and high-beam), removal
and installation of the headlight
assemblies, and removal of head-
light-assembly components, contact
your SUBARU dealer.
Page 324 of 364
11-48Maintenance and service
!Right-hand low beam light bulb
1. Remove the bulb cover, by turning it counterclockwise.
2. Disconnect the electrical connector.
3. Remove the retainer spring.
4. Replace the bulb with a new one.
5. Set the retainer spring securely.
6. Reconnect the electrical connector.
7. Install the bulb cover. !Left-hand low beam light bulb
WARNING
Replacement of the left-hand low
beam light bulb requires removal of
the battery and is thus dangerous. It
must be performed by a SUBARU
dealer. !
High beam light bulbs
1. Disconnect the electrical connector
from the bulb.
2. Remove the bulb from the headlight
assembly by turning it counterclockwise.
Page 337 of 364
12-8Specifications
&Fuse panel located in the engine compartment
A) FWD socket (AT models except Turbo)
B) Main fuse
C) Engine sensor (Non-turbo models) Fuse
panel Fuse
rating Circuit
1 20A .Radiator cooling fan
(Main)
2 20A .Radiator cooling fan
(Sub)
3 30A .ABS motor
4 20A .Rear window defogger
5 15A .Hazard warning flasher
. Horn
6 15A .Turn signal lights
7 10A .Automatic transmission
control unit
8 10A .Alternator
9 15A .Headlight (right side)
10 15A .Headlight (left side)
11 20A .Lighting switch
12 20A .Clock
. Interior light
13 10A .Secondary air combina-
tion valve (Turbo models only)
Page 343 of 364

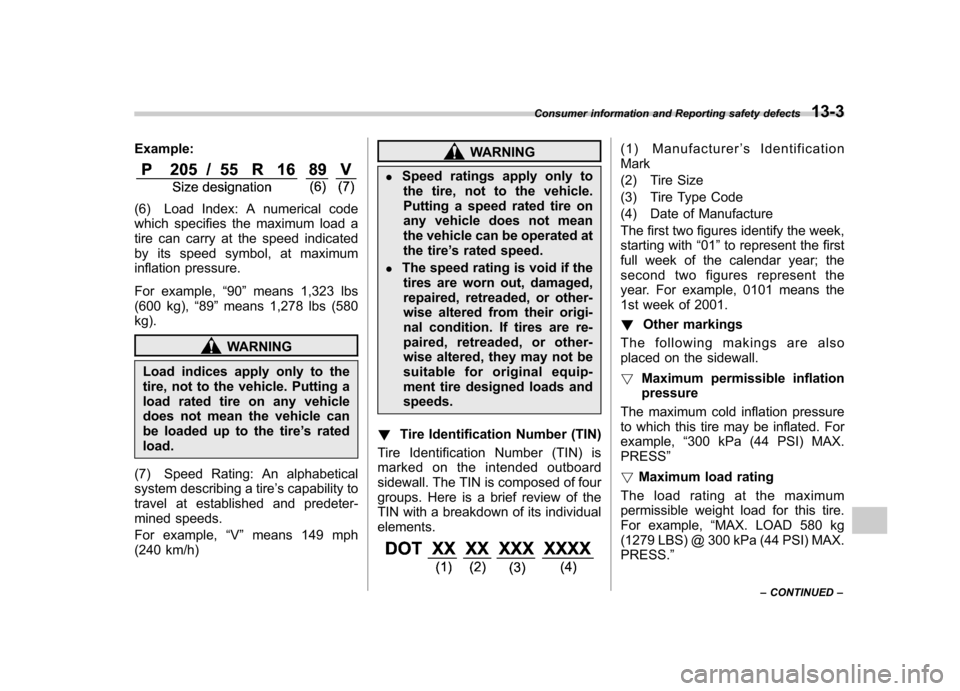
Example:
(6) Load Index: A numerical code
which specifies the maximum load a
tire can carry at the speed indicated
by its speed symbol, at maximum
inflation pressure.
For example,“90 ”means 1,323 lbs
(600 kg), “89 ”means 1,278 lbs (580
kg).
WARNING
Load indices apply only to the
tire, not to the vehicle. Putting a
load rated tire on any vehicle
does not mean the vehicle can
be loaded up to the tire ’s rated
load.
(7) Speed Rating: An alphabetical
system describing a tire ’s capability to
travel at established and predeter-
mined speeds.
For example, “V ” means 149 mph
(240 km/h)
WARNING
. Speed ratings apply only to
the tire, not to the vehicle.
Putting a speed rated tire on
any vehicle does not mean
the vehicle can be operated at
the tire ’s rated speed.
. The speed rating is void if the
tires are worn out, damaged,
repaired, retreaded, or other-
wise altered from their origi-
nal condition. If tires are re-
paired, retreaded, or other-
wise altered, they may not be
suitable for original equip-
ment tire designed loads and speeds.
! Tire Identification Number (TIN)
Tire Identification Number (TIN) is
marked on the intended outboard
sidewall. The TIN is composed of four
groups. Here is a brief review of the
TIN with a breakdown of its individual
elements.(1) Manufacturer ’s Identification
Mark
(2) Tire Size
(3) Tire Type Code
(4) Date of Manufacture
The first two figures identify the week,
starting with “01 ”to represent the first
full week of the calendar year; the
second two figures represent the
year. For example, 0101 means the
1st week of 2001. ! Other markings
The following makings are also
placed on the sidewall. ! Maximum permissible inflation
pressure
The maximum cold inflation pressure
to which this tire may be inflated. For
example, “300 kPa (44 PSI) MAX.
PRESS ”
! Maximum load rating
Theloadratingatthemaximum
permissible weight load for this tire.
For example, “MAX. LOAD 580 kg
(1279 LBS) @ 300 kPa (44 PSI) MAX.
PRESS. ”
Consumer information and Reporting safety defects
13-3
– CONTINUED –
Page 344 of 364
13-4Consumer information and Reporting safety defects
WARNING
Maximum load rating applies
only to the tire, not to the
vehicle. Putting a load rated tire
on any vehicle does not mean
the vehicle can be loaded up to
the tire ’s rated load.
! Construction type
Applicable construction of this tire.
For example, “TUBELESS STEEL
BELTED RADIAL ”
! Construction
The generic name of each cord
material used in the plies (both side-
wall and tread area) of this tire.
For example, “PLIES: TREAD 2
STEEL + 2 POLYESTER SIDEWALL
2 POLYESTER ”
! Uniform Tire Quality Grading
(UTQG)
For details, refer to “Uniform tire
quality grading standards ”in this
chapter.