2007 SUBARU FORESTER battery
[x] Cancel search: batteryPage 182 of 356
6-2 Interior equipment
Inte rior eq uip me ntInterior lights
When leaving your vehicle, make sure the
light goes out to avoid battery discharge. �„Dome light
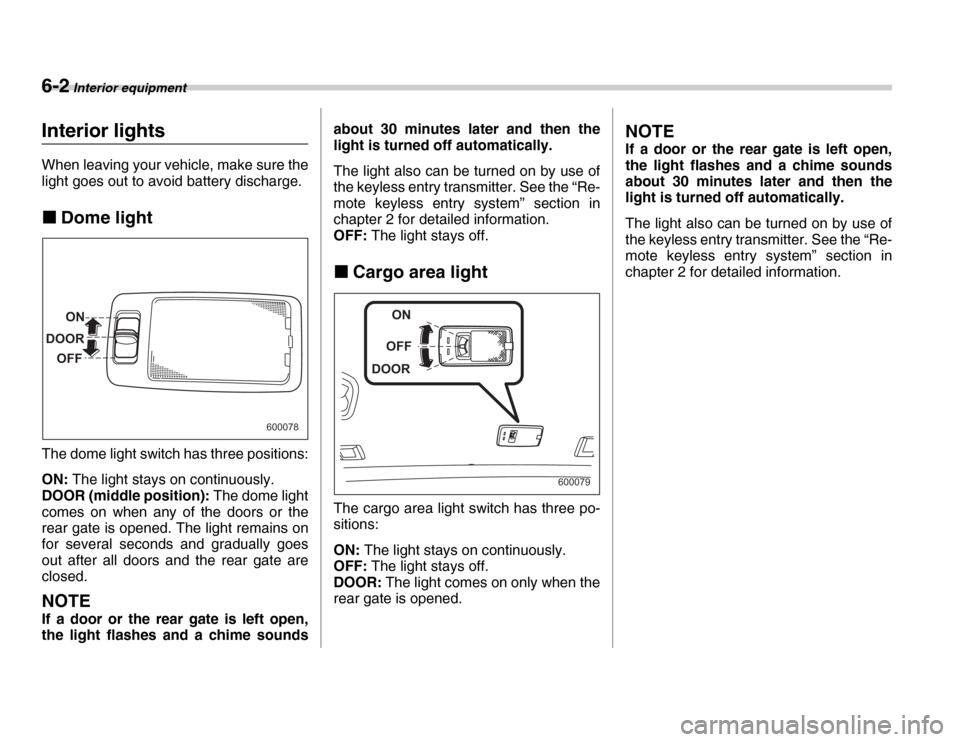
The dome light switch has three positions:
ON: The light stays on continuously.
DOOR (middle position): The dome light
comes on when any of the doors or the
rear gate is opened. The light remains on
for several seconds and gradually goes
out after all doors and the rear gate are
closed.
NOTE
If a door or the rear gate is left open,
the light flashes and a chime sounds about 30 minutes later and then the
light is turned off automatically.
The light also can be turned on by use of
the keyless entry transmitter. See the “Re-
mote keyless entry system” section in
chapter 2 for detailed information.
OFF:
The light stays off.
�„ Cargo area light
The cargo area light switch has three po-
sitions:
ON: The light stays on continuously.
OFF: The light stays off.
DOOR: The light comes on only when the
rear gate is opened.
NOTE
If a door or the rear gate is left open,
the light flashes and a chime sounds
about 30 minutes later and then the
light is turned off automatically.
The light also can be turned on by use of
the keyless entry transmitter. See the “Re-
mote keyless entry system” section in
chapter 2 for detailed information.
ON
DOOR OFF
600078
ON
OFF
DOOR
600079
Page 183 of 356
Interior equipment 6-3
Map lights
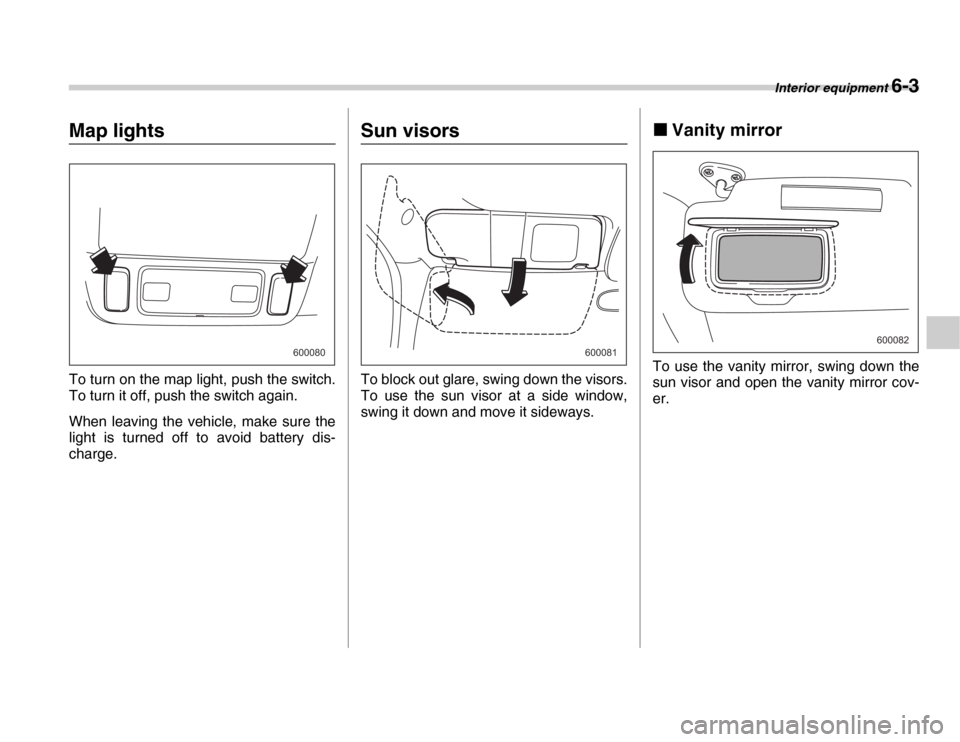
To turn on the map light, push the switch.
To turn it off, push the switch again.
When leaving the vehicle, make sure the
light is turned off to avoid battery dis-
charge.Sun visors
To block out glare, swing down the visors.
To use the sun visor at a side window,
swing it down and move it sideways.�„
Vanity mirror
To use the vanity mirror, swing down the
sun visor and open the vanity mirror cov- er.
600080600081
600082
Page 189 of 356
Interior equipment 6-9
– CONTINUED –
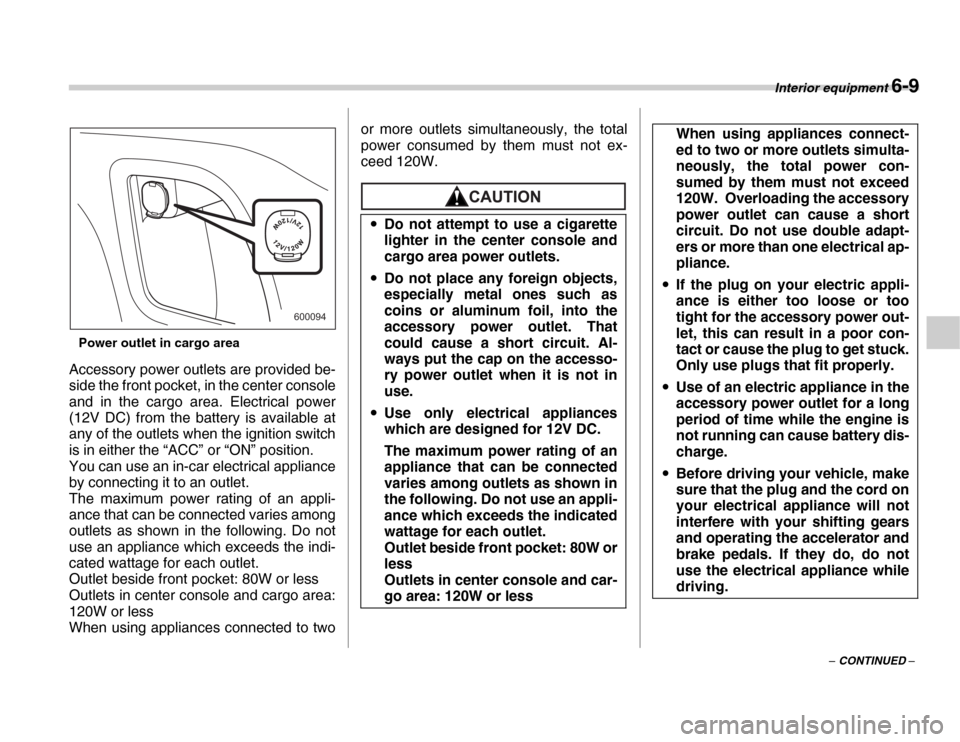
Power outlet in cargo area
Accessory power outlets are provided be-
side the front pocket, in the center console
and in the cargo area. Electrical power
(12V DC) from the battery is available at
any of the outlets when the ignition switch
is in either the “ACC” or “ON” position.
You can use an in-car electrical appliance
by connecting it to an outlet.
The maximum power rating of an appli-
ance that can be connected varies among
outlets as shown in the following. Do not
use an appliance which exceeds the indi-
cated wattage for each outlet.
Outlet beside front pocket: 80W or less
Outlets in center console and cargo area:
120W or less
When using appliances connected to two or more outlets simultaneously, the total
power consumed by them must not ex-
ceed 120W.
600094
�y
Do not attempt to use a cigarette
lighter in the center console and
cargo area power outlets.
�y Do not place any foreign objects,
especially metal ones such as
coins or aluminum foil, into the
accessory power outlet. That
could cause a short circuit. Al-
ways put the cap on the accesso-
ry power outlet when it is not in
use.
�y Use only electrical appliances
which are designed for 12V DC.
The maximum power rating of an
appliance that can be connected
varies among outlets as shown in
the following. Do not use an appli-
ance which exceeds the indicated
wattage for each outlet.
Outlet beside front pocket: 80W or
less
Outlets in center console and car-
go area: 120W or less
When using appliances connect-
ed to two or more outlets simulta-
neously, the total power con-
sumed by them must not exceed
120W. Overloading the accessory
power outlet can cause a short
circuit. Do not use double adapt-
ers or more than one electrical ap-
pliance.
�y If the plug on your electric appli-
ance is either too loose or too
tight for the accessory power out-
let, this can result in a poor con-
tact or cause the plug to get stuck.
Only use plugs that fit properly.
�y Use of an electric appliance in the
accessory power outlet for a long
period of time while the engine is
not running can cause battery dis-
charge.
�y Before driving your vehicle, make
sure that the plug and the cord on
your electrical appliance will not
interfere with your shifting gears
and operating the accelerator and
brake pedals. If they do, do not
use the electrical appliance while
driving.
Page 205 of 356

Starting and operating 7-7
– CONTINUED –
Starting the engine
�„Manual transmission vehicle
1. Apply the parking brake.
2. Turn off unnecessary lights and acces-
sories.
3. Press the clutch pedal to the floor and
shift the shift lever into neutral. Hold the
clutch pedal to the floor while starting the
engine.
The starter motor will only operate when
the clutch pedal is pressed fully to the
floor.
4. Turn the ignition switch to the “ON” po-
sition and check the operation of the warn-
ing and indicator lights. Refer to the
“Warning and indicator lights” section
(chapter 3).
5. Turn the ignition switch to the “START”
position without depressing the accelera-
tor pedal. Release the key immediately af-
ter the engine has started. If the engine does not start, try the follow-
ing.
1) Turn the ignition switch to the “OFF”
position and wait for at least 10 sec-
onds. After checking that the parking
brake is firmly set, turn the ignition
switch to the “START” position while de-
pressing the accelerator pedal slightly
(about a quarter of the full stroke). Re-
lease the accelerator pedal as soon as
the engine starts.
2) If this fails to start the engine, turn the
ignition switch back to the “OFF” posi-
tion and wait for at least 10 seconds.
Then fully depress the accelerator ped-
al and turn the ignition switch to the
“START” position. If the engine starts,
quickly release the accelerator pedal.
3) If this fails to start the engine, turn the
ignition switch again to the “OFF” posi-
tion. After waiting for 10 seconds or
longer, turn the ignition switch to the
“START” position without depressing
the accelerator pedal.
4) If the engine still refuses to start, con-
tact your nearest SUBARU dealer for
assistance.
6. Confirm that all warning and indicator
lights have gone off after the engine has
started. The fuel injection system auto-
matically lowers the idle speed as the en-
gine warms up.
NOTE
The engine may be difficult to start
when the battery has been disconnect-
ed and reconnected (for maintenance
or other purposes). This difficulty is
caused by the electronically controlled
throttle’s self-diagnosis function. To
overcome it, keep the ignition switch in
the “ON” position for approximately 10
seconds before starting the engine. �„ Automatic transmission vehi-
cle
1. Apply the parking brake.
2. Turn off unnecessary lights and acces-
sories.
3. Shift the selector lever to the “P” or “N”
position (preferably “P” position).
The starter motor will only operate when
the select lever is at the “P” or “N” position.
4. Turn the ignition switch to the “ON” po-
sition and check the operation of the warn-
ing and indicator lights. Refer to the
“Warning and indicator lights” section
(chapter 3).
5. Turn the ignition switch to the “START”
position without depressing the accelera-
tor pedal. Release the key immediately af-
ter the engine has started.
If the engine does not start, try the follow-
ing.
Do not operate the starter motor
continuously for more than ten sec-
onds. If the engine fails to start after
operating the starter for five to ten
seconds, wait for ten seconds or
more before trying again.
Page 206 of 356

7-8 Starting and operating
1) Turn the ignition switch to the “OFF”
position and wait for at least 10 sec-
onds. After checking that the parking
brake is firmly set, turn the ignition
switch to the “START” position while de-
pressing the accelerator pedal slightly
(about a quarter of the full stroke). Re-
lease the accelerator pedal as soon as
the engine starts.
2) If this fails to start the engine, turn the
ignition switch back to the “OFF” posi-
tion and wait for at least 10 seconds.
Then fully depress the accelerator ped-
al and turn the ignition switch to the
“START” position. If the engine starts,
quickly release the accelerator pedal.
3) If this fails to start the engine, turn the
ignition switch again to the “OFF” posi-
tion. After waiting for 10 seconds or
longer, turn the ignition switch to the
“START” position without depressing
the accelerator pedal.
4) If the engine still refuses to start, con-
tact your nearest SUBARU dealer for
assistance.
6. Confirm that all warning and indicator
lights have gone out after the engine has
started. The fuel injection system auto-
matically lowers the idle speed as the en-
gine warms up.
While the engine is warming up, make
sure that the selector lever is at the “P” or “N” position and that the parking brake is
applied.
NOTE
The engine may be difficult to start
when the battery has been disconnect-
ed and reconnected (for maintenance
or other purposes). This difficulty is
caused by the electronically controlled
throttle’s self-diagnosis function. To
overcome it, keep the ignition switch in
the “ON” position for approximately 10
seconds before starting the engine.
Stopping the engine
The ignition switch should be turned off
only when the vehicle is stopped and the
engine is idling.
If you restart the engine while the
vehicle is moving, shift the selector
lever into the “N” position. Do not
attempt to place the selector lever of
a moving vehicle into the “P” posi-
tion.
Do not stop the engine when the ve-
hicle is moving. This will cause loss
of power to the power steering and
the brake booster, making steering
and braking more difficult. It could
also result in accidental activation
of the “LOCK” position on the igni-
tion switch, causing the steering
wheel to lock.
Page 215 of 356
Starting and operating 7-17
– CONTINUED –
The ABS system prevents the lock-up of
wheels which may occur during sudden
braking or braking on slippery road surfac-
es. This helps prevent the loss of steering
control and directional stability caused by
wheel lock-up.
When the ABS system is operating, you
may hear a chattering noise or feel a slight
vibration in the brake pedal. This is normal
when the ABS operates.
The ABS system will not operate when the
vehicle speed is below approximately 6
mph (10 km/h). �„
ABS system self-check
You may feel a slight shock in the brake
pedal and hear the operating sound of
ABS from the engine compartment just af-
ter the vehicle is started. This is caused by
an automatic functional test of the ABS
system being carried out and does not in-
dicate any abnormal condition. �„
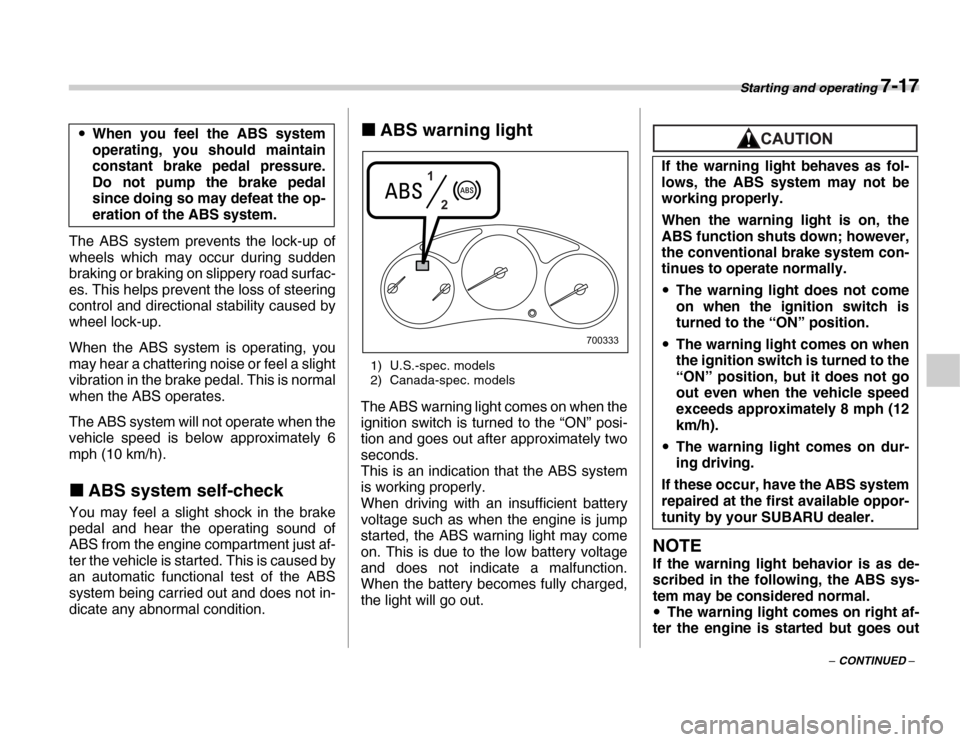
ABS warning light
1) U.S.-spec. models
2) Canada-spec. models
The ABS warning light comes on when the
ignition switch is turned to the “ON” posi-
tion and goes out after approximately two
seconds.
This is an indication that the ABS system
is working properly.
When driving with an insufficient battery
voltage such as when the engine is jump
started, the ABS warning light may come
on. This is due to the low battery voltage
and does not indicate a malfunction.
When the battery becomes fully charged,
the light will go out.
NOTE
If the warning light behavior is as de-
scribed in the following, the ABS sys-
tem may be considered normal. �y The warning light comes on right af-
ter the engine is started but goes out
�y
When you feel the ABS system
operating, you should maintain
constant brake pedal pressure.
Do not pump the brake pedal
since doing so may defeat the op-
eration of the ABS system.
1
2
700333 If the warning light behaves as fol-
lows, the ABS system may not be
working properly.
When the warning light is on, the
ABS function shuts down; however,
the conventional brake system con-
tinues to operate normally. �y
The warning light does not come
on when the ignition switch is
turned to the “ON” position.
�y The warning light comes on when
the ignition switch is turned to the
“ON” position, but it does not go
out even when the vehicle speed
exceeds approximately 8 mph (12
km/h).
�y The warning light comes on dur-
ing driving.
If these occur, have the ABS system
repaired at the first available oppor-
tunity by your SUBARU dealer.
Page 231 of 356
Driving tips 8-7
– CONTINUED –
thrown around in the vehicle and cause in-
jury. Do not pile heavy loads on the roof.
Those loads raise the vehicle’s center of
gravity and make it more prone to tip over. �y
If you must rock the vehicle to free it
from sand or mud, depress the accelera-
tor pedal slightly and move the selector le-
ver back and forth between “D” and “R” re-
peatedly. Do not race the engine. For the
best possible traction, avoid spinning the
wheels when trying to free the vehicle.
When the road surface is extremely slip-
pery, you can obtain better traction by
starting the vehicle with the transmission
in 2nd than 1st (both for MT and AT). �y Never equip your vehicle with tires larg-
er than those specified in this manual.�y Frequent driving of an AWD vehicle un-
der hard-driving conditions such as rough
roads or off roads will necessitate more
frequent replacement of engine oil, brake
fluid and transmission oil than that speci-
fied in the maintenance schedule de-
scribed in the “Warranty and Maintenance
Booklet”.
Remember that damage done to your
SUBARU while operating it off-road and
not using common sense precautions
such as those listed above is not eligible
for warranty coverage.�y Wash the vehicle’s underbody after off-
road driving. Suspension components are particularly prone to dirt buildup, so they
need to be washed thoroughly.
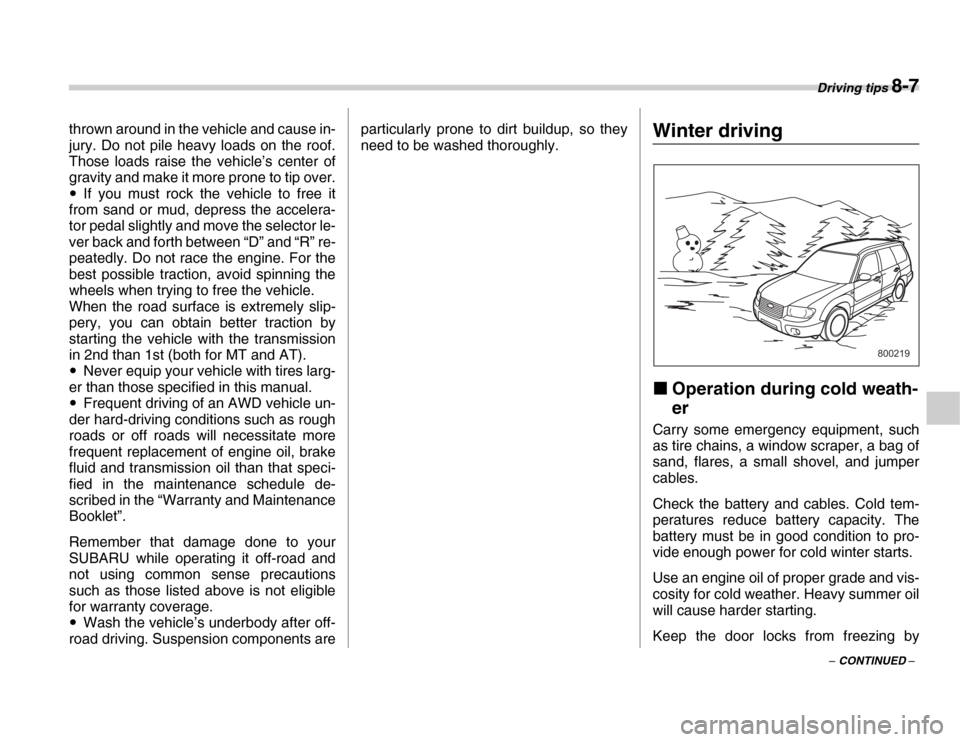
Winter driving �„
Operation during cold weath- er
Carry some emergency equipment, such
as tire chains, a window scraper, a bag of
sand, flares, a small shovel, and jumper
cables.
Check the battery and cables. Cold tem-
peratures reduce battery capacity. The
battery must be in good condition to pro-
vide enough power for cold winter starts.
Use an engine oil of proper grade and vis-
cosity for cold weather. Heavy summer oil
will cause harder starting.
Keep the door locks from freezing by
800219
Page 257 of 356

In case of emergency 9-7
– CONTINUED –
14.Store the flat tire in the spare tire com-
partment.
Put the spacer and tighten the attaching
bolt firmly.
Also store the jack and wheel nut wrench
in their storage locations.
Jump starting
When your vehicle does not start due to a
run down (discharged) battery, the vehicle
may be jump started by connecting your
battery to another battery (called the
booster battery) with jumper cables.
Never place a tire or tire changing
tools in the passenger compartment
after changing wheels. In a sudden
stop or collisions, loose equipment
could strike occupants and cause
injury. Store the tire and all tools in
the proper place.
900012
�y
Battery fluid is SULFURIC ACID.
Do not let it come in contact with
the eyes, skin, clothing or the ve-
hicle.
If battery fluid gets on you, thor-
oughly flush the exposed area
with water immediately. Get medi-
cal help if the fluid has entered
your eyes.
If battery fluid is accidentally
swallowed, immediately drink a
large amount of milk or water, and
obtain immediate medical help.
Keep everyone including children
away from the battery.
�yThe gas generated by a battery ex-
plodes if a flame or spark is
brought near it. Do not smoke or
light a match while jump starting.
�yNever attempt jump starting if the
discharged battery is frozen. It
could cause the battery to burst or
explode.
�yWhenever working on or around a
battery, always wear suitable eye
protectors, and remove metal ob-
jects such as rings, bands or oth-
er metal jewelry.
�yBe sure the jumper cables and
clamps on them do not have loose
or missing insulation.
Do not jump start unless cables in
suitable condition are available.
�yA running engine can be danger-
ous. Keep your fingers, hands,
clothing, hair and tools away from
the cooling fan, belts and any oth-
er moving engine parts. Remov-
ing rings, watches and ties is ad-
visable.
�yJump starting is dangerous if it is
done incorrectly. If you are unsure
about the proper procedure for
jump starting, consult a compe-
tent mechanic.