2007 SUBARU FORESTER tow
[x] Cancel search: towPage 113 of 356
Instruments and controls 3-3
– CONTINUED –
Instrume nts an d c ontrolsIgnition switch
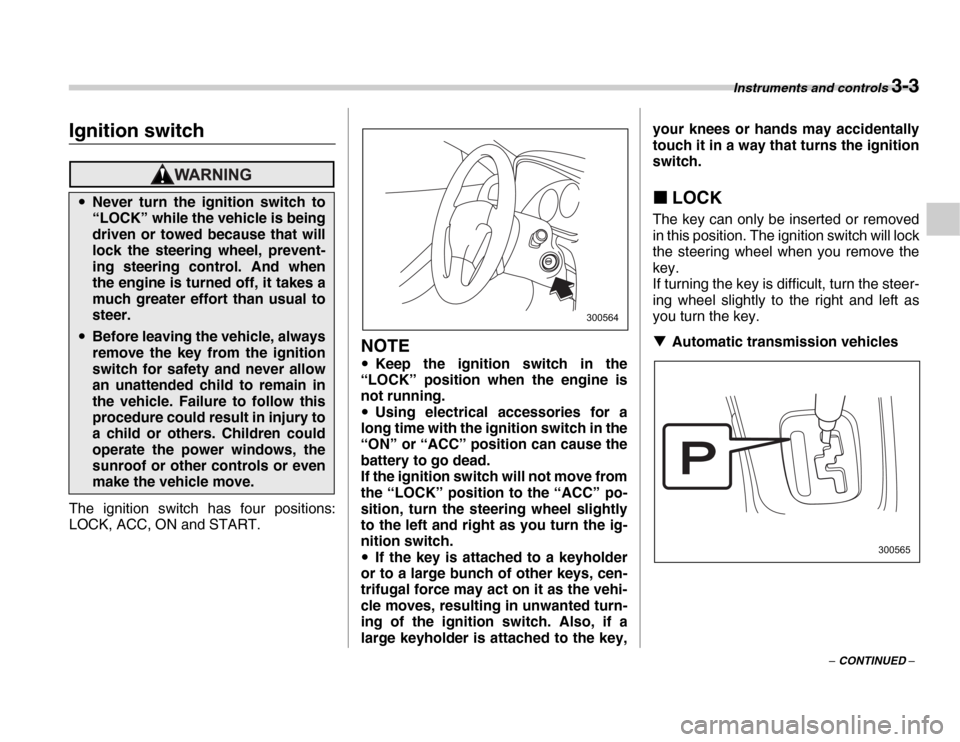
The ignition switch has four positions:
LOCK, ACC, ON and START.
NOTE
�y Keep the ignition switch in the
“LOCK” position when the engine is
not running. �y Using electrical accessories for a
long time with the ignition switch in the
“ON” or “ACC” position can cause the
battery to go dead.
If the ignition switch will not move from
the “LOCK” position to the “ACC” po-
sition, turn the steering wheel slightly
to the left and right as you turn the ig-
nition switch. �y If the key is attached to a keyholder
or to a large bunch of other keys, cen-
trifugal force may act on it as the vehi-
cle moves, resulting in unwanted turn-
ing of the ignition switch. Also, if a
large keyholder is attached to the key, your knees or hands may accidentally
touch it in a way that turns the ignition
switch. �„
LOCK
The key can only be inserted or removed
in this position. The ignition switch will lock
the steering wheel when you remove the
key.
If turning the key is difficult, turn the steer-
ing wheel slightly to the right and left as
you turn the key. �T Automatic transmission vehicles
�yNever turn the ignition switch to
“LOCK” while the vehicle is being
driven or towed because that will
lock the steering wheel, prevent-
ing steering control. And when
the engine is turned off, it takes a
much greater effort than usual to
steer.
�yBefore leaving the vehicle, always
remove the key from the ignition
switch for safety and never allow
an unattended child to remain in
the vehicle. Failure to follow this
procedure could result in injury to
a child or others. Children could
operate the power windows, the
sunroof or other controls or even
make the vehicle move.
300564
300565
Page 122 of 356

3-12 Instruments and controls
You should have your vehicle checked by
an authorized SUBARU dealer immedi-
ately.
NOTE
This light also comes on when the fuel
filler cap is not tightened until it clicks.
If you have recently refueled your vehicle,
the cause of the CHECK ENGINE warning
light/malfunction indicator lamp coming on
could be a loose or missing fuel filler cap.
Remove the cap and retighten it until it
clicks. Make sure nothing is interfering
with the sealing of the cap. Tightening the
cap will not make the CHECK ENGINE
warning light turn off immediately. It may
take several driving trips. If the light does
not go out, take your vehicle to your au-
thorized SUBARU dealer immediately. �T If the light is blinking:
If the light is blinking while driving, an en-
gine misfire condition has been detected
which may damage the emission control
system.
To prevent serious damage to the emis-
sion control system, you should do the fol-
lowing. �y Reduce vehicle speed.
�y Avoid hard acceleration.
�y Avoid steep uphill grades.
�y Reduce the amount of cargo, if possi- ble.�y
Stop towing a trailer as soon as possi-
ble.
The CHECK ENGINE warning light may
stop blinking and come on steadily after
several driving trips. You should have
your vehicle checked by an authorized
SUBARU dealer immediately.
�„ Charge warning light
If this light comes on when the engine is
running, it may indicate that the charging
system is not working properly.
If the light comes on while driving or does
not go out after the engine starts, stop the
engine at the first safe opportunity and
check the alternator belt. If the belt is
loose, broken or if the belt is in good con-
dition but the light remains on, contact
your nearest SUBARU dealer immediate-
ly. �„ Oil pressure warning
light
If this light comes on when the engine is
running, it may indicate that the engine oil
pressure is low and the lubricating system
is not working properly.
If the light comes on while driving or does
not go out after the engine starts, stop the
engine at the first safe opportunity and
check the engine oil level. If the oil level is
low, add oil immediately. If the engine oil
is at the proper level but the light remains
on, contact your nearest SUBARU dealer
immediately. �„AT OIL TEMPerature
warning light (AT vehi-
cles)
The AT oil temperature warning light
comes on when the ignition switch is
turned to the “ON” position and goes out
after the engine has started.
If this light comes on when the engine is
running, it may indicate that the automatic
transmission fluid temperature is too hot.
If the light comes on while driving, it is un-
necessary to stop the vehicle, but avoid
driving up steep grades or in stop and go
traffic. �T Automatic transmission control
system warning
If the light flashes after the engine starts,
Do not operate the engine with the
oil pressure warning light on. This
may cause serious engine damage.
Page 123 of 356
Instruments and controls 3-13
– CONTINUED –
it may indicate that the automatic trans-
mission control system is not working
properly. Contact your nearest SUBARU
dealer for service immediately. �„
ABS warning light
The ABS warning light comes on when the
ignition switch is turned to the “ON” posi-
tion and goes out after approximately two
seconds.
This is an indication that the ABS system
is working properly.
The ABS warning light comes on together
with the brake system warning light if the
EBD system becomes faulty. For further
details of the EBD system fault warning,
refer to “Brake system warning light”.
NOTE
If the warning light behavior is as de-
scribed in the following, the ABS sys-
tem may be considered normal. �y The warning light comes on right af-
ter the engine is started but goes out
immediately, remaining off. �y The warning light remains on after
the engine has been started, but it goes
out when the vehicle speed reaches
approximately 8 mph (12 km/h). �y The warning light comes on during
driving, but it goes out immediately and remains off.
When driving with an insufficient battery
voltage such as when the engine is jump
started, the ABS warning light may come
on. This is due to the low battery voltage
and does not indicate a malfunction.
When the battery becomes fully charged,
the light will go out. �„
Brake system
warning light
This light has the following three func-
tions:
If the warning light behaves as fol-
lows, the ABS system may not work
properly.
When the warning light is on, the
ABS function shuts down; however,
the conventional brake system con-
tinues to operate normally. �y
The warning light does not come
on when the ignition switch is
turned to the “ON” position.
(U.S.) (Canada)
�yThe warning light comes on when
the ignition switch is turned to the
“ON” position, but it does not go
out even when the vehicle speed
exceeds approximately 8 mph (12
km/h).
�y The warning light comes on dur-
ing driving.
If any of these conditions occur,
have the ABS system repaired at the
first available opportunity by your
SUBARU dealer.
�y Driving with the brake system
warning light on is dangerous.
This indicates your brake system
may not be working properly. If
the light remains on, have the
brakes inspected by a SUBARU
dealer immediately.
�yIf at all in doubt about whether the
brakes are operating properly, do
not drive the vehicle. Have your
vehicle towed to the nearest
SUBARU dealer for repair.
(U.S.) (Canada)
Page 124 of 356

3-14 Instruments and controls
�TParking brake warning
The light comes on with the parking brake
applied while the ignition switch is in the
“ON” position. It goes out when the park-
ing brake is fully released. �T Brake fluid level warning
This light comes on when the brake fluid
level has dropped to near the “MIN” level
of the brake fluid reservoir with the ignition
switch in the “ON” position and with the
parking brake fully released.
If the brake system warning light should
come on while driving (with the parking
brake fully released and with the ignition
switch positioned in “ON”), it could be an
indication of leaking of brake fluid or worn
brake pads. If this occurs, immediately
stop the vehicle at the nearest safe place
and check the brake fluid level. If the fluid
level is below the “MIN” mark in the reser-
voir, do not drive the vehicle. Have the ve-
hicle towed to the nearest SUBARU deal-
er for repair. �T Electronic Brake Force Distribution
(EBD) system warning
The brake system warning light also illu-
minates if a malfunction occurs in the EBD
system. In that event, it comes on together
with the ABS warning light.
The EBD system may be malfunctioning if the brake system warning light and ABS
warning light illuminate simultaneously
during driving.
Even if the EBD system fails, the conven-
tional braking system will still function.
However, the rear wheels will be more
prone to locking when the brakes are ap-
plied harder than usual and the vehicle’s
motion may therefore become somewhat
harder to control.
If the brake system warning light and ABS
warning light illuminate simultaneously,
take the following steps:
1. Stop the vehicle in the nearest safe, flat
place.
2. Shut down the engine, then restart it.
3. Release the parking brake. If both
warning lights go out, the EBD system
may be faulty.
Drive carefully to the nearest SUBARU
dealer and have the system inspected.
4. If both warning lights come on again
and stay illuminated after the engine has
been restarted, shut down the engine
again, apply the parking brake, and check
the brake fluid level.
5. If the brake fluid level is not below the
“MIN” mark, the EBD system may be
faulty. Drive carefully to the nearest SUB-
ARU dealer and have the system inspect-ed.
6. If the brake fluid level is below the
“MIN” mark, DO NOT drive the vehicle. In-
stead, have the vehicle towed to the near-
est SUBARU dealer for repair. �„
Door open warning lights
The door open warning light comes on if
any door or the rear gate is not fully
closed.
Always make sure this light is out before
you start to drive. �„ Low fuel warning light
The low fuel warning light comes on when
the tank is nearly empty [approximately
2.3 US gal (9.0 liters, 1.9 Imp gal)]. It only
operates when the ignition switch is in the
“ON” position.
NOTE
This light does not go out unless the
tank is replenished up to an internal
fuel quantity of approximately 4.0 US
gal (15 liters, 3.3 Imp gal).
Page 133 of 356

Instruments and controls 3-23
�TMist (for a single wipe)
For a single wipe of the wipers, pull the le-
ver toward you. The wipers operate until
you release the lever. �T Washer To wash the windshield, push the washer
button at the end of the wiper control le-
ver. The washer fluid sprays until you re-
lease the washer button. The wipers oper-
ate while you push the button.
�„ Rear window wiper and wash-
er switch
: Washer (accompanied by wiper operation)
ON : Normal
INT : Intermittent
OFF : Park : Washer
�T Rear wiper
To turn the rear wiper on, turn the knob on
the end of the wiper control lever upward. INT: Intermittent
ON: Normal
To turn the wiper off, return the knob on
the end of the lever to the “OFF” position. �T
Washer
To wash the rear window while the rear
wiper is operating, turn the knob on the
end of the wiper control lever counter-
clockwise to the “ ” position. The
washer fluid sprays until you release the
knob.
To wash the rear window when the rear
wiper is not in use, turn the knob on the
end of the wiper control lever clockwise to
the “ ” position. The washer fluid
sprays and the wiper operates until you
release the knob.
300796
300797
REARREAR
ON
OFFINT
ON
INTOFF
300141
Page 135 of 356
Instruments and controls 3-25
– CONTINUED –
The rear window defogger operates only
when the ignition switch is in the “ON” po-
sition.
The rear window defogger button is locat-
ed on the climate control panel.
To turn on the defogger, push the button.
To turn it off, push the button again.
The indicator light located on the button
lights up while the rear window defogger is
operating.
The defogger will automatically shut off af-
ter approximately 15 minutes. If the win-
dow clears before that time, push the but-
ton to turn it off. It also turns off when the
ignition switch is turned to the “ACC” or
“LOCK” position. If defrosting or defogging
is desired when you restart your vehicle,
you have to push the button to turn it on
again.
Turn on the rear window defogger if the
wiper is frozen to the glass.
Mirrors
Always check that the inside and outside
mirrors are properly adjusted before you
start driving. �„
Inside mirror
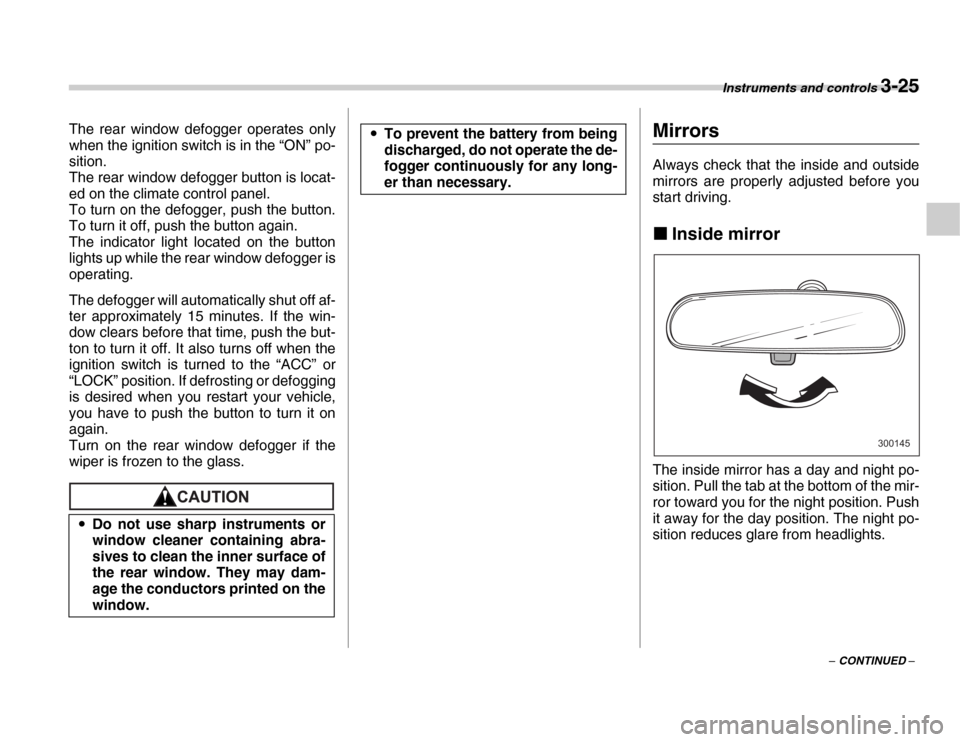
The inside mirror has a day and night po-
sition. Pull the tab at the bottom of the mir-
ror toward you for the night position. Push
it away for the day position. The night po-
sition reduces glare from headlights.
�y
Do not use sharp instruments or
window cleaner containing abra-
sives to clean the inner surface of
the rear window. They may dam-
age the conductors printed on the
window.�yTo prevent the battery from being
discharged, do not operate the de-
fogger continuously for any long-
er than necessary.
300145
Page 145 of 356
Climate control 4-5
– CONTINUED –
�„Heater operation
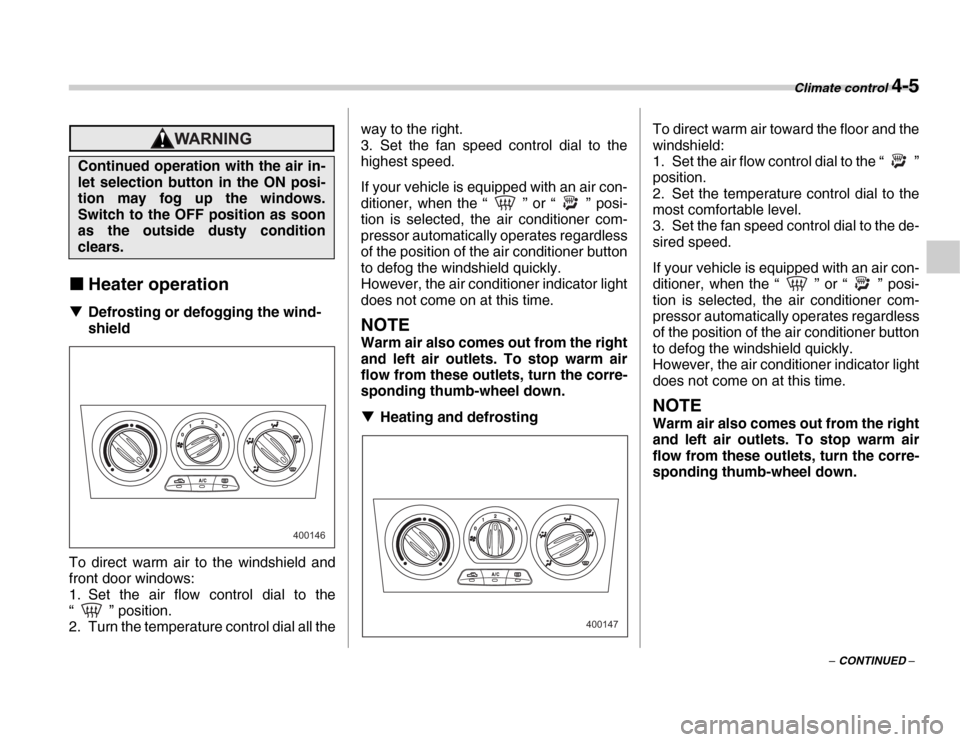
�T Defrosting or defogging the wind-
shield
To direct warm air to the windshield and
front door windows:
1. Set the air flow control dial to the
“ ” position.
2. Turn the temperature control dial all the way to the right.
3. Set the fan speed control dial to the
highest speed.
If your vehicle is equipped with an air con-
ditioner, when the “ ” or “ ” posi-
tion is selected, the air conditioner com-
pressor automatically operates regardless
of the position of the air conditioner button
to defog the windshield quickly.
However, the air conditioner indicator light
does not come on at this time.
NOTE
Warm air also comes out from the right
and left air outlets. To stop warm air
flow from these outlets, turn the corre-
sponding thumb-wheel down. �T
Heating and defrosting To direct warm air toward the floor and the
windshield:
1. Set the air flow control dial to the “ ”
position.
2. Set the temperature control dial to the
most comfortable level.
3. Set the fan speed control dial to the de-
sired speed.
If your vehicle is equipped with an air con-
ditioner, when the “ ” or “ ” posi-
tion is selected, the air conditioner com-
pressor automatically operates regardless
of the position of the air conditioner button
to defog the windshield quickly.
However, the air conditioner indicator light
does not come on at this time.
NOTE
Warm air also comes out from the right
and left air outlets. To stop warm air
flow from these outlets, turn the corre-
sponding thumb-wheel down.
Continued operation with the air in-
let selection button in the ON posi-
tion may fog up the windows.
Switch to the OFF position as soon
as the outside dusty condition
clears.
400146
400147
Page 146 of 356
4-6 Climate control
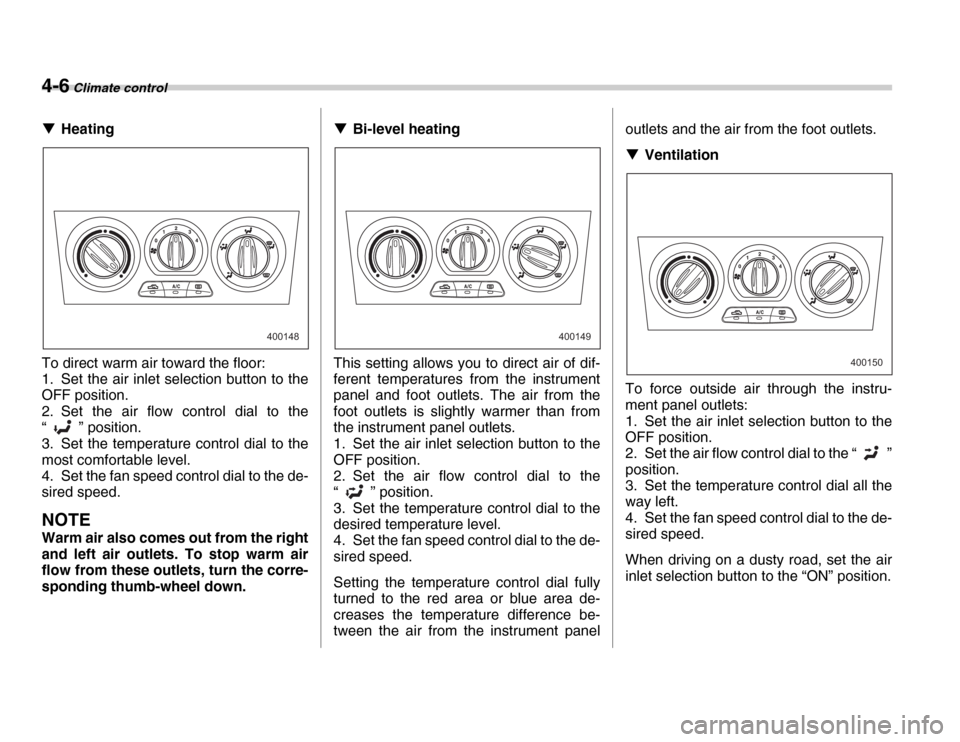
�THeating
To direct warm air toward the floor:
1. Set the air inlet selection button to the
OFF position.
2. Set the air flow control dial to the
“ ” position.
3. Set the temperature control dial to the
most comfortable level.
4. Set the fan speed control dial to the de-
sired speed.
NOTE
Warm air also comes out from the right
and left air outlets. To stop warm air
flow from these outlets, turn the corre-
sponding thumb-wheel down. �T
Bi-level heating
This setting allows you to direct air of dif-
ferent temperatures from the instrument
panel and foot outlets. The air from the
foot outlets is slightly warmer than from
the instrument panel outlets.
1. Set the air inlet selection button to the
OFF position.
2. Set the air flow control dial to the
“ ” position.
3. Set the temperature control dial to the
desired temperature level.
4. Set the fan speed control dial to the de-
sired speed.
Setting the temperature control dial fully
turned to the red area or blue area de-
creases the temperature difference be-
tween the air from the instrument panel outlets and the air from the foot outlets. �T
Ventilation
To force outside air through the instru-
ment panel outlets:
1. Set the air inlet selection button to the
OFF position.
2. Set the air flow control dial to the “ ”
position.
3. Set the temperature control dial all the
way left.
4. Set the fan speed control dial to the de-
sired speed.
When driving on a dusty road, set the air
inlet selection button to the “ON” position.
400148400149
400150