2007 SKODA ROOMSTER RIM
[x] Cancel search: RIMPage 59 of 248

Seats and Stowage58
Adjusting the seat backrest
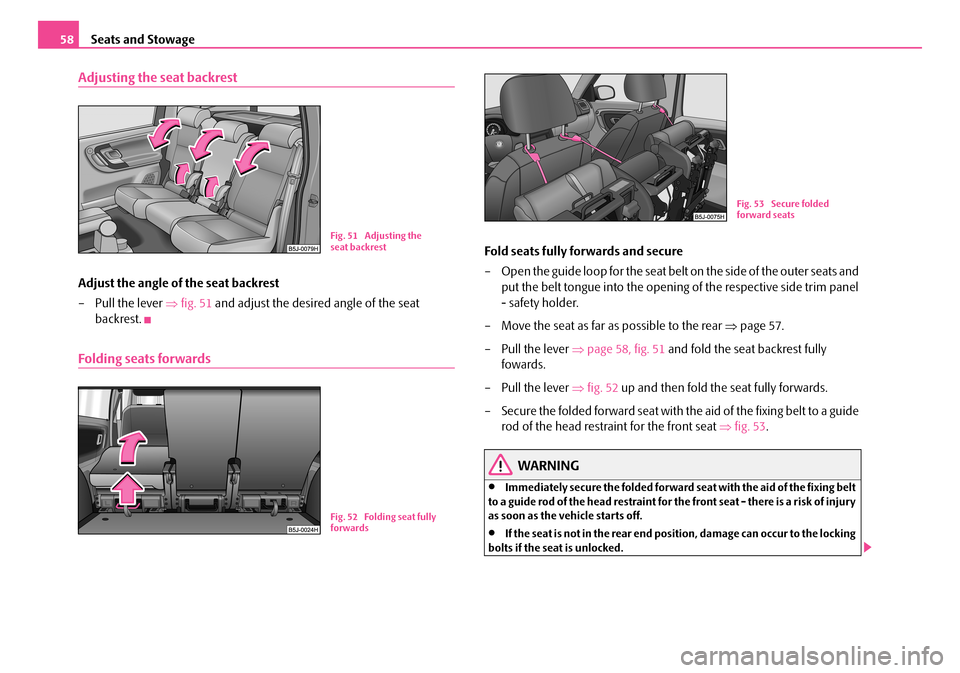
Adjust the angle of the seat backrest
– Pull the lever ⇒fig. 51 and adjust the desired angle of the seat
backrest.
Folding seats forwards
Fold seats fully forwards and secure
– Open the guide loop for the seat belt on the side of the outer seats and
put the belt tongue into the opening of the respective side trim panel
- safety holder.
– Move the seat as far as possible to the rear ⇒page 57.
– Pull the lever ⇒page 58, fig. 51 and fold the seat backrest fully
fowards.
– Pull the lever ⇒fig. 52 up and then fold the seat fully forwards.
– Secure the folded forward seat with the aid of the fixing belt to a guide
rod of the head restraint for the front seat ⇒fig. 53.
WARNING
•Immediately secure the folded forward seat with the aid of the fixing belt to a guide rod of the head restraint for the front seat - there is a risk of injury as soon as the vehicle starts off.
•If the seat is not in the rear end po sition, damage can occur to the locking bolts if the seat is unlocked.
Fig. 51 Adjusting the seat backrest
Fig. 52 Folding seat fully forwards
Fig. 53 Secure folded forward seats
NKO A05R 20 MR08.book Page 58 Wednesday, March 28, 2007 9:42 AM
Page 77 of 248

Seats and Stowage76
Installing storage box
– In order to create a better access to the middle seat, fold one outer
backrest forwards.
– Fold the backrest of the middle seat forwards.
– Release the fixing hook from the secured position.
– Move the fixing holder ⇒page 75, fig. 88 from the rear between the
seat cushion and seat backrest, then align the seat backrest to the
vertical position.
– Move the fixing arms of the storage box into the locking eyes of the
fixing holder until they lock in place ⇒page 75, fig. 89.
– Check the interlock of both fixing arms by pulling on the storage
box.
Removing storage box
– Simultaneously press on each side of the storage box the red button in
direction opposite the seat backrest. The storage box releases.
– Fold the seat backrest forwards and remove the fixing holder, then
move the seat backrest into the original position.
WARNING
•Do not place any hot beverages into th e cup holder. If the vehicle moves, the hot beverages may spill - risk of scalding!
•Do not use any cups or beakers which are made of brittle material (e.g. glass, porcelain). You might be injured by them in the event of an accident.
•While driving, the storage box can only be used as an armrest in its closed position.
Caution
Do not open the beverages in the cup holder while driving. There is a risk of spilling e.g. when braking and therefore the electrical components or the seat upholstery can be damaged.
Storage compartments in the luggage compartment
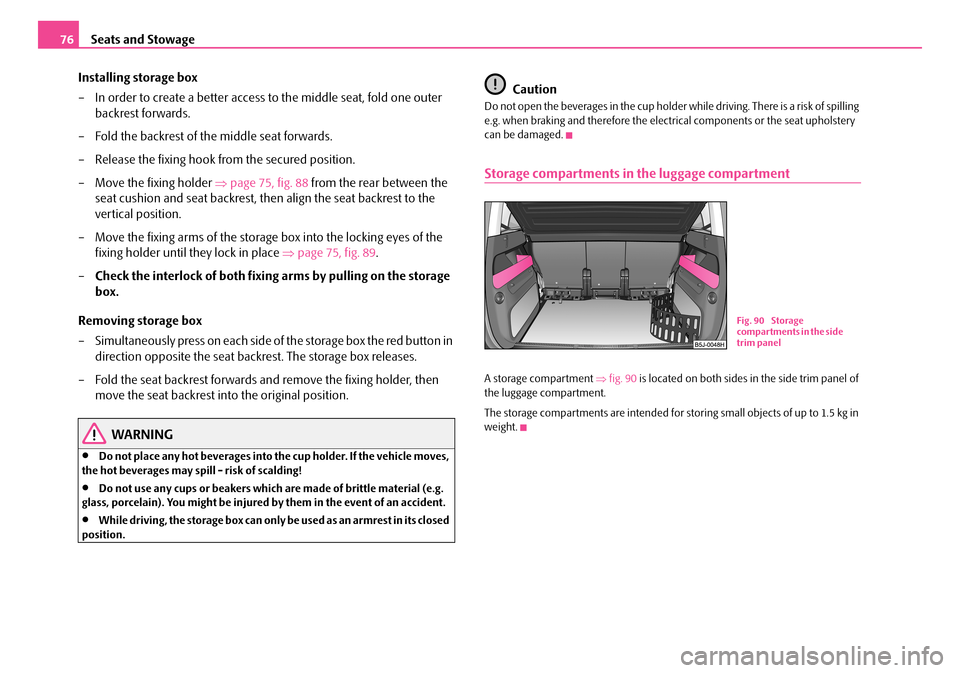
A storage compartment ⇒fig. 90 is located on both sides in the side trim panel of the luggage compartment.
The storage compartments are intended for storing small objects of up to 1.5 kg in weight.
Fig. 90 Storage compartments in the side trim panel
NKO A05R 20 MR08.book Page 76 Wednesday, March 28, 2007 9:42 AM
Page 78 of 248

Seats and Stowage77
Using the systemSafetyDriving TipsGeneral MaintenanceBreakdown assistancePraktikTechnical Data
Flexible storage compartment*
A flexible storage compartment is located on the right side of the luggage
compartment. The flexible storage compartment is foreseen for storing
small objects of up to 8 kg. in weight.
Removing
– Take hold of the flexible storage compartment at both upper corners.
– Press the upper corners to the inside and release the storage compart-
ment by pulling upwards.
– Remove by pulling towards you.
Installing
– Insert both ends of the flexible storage compartment into the open-
ings of the right side trim panel of the luggage compartment and push
it downwards until it locks.
Clothes hooks*
A clothes hook is located above the rear doors ⇒fig. 92.
WARNING
•Ensure that any clothes hanging from the hooks do not impair your vision to the rear.
•Use the hooks for hanging only light items of clothing and ensure that there are no heavy or sharp-e dged objects in the pockets.
•Do not use clothes hangers for hanging up items of clothing otherwise this will interfere with the protection offered by the head airbag.
Fig. 91 Flexible storage compartmentFig. 92 Area above rear doors: Clothes hooks
NKO A05R 20 MR08.book Page 77 Wednesday, March 28, 2007 9:42 AM
Page 105 of 248

Communication104
Universal telephone preinstallation with voice
control*
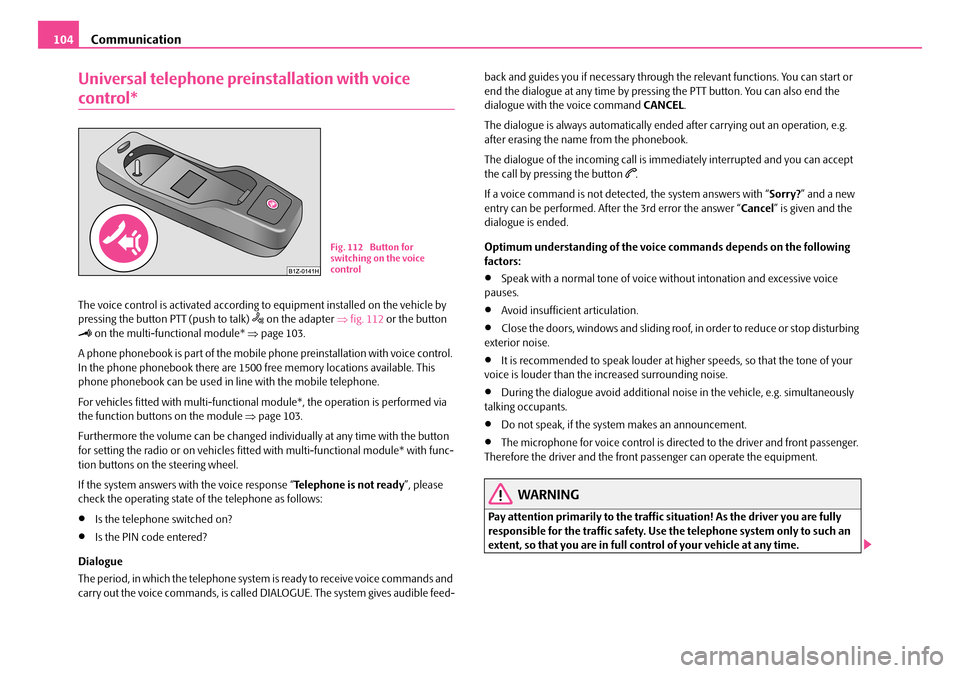
The voice control is activated according to equipment installed on the vehicle by pressing the button PTT (push to talk) on the adapter ⇒fig. 112 or the button on the multi-functional module* ⇒page 103.
A phone phonebook is part of the mobile phone preinstallation with voice control. In the phone phonebook there are 1500 free memory locations available. This phone phonebook can be used in line with the mobile telephone.
For vehicles fitted with multi-functional module*, the operation is performed via the function buttons on the module ⇒page 103.
Furthermore the volume can be changed indi vidually at any time with the button for setting the radio or on vehicles fitted with multi-functional module* with func- tion buttons on the steering wheel.
If the system answers with the voice response “ Telephone is not ready”, please check the operating state of the telephone as follows:
•Is the telephone switched on?
•Is the PIN code entered?
Dialogue
The period, in which the telephone system is ready to receive voice commands and carry out the voice commands, is called DIALOGUE. The system gives audible feed-
back and guides you if necessary through the relevant functions. You can start or end the dialogue at any time by pressi ng the PTT button. You can also end the dialogue with the voice command CANCEL.
The dialogue is always automatically ended after carrying out an operation, e.g. after erasing the name from the phonebook.
The dialogue of the incoming call is i mmediately interrupted and you can accept the call by pressing the button .
If a voice command is not detected, the system answers with “ Sorry?” and a new entry can be performed. After the 3rd error the answer “ Cancel” is given and the dialogue is ended.
Optimum understanding of the voice commands depends on the following factors:
•Speak with a normal tone of voice wi thout intonation and excessive voice pauses.
•Avoid insufficient articulation.
•Close the doors, windows and sliding roof, in order to reduce or stop disturbing exterior noise.
•It is recommended to speak louder at higher speeds, so that the tone of your voice is louder than the increased surrounding noise.
•During the dialogue avoid additional nois e in the vehicle, e.g. simultaneously talking occupants.
•Do not speak, if the system makes an announcement.
•The microphone for voice control is directed to the driver and front passenger. Therefore the driver and the front passenger can operate the equipment.
WARNING
Pay attention primarily to the traffic si tuation! As the driver you are fully responsible for the traffic safety. Use the telephone system only to such an extent, so that you are in full control of your vehicle at any time.
Fig. 112 Button for switching on the voice control
NKO A05R 20 MR08.book Page 104 Wednesday, March 28, 2007 9:42 AM
Page 113 of 248

Communication112
In the modern business world as well as within the private sector the mobile communication gains increasi ngly on importance. Mobile phones from different manufacturers can be connected with the hands-free system by means of Blue- tooth. During the connecting procedure, no other mobile phone may be connected via Bluetooth with the hands-free system.
Up to four mobile phones can be connected to the hands-free system by means of Bluetooth, whereby only one mobile ph one can communicate via Bluetooth with the hands-free system. If a fifth mobile phone is connected to the handsfree- system, then the telephone, which has not been used together with the handsfree system for the longest period, is disconnected.
Establishing the Bluetooth connection
After switching on the ignition, the Blue tooth connection is automatically estab- lished for the already adapted mobile phone 3). You can hear an increasing tone sequence from the loudspeakers of the vehicle.
Disconnecting the Bluetooth connection
After withdrawing the ignition key, the Bluetooth connection is disonnected. You can hear an increasing tone sequence from the loudspeakers of the vehicle.
WARNING
•Pay attention primarily to the traffic situation! As the driver you are fully responsible for the traffic safety. Use the telephone system only to such an extent, so that you are in full control of your vehicle at any time - risk of acci- dent!
•In the event of air transport, the Bluetooth function of the handsfree- system must be switched off by a specialist garage.
Caution
Taking the mobile phone out of the adapter during the call can lead to interruption of the connection. When taking out th e mobile phone, the connection to the factory-fitted antenna is interrupted, this reduces the quality of the transmitting and receiving signal. This might result additionally in harmful radiation from the mobile phone in the interior of the ve hicle and the charging of the telephone battery is interrupted.
Note
•Not valid for all mobile phones which enable a communication via Bluetooth.
•Please operate your mobile phone exclusively with a suitable adapter, in order to keep a low radiation in the vehicle.
•Inserting the mobile phone into the adapter ensures an optimal sending and receiving power and offers at the same time the advantage of the battery charging.
•If you insert the mobile telephone in to the adapter, the connection is estab- lished via the interface in the adapter set and the Bluetooth connection is discon-nected. You can hear an incr easing tone sequence from the loudspeakers of the vehicle.
•Note that the range of the Bluetooth connection to the handsfree-system is limited to the vehicle interior. The range is dependent on local factors, e.g. obstacles between the devices and interferences with other devices. If your mobile phone is e.g. in a jacket pocket, this can lead to difficulties when establishing the Bluetooth connection with the handsfree-sy stem or the data transfer.
•If you have set the Portuguese language in the information display, it is used automatically for the mobile phone operat ion, as this is the language, which was entered during coding of the handsfree-system.
•On certain mobile phones with operating system, it is necessary to install on the mobile phone an application of the mobi le phone manufacturer, which enables the take-over of the phone phonebook via Bluetooth.
Mobile phones and tw o-way radio systems
We recommend that you have the installation of a mobile phone and two-way radio system in a vehicle carried out by a Škoda Service Partner.
Škoda Auto a.s. permits the operation of mobile phones and two-way radio systems with a professionally installed external aerial and a maximum transmission power of up to 10 watts.
Our Škoda Service Partners are also happy to inform you about the possibilities available for installing and operating mo bile telephones and radio transmitters which have an output greater than 10 watt s. The Škoda Service Partners can provide
NKO A05R 20 MR08.book Page 112 Wednesday, March 28, 2007 9:42 AM
Page 119 of 248

Passive Safety118
Before setting off
The driver is always fully respon sible for his occupants and for the
operating safety of the vehicle.
For your own safety and the safety of the people travelling with you, please pay attention to the following points before setting off.
•Ensure that the lighting and the turn signal system are functioning properly.
•Inspect the tyre inflation pressure.
•Ensure that all the windows offer a good visibility to the outside.
•Safely attach the items of luggage ⇒page 62, “Loading the luggage compart- ment”.
•Ensure that no objects can obstruct the pedal.
•Adjust the mirror, the front seat and the head restraint to match your body size.
•Point out to your occupants that the head restraints must be adjusted to match their body size.
•Protect the children in suitable child se ats with correctly fastened seat belts ⇒ page 137, “Transporting children safely”.
•Adopt the correct seated position. Also inform your occupants to adopt the correct seated position.
•Fasten the seat belt correctly. Also inform your occupants to properly fasten the seat belts ⇒page 124, “How are seat belts correctly fastened?”.
What influences the driving safety?
The driving safety is primarily dete rmined by the style of driving and
the personal behaviour of all the occupants.
The driver is fully responsible for himself and his occupants. If your driving safety is effected, you place yourself and the oncomi ng traffic at risk. Please refer to the following guidelines.
•Do not get distracted from concentrating on the traffic situation, e.g. by your occupants or mobile phone calls.
•Never drive when your driving ability is impaired, e.g. through medication, alcohol, drugs.
•Keep to the traffic regulations and the permissible speed limit.
•Adjust the driving speed at all times to the road condition as well as to the traffic and weather conditions.
•Take regular breaks on long journe ys - at the latest every two hours.
NKO A05R 20 MR08.book Page 118 Wednesday, March 28, 2007 9:42 AM
Page 146 of 248

Intelligent Technology145
Using the systemSafetyDriving TipsGeneral MaintenanceBreakdown assistancePraktikTechnical Data
Driving Tips
Intelligent Technology
Electronic stability programme (ESP)*
General
General
The ESP aids you maintain control of your vehicle in situations in borderline driving situations such as when negotiating a curve too fast. The risk of skidding is reduced and your car thus offers greater driving stability depending on the conditions of the road surface. This occurs at all speeds.
The following systems are integrated into the electronic stability programme:
•Electronic Differential Lock (EDL),
•Traction control system (TCS),
•Antilock brake system (ABS),
•Brake Assist.
Operating principle
The ESP switches on automatically when the engine is started and then conducts a self-test. The ESP control unit processes data from the individual systems. It also processes additional measurement data which are supplied by highly sensitive sensors: the rotational velocity of the vehi cle about its vertical axis, the lateral accel- eration of the vehicle, the brakin g pressure and the steering angle.
The direction which the driver wishes to ta ke is determined based on the steering angle and the speed of the vehicle and is constantly compared with the actual behaviour of the vehicle. If differences exis t, such as the car beginning to skid, the ESP will automatically brake the appropriate wheel.
The car is stabilised again by the forces which take effect when the wheel is braked. Intervention into the brake system takes place primarily on the outer front wheel of a vehicle which tends to oversteer (tendency for the rear of the vehicle to break away) while occurs this is on the inner re ar wheel of a vehicle which tends to under- steer (tendency to shift out of the curve). This braking control cycle is accompanied by noises.
The ESP operates in combination with the ABS ⇒page 149, “Antilock brake system (ABS)*”. If there is a fault in the ABS system, the ESP also does not operate.
The ESP warning light ⇒page 27 lights up in the instrument cluster when there is a fault on the ESP.
Switching off
You can switch the ESP off and on again as you wish, by pressing the button ⇒ fig. 145. The ESP warning light ⇒page 27 lights up in the instrument cluster when the ESP is switched off.
The ESP should normally always be switched on. It may be good practice in certain exceptional cases, such as when you wish to have wheel slip, to switch off the system.
Examples:
Fig. 145 ESP switch
NKO A05R 20 MR08.book Page 145 Wednesday, March 28, 2007 9:42 AM
Page 161 of 248

Towing a trailer160
Towing a trailer
To w i n g a t r a i l e r
Technical requirements
The towing device must satisfy certain technical requirements.
Your vehicle is designed primarily for transporting persons and luggage. It can, however, also be used for towing a traile r - provided certain technical equipment is fitted.
If your vehicle has been eq uipped with a towing device from Škoda Original Acces- sories, then the towing device satisfies all technical and legal requirements.
Your vehicle is fitted with a 13-pin po wer socket for the electrical connection between the vehicle and trailer. If th e trailer which you wish to tow has a 7-pin connector , you can use a suitable adapter 5) from Škoda original accessories.
This work must be carried out in accordan ce with the manufacturer's specifications if a towing device is retrofitted.
Škoda Service Partners are familiar with de tails relating to retrofitting a towing device and for any necessary modi fications to the cooling system.
WARNING
We recommend that you have the towing device from Škoda original acces- sories installed by a Škoda Service Partner. He is familiar with all the relevant details relating to retrofitting such equi pment. There is a risk of an accident if the towing device is not properly fitted!
General Maintenance
There are a number of points to pay attention to when towing a
trailer.
Trailer load
The permissible trailer load must on no account be exceeded.
You can negotiate appr opriately steeper inclines and descents if you do not make full use of the perm issible trailer load.
The trailer loads specified only apply for altitudes up to 1 000 metres above mean sea level. The fact that the engine power ou tput drops with increasing height due to a lowering of air pressure and thus the abil ity to climb, means that the towed weight must be reduced by 10% for every further increase of 1 000 metres in height above sea level. The towed weight is the weight of the (laden) vehicle and the (laden) trailer together. One should take this into account before driving up to higher alti- tudes.
The trailer and drawbar load information on the type plate of the towing device are merely test data for the tow ing device The data relating to your vehicle, which is often less than this test data, can be found in your vehicle registration documents.
Distribution of the load
Distribute the load in the trailer in such a way that any heavy items are located as close as possible to the axle. Secure the items to prevent them slipping.
Tyre pressure
Correct the tyre inflation pressure on yo ur vehicle for that of “fully laden”, ⇒ page 187. The inflation pressure of the tyres fitted to the trailer adjust in accord- ance with the manufacturer's recommendation.
Exterior mirrors
You have to have additional exterior mirrors fitted if you are not able to see the traffic behind the trailer with the standard rear-view mirrors. Both exterior mirrors 5)In some countries the adapter is supplied with the towing device.
NKO A05R 20 MR08.book Page 160 Wednesday, March 28, 2007 9:42 AM