2007 NISSAN VERSA emergency rear
[x] Cancel search: emergency rearPage 28 of 304
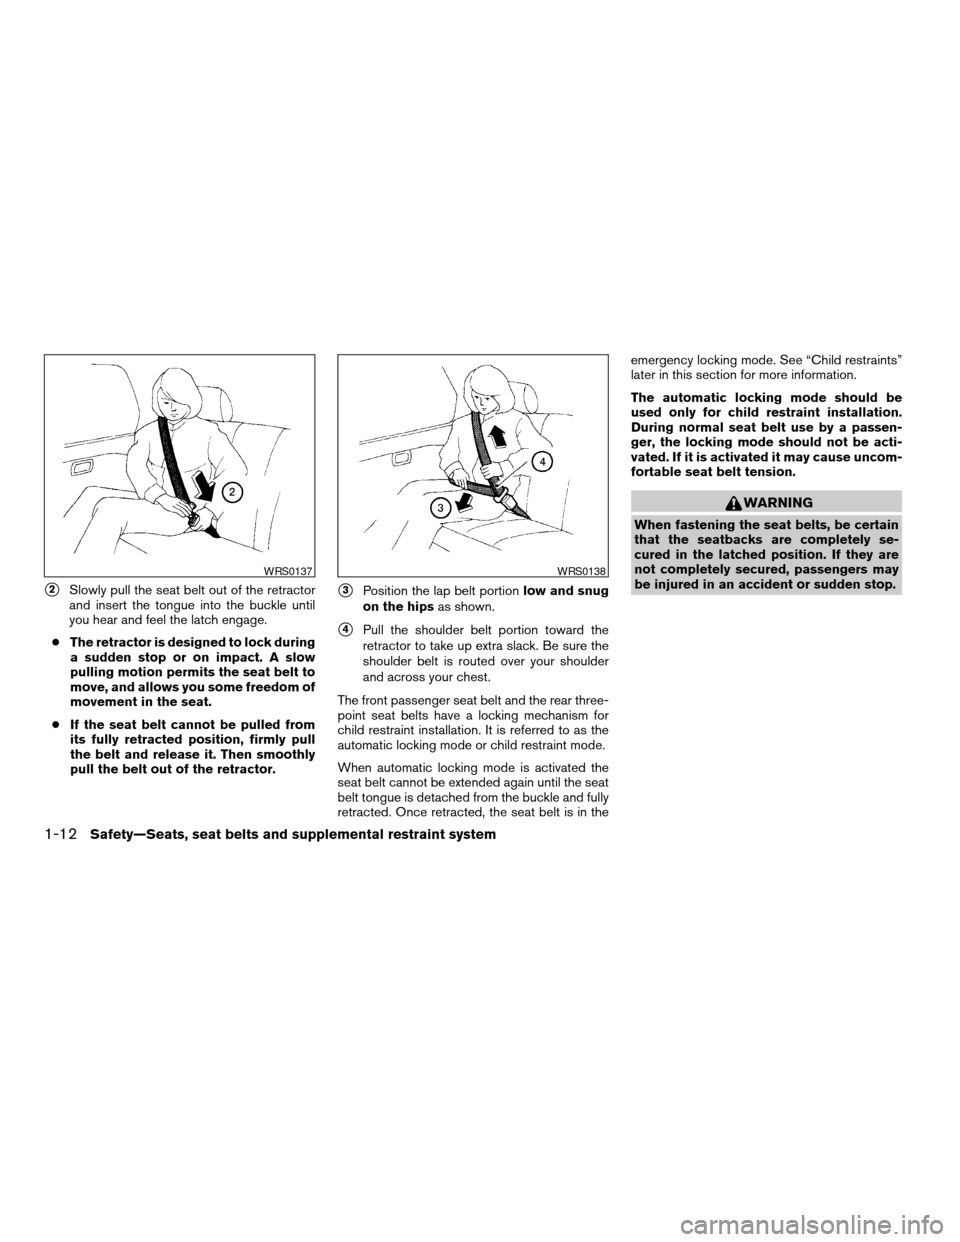
s2Slowly pull the seat belt out of the retractor
and insert the tongue into the buckle until
you hear and feel the latch engage.
cThe retractor is designed to lock during
a sudden stop or on impact. A slow
pulling motion permits the seat belt to
move, and allows you some freedom of
movement in the seat.
cIf the seat belt cannot be pulled from
its fully retracted position, firmly pull
the belt and release it. Then smoothly
pull the belt out of the retractor.s3Position the lap belt portionlow and snug
on the hipsas shown.
s4Pull the shoulder belt portion toward the
retractor to take up extra slack. Be sure the
shoulder belt is routed over your shoulder
and across your chest.
The front passenger seat belt and the rear three-
point seat belts have a locking mechanism for
child restraint installation. It is referred to as the
automatic locking mode or child restraint mode.
When automatic locking mode is activated the
seat belt cannot be extended again until the seat
belt tongue is detached from the buckle and fully
retracted. Once retracted, the seat belt is in theemergency locking mode. See “Child restraints”
later in this section for more information.
The automatic locking mode should be
used only for child restraint installation.
During normal seat belt use by a passen-
ger, the locking mode should not be acti-
vated. If it is activated it may cause uncom-
fortable seat belt tension.
WARNING
When fastening the seat belts, be certain
that the seatbacks are completely se-
cured in the latched position. If they are
not completely secured, passengers may
be injured in an accident or sudden stop.
WRS0137WRS0138
1-12Safety—Seats, seat belts and supplemental restraint system
ZREVIEW COPYÐ2007 Versa(vrs)
Owners ManualÐUSA_English(nna)
10/05/06Ðdebbie
X
Page 41 of 304
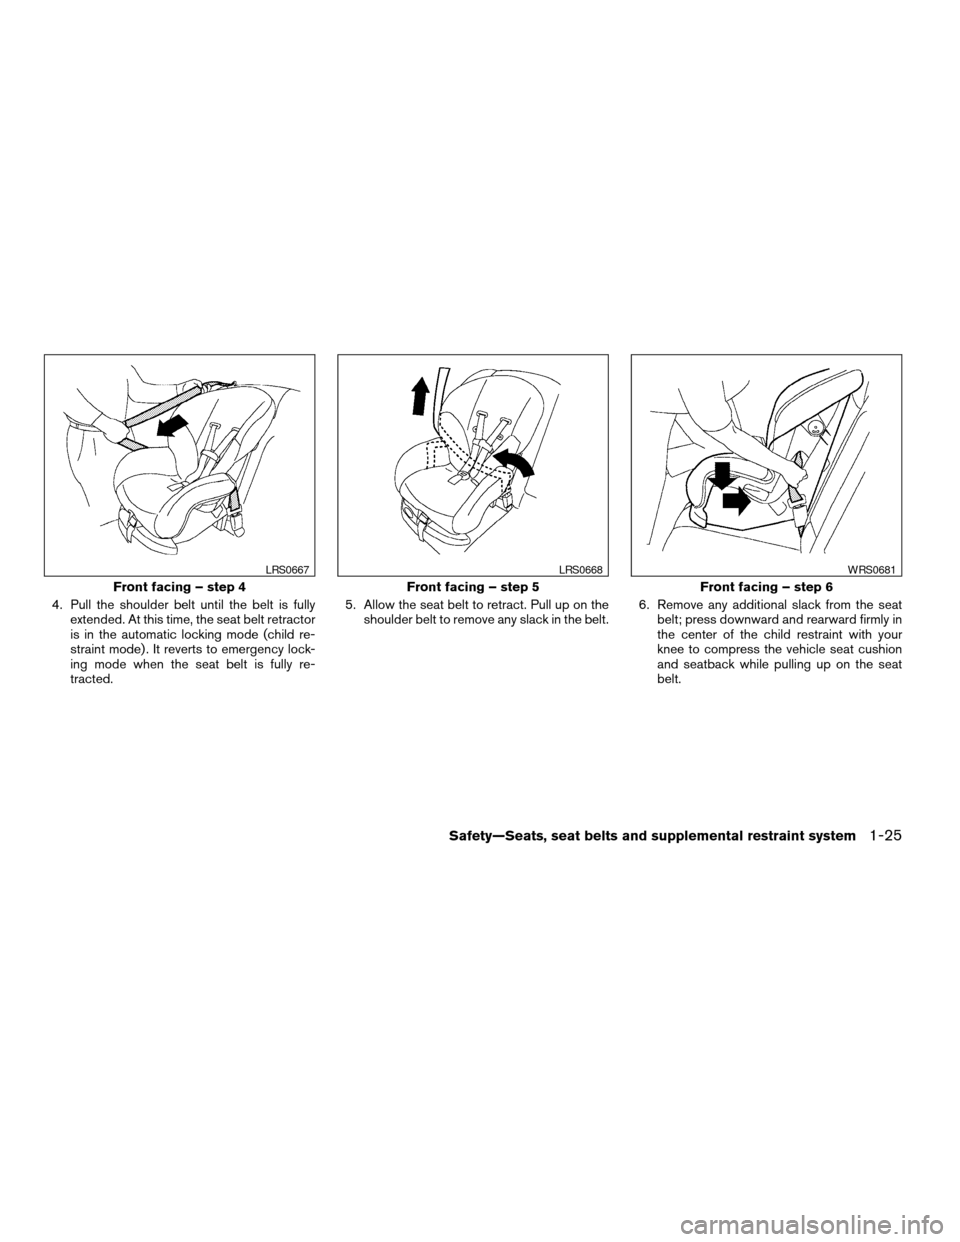
4. Pull the shoulder belt until the belt is fully
extended. At this time, the seat belt retractor
is in the automatic locking mode (child re-
straint mode) . It reverts to emergency lock-
ing mode when the seat belt is fully re-
tracted.5. Allow the seat belt to retract. Pull up on the
shoulder belt to remove any slack in the belt.6. Remove any additional slack from the seat
belt; press downward and rearward firmly in
the center of the child restraint with your
knee to compress the vehicle seat cushion
and seatback while pulling up on the seat
belt.
Front facing – step 4
LRS0667
Front facing – step 5
LRS0668
Front facing – step 6
WRS0681
Safety—Seats, seat belts and supplemental restraint system1-25
ZREVIEW COPYÐ2007 Versa(vrs)
Owners ManualÐUSA_English(nna)
10/05/06Ðdebbie
X
Page 43 of 304
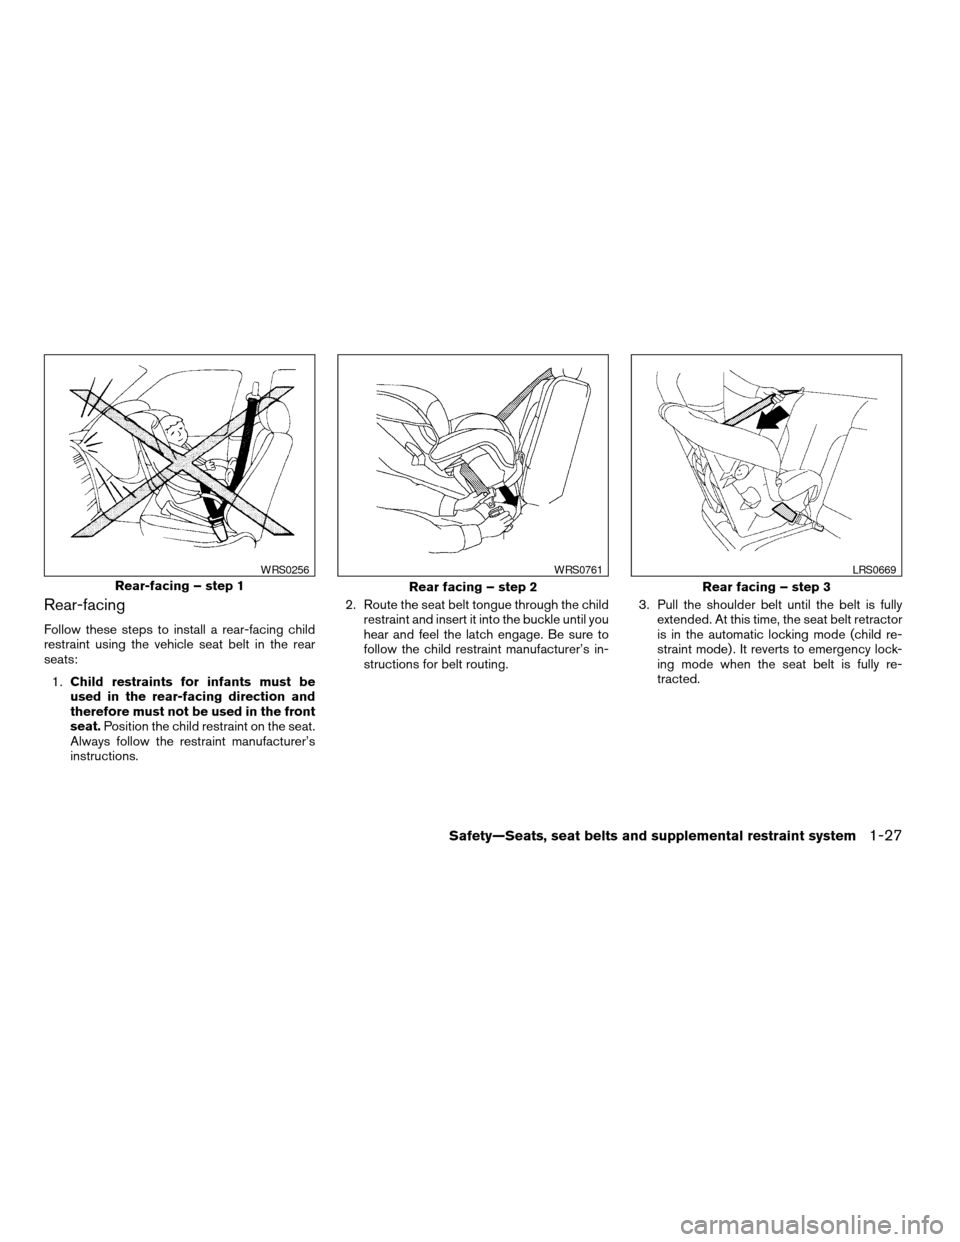
Rear-facing
Follow these steps to install a rear-facing child
restraint using the vehicle seat belt in the rear
seats:
1.Child restraints for infants must be
used in the rear-facing direction and
therefore must not be used in the front
seat.Position the child restraint on the seat.
Always follow the restraint manufacturer’s
instructions.2. Route the seat belt tongue through the child
restraint and insert it into the buckle until you
hear and feel the latch engage. Be sure to
follow the child restraint manufacturer’s in-
structions for belt routing.3. Pull the shoulder belt until the belt is fully
extended. At this time, the seat belt retractor
is in the automatic locking mode (child re-
straint mode) . It reverts to emergency lock-
ing mode when the seat belt is fully re-
tracted.
Rear-facing – step 1
WRS0256
Rear facing – step 2
WRS0761
Rear facing – step 3
LRS0669
Safety—Seats, seat belts and supplemental restraint system1-27
ZREVIEW COPYÐ2007 Versa(vrs)
Owners ManualÐUSA_English(nna)
10/05/06Ðdebbie
X
Page 212 of 304
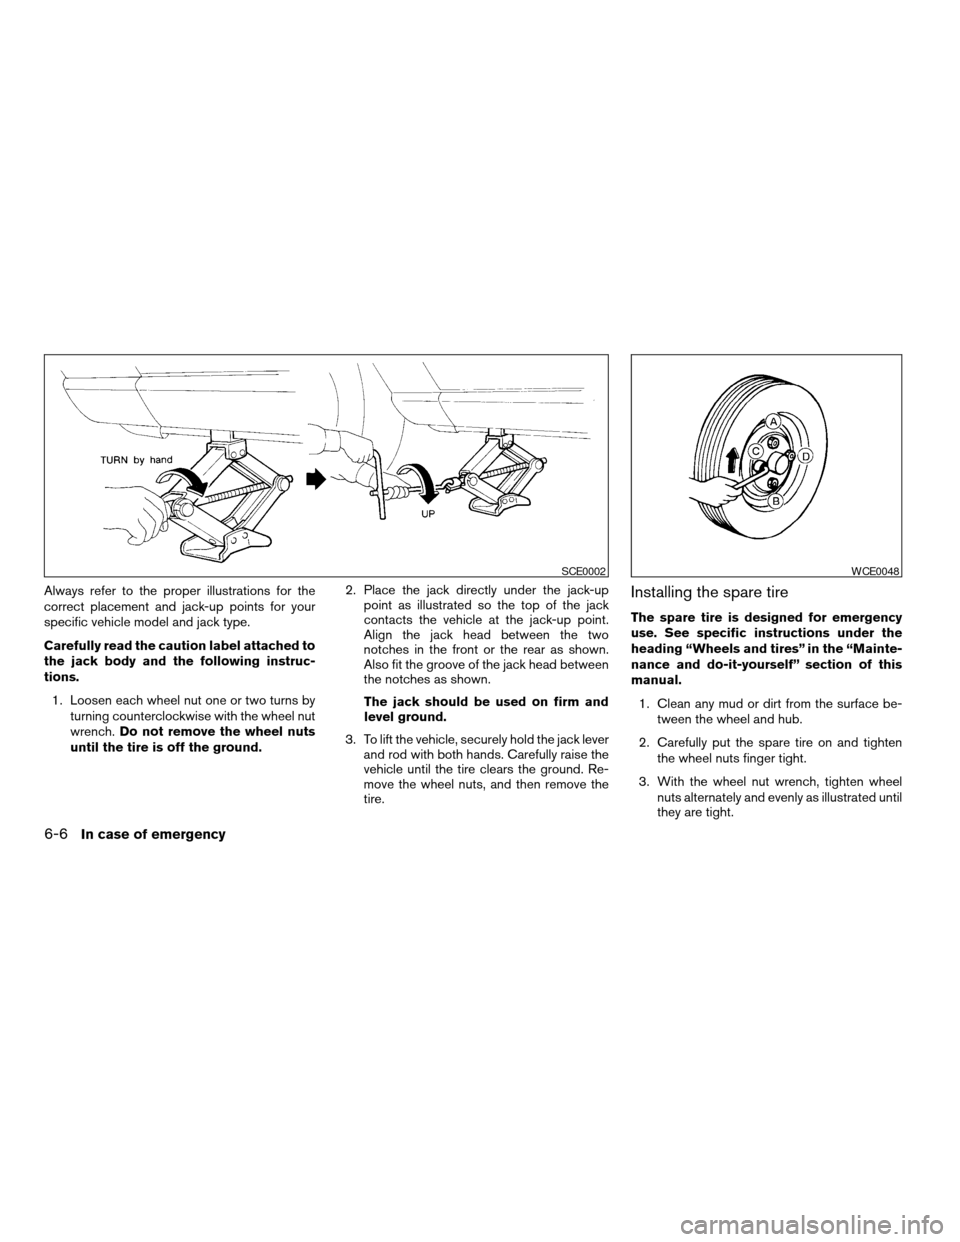
Always refer to the proper illustrations for the
correct placement and jack-up points for your
specific vehicle model and jack type.
Carefully read the caution label attached to
the jack body and the following instruc-
tions.
1. Loosen each wheel nut one or two turns by
turning counterclockwise with the wheel nut
wrench.Do not remove the wheel nuts
until the tire is off the ground.2. Place the jack directly under the jack-up
point as illustrated so the top of the jack
contacts the vehicle at the jack-up point.
Align the jack head between the two
notches in the front or the rear as shown.
Also fit the groove of the jack head between
the notches as shown.
The jack should be used on firm and
level ground.
3. To lift the vehicle, securely hold the jack lever
and rod with both hands. Carefully raise the
vehicle until the tire clears the ground. Re-
move the wheel nuts, and then remove the
tire.Installing the spare tire
The spare tire is designed for emergency
use. See specific instructions under the
heading “Wheels and tires” in the “Mainte-
nance and do-it-yourself” section of this
manual.
1. Clean any mud or dirt from the surface be-
tween the wheel and hub.
2. Carefully put the spare tire on and tighten
the wheel nuts finger tight.
3. With the wheel nut wrench, tighten wheel
nuts alternately and evenly as illustrated until
they are tight.
SCE0002WCE0048
6-6In case of emergency
ZREVIEW COPYÐ2007 Versa(vrs)
Owners ManualÐUSA_English(nna)
10/05/06Ðdebbie
X
Page 218 of 304
CAUTION
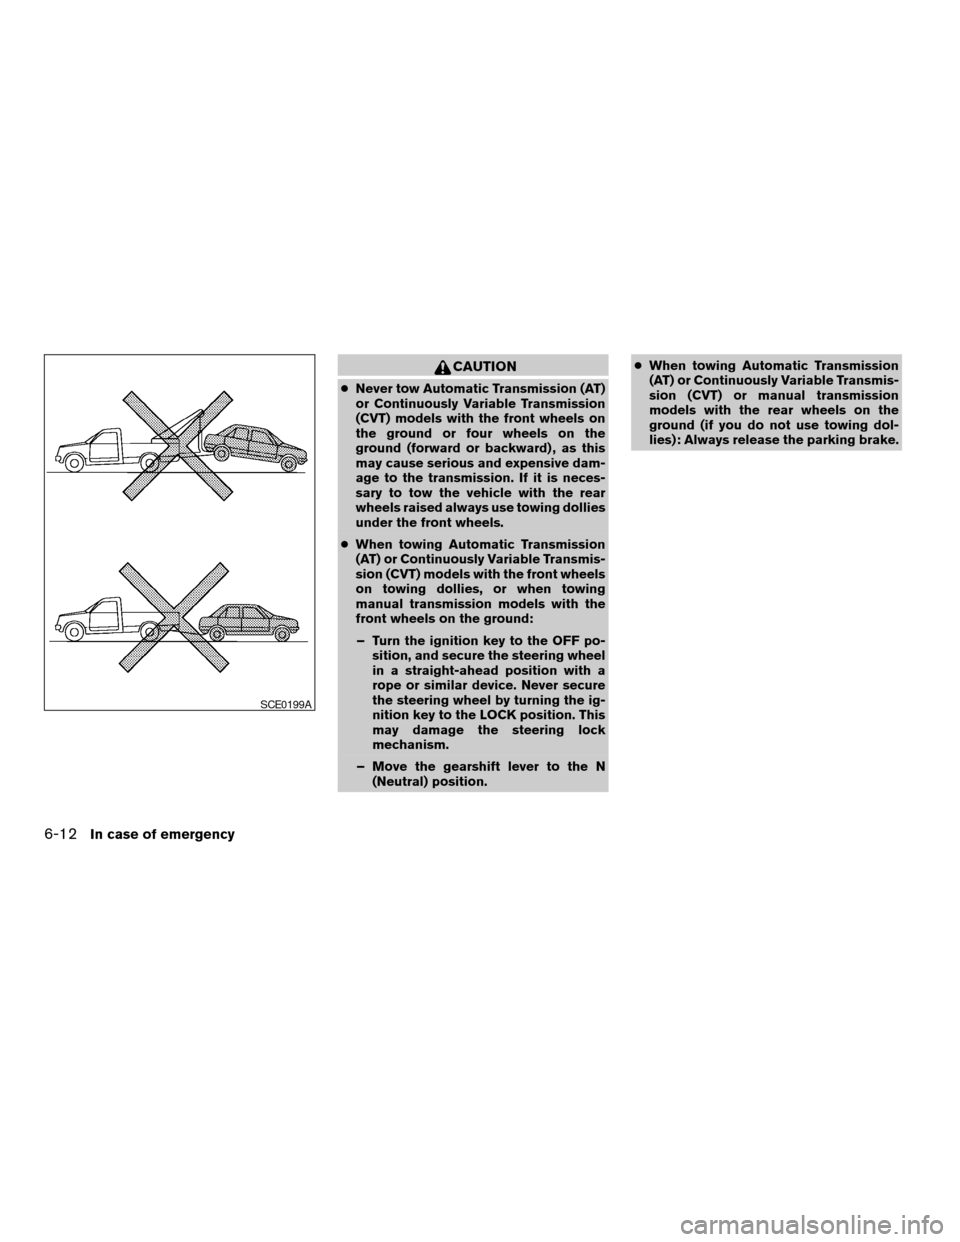
cNever tow Automatic Transmission (AT)
or Continuously Variable Transmission
(CVT) models with the front wheels on
the ground or four wheels on the
ground (forward or backward) , as this
may cause serious and expensive dam-
age to the transmission. If it is neces-
sary to tow the vehicle with the rear
wheels raised always use towing dollies
under the front wheels.
cWhen towing Automatic Transmission
(AT) or Continuously Variable Transmis-
sion (CVT) models with the front wheels
on towing dollies, or when towing
manual transmission models with the
front wheels on the ground:
– Turn the ignition key to the OFF po-
sition, and secure the steering wheel
in a straight-ahead position with a
rope or similar device. Never secure
the steering wheel by turning the ig-
nition key to the LOCK position. This
may damage the steering lock
mechanism.
– Move the gearshift lever to the N
(Neutral) position.cWhen towing Automatic Transmission
(AT) or Continuously Variable Transmis-
sion (CVT) or manual transmission
models with the rear wheels on the
ground (if you do not use towing dol-
lies): Always release the parking brake.
SCE0199A
6-12In case of emergency
ZREVIEW COPYÐ2007 Versa(vrs)
Owners ManualÐUSA_English(nna)
10/05/06Ðdebbie
X
Page 219 of 304
VEHICLE RECOVERY (freeing a stuck
vehicle)
Front
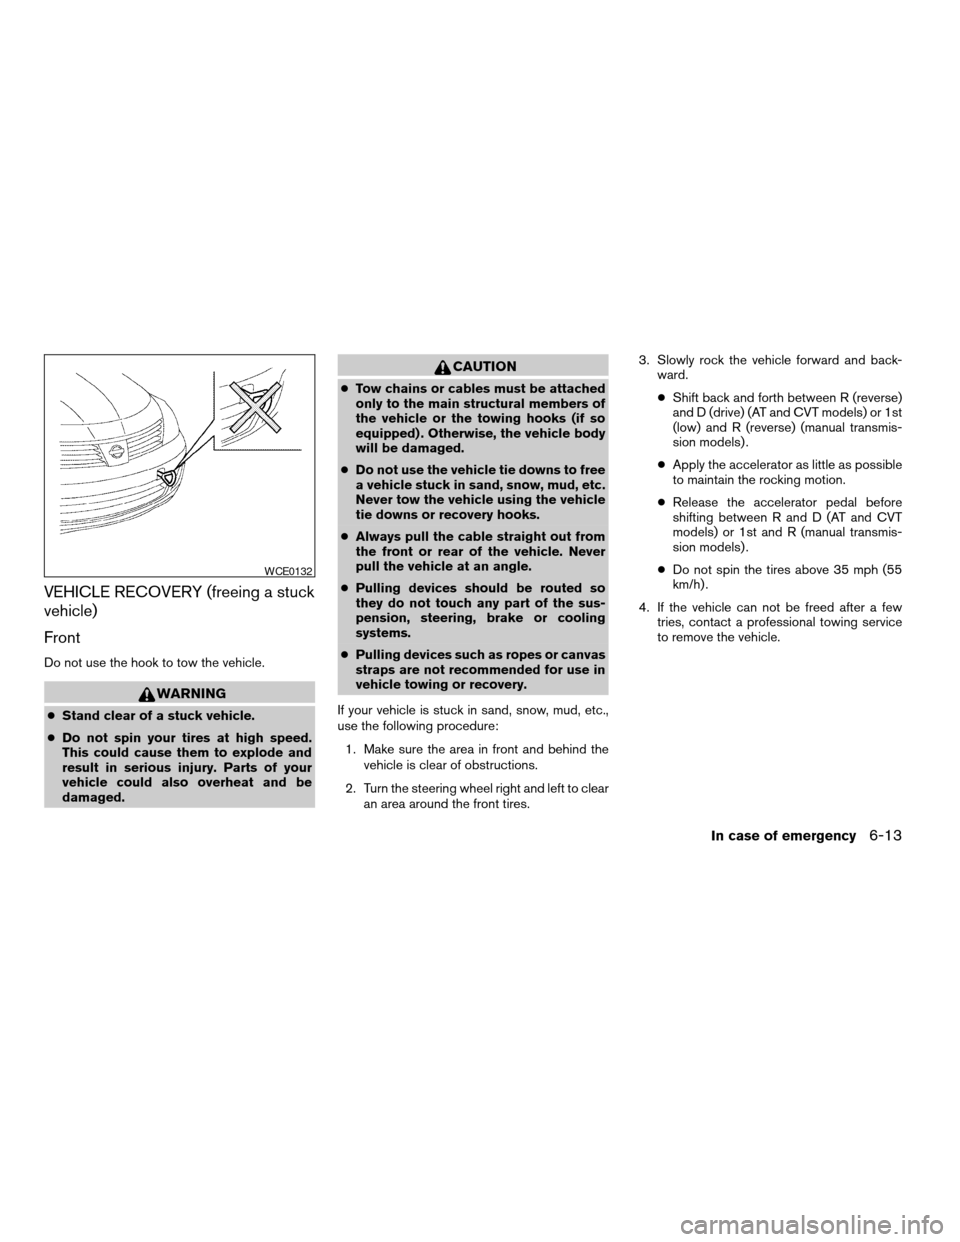
Do not use the hook to tow the vehicle.
WARNING
cStand clear of a stuck vehicle.
cDo not spin your tires at high speed.
This could cause them to explode and
result in serious injury. Parts of your
vehicle could also overheat and be
damaged.
CAUTION
cTow chains or cables must be attached
only to the main structural members of
the vehicle or the towing hooks (if so
equipped) . Otherwise, the vehicle body
will be damaged.
cDo not use the vehicle tie downs to free
a vehicle stuck in sand, snow, mud, etc.
Never tow the vehicle using the vehicle
tie downs or recovery hooks.
cAlways pull the cable straight out from
the front or rear of the vehicle. Never
pull the vehicle at an angle.
cPulling devices should be routed so
they do not touch any part of the sus-
pension, steering, brake or cooling
systems.
cPulling devices such as ropes or canvas
straps are not recommended for use in
vehicle towing or recovery.
If your vehicle is stuck in sand, snow, mud, etc.,
use the following procedure:
1. Make sure the area in front and behind the
vehicle is clear of obstructions.
2. Turn the steering wheel right and left to clear
an area around the front tires.3. Slowly rock the vehicle forward and back-
ward.
cShift back and forth between R (reverse)
and D (drive) (AT and CVT models) or 1st
(low) and R (reverse) (manual transmis-
sion models) .
cApply the accelerator as little as possible
to maintain the rocking motion.
cRelease the accelerator pedal before
shifting between R and D (AT and CVT
models) or 1st and R (manual transmis-
sion models) .
cDo not spin the tires above 35 mph (55
km/h) .
4. If the vehicle can not be freed after a few
tries, contact a professional towing service
to remove the vehicle.
WCE0132
In case of emergency6-13
ZREVIEW COPYÐ2007 Versa(vrs)
Owners ManualÐUSA_English(nna)
10/05/06Ðdebbie
X
Page 220 of 304
Rear
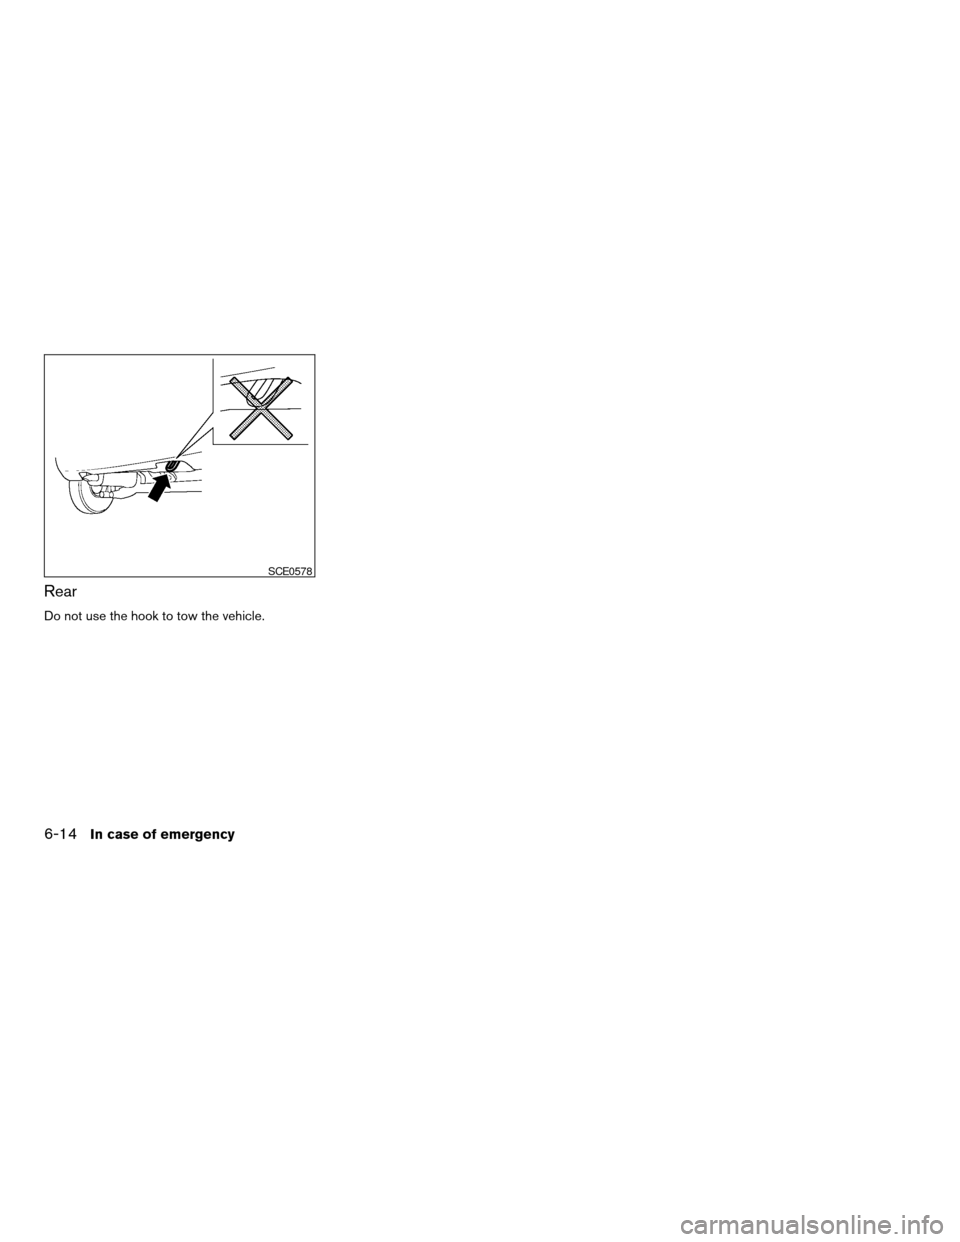
Do not use the hook to tow the vehicle.
SCE0578
6-14In case of emergency
ZREVIEW COPYÐ2007 Versa(vrs)
Owners ManualÐUSA_English(nna)
10/05/06Ðdebbie
X
Page 281 of 304
Use the following steps to mount the front license
plate:
Before mounting the license plate, confirm that
the following parts are enclosed in the plastic
bag:
cLicense plate bracket
cLicense plate bracket screws x 2
cLicense plate screws x 2
cScrew grommets x 2
1. Hold the license plate bracket
s1and make
a shallow hole in the bumper fascia at the
location marks (small dimples) using a 0.39
in (10 mm) drill. To avoid damaging the area
behind the fascia, apply only light pressure
to the drill.
2. Insert the grommets
s2into the holes in the
bumper fascia.
3. Insert a small flat-bladed screwdriver into
the grommet hole to turn the threaded part of
the grommet 90°.
4. Mount the license plate bracket using the
two longer screws
s3.
5. Use the two shorter hex head screws to
mount the license plate to the license plate
bracket using the two M6-14 mm bolts.
WARNING
cIt is extremely dangerous to ride
in a cargo area inside a vehicle. In
a collision, people riding in these
areas are more likely to be seri-
ously injured or killed.
cDo not allow people to ride in any
area of your vehicle that is not
equipped with seats and seat
belts.
cBe sure everyone in your vehicle
is in a seat and using a seat belt
properly.
TERMS
It is important to familiarize yourself with
the following terms before loading your
vehicle:
cCurb Weight (actual weight of your
vehicle) - vehicle weight including:
standard and optional equipment, flu-
ids, emergency tools, and spare tire
assembly. This weightdoes notin-
clude passengers and cargo.cGVW (Gross Vehicle Weight) - curb
weight plus the combined weight of
passengers and cargo.
cGVWR (Gross Vehicle Weight Rat-
ing) - maximum total combined
weight of the unloaded vehicle, pas-
sengers, luggage, hitch, trailer
tongue load and any other optional
equipment. This information is lo-
cated on the F.M.V.S.S./C.M.V.S.S.
label.
cGAWR (Gross Axle Weight Rating) -
maximum weight (load) limit specified
for the front or rear axle. This informa-
tion is located on the
F.M.V.S.S./C.M.V.S.S. label.
cGCWR (Gross Combined Weight
rating) - The maximum total weight
rating of the vehicle, passengers,
cargo, and trailer.
VEHICLE LOADING INFORMATION
Technical and consumer information9-13
ZREVIEW COPYÐ2007 Versa(vrs)
Owners ManualÐUSA_English(nna)
10/05/06Ðdebbie
X