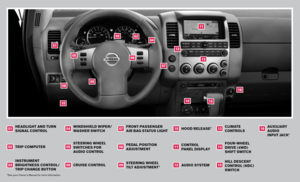
Page 9 of 14

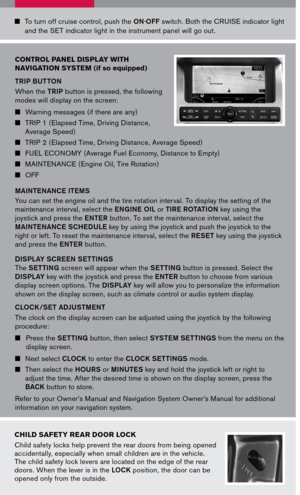
SEEK /TRACK BUTTON
To scan quickly through each broadcasting station, press the SEEK/TRACK button.
To skip from one tr")
0201
09
07
0403
05
FM/AM/SAT* RADIO WITH CD CHANGER (if so equipped)
SEEK /TRACK BUTTON
To scan quickly through each broadcasting station, press the SEEK/TRACK button.
To skip from one track to another on a CD, press the SEEK /TRACK button.
DISP BUTTON
To show CD or SAT* information in the audio display, press the DISP button.
TUNE/FOLDER.CAT FOLDER BUTTON
To manually tune the radio, press the TUNE/FOLDER · CAT button or turn the
FOLDER · CAT knob.
When the TUNE/FOLDER · CAT button is pressed while a CD is playing, it will fast
forward or rewind. When the button is released, the CD will play at normal speed.
MP3 PLAYBACK (if so equipped)
In addition to playing audio CDs, the audio system can play MP3 files recorded
on CD-ROM, CD-R, and CD-RW discs. Each disc can have a maximum of
8 folder levels and 255 folders. A total of 512 MP3 files can be played back.
During MP3 playback, some recorded ID3 tag information can be displayed by
pressing the DISP button. Press the TUNE/FOLDER · CAT button to navigate the
MP3 folders.
SCAN/RPT BUTTON
Press the SCAN/RPT button to stop at each broadcasting station ( FM, AM or SAT*)
for 5 seconds. Pressing the button again during this 5-second period will stop scan
tuning and the radio will remain tuned to that station.
PRESET A · B · C BUTTON
Press the PRESET A · B · C button until you reach the desired setting. The radio is
equipped with three separate banks, each with six station presets. You may store
any combination of FM, AM or SAT* radio presets on each bank.
FM/AM/SAT* BUTTONS
Pressing the FM.AM or SAT* radio select button will change the band to either FM,
AM or SAT* radio stations.
06
04
06
03
02
01
09
08
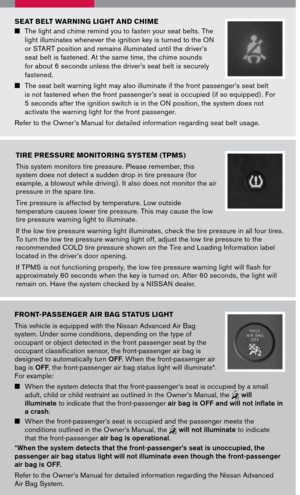
AIR RECIRCULATION BUTTON
Press the air recirculation button to recirculate air inside the vehicle.
Press the air recirculation button again to turn air recirculation off.
The air recirculation mode cannot be selected if the air flow control dial is in the defrost position .
05
Page 10 of 14

07AUX BUTTON
Press the AUX button to play a compatible device such as an MP3 player when it is
plugged into the auxiliary jack.
STATION AND CD SELECT BUTTONS
To store a station in a preset you must first select the A , B, or C memory bank by
pressing the PRESET A · B · C button and tune to the desired FM, AM or SAT*
station. Then press and hold the desired station select button for at least 2 seconds.
When the preset indicator illuminates, a beep will sound, indicating memorization
is complete. To retrieve a previously set station, select the memory bank where the
preset was set, then press the corresponding station select button.
TUNING AND AUDIO CONTROL KNOB
To manually tune the radio, turn the TUNE knob. Adjust the Bass, Midrange, Treble,
Fade, Balance, and Speed Sensitive Volume ( SSV) (if so equipped), press the
AUDIO knob until the desired mode appears in the display. Then turn the TUNE knob
to adjust to the desired level.
09
* SAT presets are only available on SAT equipped vehicles.
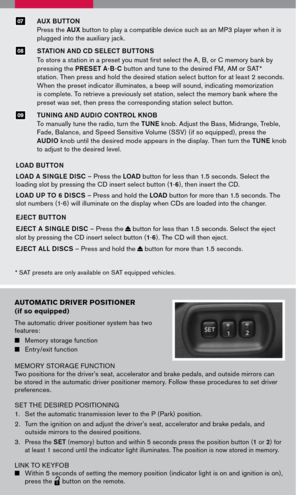
autoMatic driVer P ositioner
(if so equipped)
The automatic driver positioner system has two features:
Memory storage function
Entry/exit function
MEMORY STOR AGE FUNCTIONTwo positions for the driver’s seat, accelerator and brake pedals, and outside mirrors can be stored in the automatic driver positioner memory. Follow these procedures to set driver preferences.
SET THE DESIRED POSITIONING
1. Set the automatic transmission lever to the P ( Park) position.
2. Turn the ignition on and adjust the driver’s seat, accelerator and brake pedals, and
outside mirrors to the desired positions.
3. Press the SET (memory) button and within 5 seconds press the position button (1 or 2) for at least 1 second until the indicator light illuminates. The position is now stored in memory.
LINK TO KEYFOB Within 5 seconds of setting the memory position (indicator light is on and ignition is on), press the
lpd0151
button on the remote.
08
LOAD BUT TON
LOAD A SINGLE DISC – Press the LOAD button for less than 1.5 seconds. Select the loading slot by pressing the CD insert select button (1-6), then insert the CD.
LOAD UP TO 6 DISCS – Press and hold the LOAD button for more than 1.5 seconds. The slot numbers (1-6) will illuminate on the display when CDs are loaded into the changer.
EJECT BUT TON
EJECT A SINGLE DISC – Press the button for less than 1.5 seconds. Select the eject
slot by pressing the CD insert select button (1-6). The CD will then eject.
EJECT ALL DISCS – Press and hold the button for more than 1.5 seconds.
Page 11 of 14

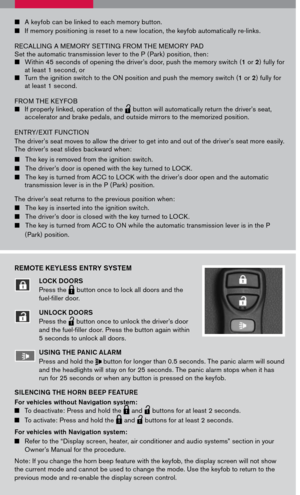
REMOTE KEYLESS ENTRY SYSTEM
LOCK DOORS
Press the LPD0150 button once to lock all doors and the
fuel-filler door.
UNLOCK DOORS
Press the
lpd0151
button once to unlock the driver’s door and the fuel-filler door. Press the button again within 5 seconds to unlock all doors.
U SING THE PANIC ALARM
Press and hold the button for longer than 0.5 seconds. The panic alarm will sound and the headlights will stay on for 25 seconds. The panic alarm stops when it has run for 25 seconds or when any button is pressed on the keyfob.
SILENCING THE HORN BEEP FEATURE
For vehicles without Navigation system: To deactivate: Press and hold the LPD0150 and
lpd0151
buttons for at least 2 seconds.
To activate: Press and hold the LPD0150 and
lpd0151
buttons for at least 2 seconds.
For vehicles with Navigation system:
Refer to the “Display screen, heater, air conditioner and audio systems” section in your Owner’s Manual for the procedure.
Note: If you change the horn beep feature with the keyfob, the display screen will not show the current mode and cannot be used to change the mode. Use the keyfob to return to the previous mode and re-enable the display screen control.
A keyfob can be linked to each memory button.
If memory positioning is reset to a new location, the keyfob automatically re-links.
RECALLING A MEMORY SET TING FROM THE MEMORY PAD Set the automatic transmission lever to the P ( Park) position, then: Within 45 seconds of opening the driver’s door, push the memory switch (1 or 2) fully for at least 1 second, or Turn the ignition switch to the ON position and push the memory switch (1 or 2) fully for at least 1 second.
FROM THE KEYFOB If properly linked, operation of the
lpd0151
button will automatically return the driver’s seat, accelerator and brake pedals, and outside mirrors to the memorized position.
ENTRY/ EXIT FUNCTION
The driver’s seat moves to allow the driver to get into and out of the driver’s seat more easily. The driver’s seat slides backward when:
The key is removed from the ignition switch.
The driver’s door is opened with the key turned to LOCK.
The key is turned from ACC to LOCK with the driver’s door open and the automatic transmission lever is in the P ( Park) position.
The driver’s seat returns to the previous position when:
The key is inserted into the ignition switch.
The driver’s door is closed with the key turned to LOCK.
The key is turned from ACC to ON while the automatic transmission lever is in the P
( Park) position.
Page 12 of 14

The accelerator and brake pedals can be adjusted for your driving comfort.
Adjust the pedals when the automatic transmission selector lever is in P")
Pedal P osition adJust Ment (if so equipped)
The accelerator and brake pedals can be adjusted for your driving comfort.
Adjust the pedals when the automatic transmission selector lever is in P ( Park).
Push 01 to move the position of the pedals forward. Push 02 to move the position of the pedals backward.02
01
tri P co MP uter (if so equipped)
The trip computer readout is in the speedometer display. It can show the following items:
TRIP “A” – Measures the distance of one specific trip.
TRIP “B” – Measures the distance of a second specific trip.
DISTANCE TO EMPT Y (dte) – Estimates the distance that can be driven before refueling.
AVER AGE SPEED – (mph or km /h) Shows the average speed since the last reset.
AVER AGE FUEL CONSUMPTION – (mpg or l /100km) Shows the average fuel consumption since the last reset.
JOURNEY TIME – Shows the time since the last reset.
RESET – Press the CHANGE button on the instrument panel for more than 1 second to reset the trip odometer to zero.
With the ignition key in the ON position or the vehicle running, you can select an item by pressing the CHANGE button on the instrument panel.
instru Ment Brightness control /tri P change
B utton
The instrument brightness control operates when the headlight control switch is in the or position.
Turn the control to adjust the brightness of the instrument panel lights.
Press the change button to select trip computer features. See above for more information on the trip computer.
front seat ad Just Ments
With manual seats (passenger’s side, if so equipped):
Pull up on the lever under the front of the seat and slide backward or forward; release.
Lift the lever on the side of the seat to adjust your seatback backward or forward; release when you have found a comfortable
angle and the seat belt fits properly.
With power seats (if so equipped):
Move the control 01 forward or backward to adjust the seat cushion forward or backward.
Pull up 01 to raise the seat cushion; press down to lower the cushion.
0102
Page 13 of 14
 Your driver’s seat has a lumbar support; adjust it by movi")
Push the switch 02 forward to move the seatback forward; push it back to move the seatback backward.
LUMBAR SUPPORT (if so equipped) Your driver’s seat has a lumbar support; adjust it by moving the lever
03 up or down.
03
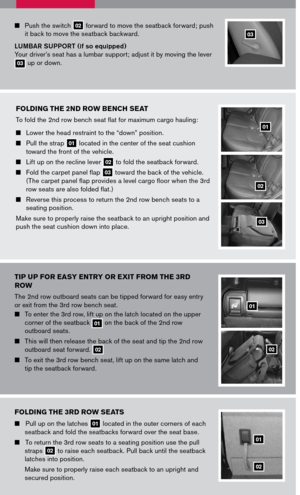
folding the 3rd row seats
Pull up on the latches 01 located in the outer corners of each seatback and fold the seatbacks forward over the seat base.
To return the 3rd row seats to a seating position use the pull straps 02 to raise each seatback. Pull back until the seatback latches into position.
Make sure to properly raise each seatback to an upright and
secured position.
folding the 2nd row Bench seat
To fold the 2nd row bench seat flat for maximum cargo hauling:
Lower the head restraint to the “down” position.
Pull the strap 01 located in the center of the seat cushion toward the front of the vehicle. Lift up on the recline lever 02 to fold the seatback forward.
Fold the carpet panel flap 03 toward the back of the vehicle. (The carpet panel flap provides a level cargo floor when the 3rd row seats are also folded flat.)
Reverse this process to return the 2nd row bench seats to a seating position.
Make sure to properly raise the seatback to an upright position and push the seat cushion down into place.
01
02
03
01
02
ti P uP for eas Y entr Y or exit fro M the 3rd
row
The 2nd row outboard seats can be tipped forward for easy entry or exit from the 3rd row bench seat.
To enter the 3rd row, lift up on the latch located on the upper corner of the seatback 01 on the back of the 2nd row outboard seats.
This will then release the back of the seat and tip the 2nd row outboard seat forward. 02
To exit the 3rd row bench seat, lift up on the same latch and tip the seatback forward.
01
02
Page 14 of 14

This easy-to-use Quick Reference Guide is intended to help you more fully appreciate some of the unique features and functions of your new vehicle. However, it is not intended to replace your Owner’s Manual. The Owner’s Manual contains more detailed information to help you better understand the important safety warnings, features, operation, and maintenance of your vehicle.
QR7E-0R51U1 Printing: January 2007 (09)
Nissan, the Nissan Brand Symbol, “SHIFT_” tagline, Z and Nissan model names are Nissan trademarks. ©2007 Nissan North America, Inc.
Sh ift_
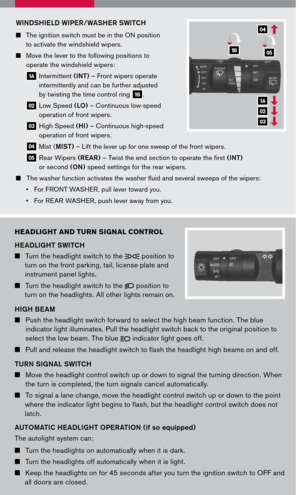
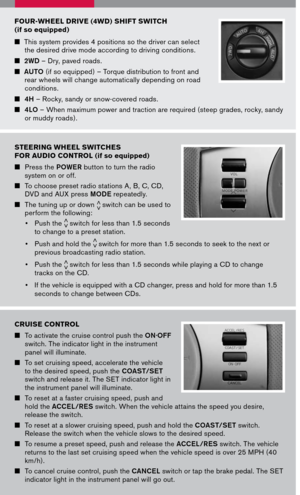
sunroof controls (if so equipped)
The ignition switch must be in the ON position to operate the sunroof.
TILTING THE SUNROOF
To tilt the sunroof up, first close the sunroof by pushing the switch toward UP/CLOSE 01. Release the switch, then push the UP/CLOSE switch again to tilt the sunroof up.
To tilt the sunroof down, push the switch toward DOWN/OPEN 02.
SLIDING THE SUNROOF
To fully open the sunroof, push the switch toward DOWN/OPEN. To open the sunroof part way, push the switch in any direction while the sunroof is sliding to stop it in the desired position.
To fully close the sunroof, push the switch toward UP/CLOSE. To close the sunroof part way, push the switch in any direction while the sunroof is sliding to stop it in the desired position.
02
01
fuel-filler door
The fuel-filler door lock (if so equipped) is automatically engaged with the door lock system.
1. Unlock the fuel-filler door using one of the following
operations.
Press the
lpd0151
button on the keyfob once to unlock
the driver’s door and the fuel-filler door.
Unlock all doors with the key cylinder. (Turn twice.)
Press
lpd0151
on the power door lock switch.
NOTE: The fuel-filler door will remain locked if the driver’s door is manually
unlocked using the inside door lock handle lever.
2. Push the left side of the fuel-filler door to open.
3. To lock, close the fuel-filler door and lock all doors.