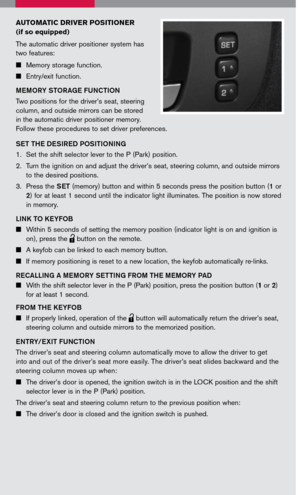
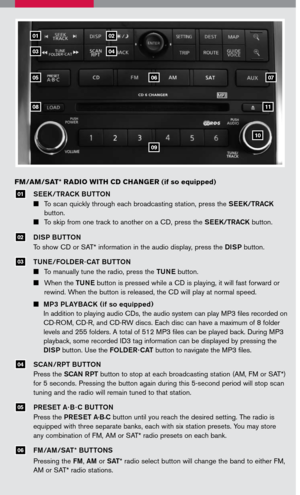
Page 9 of 14

07
08
AUX BUTTON
Press the AUX button to play a compatible device such as an MP3 player when it is
plugged into the auxiliary jack.
LOAD BUTTON
LOAD A SINGLE DISC - Press the LOAD button for less than 1.5 seconds. Select
the loading slot by pressing the CD insert select button (1- 6), then insert the CD.
LOAD UP TO 6 DISCS - Press and hold the LOAD button for more than 1.5
seconds. The slot numbers (1- 6) will illuminate on the display when CDs are loaded
into the changer.
STATION AND CD SELECT BUTTONS
To store a station in a preset you must first select A, B, or C memory bank by
pressing the PRESET A·B·C button and tune to the desired FM, AM or SAT*
station. Then press and hold the desired station select button for at least 2
seconds. When the preset indicator illuminates, a beep will sound, indicating
memorization is complete. To retrieve a previously set station, select the memory
bank where the preset was set, then press the corresponding station select button.
TUNING AND AUDIO CONTROL KNOB
To manually tune the radio, turn the TUNE knob. To adjust the Bass, Midrange,
Treble, Fade, Balance, and Speed Sensitive Volume (SSV) (if so equipped), press
the AUDIO knob until the desired mode appears in the display. Then turn the
TUNE knob to adjust to the desired level.
EJECT BUTTON
EJECT A SINGLE DISC - Press the button for less than 1.5 seconds. Select the
eject slot by pressing the CD insert select button (1 to 6). The CD will then eject.
09
11
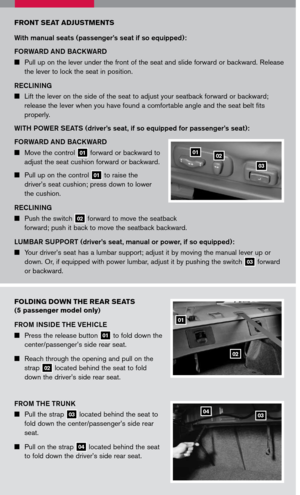
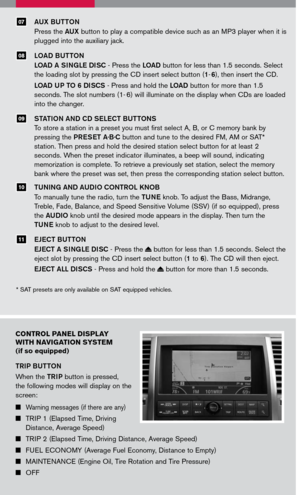
CONTROL PANEL DISPLAY
WITH NAVIGATION SYSTEM
(if so equipped)
TRIP BUTTON
When the TRIP button is pressed,
the following modes will display on the
screen:
Warning messages (if there are any)
TRIP 1 (Elapsed Time, Driving
Distance, Average Speed)
TRIP 2 (Elapsed Time, Driving Distance, Average Speed)
FUEL ECONOMY (Average Fuel Economy, Distance to Empty)
MAINTENANCE (Engine Oil, Tire Rotation and Tire Pressure)
OFF
10
EJECT ALL DISCS - Press and hold the button for more than 1.5 seconds.
* SAT presets are only available on SAT equipped vehicles.
Page 10 of 14

MAINTENANCE ITEMS
You can set the engine oil and the tire rotation interval. To display the setting of the
maintenance interval, select the ENGINE OIL or TIRE ROTATION key using the
joystick and press the ENTER button. To set the maintenance interval, select the
M AINTENANCE SCHEDULE
key using the joystick and push the joystick to the right or
left. To reset the maintenance interval, select the RESET key using the joystick and press
the ENTER button.
DISPLAY SCREEN SETTINGS
The SETTING screen will appear when the SETTING button is pressed. Select the
DISPLAY key with the joystick and press the ENTER button to choose from various
display screen options. The DISPLAY key will allow you to personalize the information
shown on the display screen, such as climate control or audio system display.
CLOCK SET/ADJUSTMENT
The clock on the display screen can be adjusted using the joystick by the following
procedure:
Press the SETTING button, then select SYSTEM SETTINGS from the menu on the
display screen.
Next select CLOCK to enter the CLOCK SETTINGS mode.
Then select the HOURS or MINUTES key and hold the joystick left or right to adjust
the time. After the desired time is shown on the display screen, press the BACK
button to store.
Refer to your Owner’s Manual and Navigation System Owner’s Manual for additional
information on your navigation system.
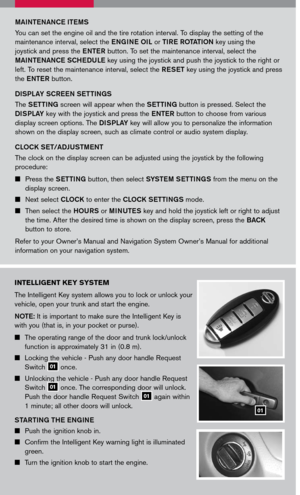
I NTELLIGENT KEY SYSTEM
The Intelligent Key system allows you to lock or unlock your
vehicle, open your trunk and start the engine.
NOTE
: It is important to make sure the Intelligent Key is
with you (that is, in your pocket or purse).
The operating range of the door and trunk lock/unlock
function is approximately 31 in (0.8 m).
Locking the vehicle - Push any door handle Request
Switch 01 once.
Unlocking the vehicle - Push any door handle Request
Switch 01 once. The corresponding door will unlock.
Push the door handle Request Switch 01 again within
1 minute; all other doors will unlock.
STARTING THE ENGINE
Push the ignition knob in.
Confirm the Intelligent Key warning light is illuminated
green.
Turn the ignition knob to start the engine.
01
Page 11 of 14
 ™
The Xtronic CVT™ does not produce a gear change
sensation like traditional automatic transmissions.
The transmission in your vehicle r")
XTRONIC CONTINUOUSLY VARIABLE
TRANSMISSION (CVT) ™
The Xtronic CVT™ does not produce a gear change
sensation like traditional automatic transmissions.
The transmission in your vehicle requires a special fluid
available only at your NISSAN dealer. No other fluid will
meet the exact requirements of the new Xtronic CVT™.
MANUAL SHIFT MODE
When the shift selector lever is shifted from D (Drive) to
the manual shift gate, the transmission enters the manual shift mode.
In the manual shift mode, shift range is displayed on the position indicator in the
meter.
When shifting up, move the shift selector lever to the + (up) side. (Shifts to higher
range.)
When shifting down, move the shift selector lever to the - (down) side. (Shifts to
lower range.)
In manual shift mode, the transmission automatically shifts down to M1 (first) before
the vehicle comes to a stop. When accelerating again, it is necessary to shift to the
desired range.
When canceling the manual shift mode, return the shift selector lever to the D (Drive)
position. The transmission returns to the normal driving mode.
TURNING ENGINE OFF
Shift transmission into P (Park).
Turn ignition knob to LOCK position.
An audible warning chime will sound when exiting the vehicle if the ignition knob is
not completely turned to the OFF position.
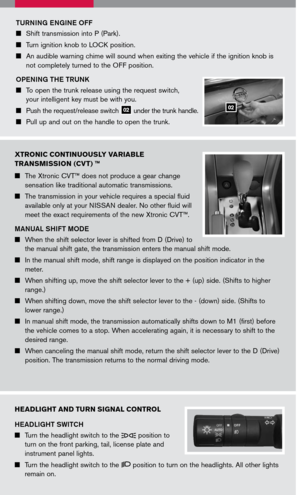
OPENING THE TRUNK
To open the trunk release using the request switch,
your intelligent key must be with you.
Push the request/release switch 02 under the trunk handle.
Pull up and out on the handle to open the trunk.
02
HEADLIGHT AND TURN SIGNAL CONTROL
HEADLIGHT SWITCH
Turn the headlight switch to the position to
turn on the front parking, tail, license plate and
instrument panel lights.
Turn the headlight switch to the position to turn on the headlights. All other lights
remain on.
Page 12 of 14

HIGH BEAM
Push the headlight switch forward to select the high beam function. The blue indicator light illuminates. Pull the headlight switch back to the original position to select
the low beam. The blue indicator light goes off.
Pull and release the headlight switch to flash the headlight high beams on and off.
AUTOMATIC HEADLIGHT OPERATION
The autolight system can:
Turn the headlights on automatically when it is dark.
Turn the headlights off automatically when it is light.
Keep the headlights on for 45 seconds after you turn the ignition switch to OFF and all
doors are closed.
TO ACTIVATE THE AUTOLIGHT SYSTEM :
Turn the headlight switch to the AUTO position, then turn the ignition switch to ON.
TO DE ACTIVATE THE AUTOLIGHT SYSTEM :
Turn the headlight switch to the OFF, or position.
FOG LIGHT OPERATION
NOTE: The headlights must be on and the low beams selected for the fog lights to operate.
Turn the switch to the position to turn on the fog lights.
Turn the switch to the OFF position to turn off the fog lights.
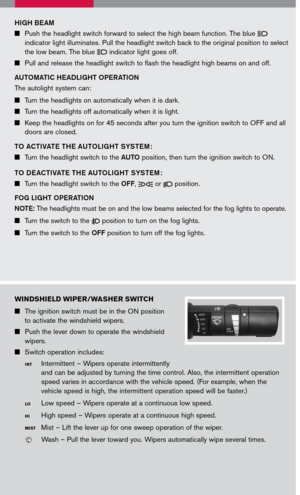
WINDSHIELD WIPER/WASHER SWITCH
The ignition switch must be in the ON position
to activate the windshield wipers.
Push the lever down to operate the windshield
wipers.
Switch operation includes:
Intermittent – Wipers operate intermittently
and can be adjusted by turning the time control. Also, the intermittent operation
speed varies in accordance with the vehicle speed. (For example, when the
vehicle speed is high, the intermittent operation speed will be faster.)
Low speed – Wipers operate at a continuous low speed.
High speed – Wipers operate at a continuous high speed.
Mist – Lift the lever up for one sweep operation of the wiper.
LCN0042
Wash – Pull the lever toward you. Wipers automatically wipe several times.
INT
LO
HI
MIST
Page 13 of 14

TILTING THE SUNROOF
To tilt the sunroof up, push the tilt switch to the UP 01 position. If the roof is open, it will automatically
close and then tilt up.
")
SUNROOF CONTROLS (if so equipped)
TILTING THE SUNROOF
To tilt the sunroof up, push the tilt switch to the UP 01 position. If the roof is open, it will automatically
close and then tilt up.
To tilt the sunroof down, push the tilt switch to the
DOWN 02 position.
SLIDING THE SUNROOF
To open the roof, slide the switch to the OPEN 03 position. If the roof is tilted up, it
will automatically tilt down and then open.
To close the roof, slide the switch to the CLOSE 04 position.
The position of the sliding roof lid can be chosen by the position of the sliding switch.
To fully open or close the roof, move the switch completely to the OPEN or
CLOSE position.
OUTSIDE MIRROR CONTROL SWITCH
POWER FOLDING MIRRORS (if so equipped)
Move the switch 01 to select the left or right mirror.
Adjust each mirror to the desired position using the
switch 02.
Push the switch 03 to fold both mirrors in or out.
REVERSE TILT-DOWN FEATURE (if so equipped)
The reverse tilt-down feature will turn the selected outside mirror surface downward to
provide better rear visibility close to the vehicle.
Turn the outside mirror control switch to the left or right position 01 when the
ignition switch is in the ON position.
Move the shift selector lever to R (Reverse). The selected mirror will turn downward.
The selected mirror surface will return to its original position when any of the following
have occurred:
The shift selector lever is moved to any position other than R (Reverse).
The outside mirror control switch is set to the neutral position.
The ignition switch is turned to the OFF position.
02
03
01
REAR SONAR SYSTEM OFF SWITCH (if so equipped)
When backing up, this system will beep to alert you to obstacles within
6 ft. (1.8 m) of the rear bumper. The system beeps faster as the vehicle
gets closer to the obstacle. A continuous tone sounds when an obstacle
is less than 10 inches (25 cm) away from the bumper. Turn the system
off by pushing the rear sonar system OFF switch. The system will
automatically reset the next time the ignition switch is turned on.
04
01
02
03
Page 14 of 14

TRUNK LID OPENER
The trunk lid opener lever is located on the driver’s door.
To open the trunk lid, pull the opener lever out.
To close the trunk lid, lower and push the trunk lid
down securely.
FUEL-FILLER DOOR RELEASE
The fuel-filler door release is located on the driver’s door.
To open the fuel-filler door, push the release.
To lock, close the fuel-filler door securely.
QR7E-0A34U1 Printing: February 2007 (07)
Nissan, the Nissan Brand Symbol, “SHIFT_” tagline, Z and Nissan model names are Nissan trademarks. ©2007 Nissan North America, Inc.
Sh ift_
AIR RECIRCULATION BUTTON
Press the air recirculation button to recirculate air inside the vehicle.
Press the air recirculation button again to turn air recirculation off.
The air recirculation mode cannot be selected if the air flow mode is selected.
10
This easy-to-use Quick Reference Guide is intended to help you more fully appreciate
some of the unique features and functions of your new vehicle. However, it is not intended
to replace your Owner’s Manual. The Owner’s Manual contains more detailed information
to help you better understand the important safety warnings, features, operation, and
maintenance of your vehicle.